Checklist View for Public Checklist Templates
The Checklist view is the most flexible template type. Use it for anything that doesn’t neatly fit the specialized views (like DIY, Recipe, or Trip plan). It shines when you want a clear, step‑by‑step list with optional subtasks and notes.
Great for:
- General how‑to guides and tutorials
- Study or revision lists
- Onboarding steps and standard operating procedures
- Troubleshooting flows and maintenance routines
New to templates? See Create from Scratch or Generate from Content. For editor controls and publishing, see the Template Editor.

Examples of successful checklists
Get inspired by these popular templates that demonstrate different content types and approaches:
- Baby Checklist - Comprehensive preparation for new parents with nested categories
- Marketing Checklist - Strategic marketing tasks organized by campaign phases
- Office Cleaning Checklist - Systematic workplace cleaning with room-by-room breakdowns
- Hotel Checklist - Travel preparation with accommodation and booking tasks
- Office Equipment Checklist - Workplace setup organized by equipment categories
Structure at a glance
- Tasks and subtasks: Create a hierarchy with as many levels as you need
- Task details: Add optional notes and a reference link to each task
- Order matters: Reorder tasks and subtasks to reflect the correct sequence
- Editor features: Cover image, tags, SEO, and publish are managed in the Template Editor
Adding tasks
There are two ways to add tasks:
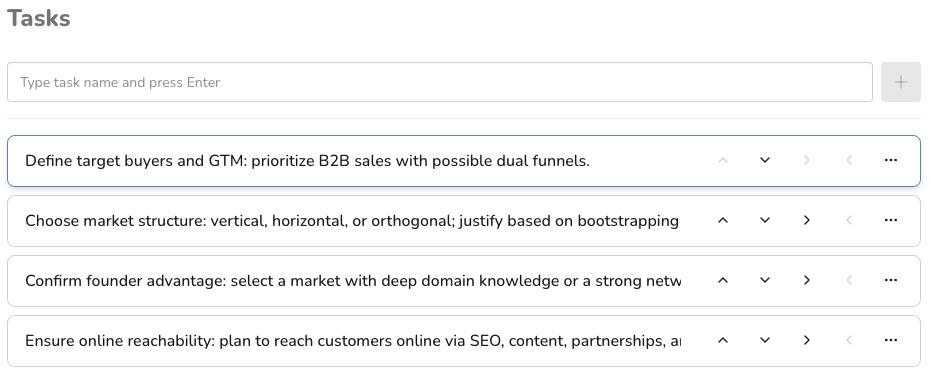
- Add Task toolbar: Found at the top of the tasks. Enter a task name and press Enter to add it. If another task is selected, the new task is added below it; otherwise it’s added to the end of the list.
- While editing a task name, press Enter to create a new task below and focus it immediately.
Keyboard tips:
- Enter: Create a new task
- Tab (or Shift+Tab): Navigate between tasks
Organizing tasks
- Make subtask / Unsubtask: Indent or outdent to change hierarchy using the left/right buttons on the task. Controls are disabled when the action isn’t possible.
- Move up / Move down: Reorder within the same level using the up/down buttons (disabled when not possible).
- Delete: Remove a task (its subtasks are removed with it). This option is available from the task menu.
Notes and links
- Notes: Use for explanations, tips, or acceptance criteria
- Show task notes: Toggle:
- in the task menu for a specific task
- in the sidebar to display note fields for all tasks
- Link: Add a helpful reference (video, doc, product page)
Best practices
- One action per task: Keep task names short and specific; move details to notes
- Group by phases: Use top‑level tasks for phases; subtasks for steps
- Keep hierarchy shallow where possible: 1–2 levels are easiest to scan
- Use links sparingly: Add only high‑value references
Common patterns
- Prerequisites at the top (accounts, tools, downloads) as a task with subtasks
- Main steps ordered from start to finish
- Optional/advanced steps at the end
- Review and cleanup as the final tasks
