Organizations
An organization is the top-level unit for Checklist. Upon creating a new account, we automatically generate an organization (and a team within it) for you. This organization can be utilized individually or collaboratively with others as part of a team or teams.
While the basic Checklist plan is free, you have the option to upgrade your account for enhanced features and quotas. In this scenario, the Organization serves as the billing entity for the subscription, with allowed quotas and usage calculated based on the Organization and its plan. Learn more about Checklist Plans ↗.
An organization can encompass one or more teams, such as a marketing or sales team. Refer to teams ↗ for more information.
You can still use Checklist individually without any sharing.
Viewing an Organization
To view your organization, click on the Teams button on the main navigation of the app (on the left side of the screen):
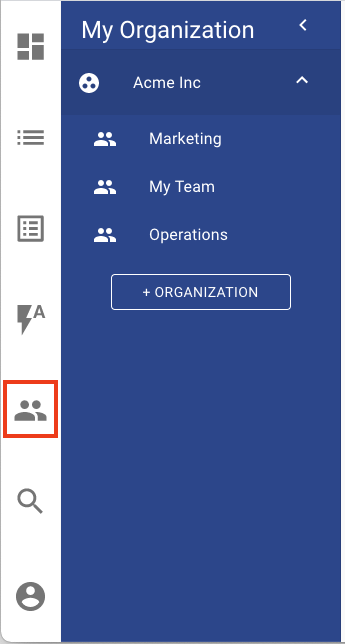
Upon selection, you'll see a list of organizations or teams you belong to in the blue section. Choose the organization you want to view, and it will display in the main section of the screen.
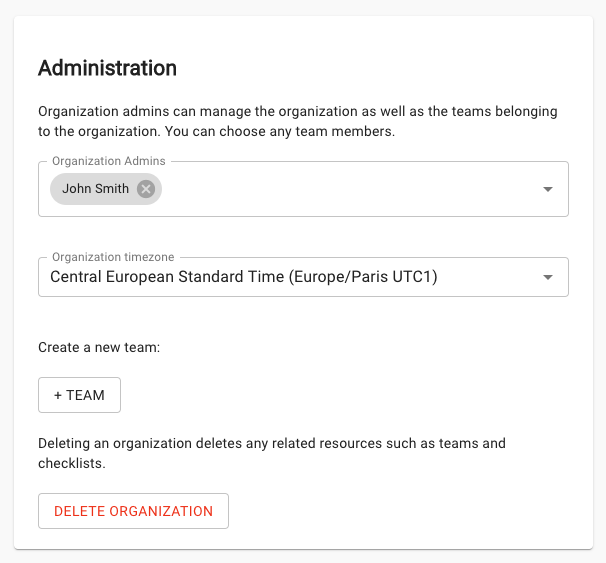
Only organization admins can view organization details or make changes to them:
Plan
The organization's plan determines the features and quotas available. Read more about billing ↗.
Rename Organization
To change the organization's name, navigate to it and scroll down to the Rename Organization section:

Modify the organization name and click the Rename button.
Note: Your organization name must be 3-30 alphanumeric characters or spaces.
Managing Admins
Organization admins can:
- Change the organization name
- Manage the billing Plan
- Manage organization admins
- Change the organization timezone
- Create & Delete teams
To add or remove an admin, navigate to the Organization page and scroll down to the Administration section. In the Organization Admins selector, click the drop-down arrow to reveal all available users:

Who can be an admin?
- The organization owner is always an admin of the organization and cannot be removed
- Any user who is an admin of one of the organization's teams
Delete an admin by deselecting them from the drop-down or clicking the X next to their name.
Timezone
Upon creation, the organization adopts the same timezone as its owning user. Any teams created under the organization will inherit the same timezone when created.
To change the timezone of an organization, navigate to the Organization page and scroll down to the Administration section. Click the drop-down of the timezone selector:
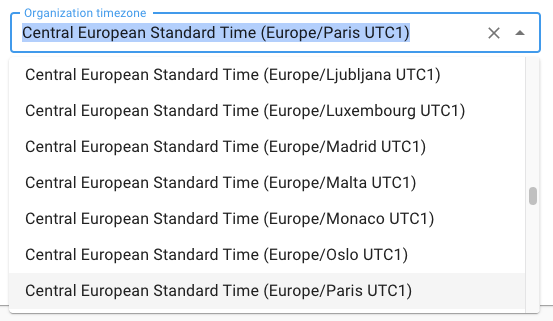
Scroll up or down to choose your timezone or start typing and select from the autocomplete options.
Changing the organization timezone does not affect the timezones of its teams.
Deleting an Organization
To delete an organization, navigate to the organization page and scroll down to the Administration section. Click the Delete Organization button. A confirmation dialog will appear. Click Delete to confirm.
Warning: Deleting organizations erases all teams, checklists, and associated resources, disabling further billing.
Note: Deleting an organization is permanent. Ensure you do not do so accidentally, as restoration is not possible.
You cannot delete the last organization you belong to.
Adding a team to the Organization
To add a team, navigate to the organization you wish to add it under and scroll down to the Administration section. Click the +Team button:
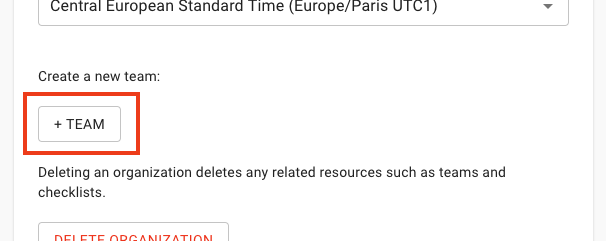
The Create a new Team dialog will open. Set the name of the new team and click Create to confirm.
Note: Team names can be 3-30 alphanumeric characters, and spaces are allowed.
Adding an Organization
If you need to add a new organization, click on the +Organization button:
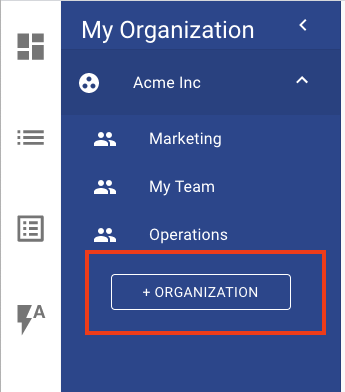
A dialog will appear where you can set the name of the new organization you wish to create.
Note: The newly created organization is separate from your existing organizations and acts as a distinct billing entity.
