Checklist Members
When creating a checklist, the user becomes its owner by default. Ownership can differ if the checklist is created from a template or via automation (recipe).
Definitions
Owners
A checklist can be owned by one or more team members, excluding guest users. Owners have complete control over the checklist, including its structure (meta) and content.
Members
Checklist owners can invite others, turning them into Checklist Members. Members have limited rights based on the "Permissions" setting for the checklist (see below).
Permissions
Checklist Permissions limit what Checklist Members can do with the checklist, but they do not restrict Checklist Owners.
The four permission levels are:
- All: Members have the same actions as owners.
- Content: Members can only change the checklist's content, excluding meta, name, and settings.
- Assign: Members can only modify tasks assigned to them.
- View: Members can only view the checklist without making changes.
See the description of each level below:
All
Members with "All" permission can perform actions equivalent to owners.
Content
When a checklist has the "Content" permission, checklist members can only make changes to the content of the checklist. Specifically, they:
- Cannot change the checklist meta (columns).
- Cannot change the checklist name.
- Cannot make changes to any of the checklist settings.
- Cannot delete the checklist.
- Cannot create a template from the checklist.
- Cannot create automations.
- Cannot change the Checklist View; they can only view the default view of the checklist.
- Cannot manage team members, except for removing themselves.
- Changes they make to the sort order or filtering are only applicable to them.
Assign
Members with "Assign" permission can only modify tasks assigned to them. All other actions are restricted.
View
Members with "View" permission can only view the checklist without making changes.
View Checklist Members
To view checklist members, click on the "Checklist Members" button at the top right of the screen:

The Checklist Members dialog will display:
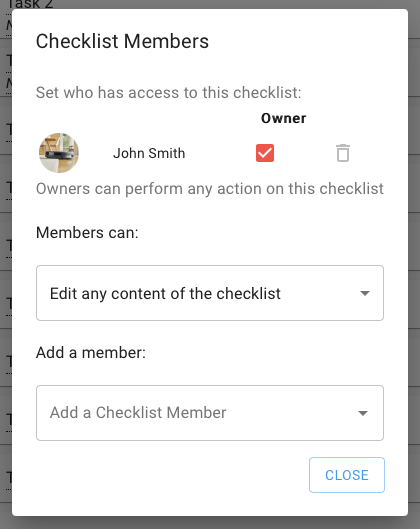
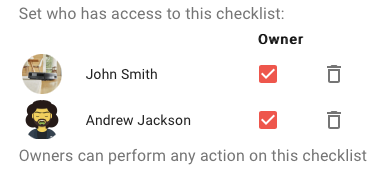
At the top, see existing members, marked with a checkbox if they are owners.
Below, find checklist permissions followed by a drop-down to add more members from the team.
Note: Non-owners won't see the "Checklist Members" button. To remove yourself, click "Delete Checklist" in the Checklist Menu.
Adding Members
To add a member, be a checklist owner. Open the Checklist Members dialog and click "Add a Checklist Member" to see available team members:
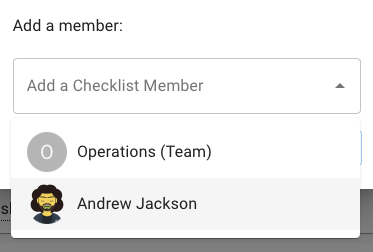
Add the entire team as members, allowing any team member (except guests) to join.
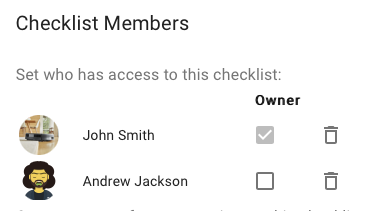
Once added, the member appears in the list:
Removing Members
To remove a member, be a checklist owner. If you're removing yourself, ensure another owner exists to prevent orphaning the checklist.
Open the Checklist Members dialog and click the Trash icon next to the member to remove:
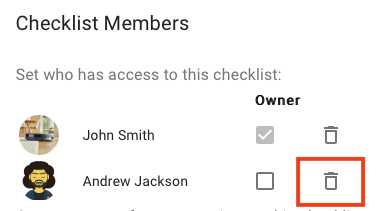
The member is removed and added to the "Add a member" dropdown in case of a change of mind.
Updating Ownership
To manage ownership, be an owner. Open the Checklist Members dialog:
Adding an Owner
To make a member an owner, check the "Owner" checkbox.
Removing an Owner
To make an owner a member, uncheck the "Owner" checkbox. If there's only one owner, their checkbox will be disabled to avoid orphaning the checklist.
Setting Permissions Level
To change the permissions level, be an owner. Open the Checklist Members dialog and click on the members' permissions dropdown:
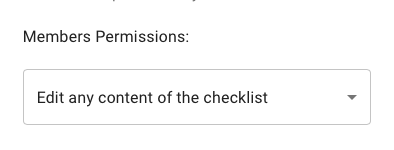
The 4 different levels will be shown:
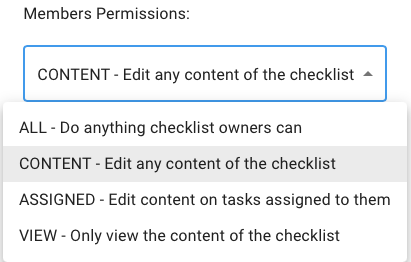
Choose the desired permission level.
