Create Public Checklist Templates
This guide walks you through creating a new checklist template from scratch in the Public Templates section. If you prefer to start from existing content, see Generate from Content.

Before you begin
- You’ll need to be logged in. If you aren’t, you’ll be redirected to the login page.
- If you have no organizations, you’ll be redirected to the app to set one up.
Step 1 — Open the Create page
- Go to Public Templates
- Click Create Template.
Step 2 — Choose how to start
- Generate from Content: Paste a URL or text and let the generator extract steps. See Generate from Content.
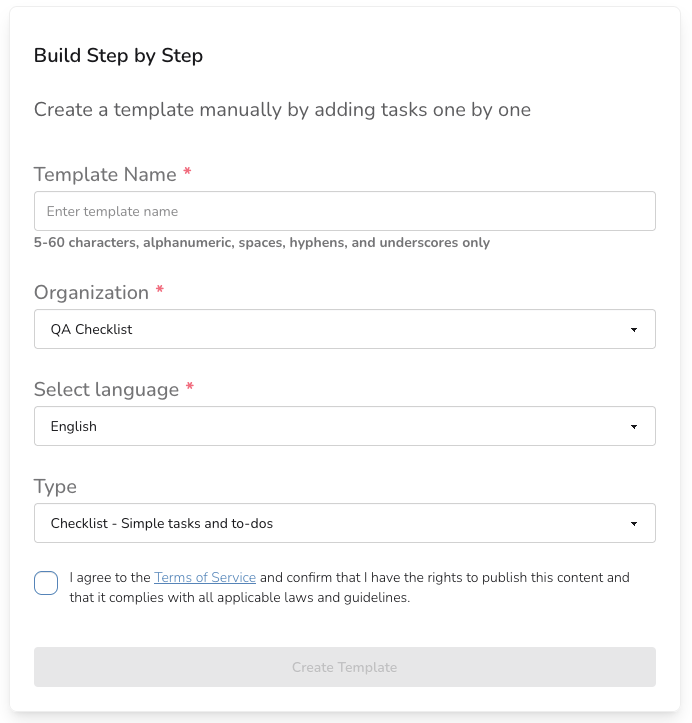
- Build Step by Step: Create a checklist template manually - choose this option.
Step 3 — Fill in the form
- Name: Required. 5–60 characters. Letters, numbers, spaces, hyphens, and underscores.
- Organization: Available if you have multiple organizations you publish under.
- Language: Required. Choose the language of your template (e.g., English, Nederlands).
- Type: Select the view type:
- Checklist. List of tasks and sub tasks.
- DIY. Do It Yourself guides with materials and steps.
- Recipe (Coming up). Ingredients, Instructions and servings calculator.
- Trip plan (Comping up). List of places to visit together with a dynamic map.
- Terms: Check the box to agree to the Terms of Service to enable Create.
Step 4 — Create
- Click Create to make your new template.
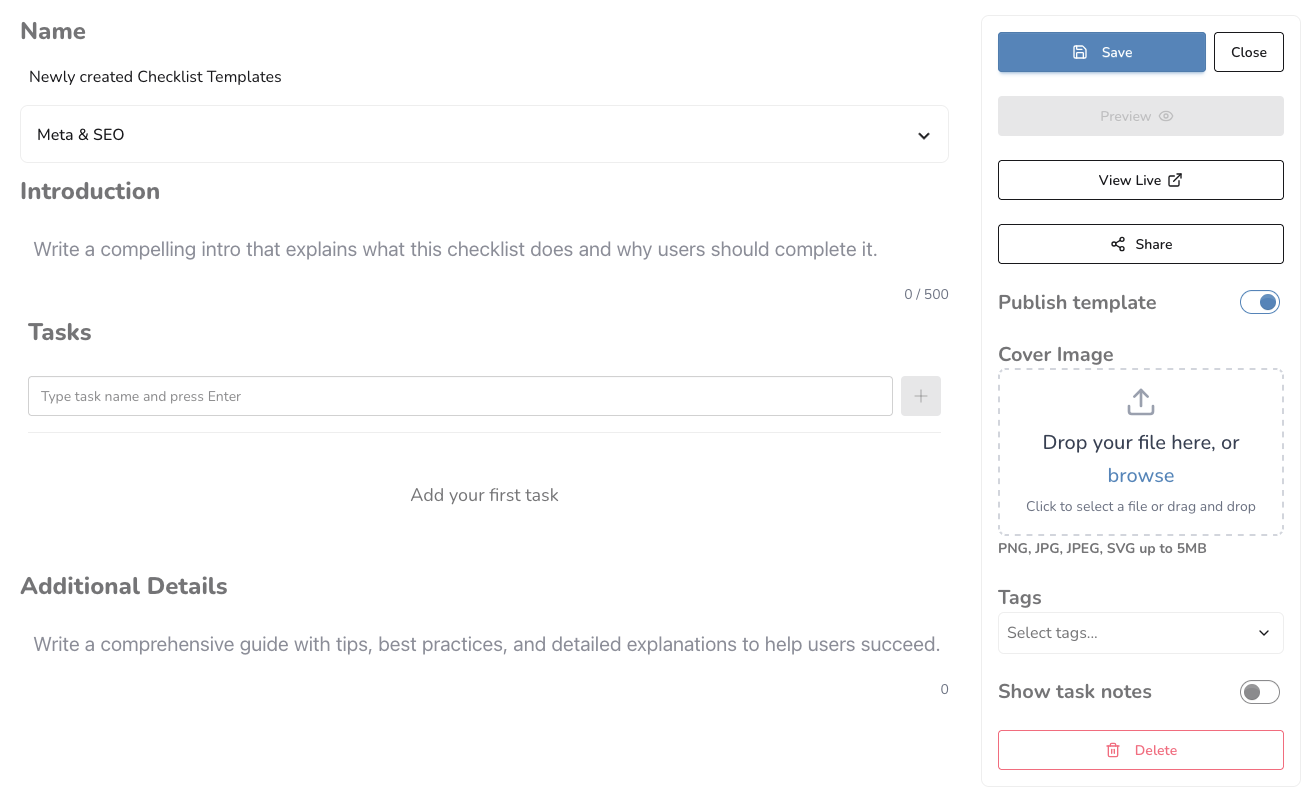
- You will be redirected to the Template Editor.

What happens next
In the editor you can:
- Rename your template and edit SEO (title, description, source URL).
- Add and manage tasks and subtasks.
- Upload a cover image, add tags, and toggle publish.
- Preview and share.
Tips
- have the content in text?: use the Generate option instead
- Start small: Add a few top-level tasks and refine later.
- Use tags: Improve discoverability of your published checklist.
- Draft first: Keep Publish off until you’re happy with the content.
