The Checklist Template Editor
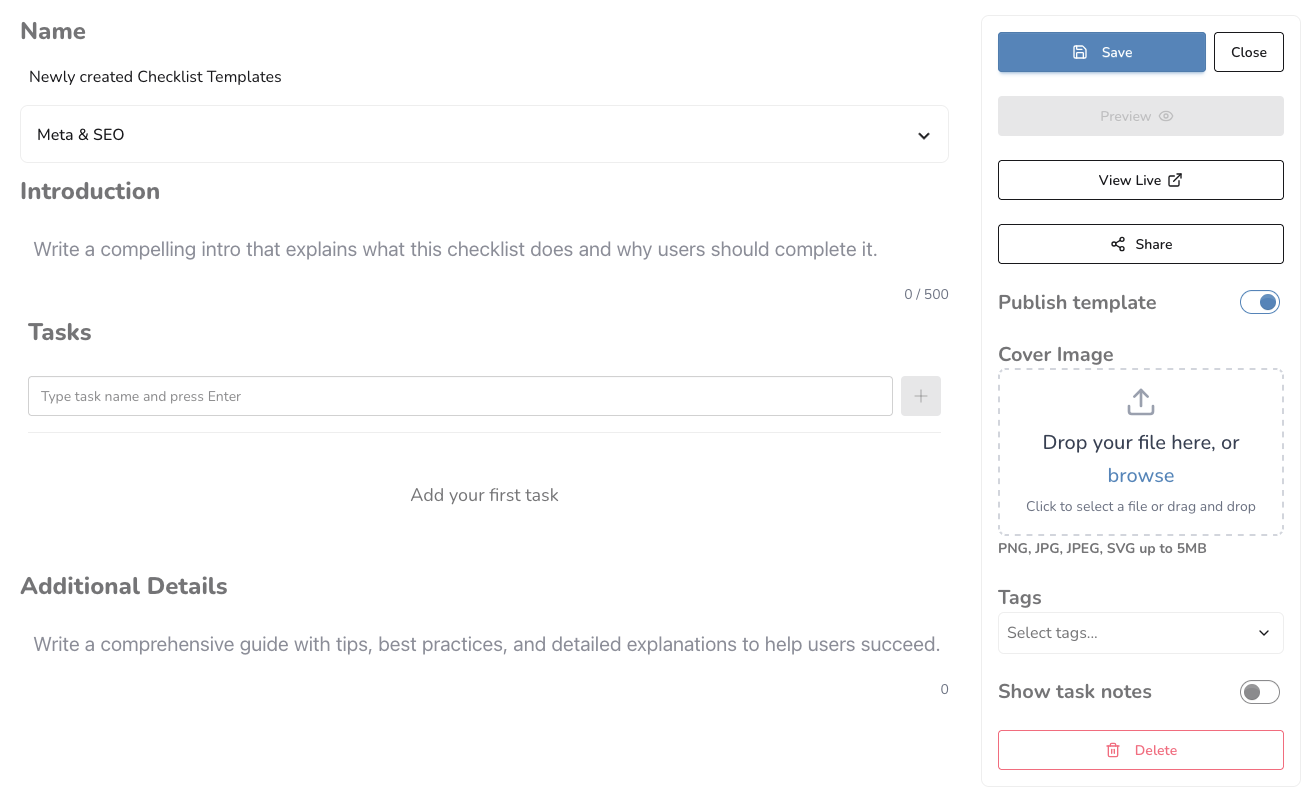
The Template Editor is where you turn ideas into usable, shareable checklists. Here you’ll organize tasks and subtasks, add helpful notes and links, set your cover image, tweak SEO, and publish your template to your public channel.
New to creating? Start with Create from Scratch or Generate from Content. Both paths open your draft in the editor.
Open the Template Editor
You’ll land here automatically after creating or generating a template. To return later:
- Go to Public Templates
- Find your draft or published item
- Click on the template name to start editing it
Editor layout at a glance
- Main content: Build your checklist—intro, tasks, details, SEO & meta.
- Right sidebar: Cover image, tags, visibility (Publish), and sharing.

Main content
-
Template Name: Choose a descriptive name for your template.
-
Meta & SEO: Toggle to show or hide these fields.
-
Title: Set a concise title so your template looks great when shared and in search results.
-
Description: Set a description for search results.
-
Source URL: If your template is based on an external source, include the original URL.
-
Introduction: Write a compelling intro that explains what this checklist does and why users should complete it.
-
View types (choose what fits your content): Pick the format that matches your content style. See the dedicated pages for how to work with each type:
- Checklist View: Hierarchical tasks and subtasks—great for how‑tos and guides.
- DIY View: Adds structured sections like Materials and Steps—ideal for projects.
- Coming soon: Trip plan and Recipe. Contact us if you wish to join the beta.
The Template Editor focuses on your overall template. For specifics about each view’s sections and best practices, visit the pages above.
-
Additional Details: Write a comprehensive guide with tips, best practices, and detailed explanations to help users succeed with your checklist.
Right sidebar
- Save: Click to save your work. This button remains disabled if no changes were made.
- Close: Go back to the Templates page.
- Preview: Preview your template before saving or publishing.
- Publish: Toggle to make your template public on your channel. You’ll need to save to apply.
- Open Template: View the public page as your audience will see it. Available after publishing.
- Share: Post your template on your socials, site, or community.
- Cover image: Upload a clear, relevant image that represents your template.
- Tags: Add tags to improve discoverability on your channel and in search.
- Show task notes: Toggle to show all task notes (even when empty) so you can easily add many notes.
Tips for creators
- Start with the core steps—refine wording later.
- Keep task names short and specific; move details into task notes.
- Use tags your audience would search for.
- Add a helpful cover image and a clear description before publishing.
- Link to the original content (if applicable) to give viewers full context.
