Templates
Templates can hugely increase your productivy. Why keep re-inventing the wheel? Either you, and most probably someone else, has already thought and perfected the checklist for your task at hand. Businesses can use templates to mirror and run the processes. Advantages of using checklist templates:
- a simple and effective way to document your business processes
- can be triggered multiple times and assigned to team members
- can be scheduled to run in the future and at regular schedules
- can be used to track current and past progress
Public Templates
Instead of starting with a blank page, browse our checklist templates ↗ to find the right one. You can then save the template as a checklist and start working with it. Our library is divided into different categories. You can take over a complete category (or part of it) and make it your own. See Real Estate Agent Checklists Templates ↗ for an example.
Team Templates
Of course not every organization is the same and you can create your own templates from scratch (or use a public template) and make it available to your entire team. This is where Checklist shines, again:
- you can "trigger" these templates to create a checklist with a click of a button
- you can "schedule" these templates to be triggered (e.g. daily, weekly)
- you can automatically assign the created checklists to the entire team or specific users
Managing Templates
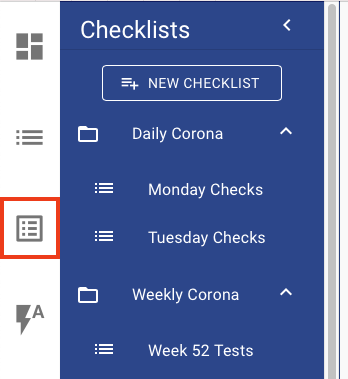
To view your team templates, open the team and then click on the Templates icon on the left navigation:
The Templates page will open showing all your existing templates:
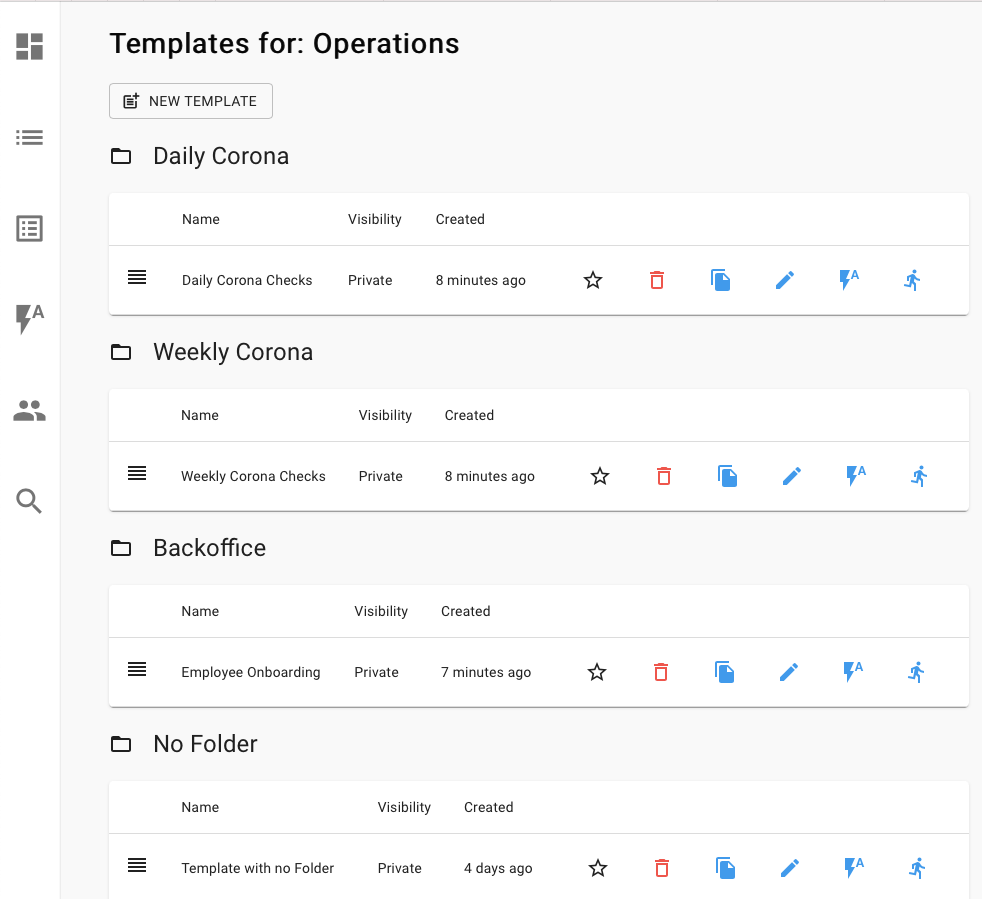
Just like checklists, your templates can be sorted into your team folders. Any template without a folder will be placed at the end in the "No Folder" section. You can easily re-order a template by dragging the "dragger" on its left and dropping it onto any folder. You can also re-order within a folder by dragging up or down.
Important note: Managing templates can only be performed by team users with the Editor role. Other users will not have access to the templates or the template editor.
Creating Templates
To create a new template, click on the New Template button. The Create a new Template dialog will open:
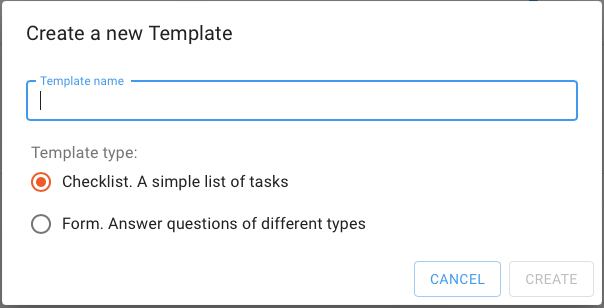
Give your template a name, choose its type (read more about view types ↗) and click Create. The new template will be created and open for editting.
Note that the template name can be 1-500 long and contain any character.
Editing templates
To edit an existing template, open the Templates page and click on the Template Name you wish to edit:

The Template Editor will open where you can edit your template.
Read more on how to work with the template editor ↗.
Triggering Templates
Triggering refers to creating a checklist from a template. Another term sometimes used is "Run". To trigger your template click on the Trigger button of the template:

This will open the Template Trigger dialog:
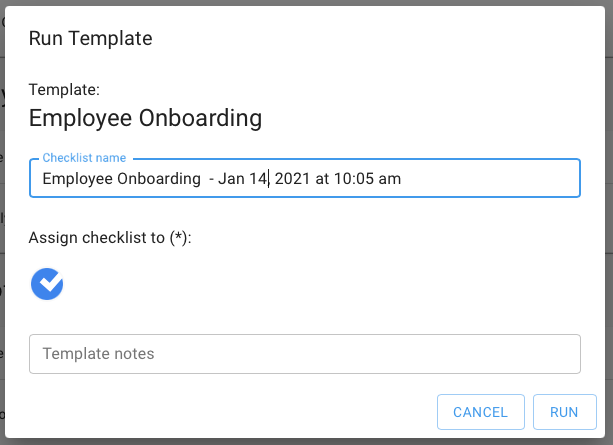
The new checklist will get its name from the "Default Checklist name" as defined in the template. You can still edit the name before creating.
By default, the checklist is assigned to the entire team. You can can change this by clicking on the team icon and selecting other members of the team:
If you have set template notes, those will be set as the checklist notes by default. You can still make changes to the notes before triggering.
Click on the Trigger button to create the checklist. The checklist is created and you get a confirmation at the top of the screen:

Click on the View button on the confirmation to navigate to the created checklist and start using it.
Scheduling Templates
When you need to Trigger a template on a regular basis, you can easily Schedule it. For example, if you need a Restaurant Daily Opening Checklist ↗. Or a "Weekly Corona Checks" checklist for compliance and staying healthy.
To schedule a regular Trigger, click on the Automation button of the template:

This will open the Automations page with the already existing automations of this template where you can also create a new schedule.
As you plan those recurring runs, align them with your team calendar using the time blocking method to guarantee uninterrupted execution windows for every scheduled checklist.
Read more about Template Automation ↗.
Deleting Templates
To delete a template, click on the Trashcan button next to its name:

The Delete Template confirmation dialog will open. Click Delete to confirm.
Duplicating a Template
If you want to use an existing template as the starting point for a new template, you can easily duplicate the existing template. Click on the Duplicate button of the existing template:

The Duplicate A template dialog will open:
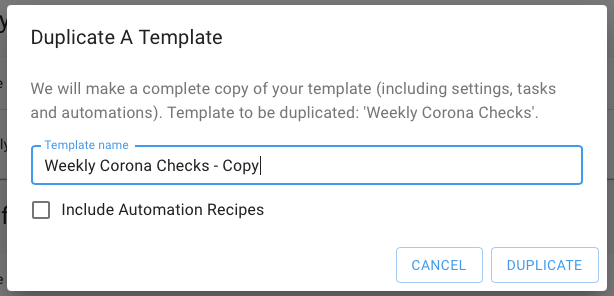
You can rename the new template as well as decide if you want to duplicate any existing template recieps. Click Duplicate to make the copy.
The newly created template will be in the same folder as the original template.
Favorite a Template
You can mark a template as a Favorite using the Star:

Templates marked as Favorite can be triggered by team users with the RUNNER role. The template will be accessible to them from the Dashboard page ↗.
