Table View
The Table view allows you to add additional columns to your checklist and present them in a table format. You can effortlessly add, remove, hide, and customize columns for each checklist:
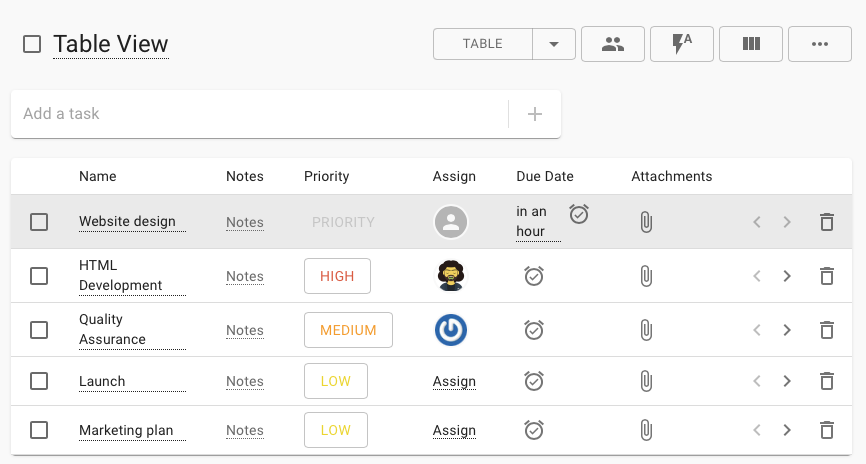
Adding Tasks
Adding tasks in the Table view is akin to Adding tasks in Checklist View ↗.
Editing Task Name
To modify a task's name, simply click on it to enter "Edit Mode":

Task Notes
To provide additional information about a task, you can add Notes. To set new notes, click on the empty "Notes." To edit existing notes, click on them.

The Notes dialog will open:
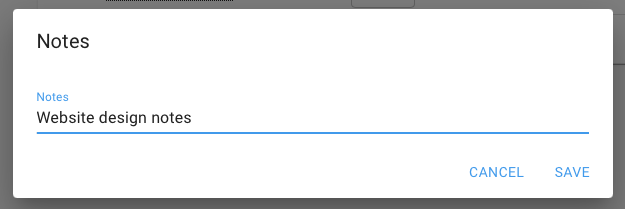
Enter your notes or make the desired changes and click Save.
Deleting Tasks
To delete a task, click on the Delete button (Trashcan) on the task itself:

Columns
The most significant difference between Checklist and Table views lies in "Columns." Columns enable you to add an unlimited number of "fields" (columns) to each task, allowing for more extensive data inclusion. Once a column is added, it is available to all tasks on this checklist, including subtasks and sub-subtasks.
By default, the following fields are created for each checklist:
- Assign
- Due Date
- Attachments
- Priority
Depending on your organization's billing plan, you can add more fields or edit existing ones.
Managing Columns
To manage your checklist columns, click on the Columns button:

The Columns Management dialog opens:
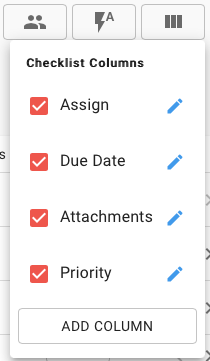
The dialog displays which columns have been defined for this checklist. Each column has:
- a checkbox - determines whether to show (checked) or hide (unchecked) the column in the table itself
- name - the column's name
- edit button (pencil) - use it to make changes to the column
If you want to add a column, click the Add Column button.
Add / Edit a Column
The Add/ Edit Column dialog:
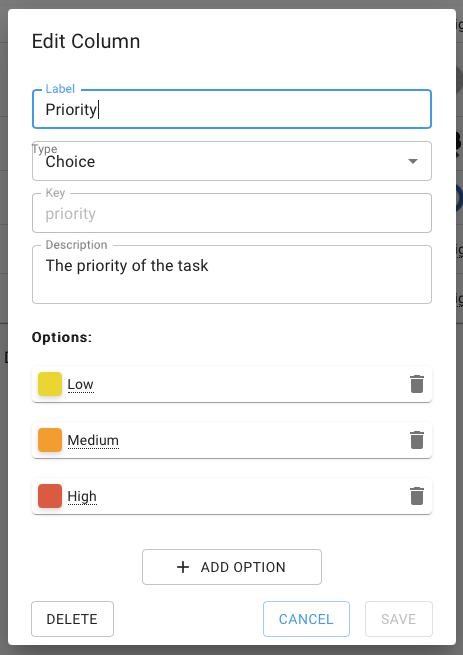
The dialog includes:
- name - 1-20 alphanumeric characters ( '-' '_', and spaces are allowed)
- type - the column type - see below
- key - automatically generated from the column name; once set, cannot be changed
- description - shown as a tooltip with a mouse-over on the column name
- options - only applicable for type Choice. See below.
Delete a Column
To delete a column:
- open the Columns dropdown by clicking on the Columns button
- click on the Pencil next to the column you wish to delete
- the Edit Column dialog opens
- click on Delete button at the bottom of the dialog
Column Types
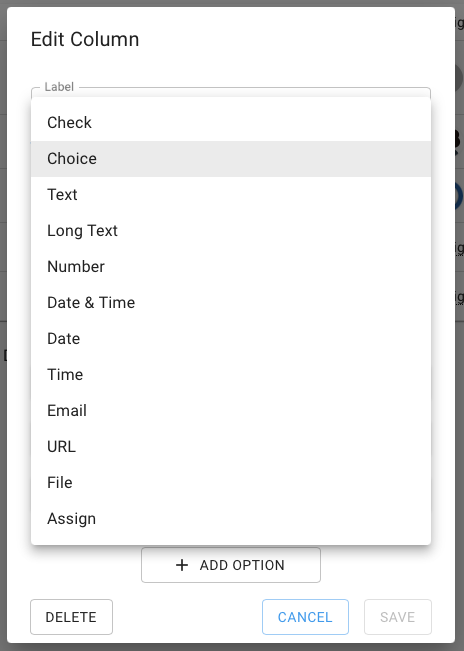
The following column types are available:
- Check
- Choice
- Text
- Long Text
- Number
- Date & Time
- Date
- Time
- URL (link)
- File (attachment)
- Assign
To change a column type:
- open the Columns Management dialog
- click on the Edit (pencil) button
- on the Column Edit dialog use the Type selector:
Choice Type
The Choice Type allows users to choose from a number of options. The Priority column is an example of a column using the Choice Type:
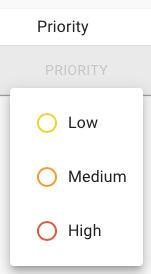
The column is of Choice type with the following options:
- low
- medium
- high
If you try to edit the column, you will see at the bottom of the Column Edit dialog the three options:
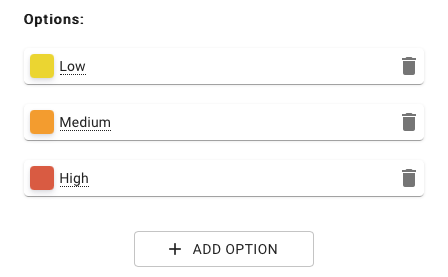
You can:
- click on the option name to edit it
- click on the Trash button to delete an option
- click on the + Add Option button to add a new option
- drag and drop an option to reorder it
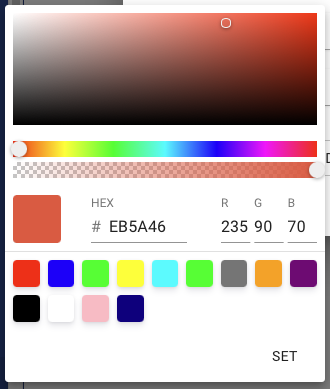
- click on the color section of an Option to get the color picker:
Subtasks
Subtasks in the Table view are similar to Checklist View Subtasks ↗.
Task Reordering
To change the order of tasks, drag the task and drop it at the desired new location:

Density
Depending on your preference, you can increase or decrease the density (spacing between table rows). Use the toggle below the table:
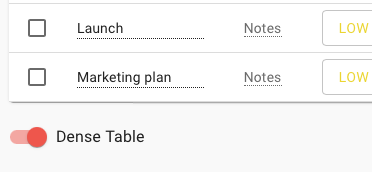
The density is stored on your browser and kept between navigation and sessions. It is not saved to the cloud and therefore not shared with others.
