
Your checklist
No exercises selected yet
Choose a preset above or add exercises from the list below.
Choose more exercises
Add optional exercises to your routine.
47 exercises currently match
Chin Tuck
Seated Chin Tuck
Neck Retraction Hold
Neck Side Stretch
Neck Rotation

Upper Trap Stretch
Levator Scapulae Stretch
Doorway Chest Stretch
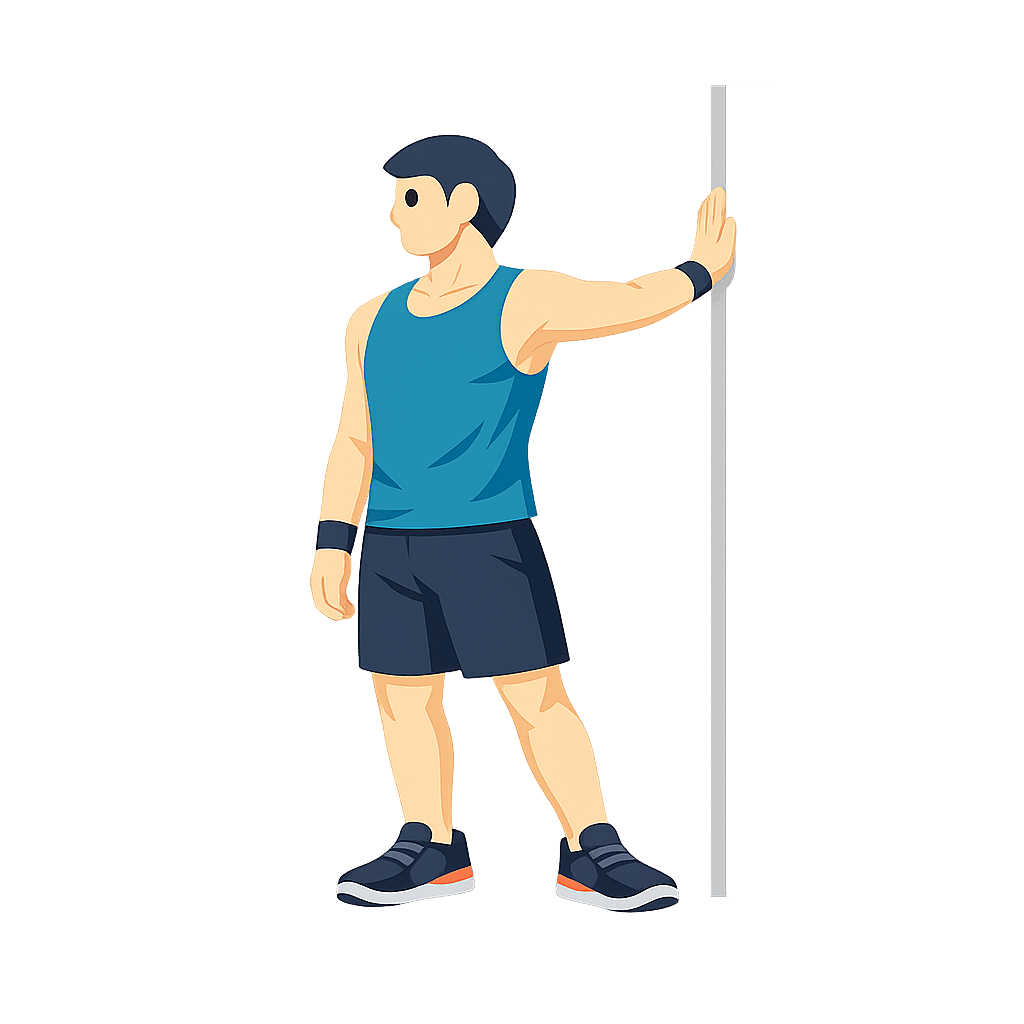
Wall Chest Stretch
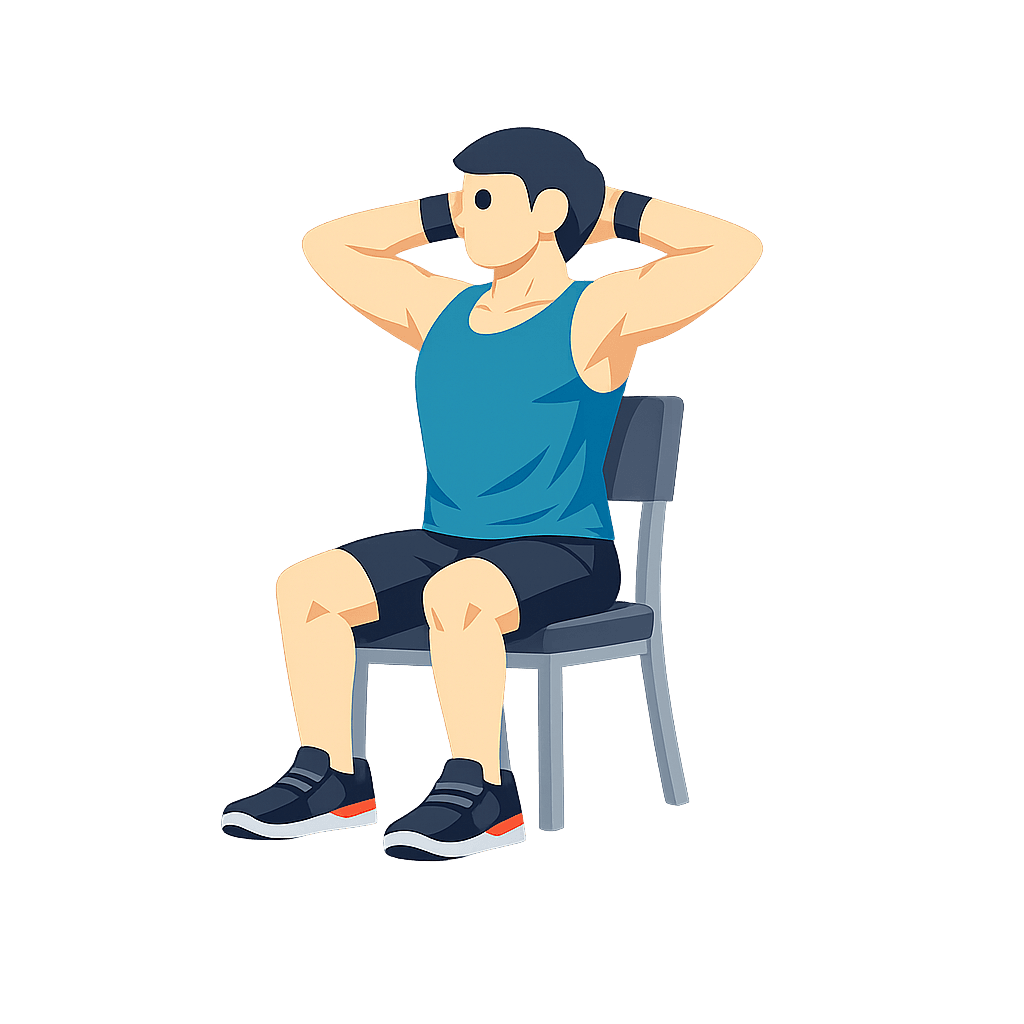
Seated Chest Opener
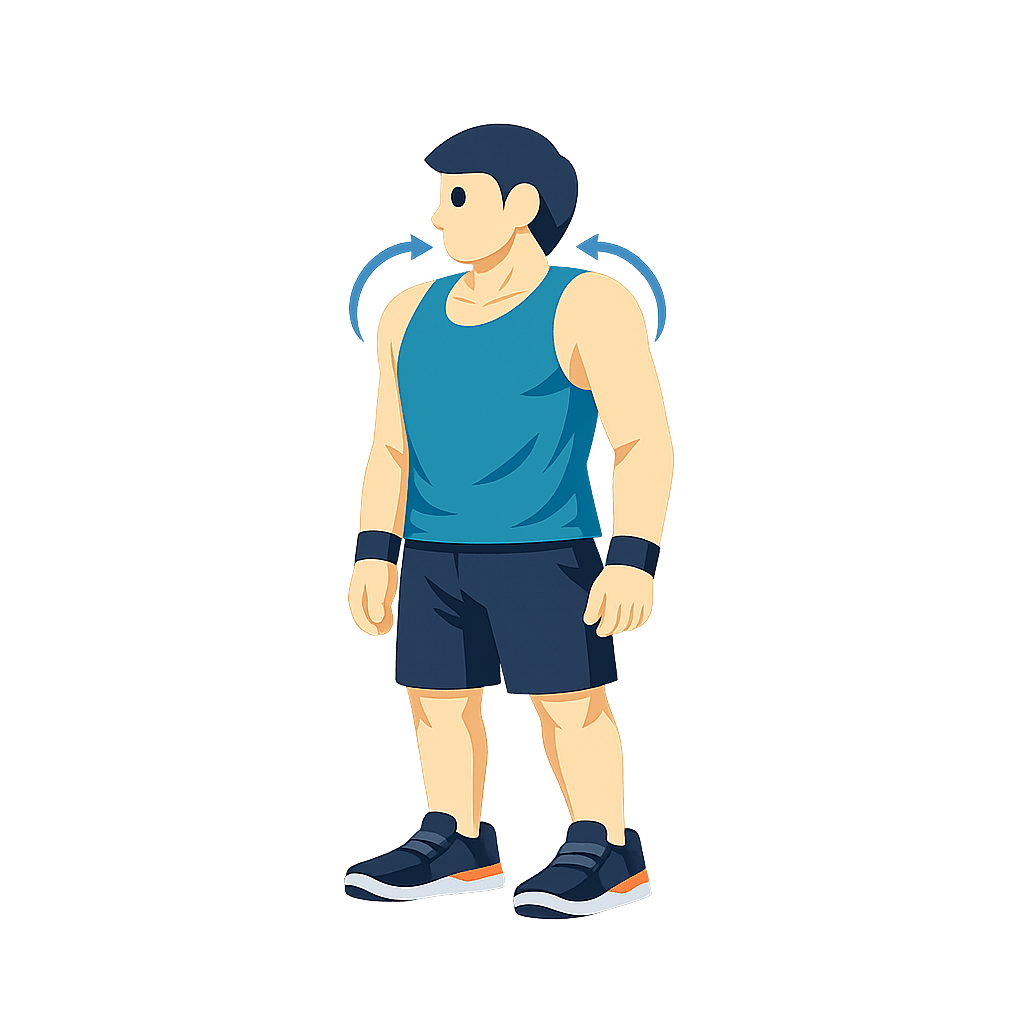
Shoulder Rolls
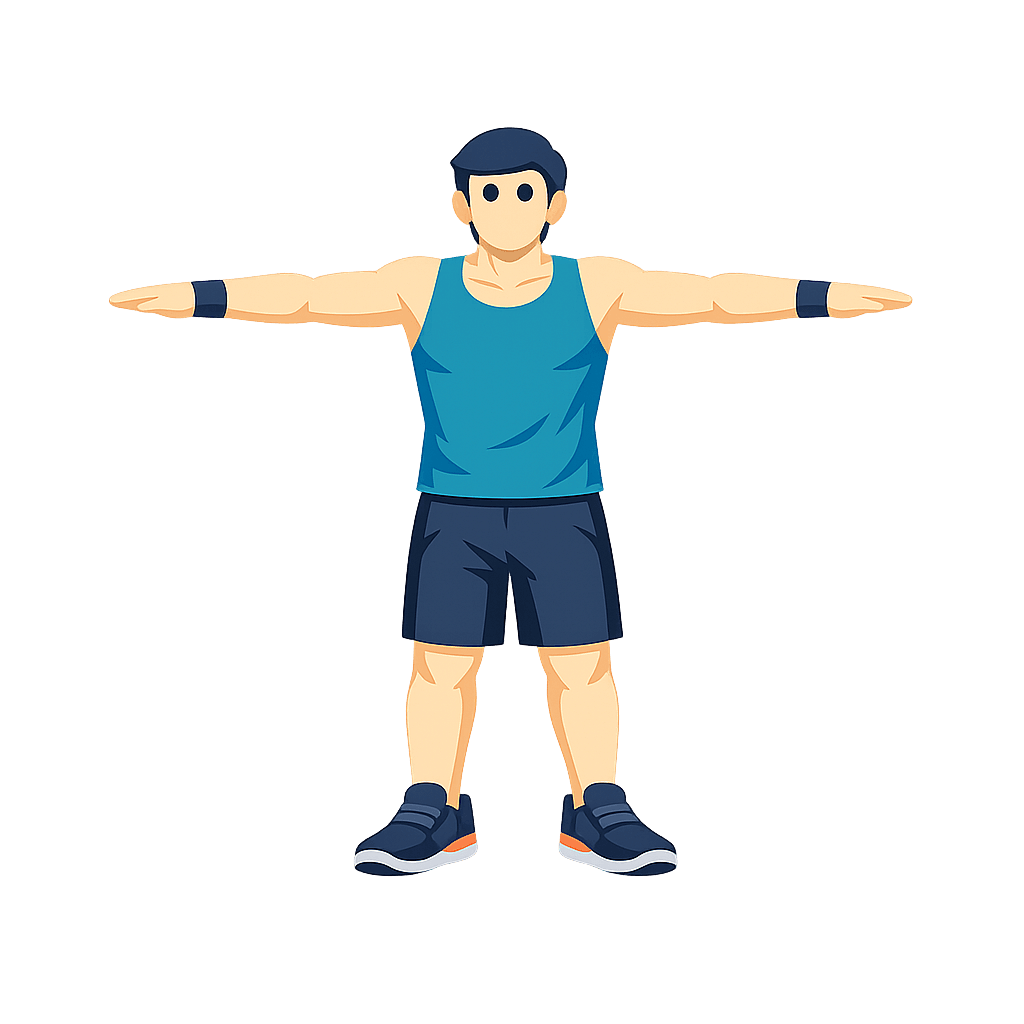
Arm Circles
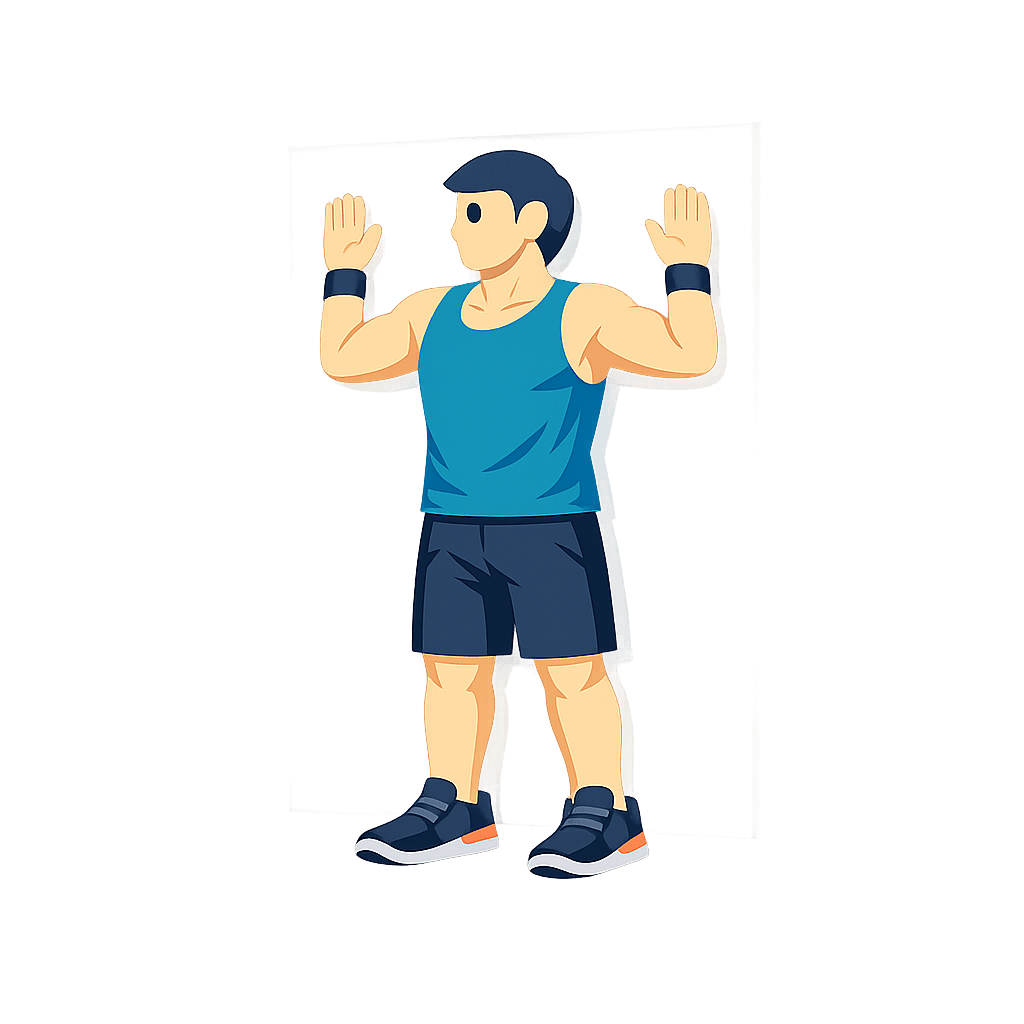
Wall Angels
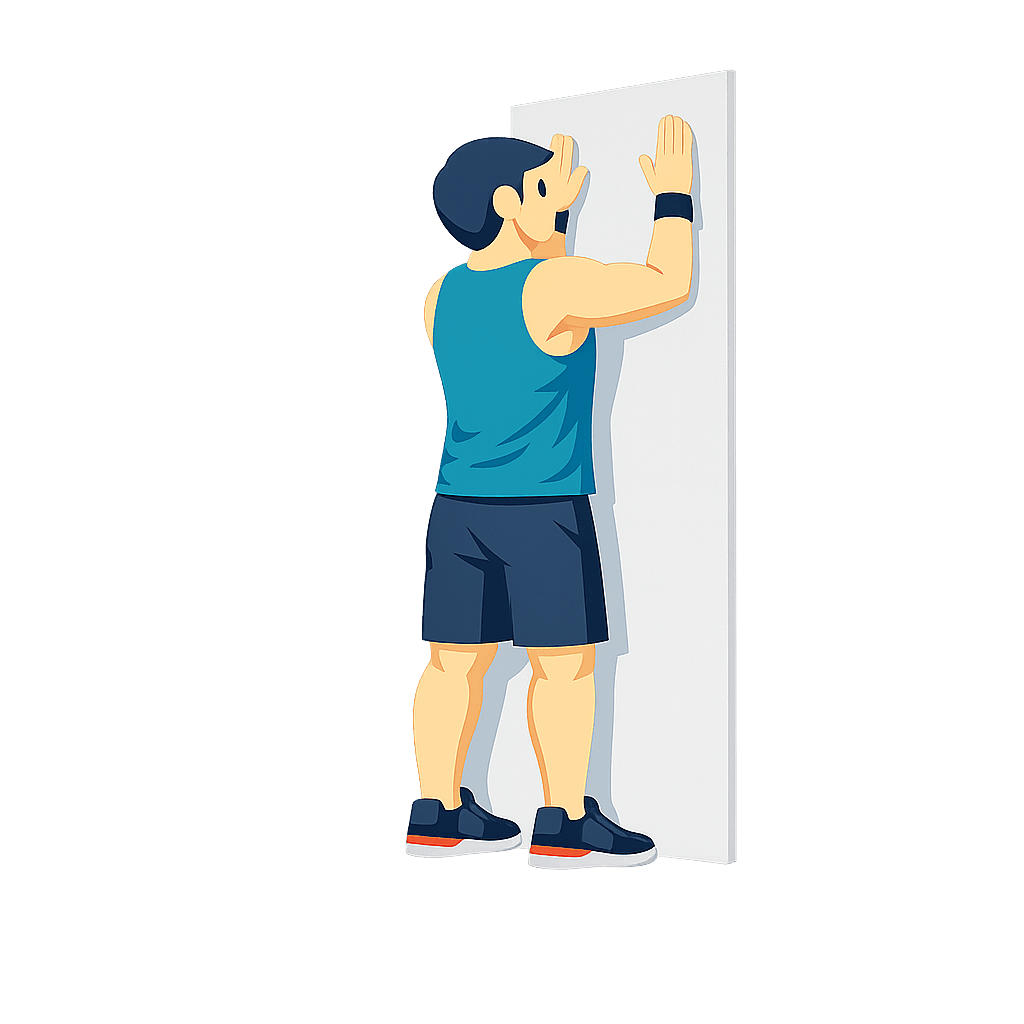
Wall Slides
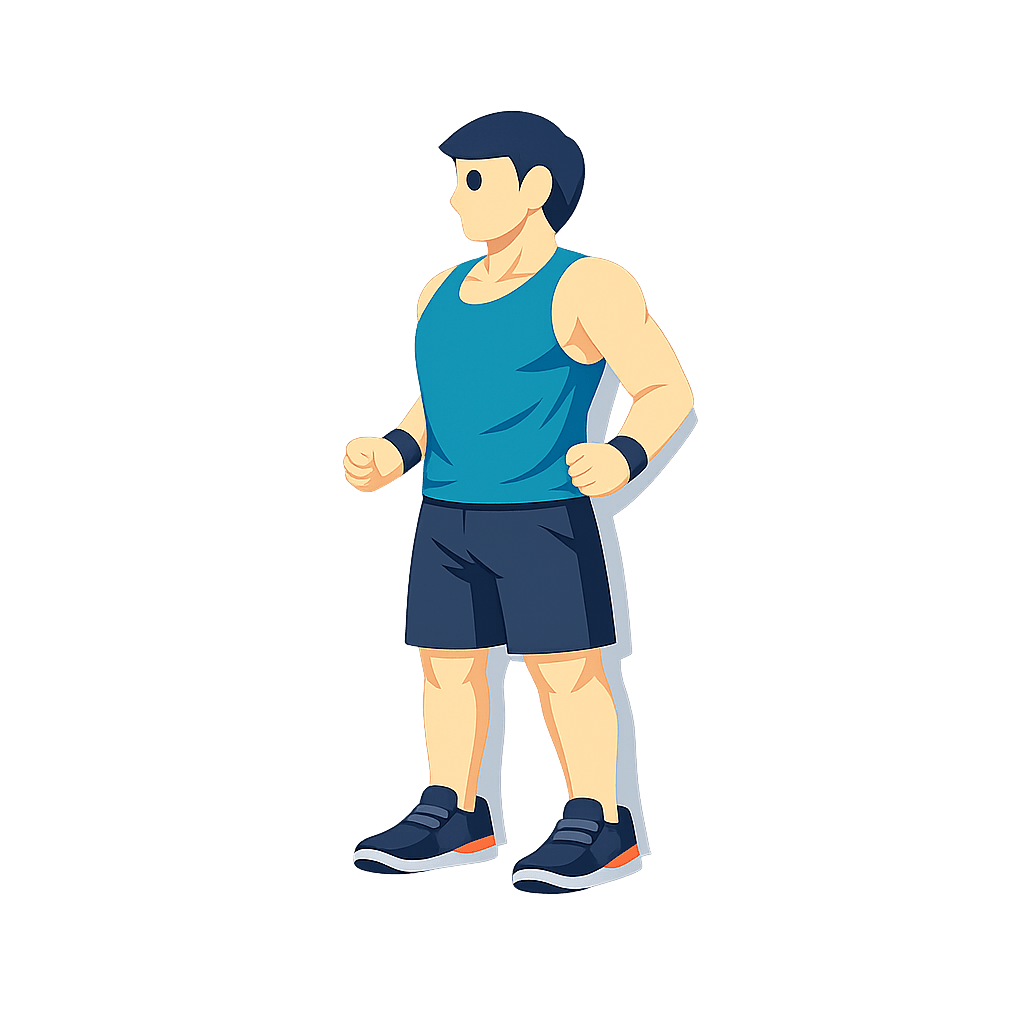
Shoulder Blade Squeeze
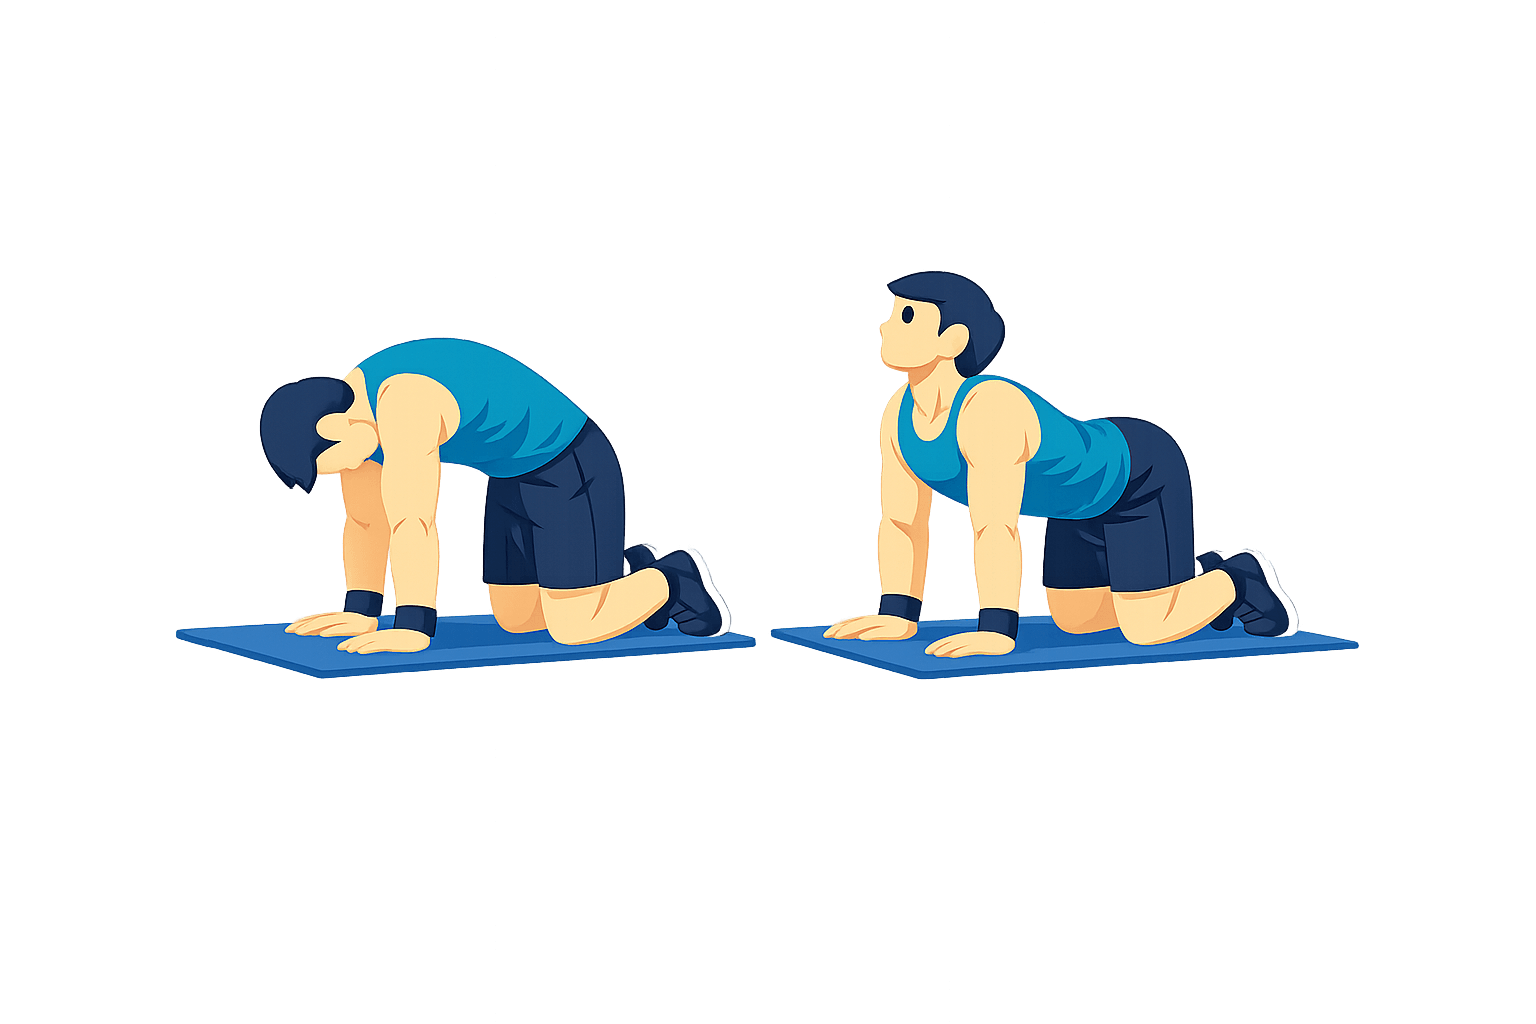
Cat-Cow
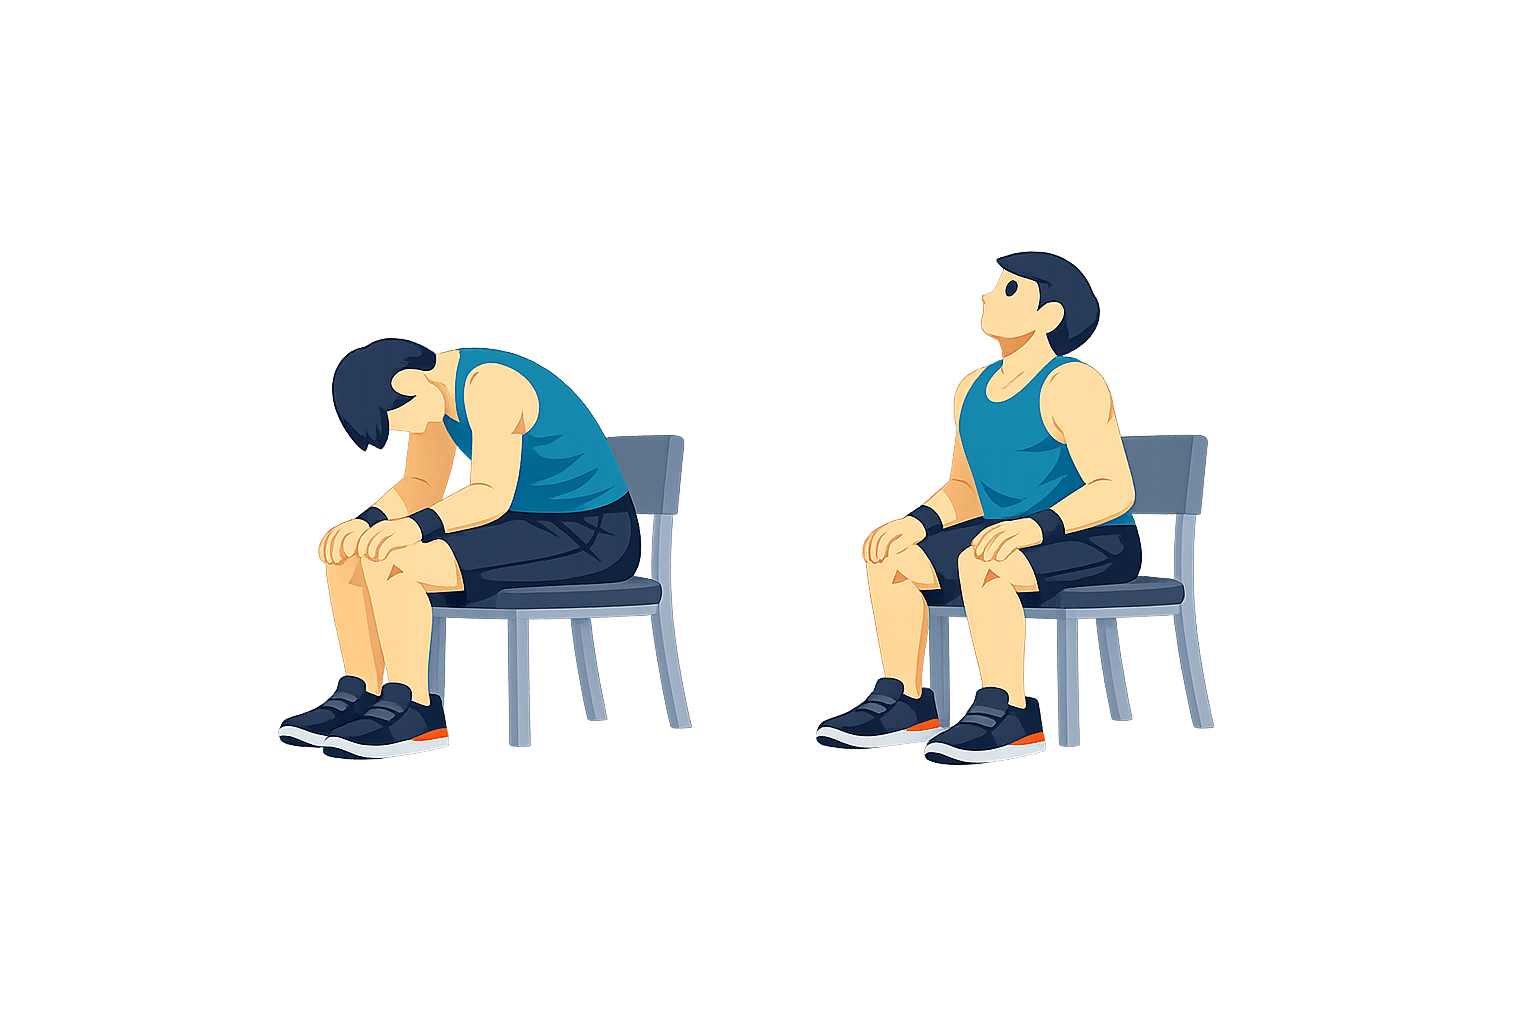
Seated Cat-Cow
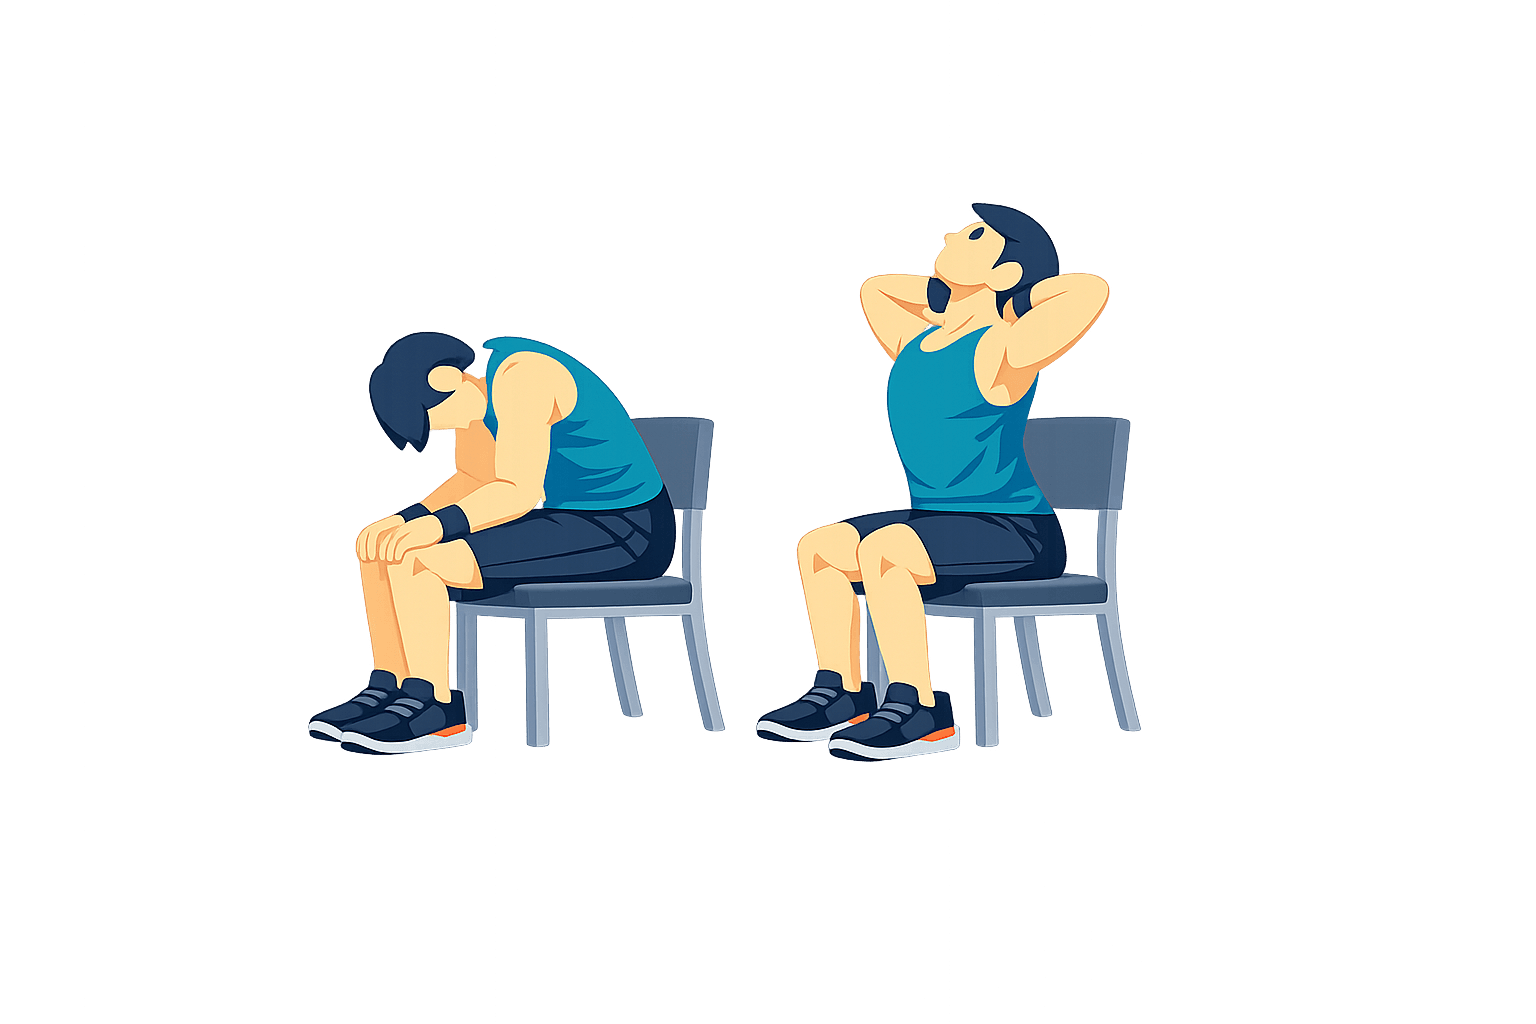
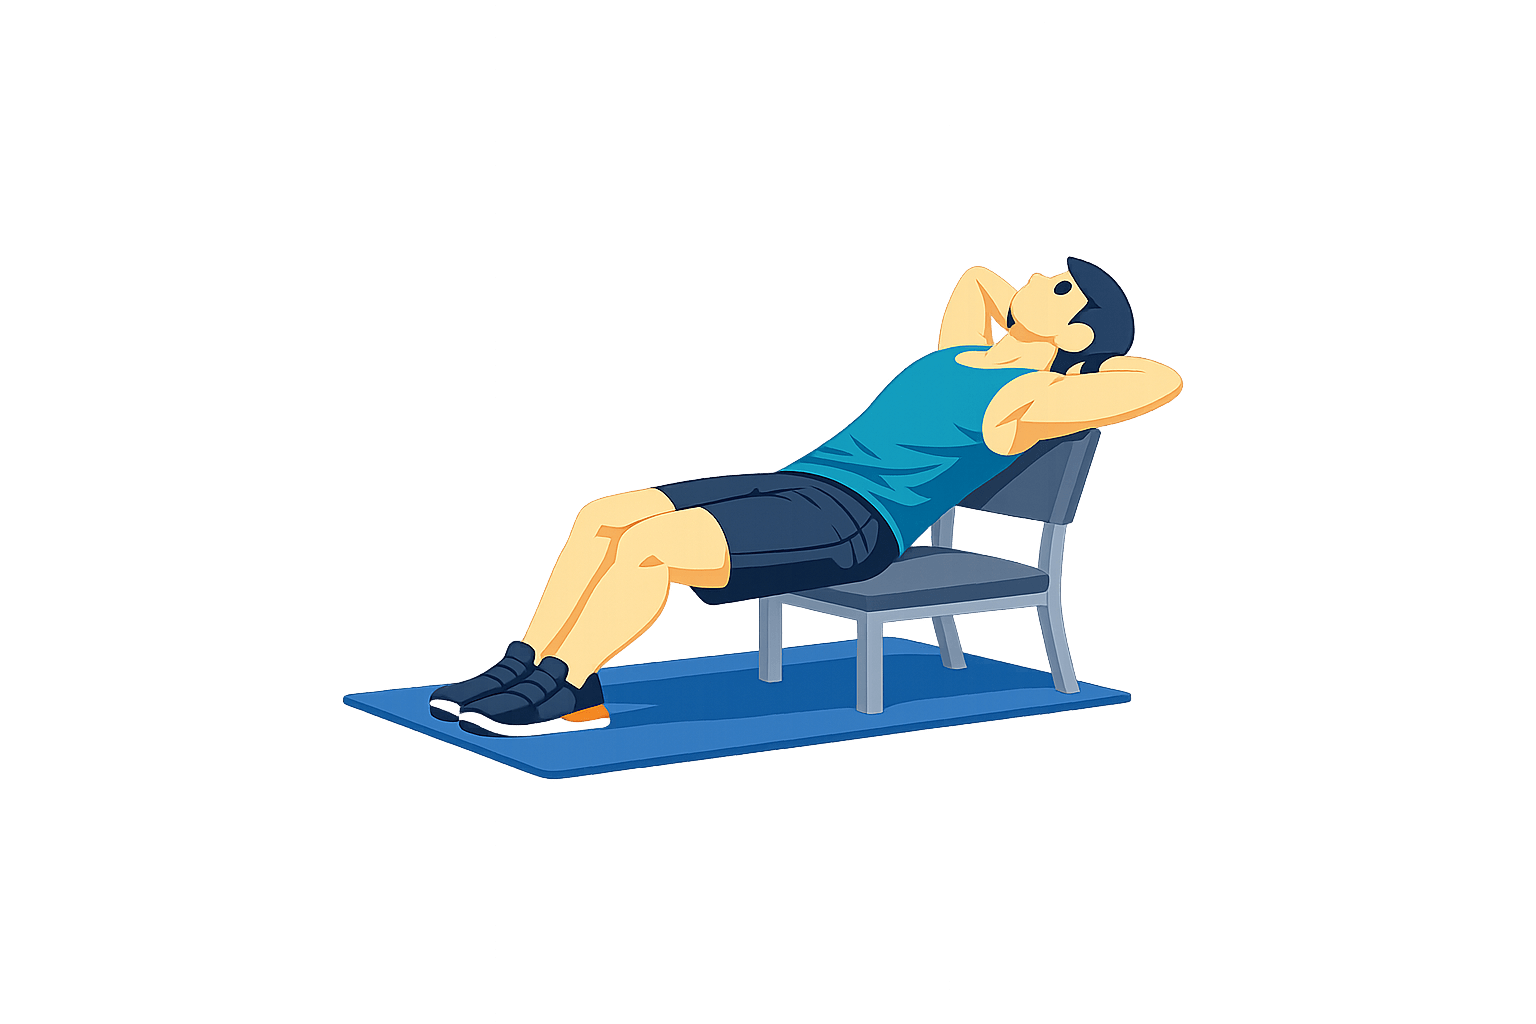
Thoracic Extension on Chair
Open Book Stretch
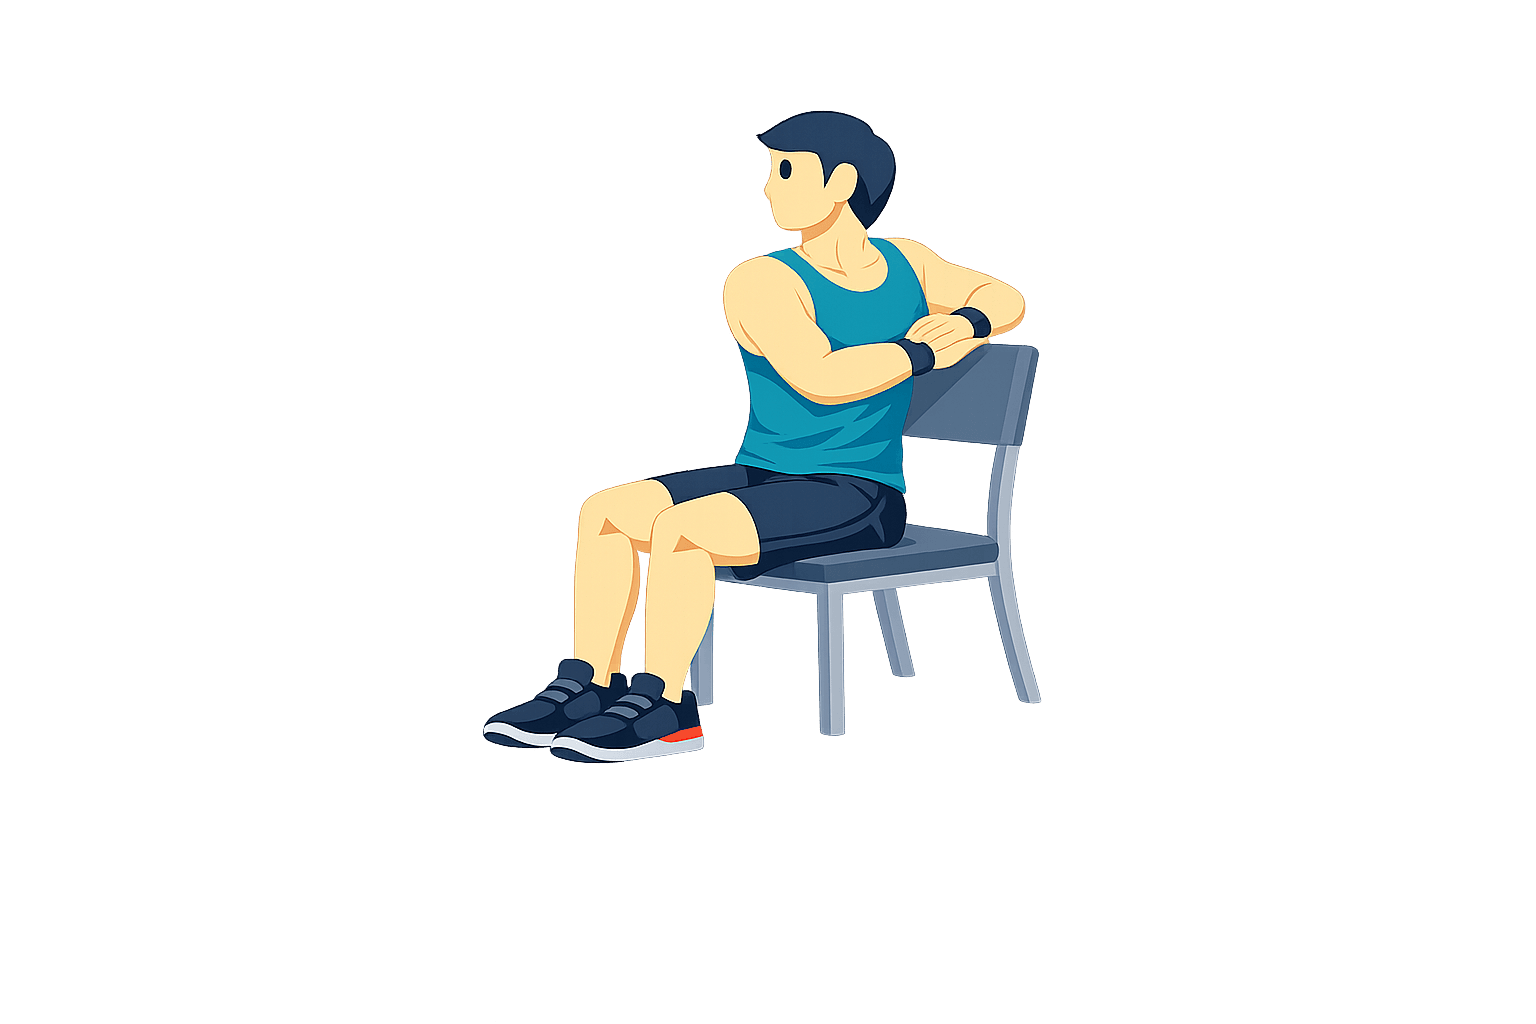
Seated Thoracic Rotation
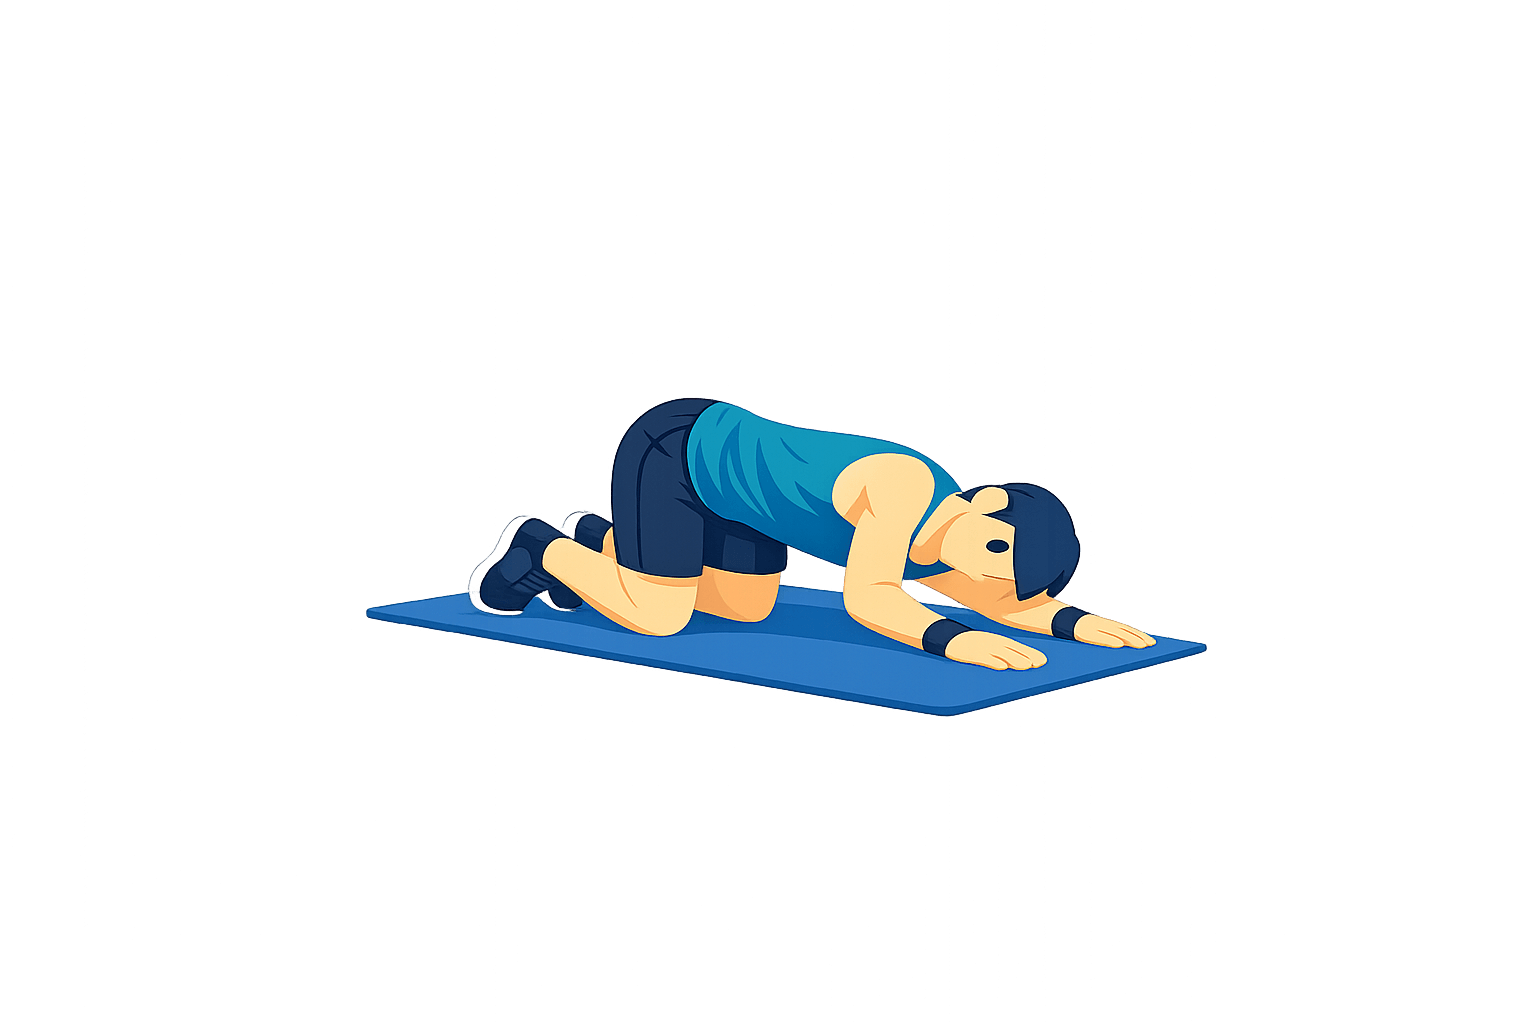
Thread the Needle
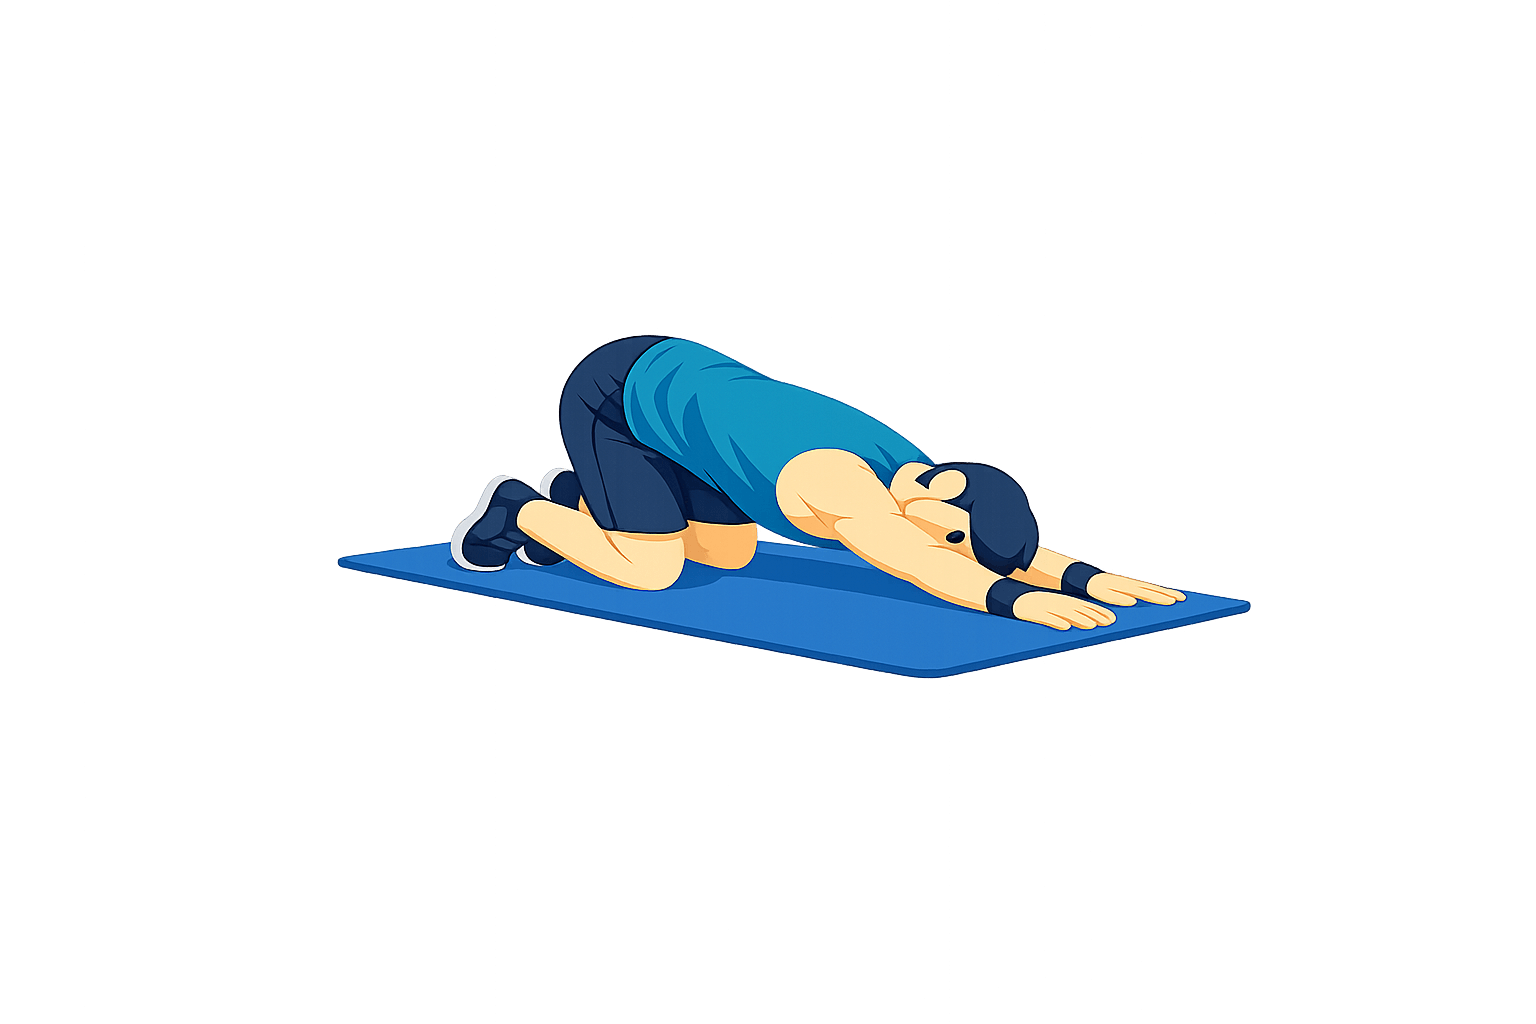
Childs Pose Reach
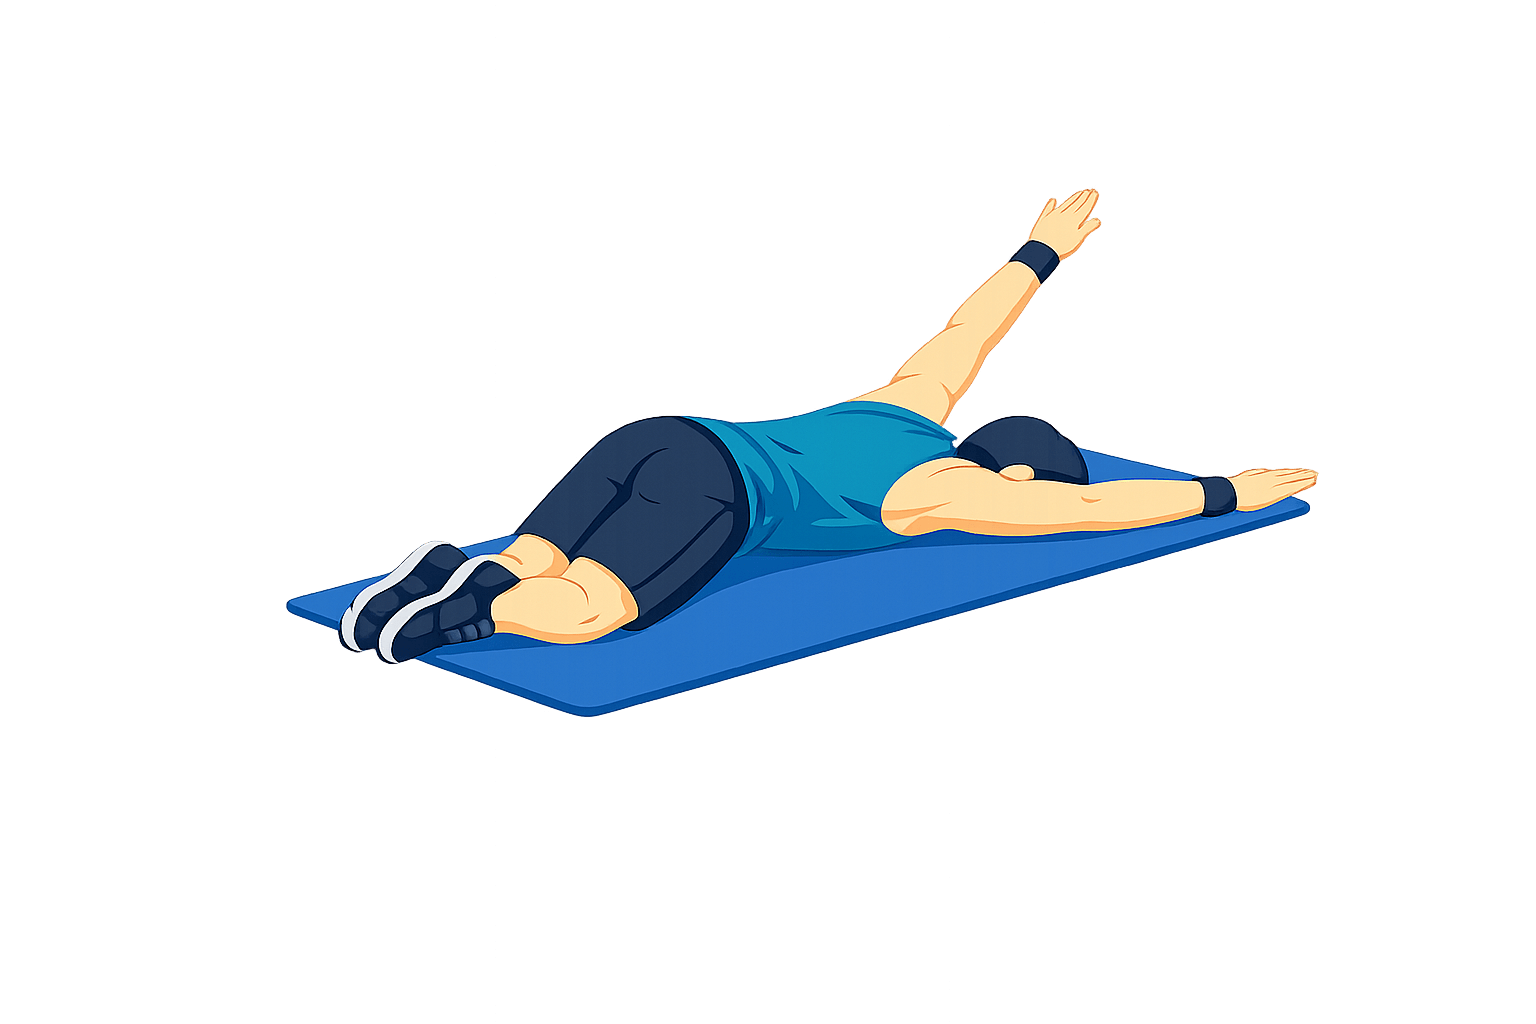
Prone Y Raise
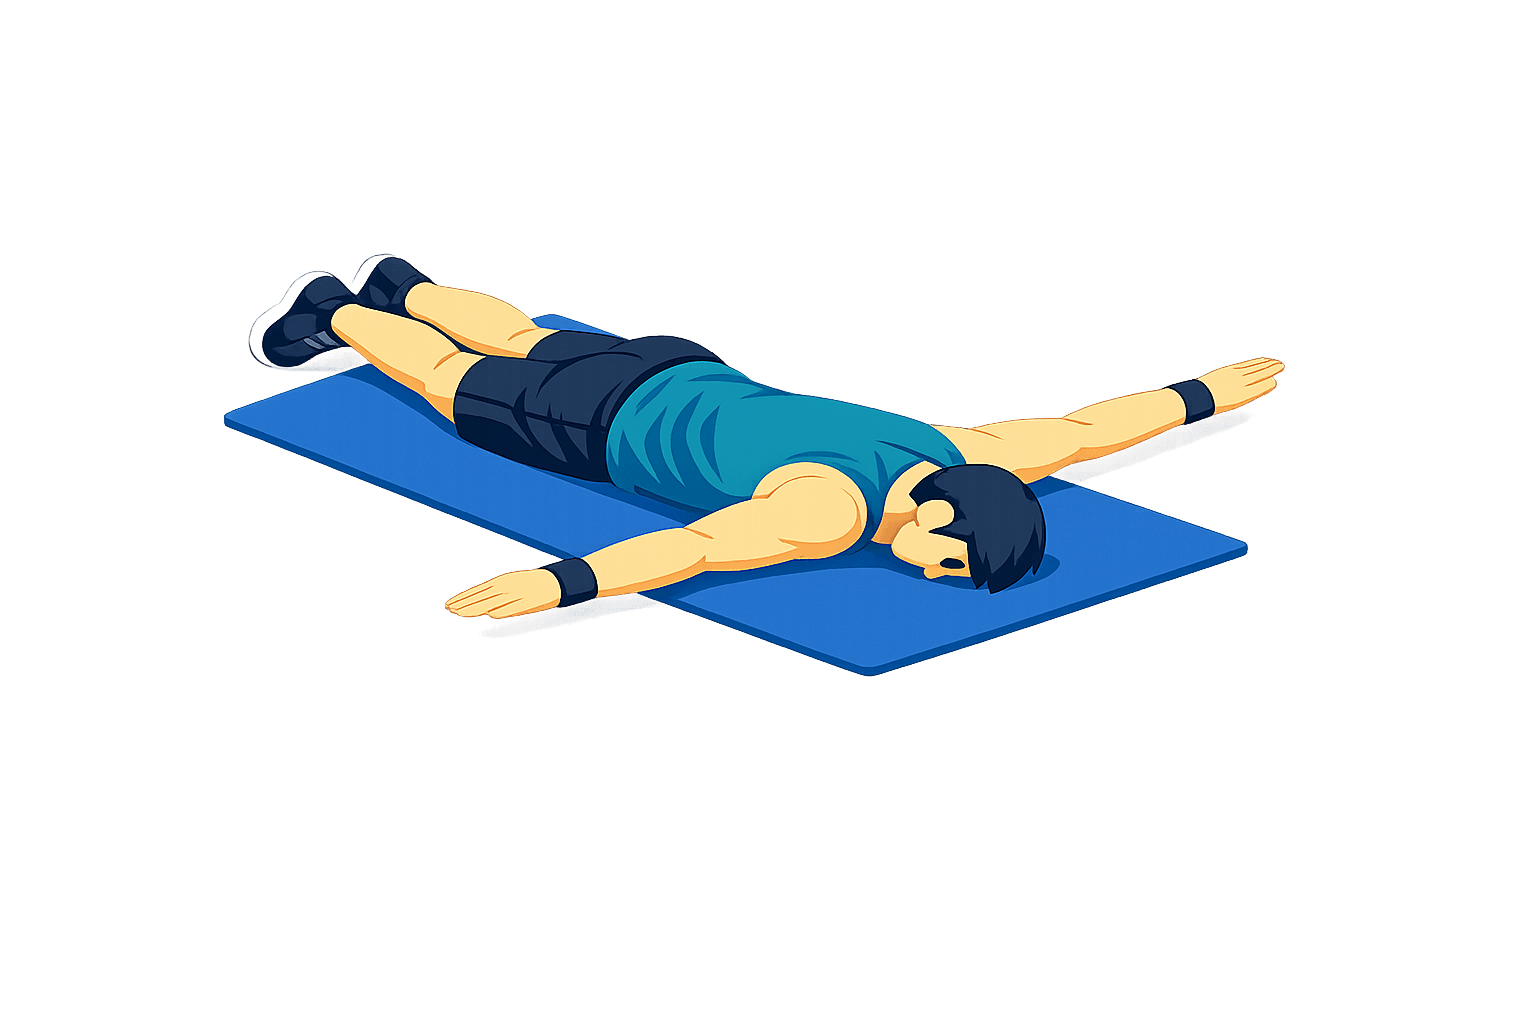
Prone T Raise
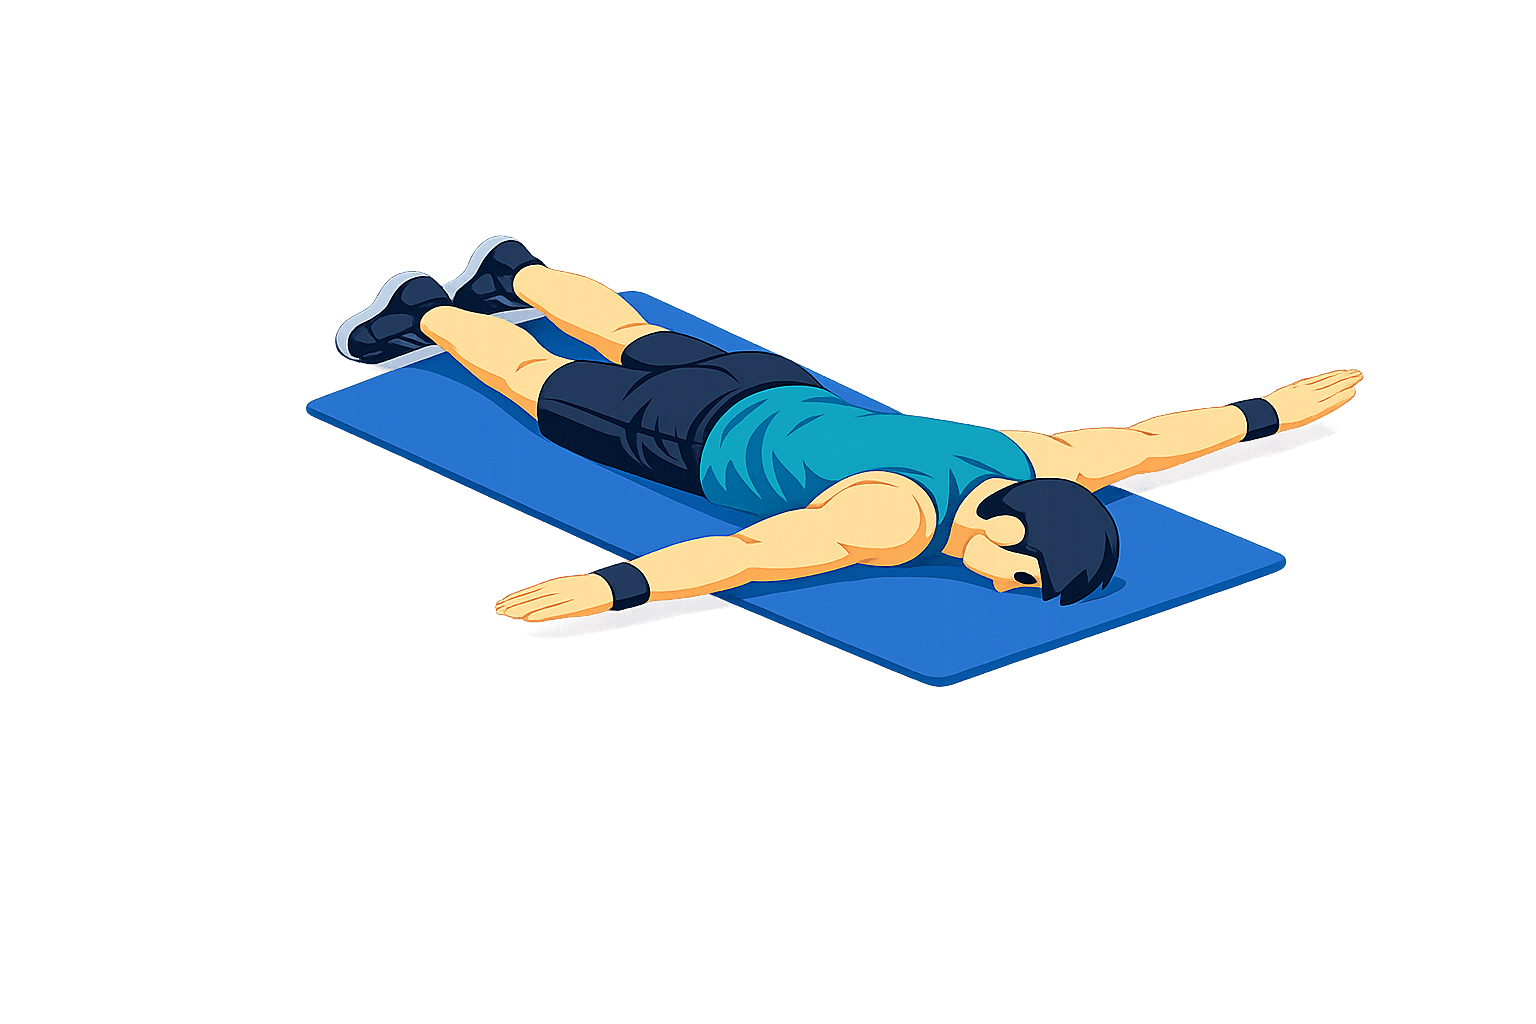
Reverse Snow Angels
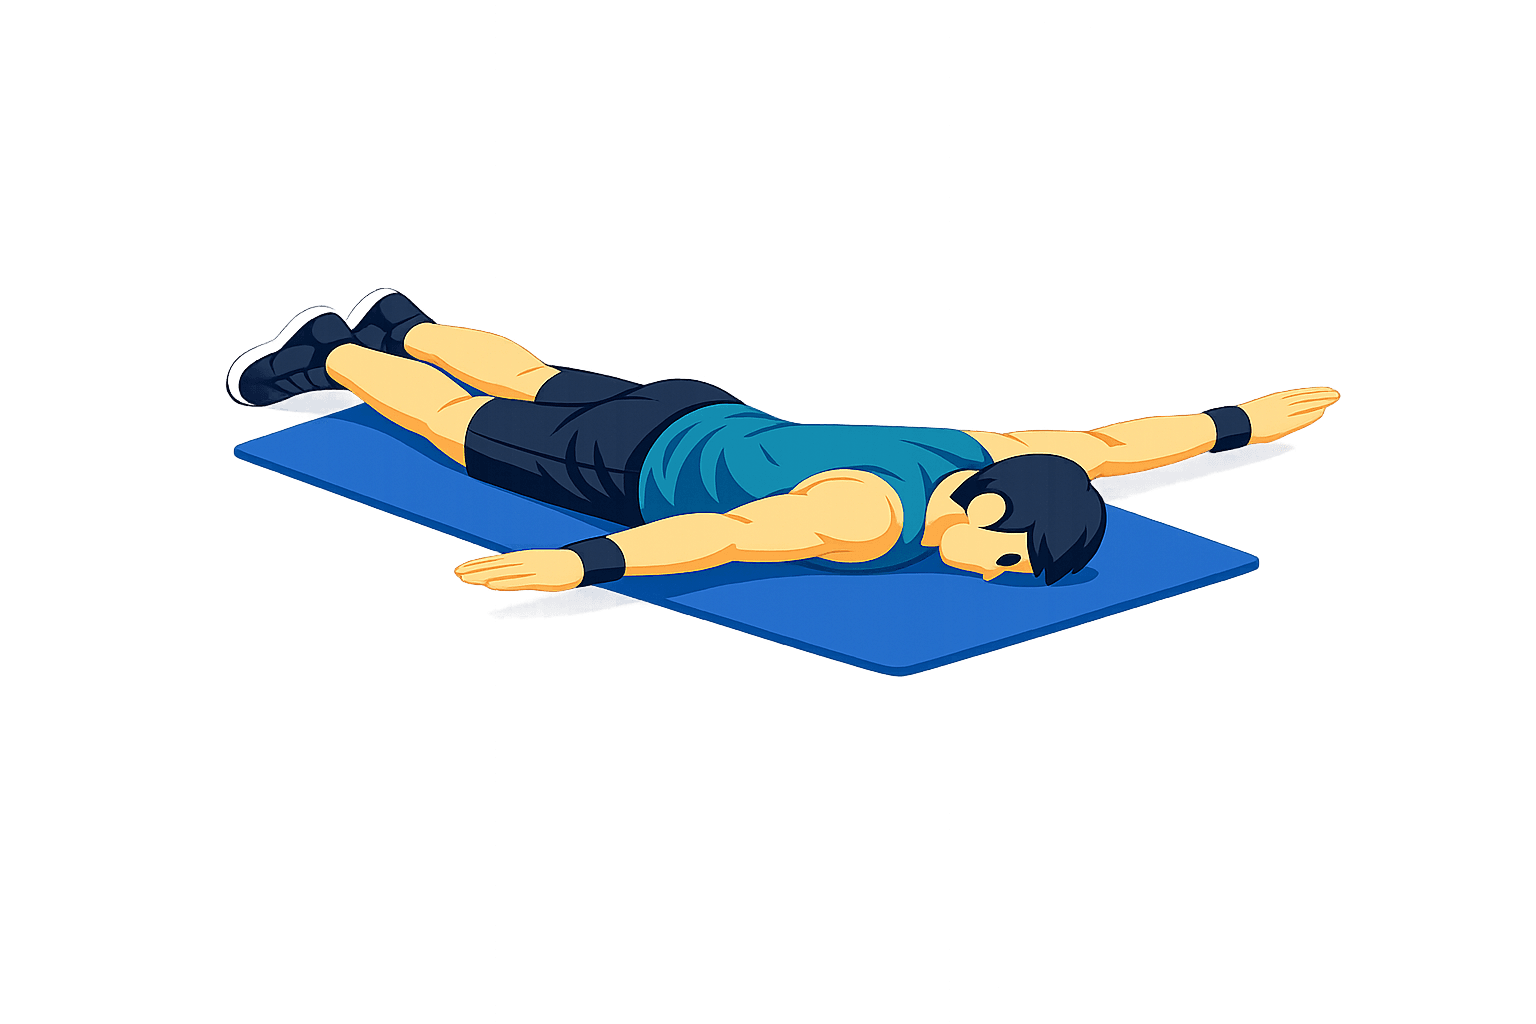
Superman Hold
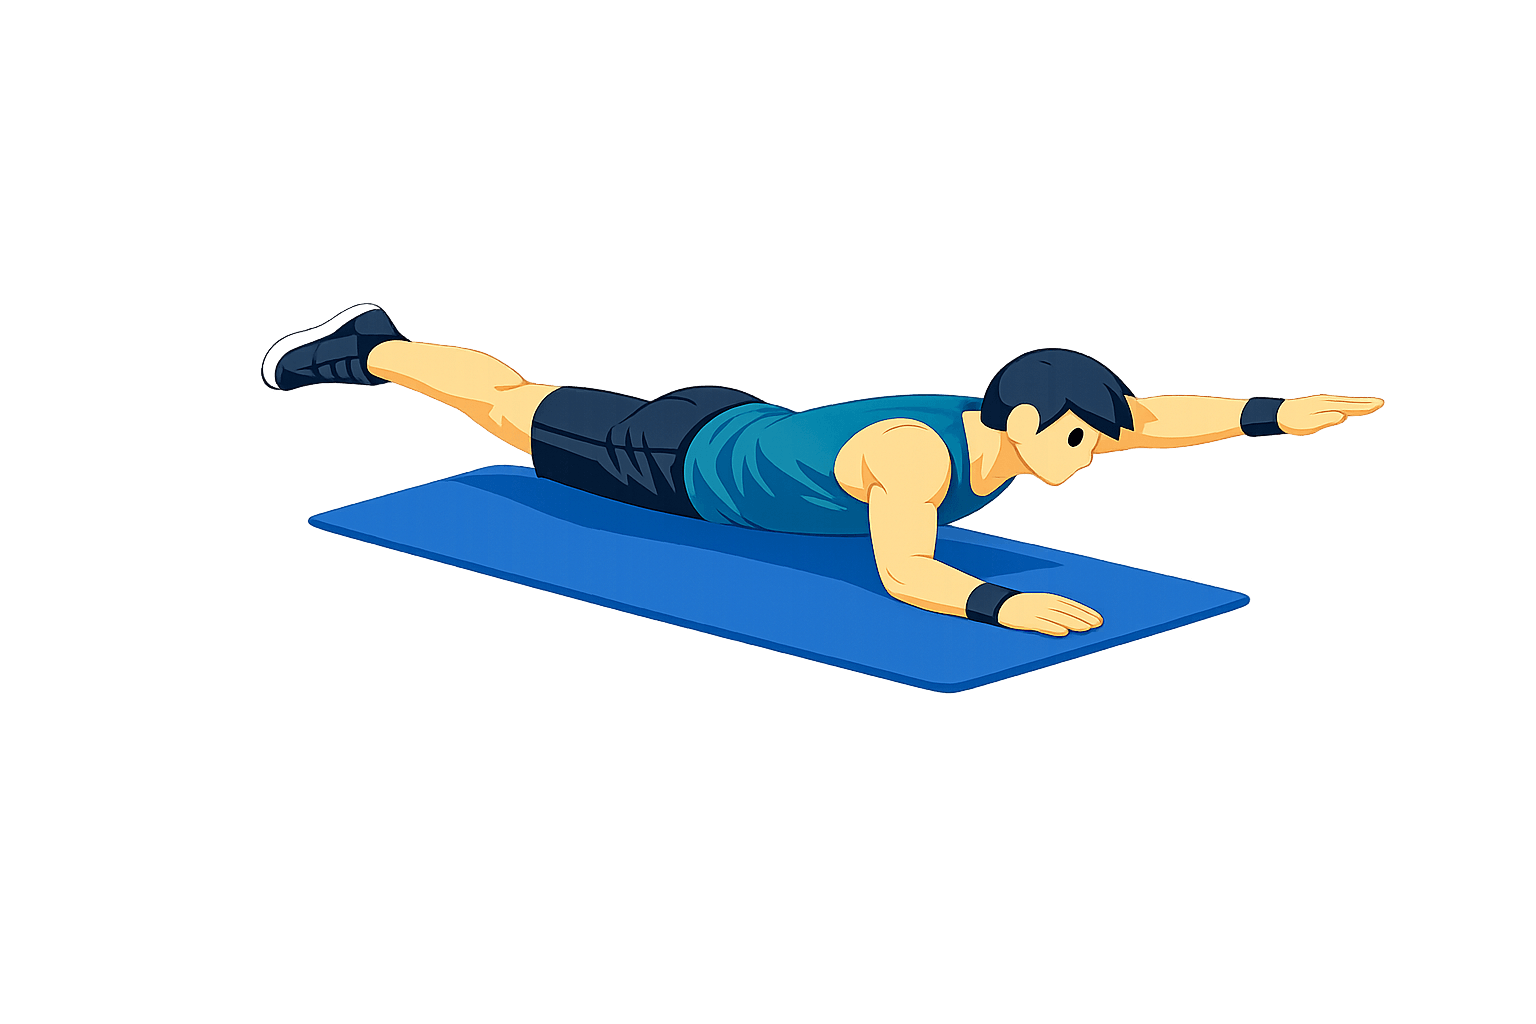
Bird Dog
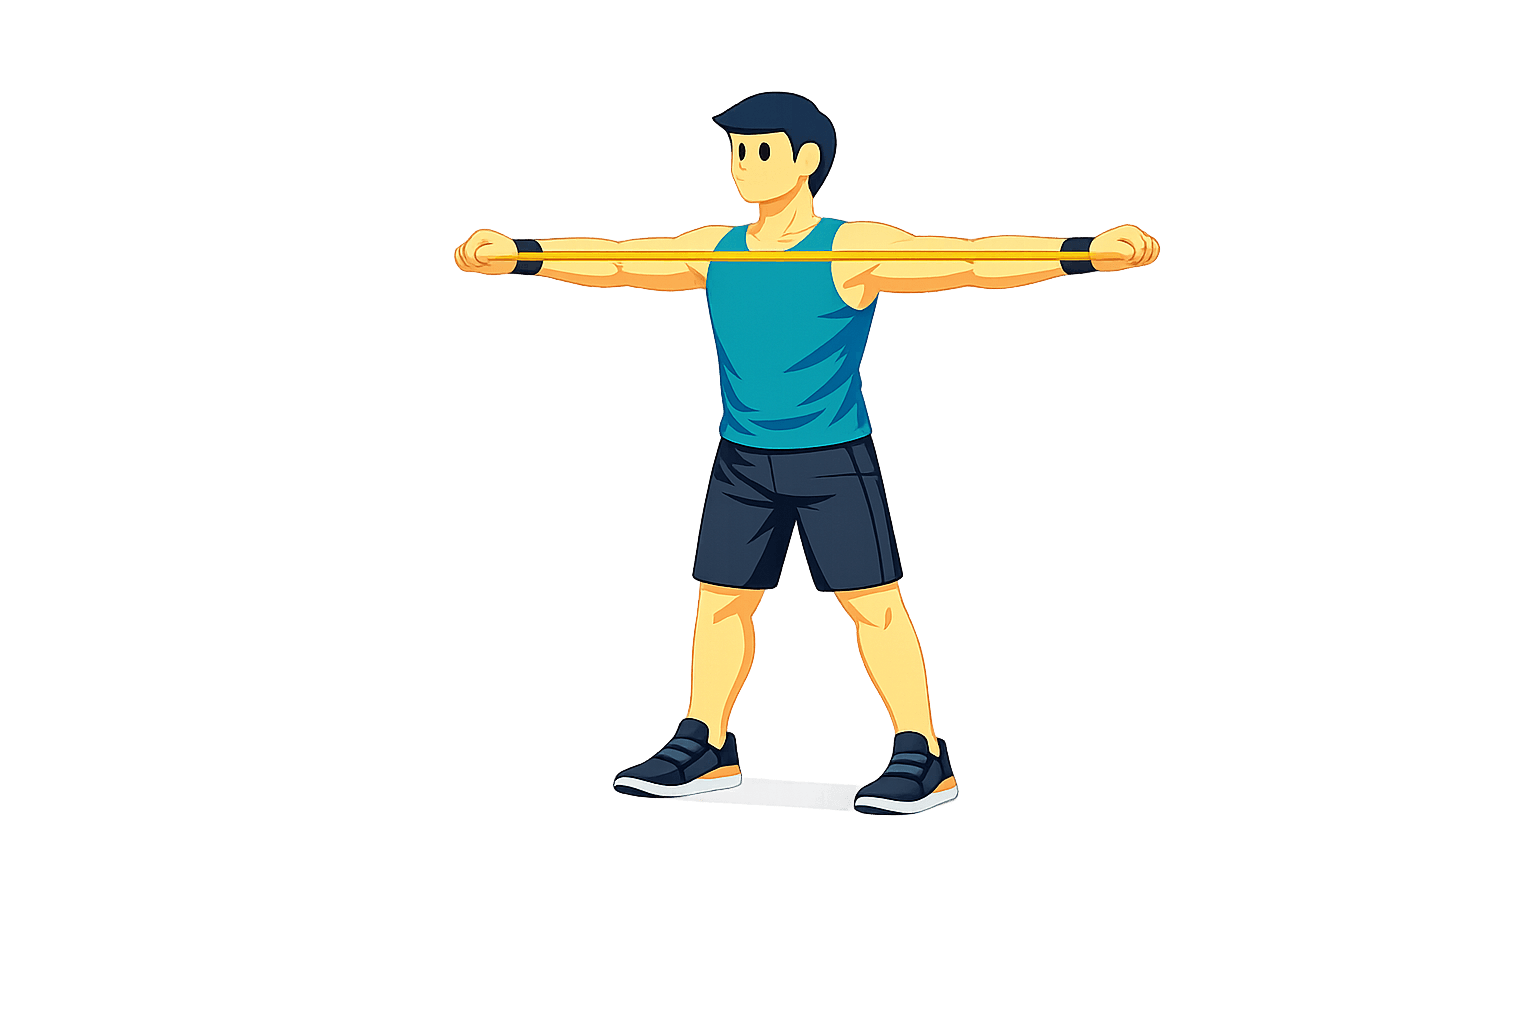
Band Pull-Apart
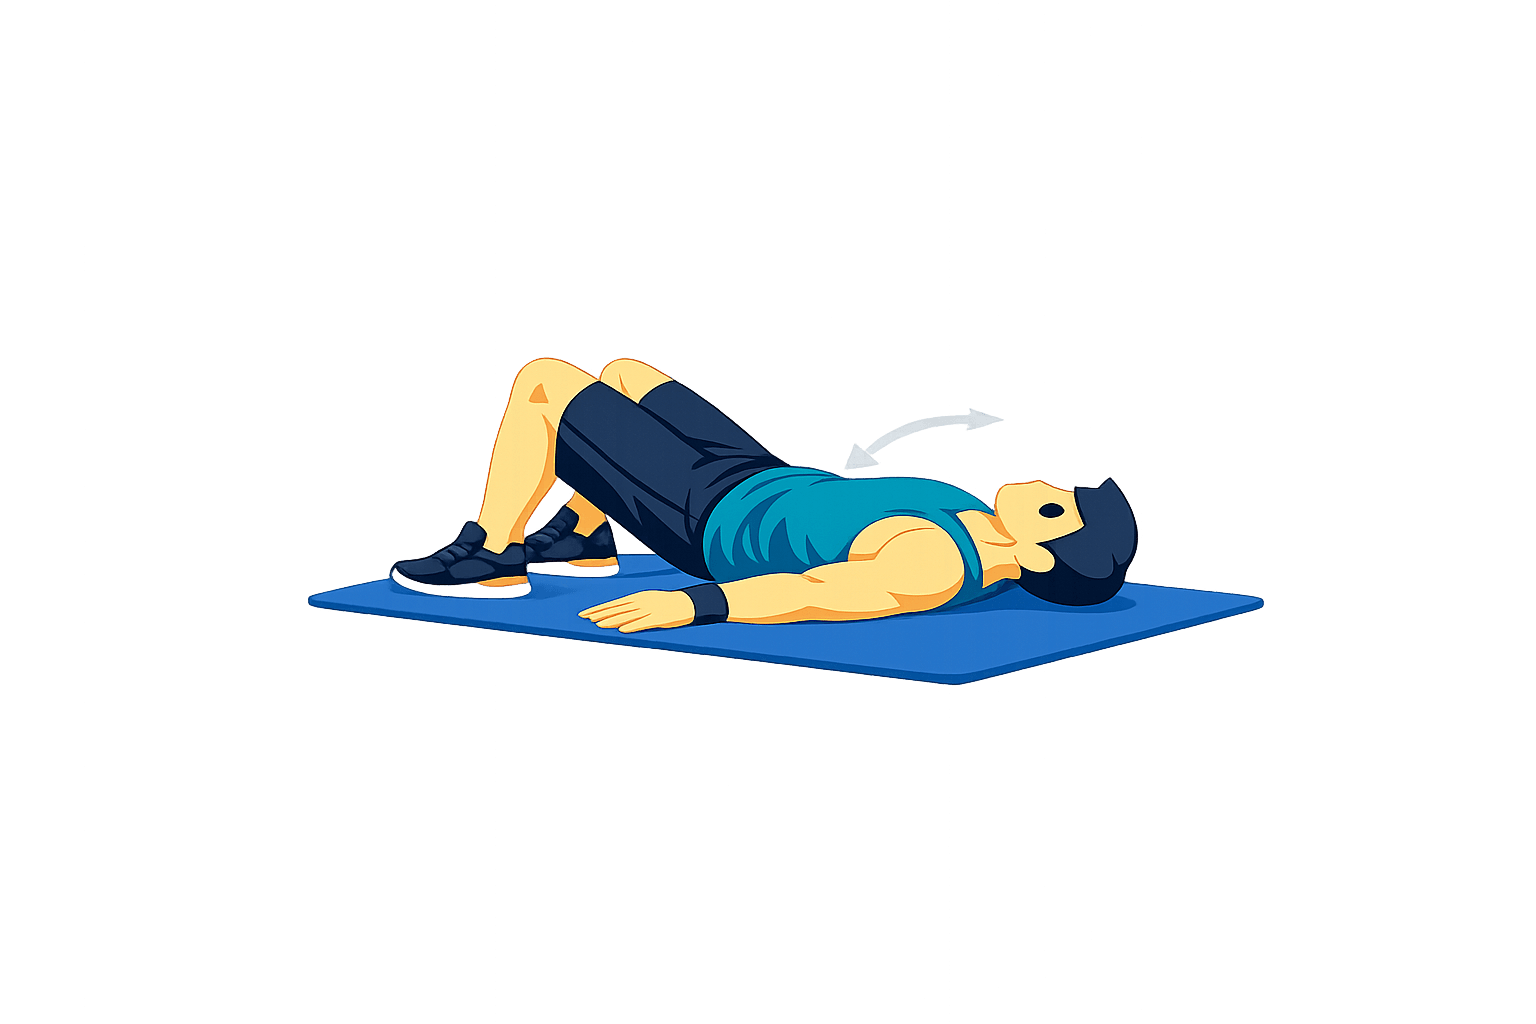
Pelvic Tilt
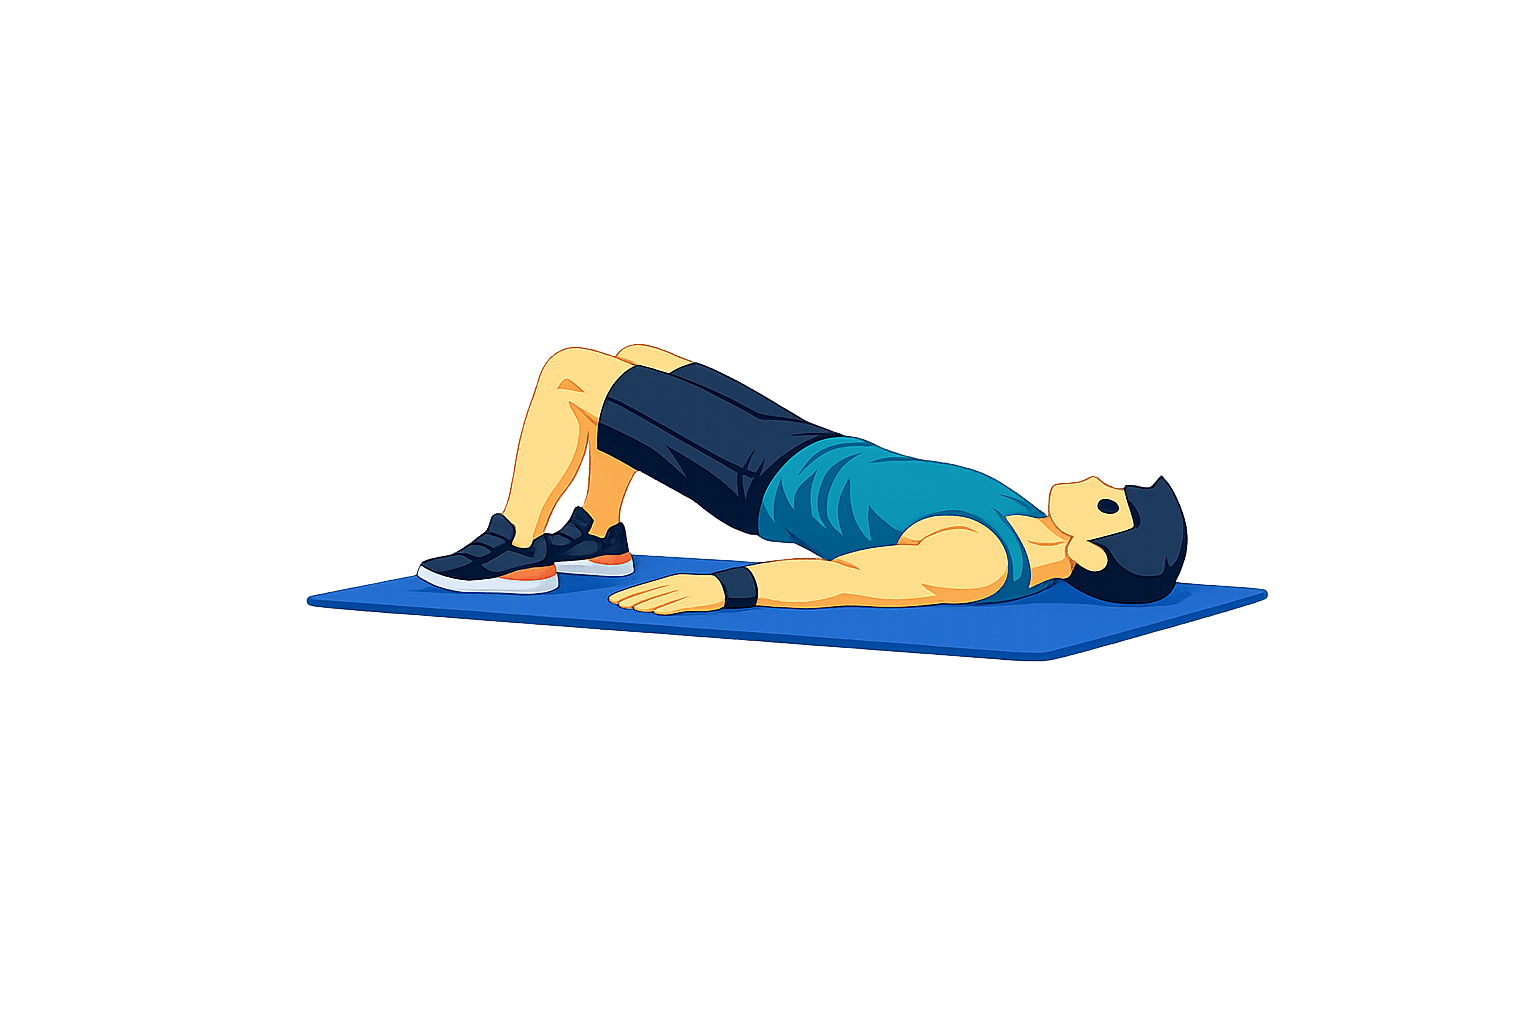
Glute Bridge
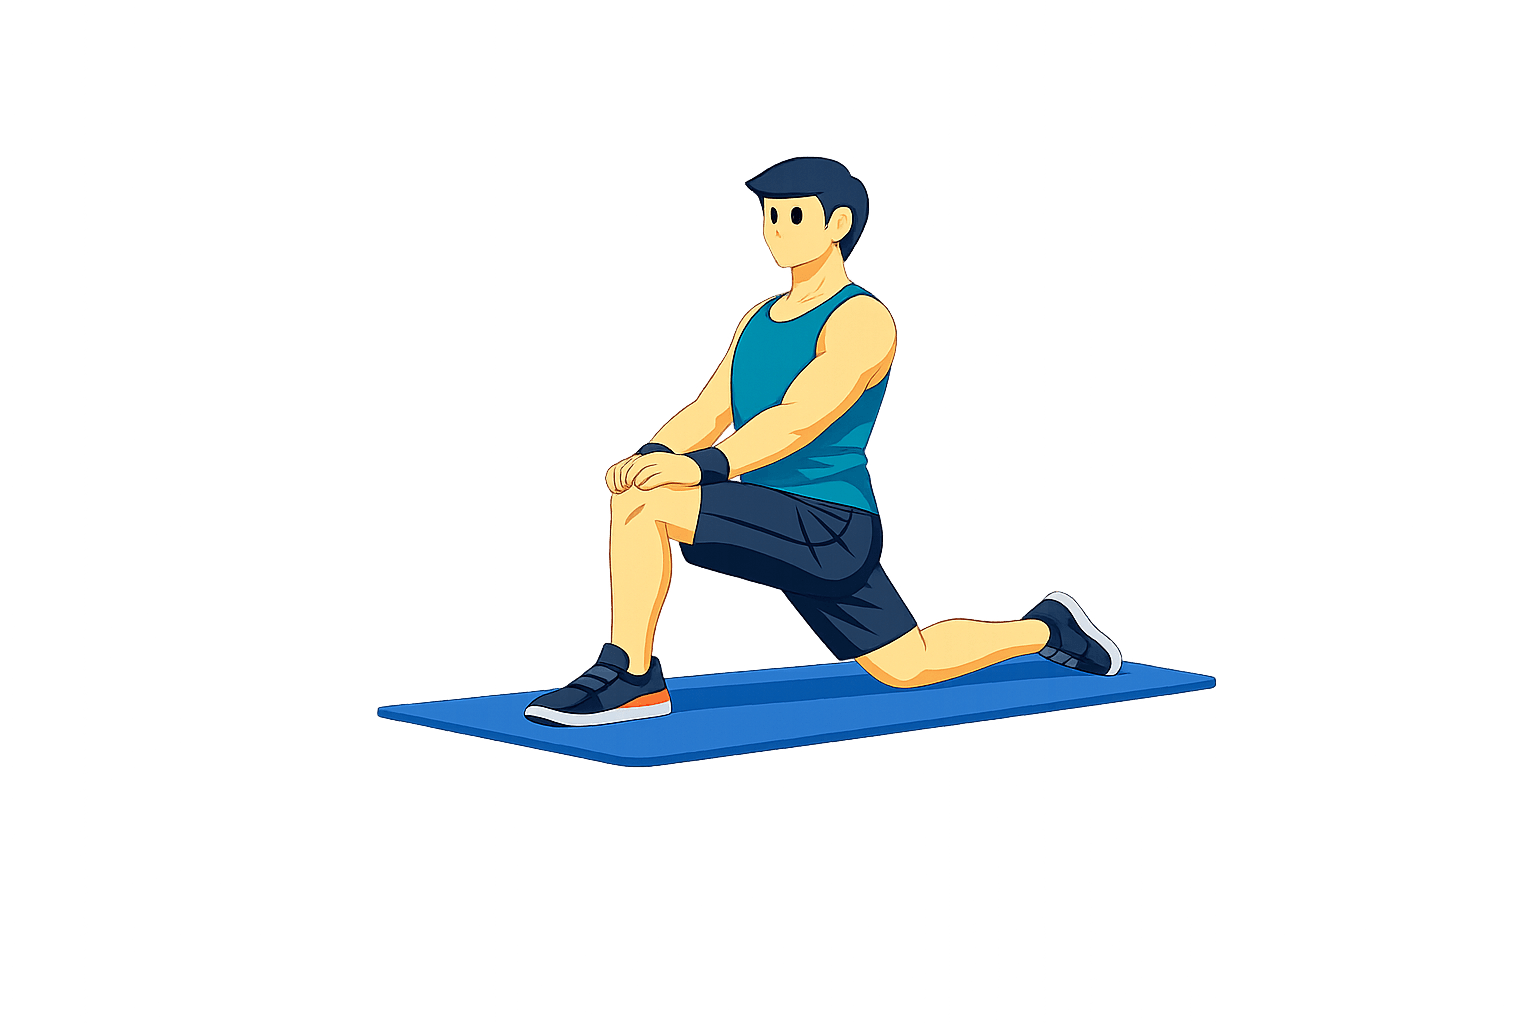
Hip Flexor Stretch
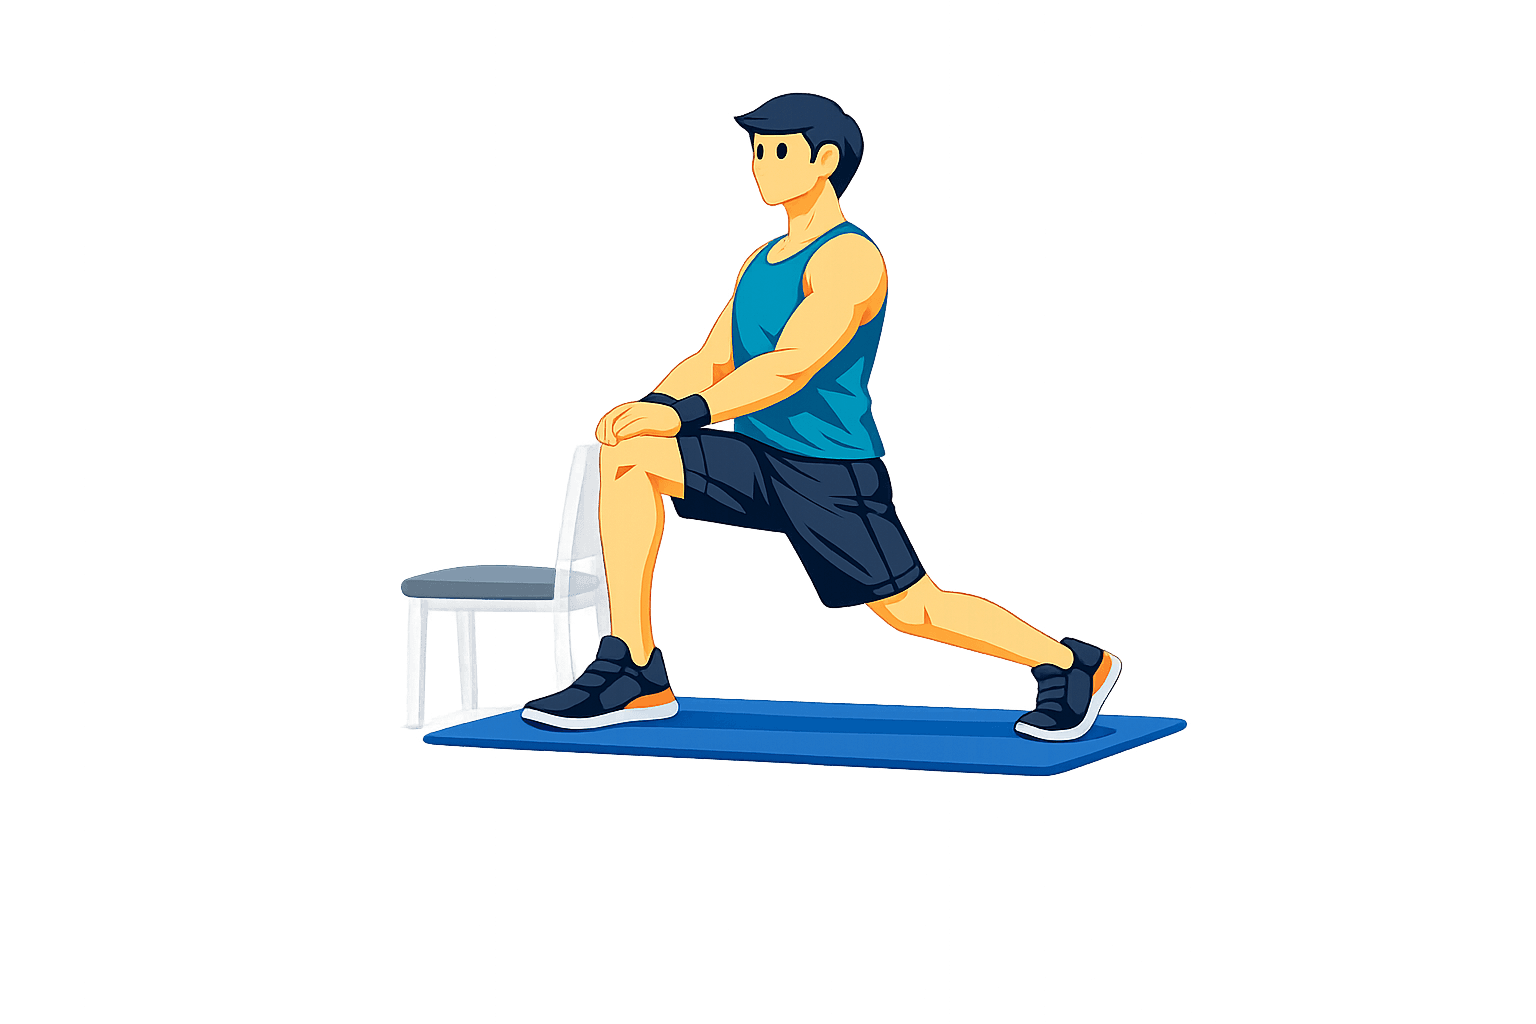
Standing Hip Flexor Stretch
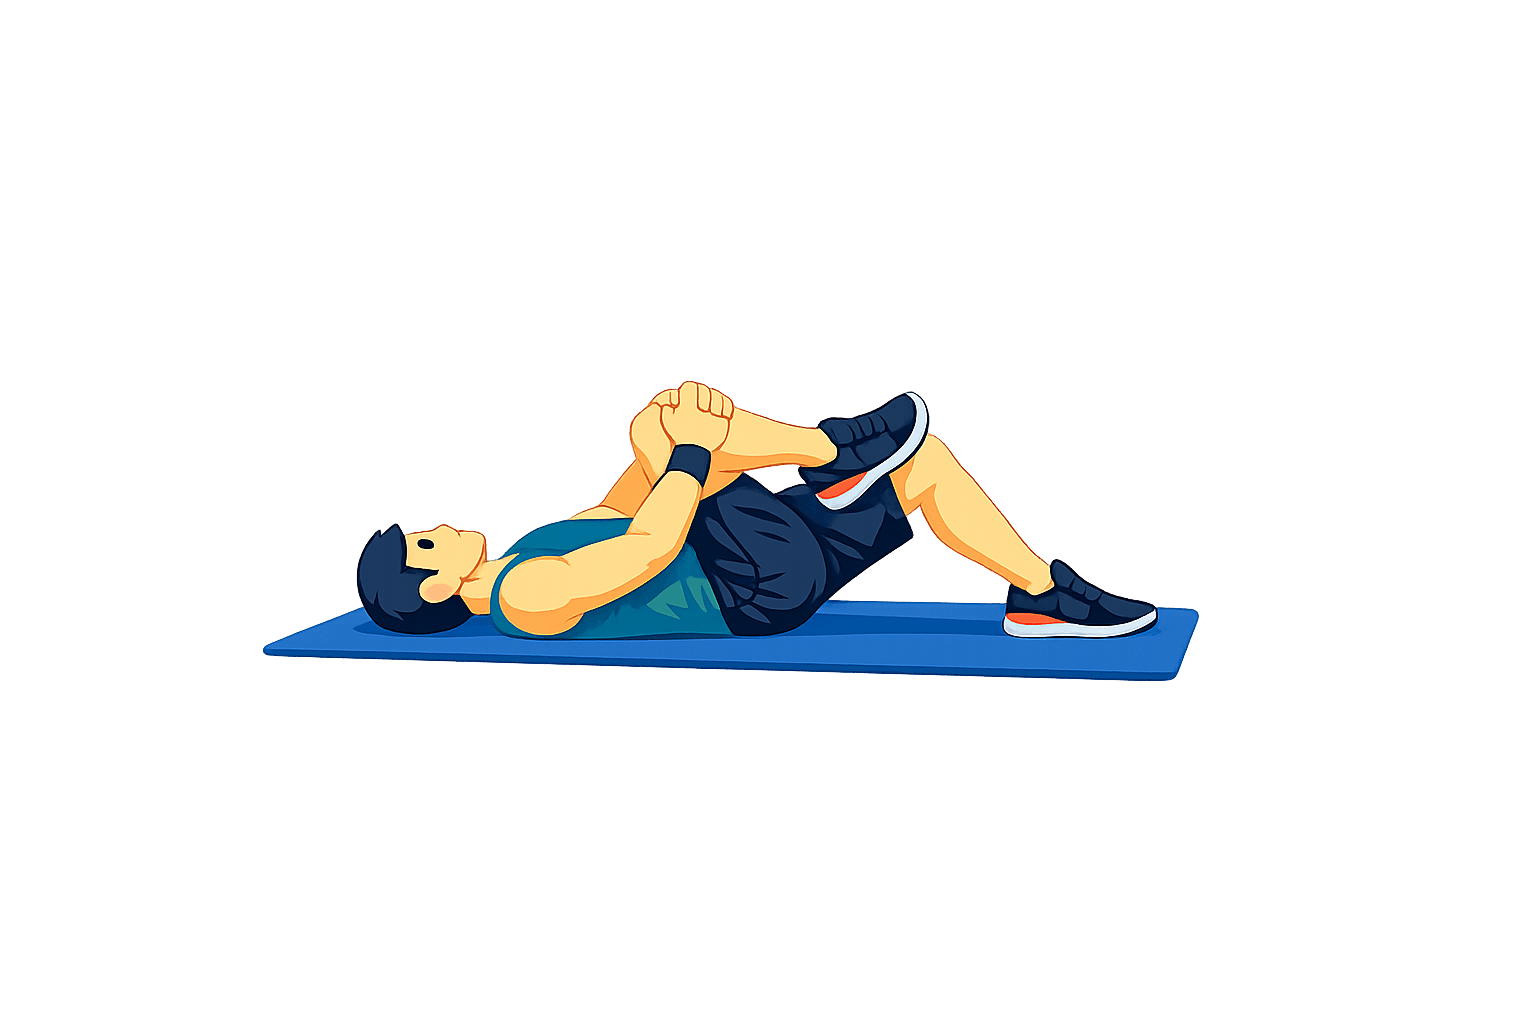
Figure-Four Stretch
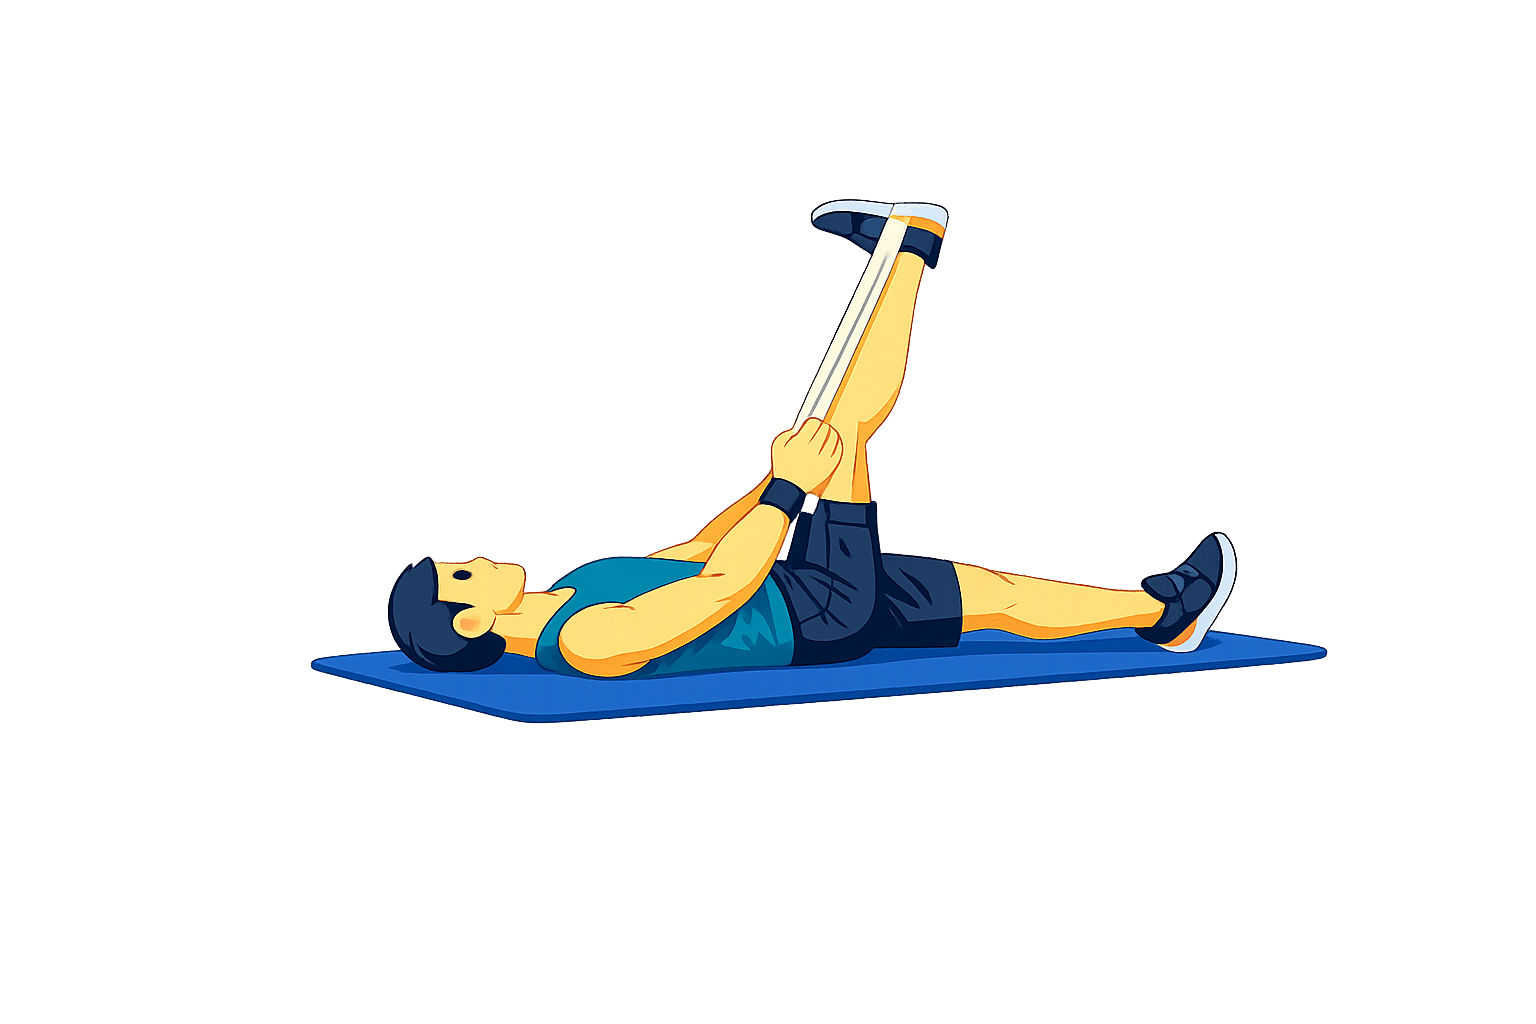
Hamstring Stretch
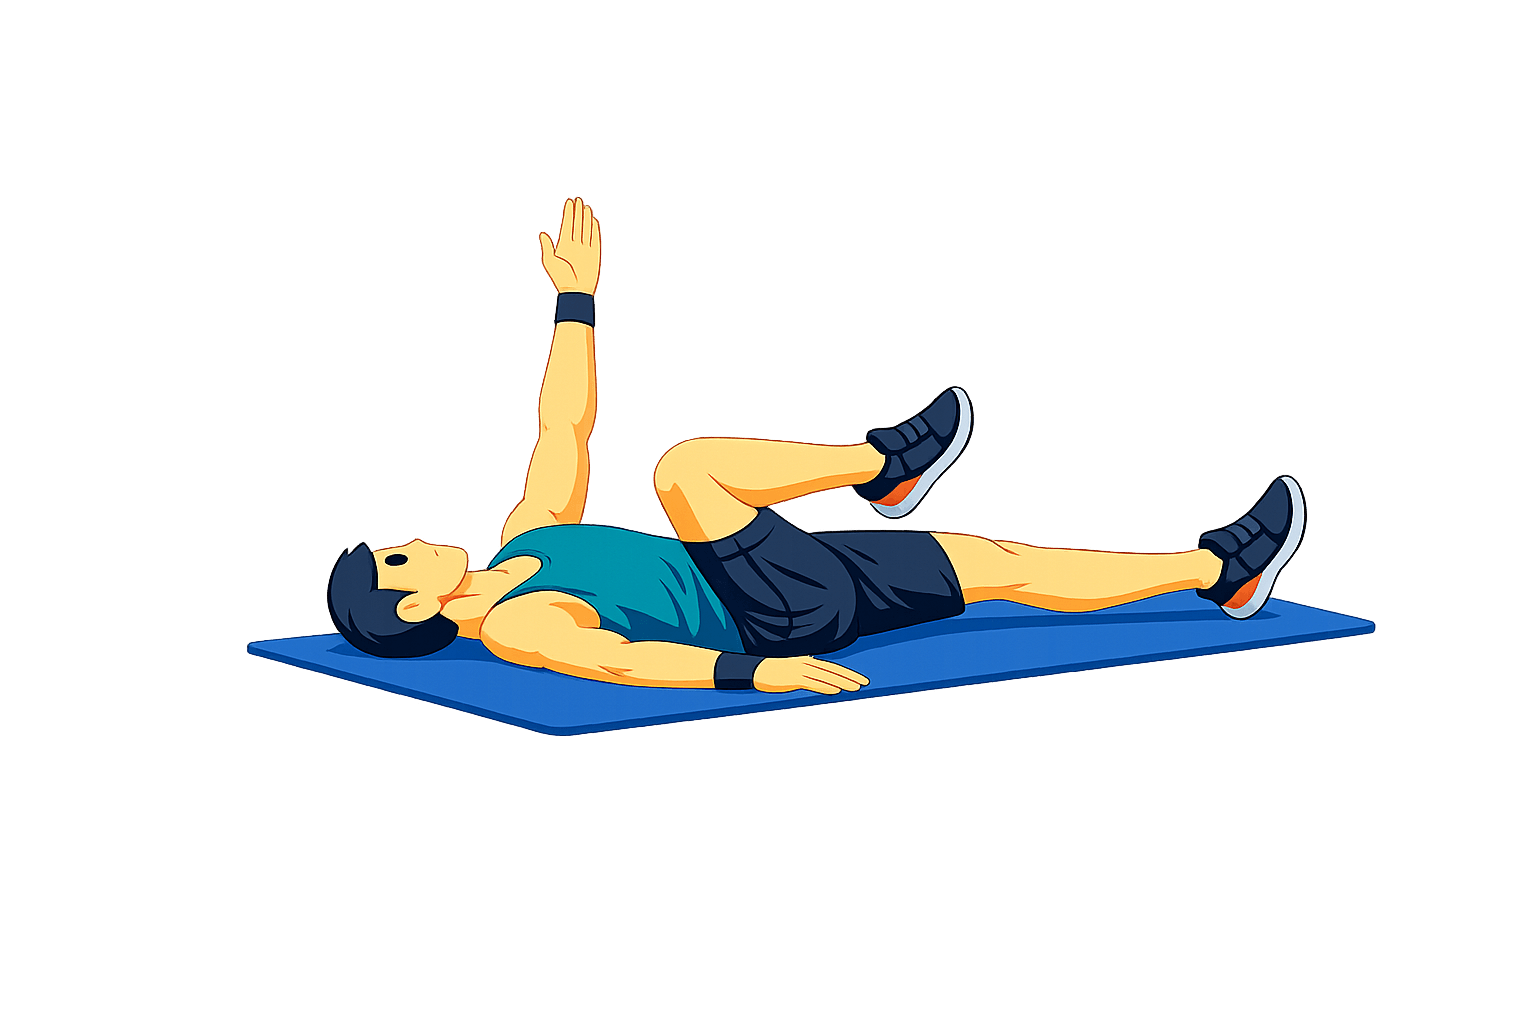
Dead Bug
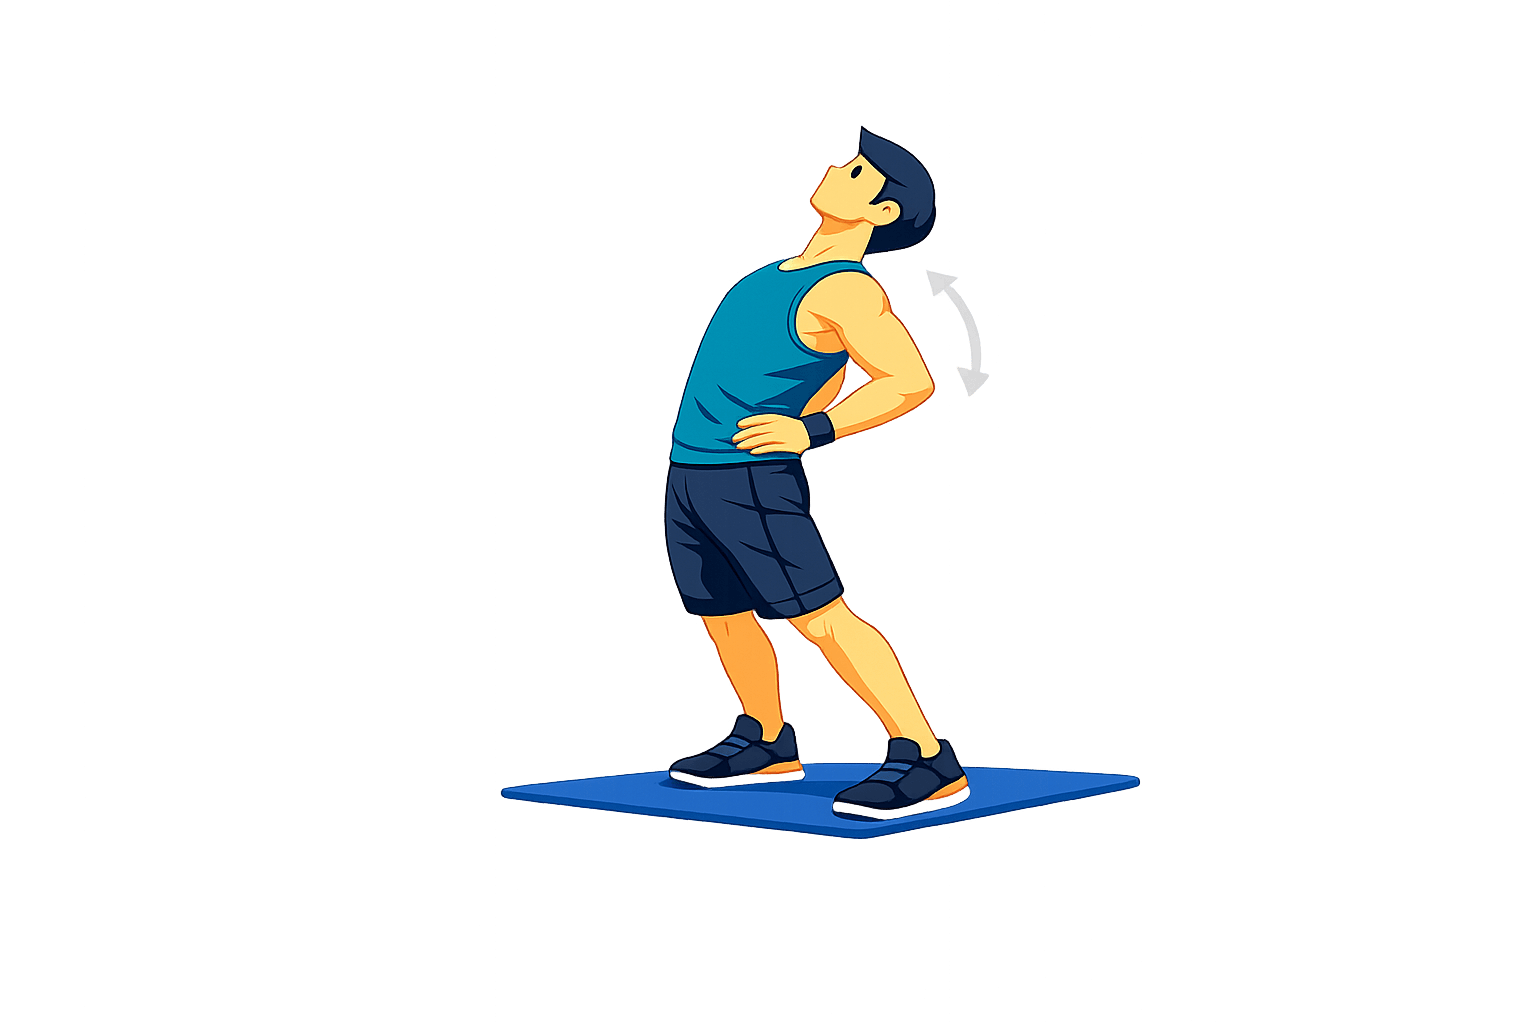
Standing Back Extension
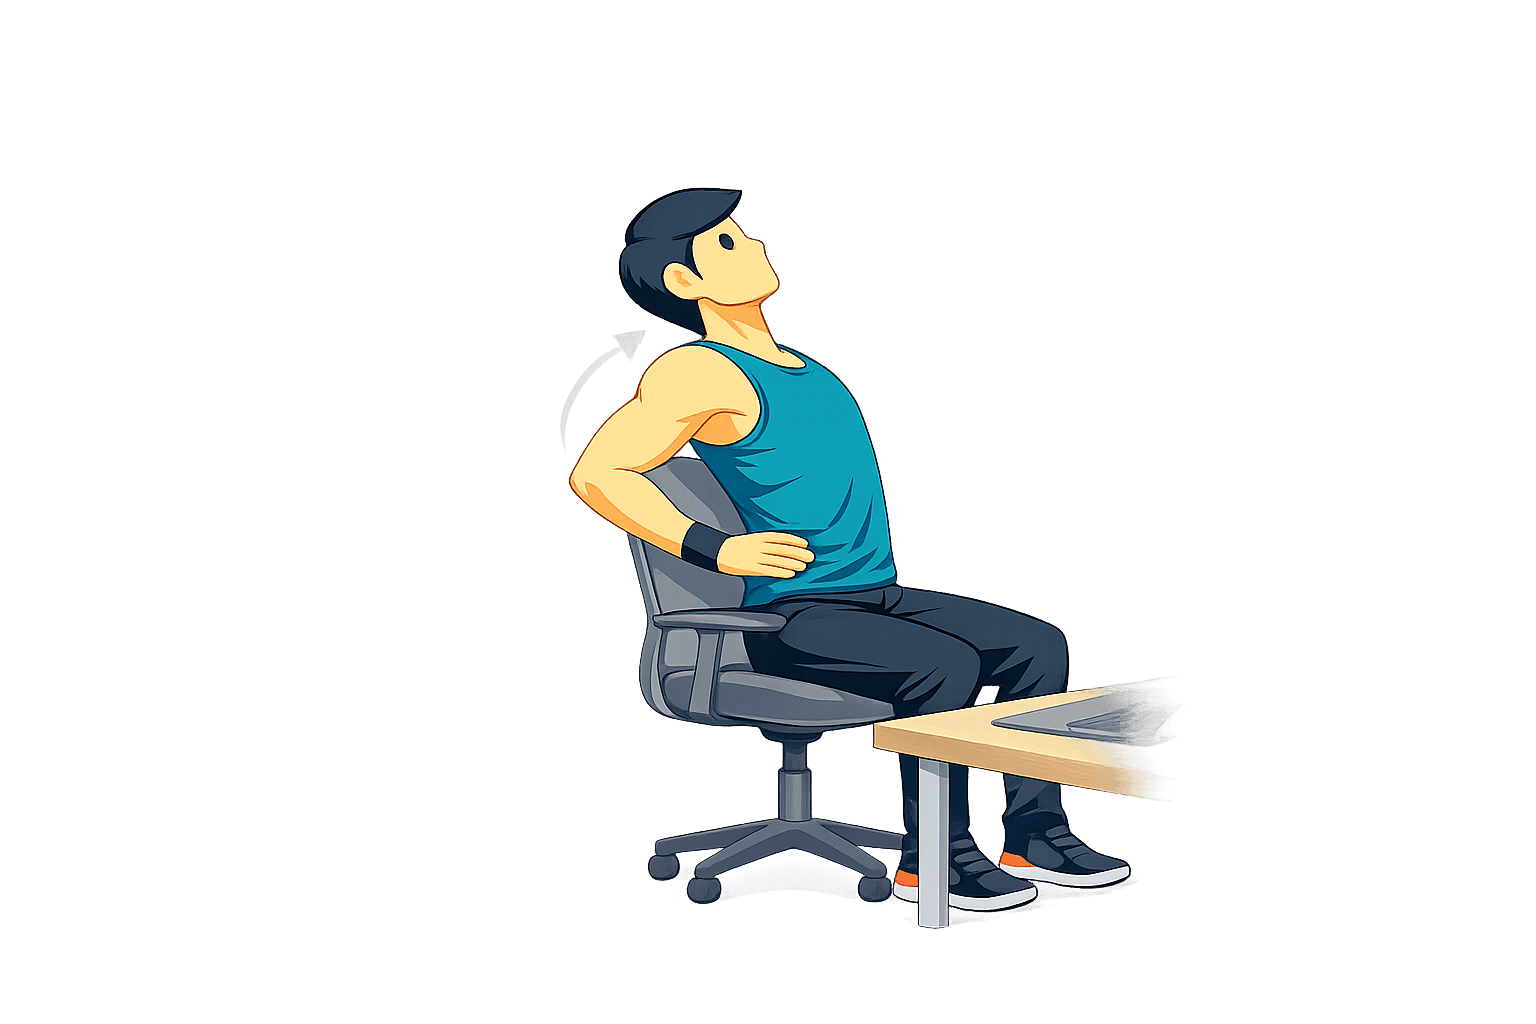
Desk Shoulder Rolls
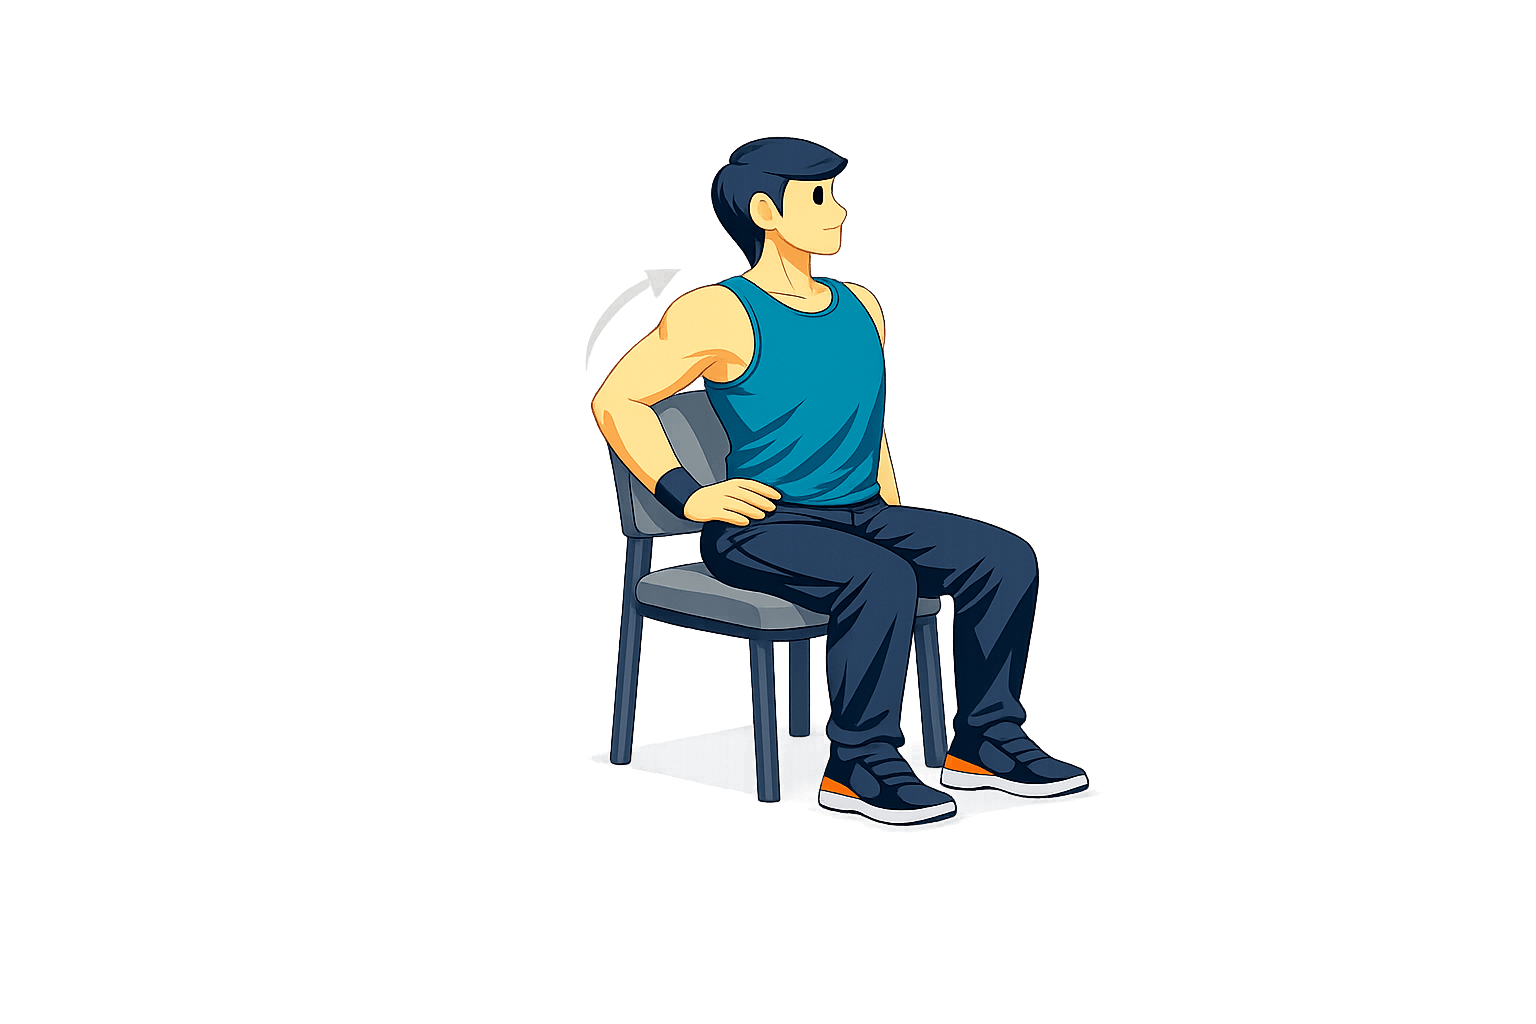
Seated Twist
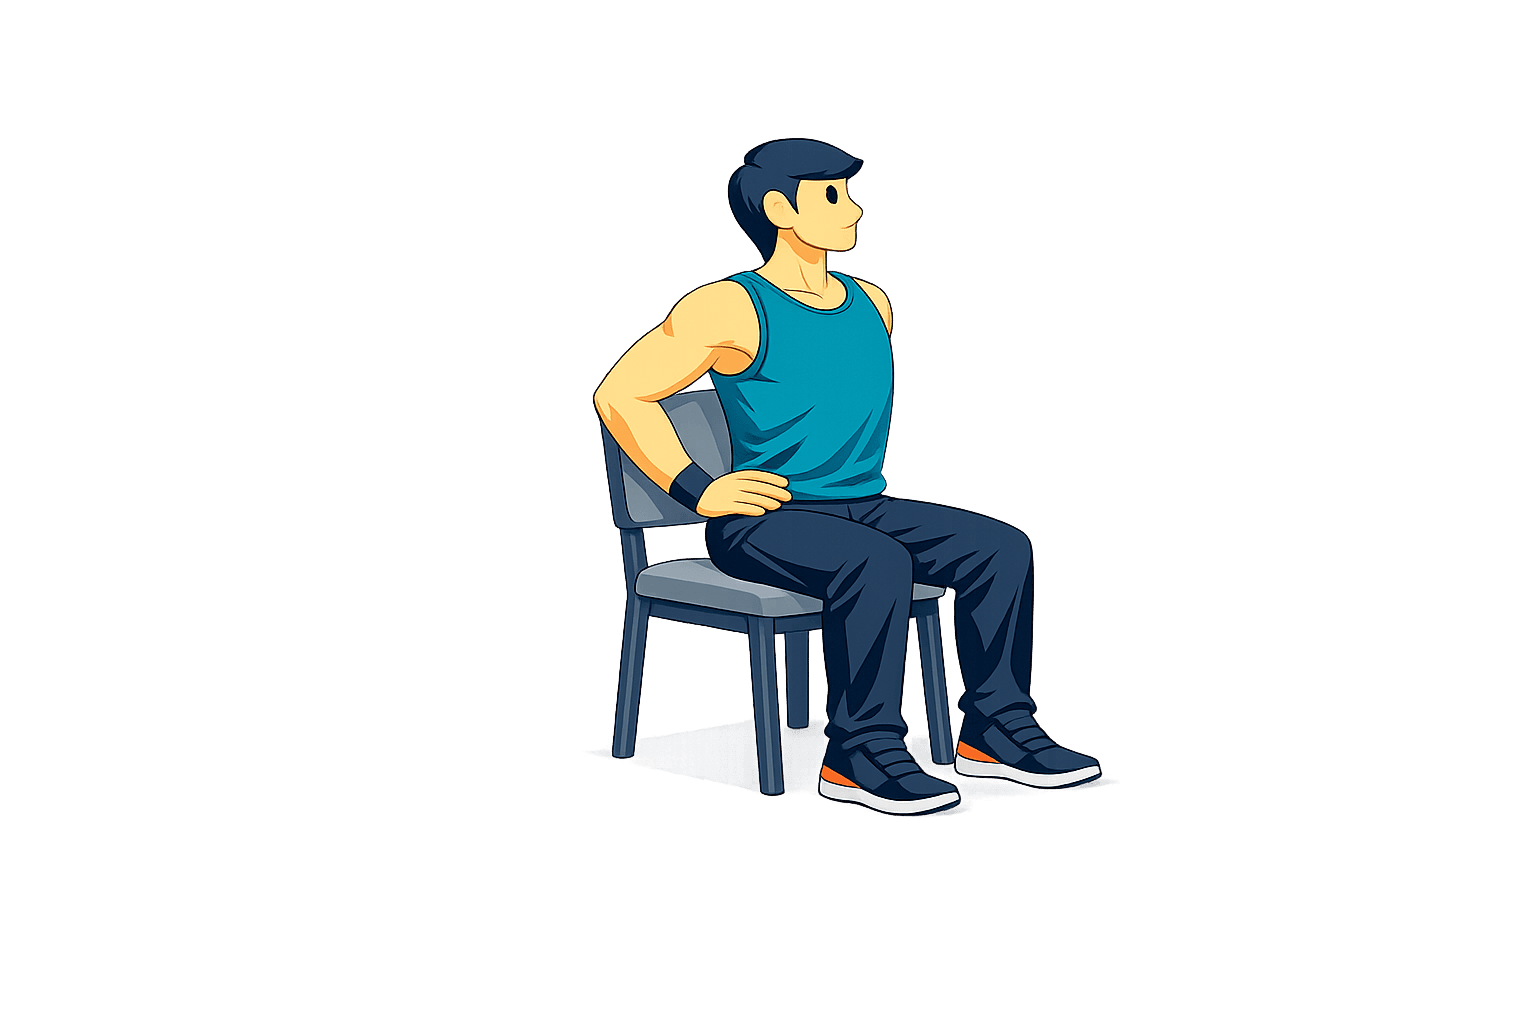
Chair Chest Opener
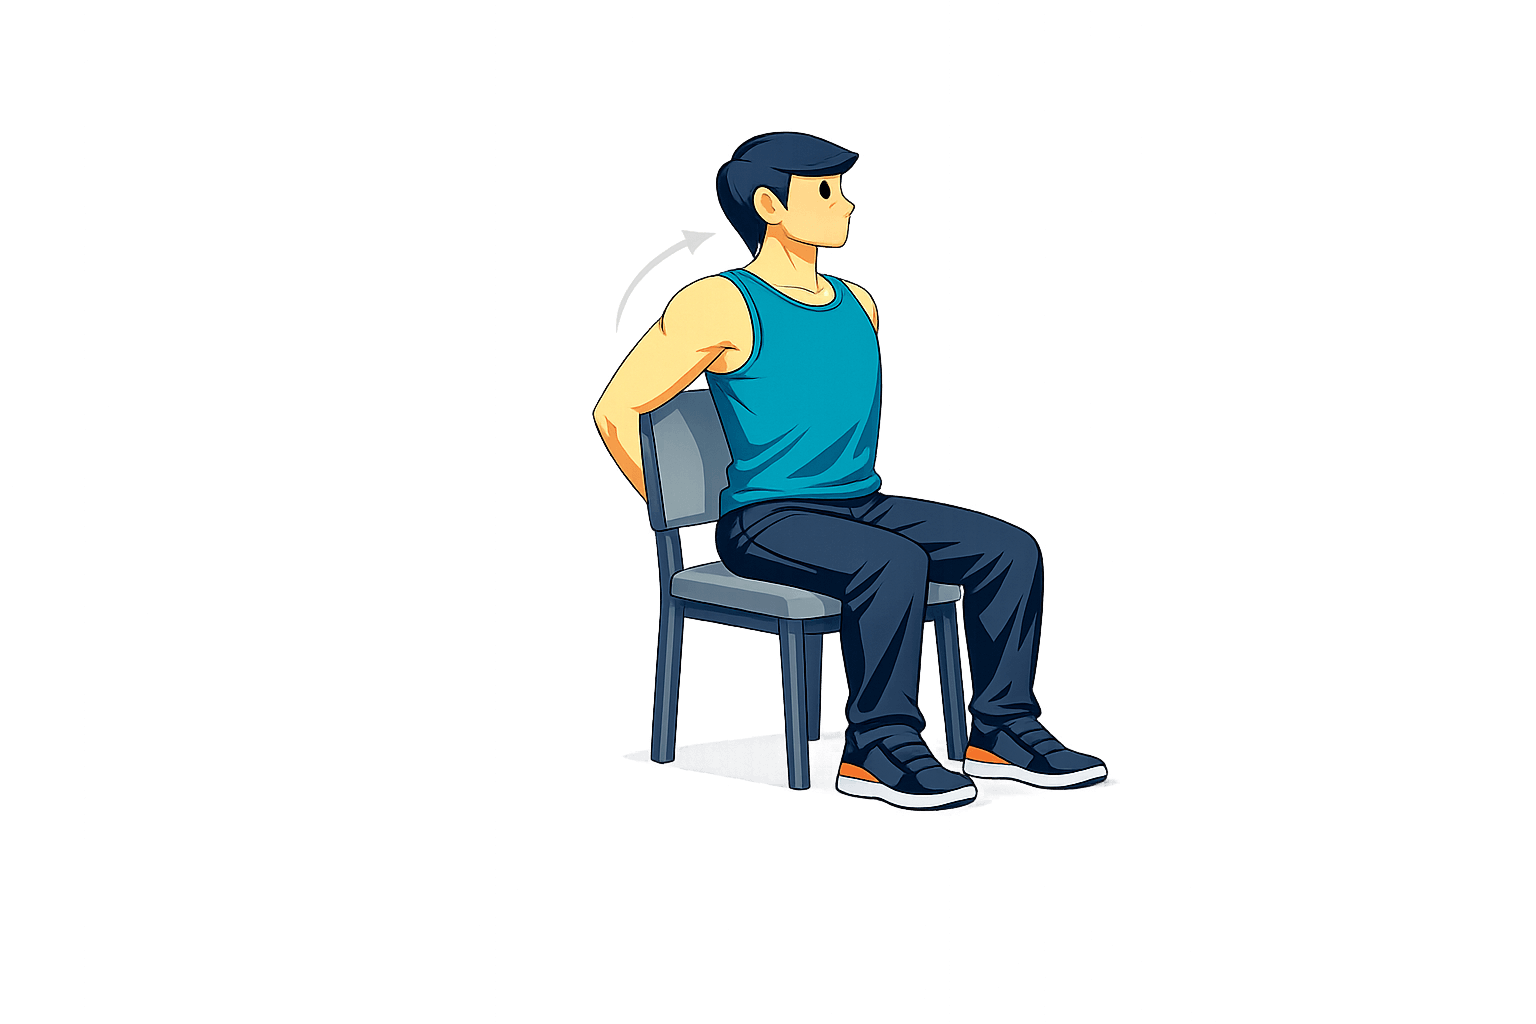
Chair Neck Reset
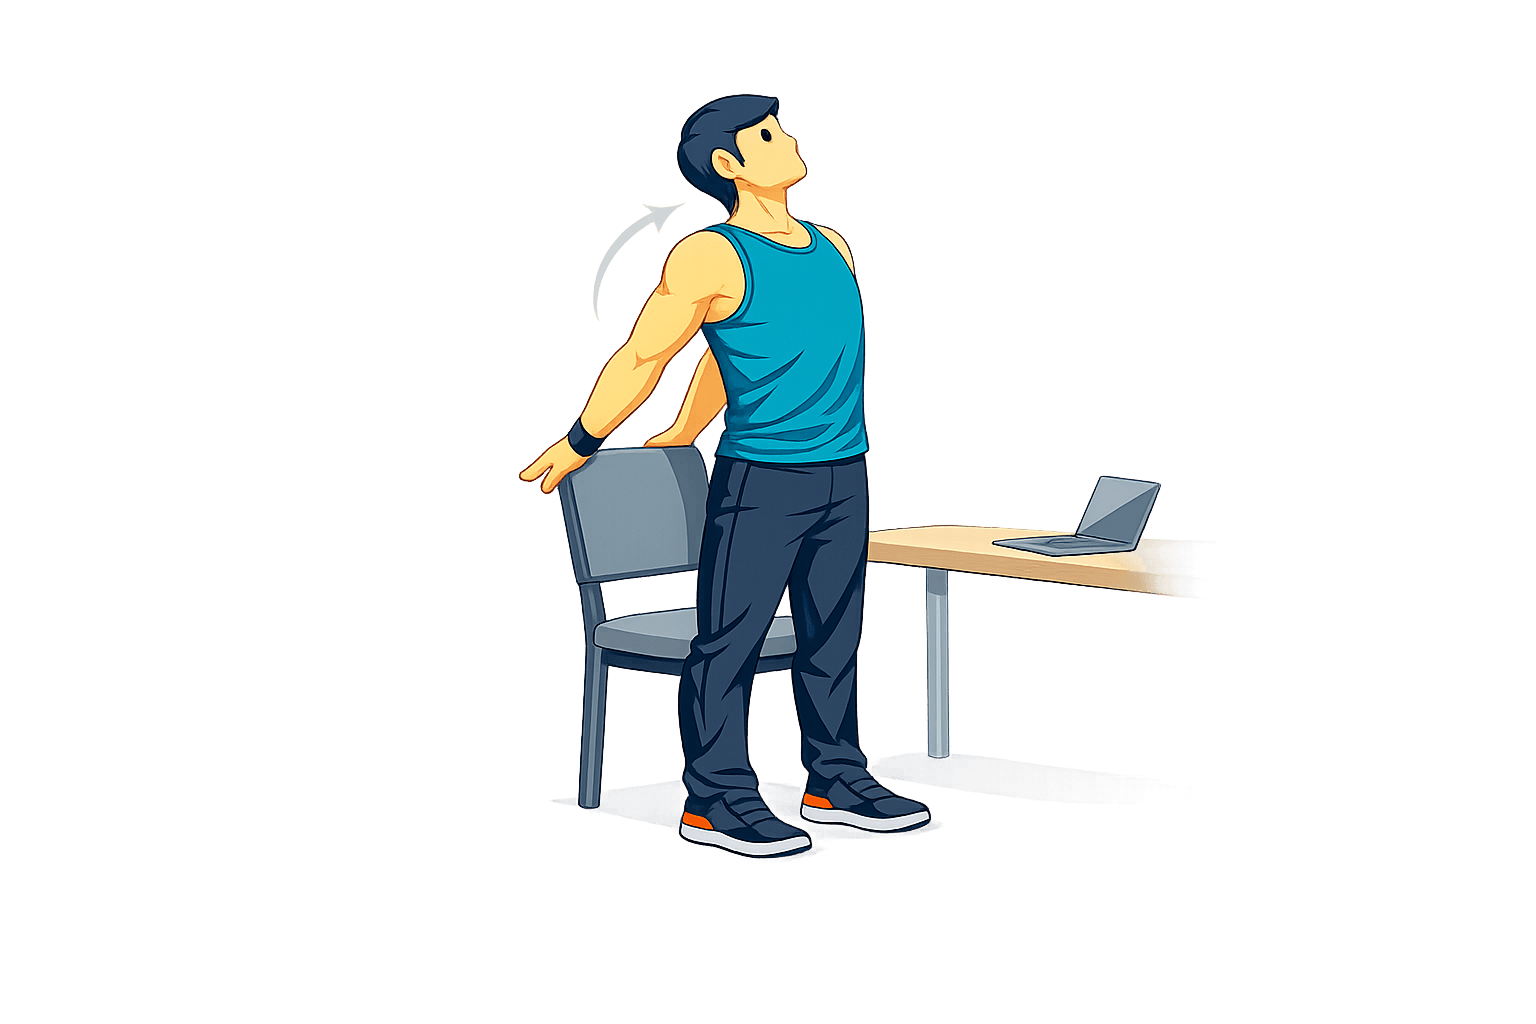
Standing Desk Reset
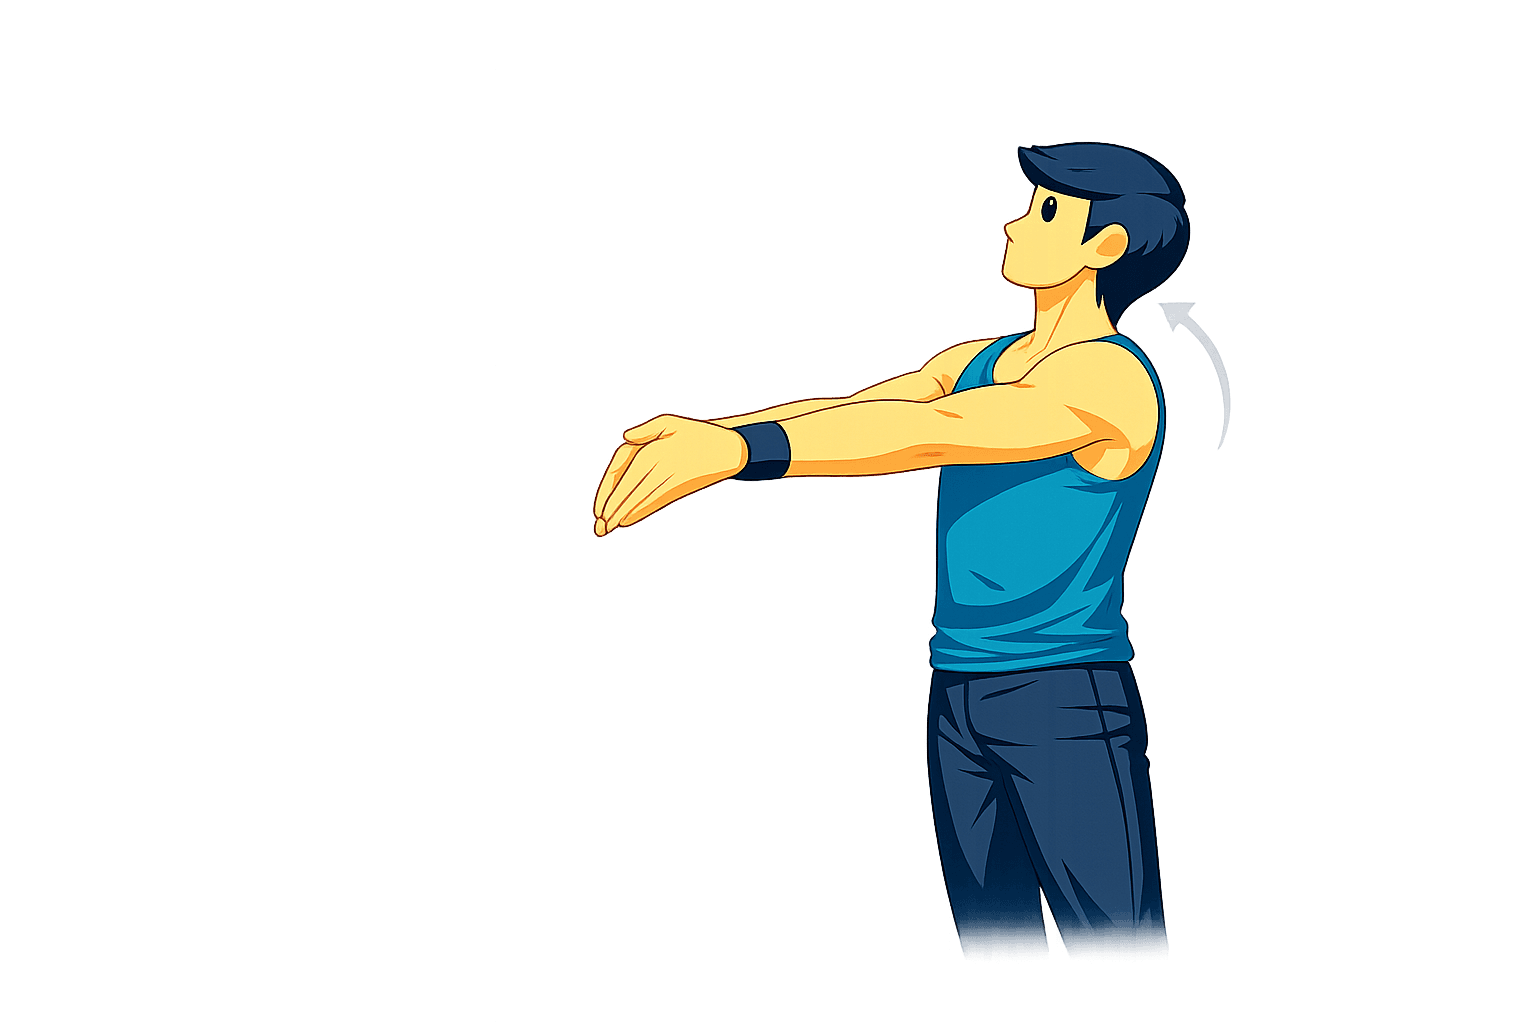
Wrist and Forearm Stretch
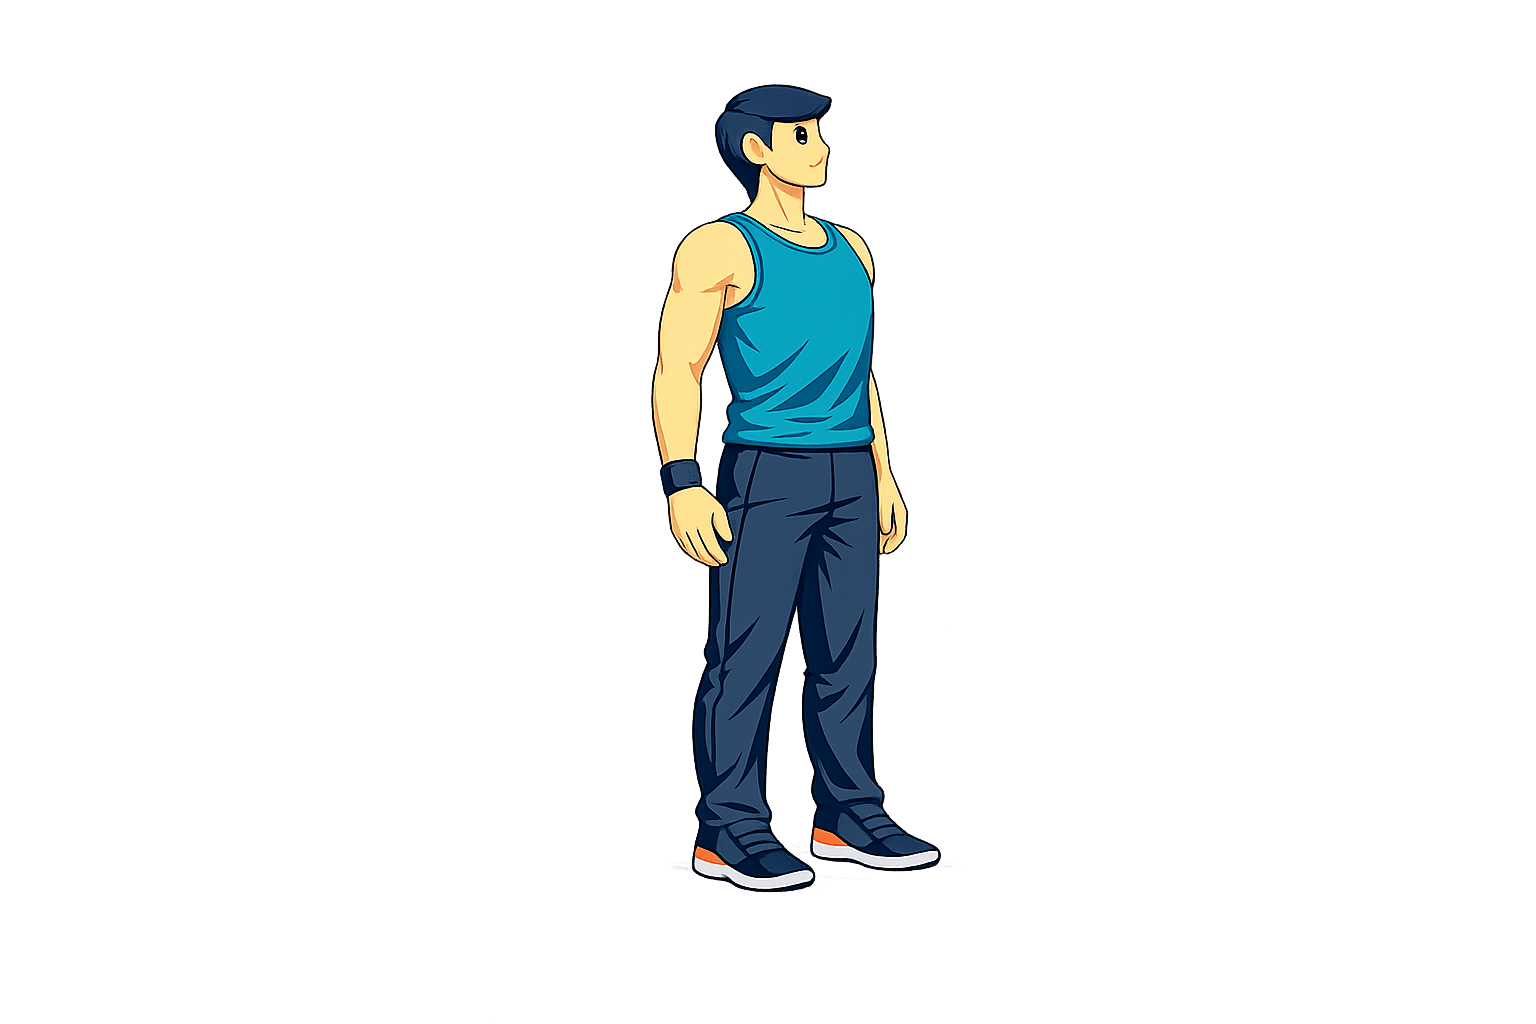
Standing Posture Check
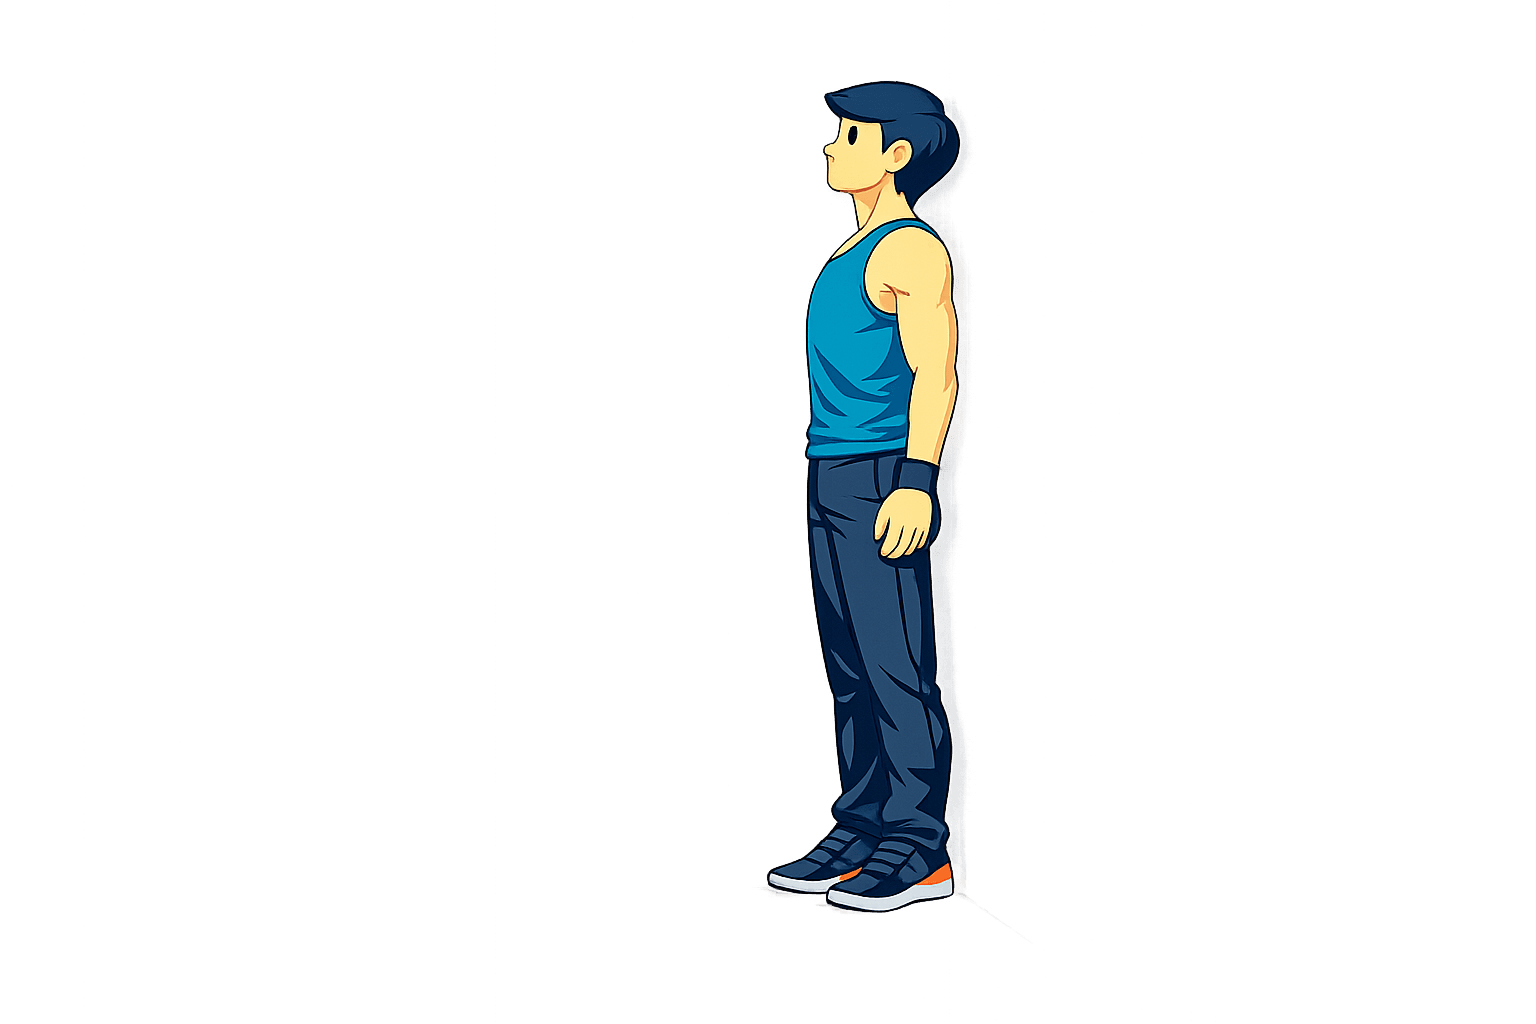
Wall Posture Check
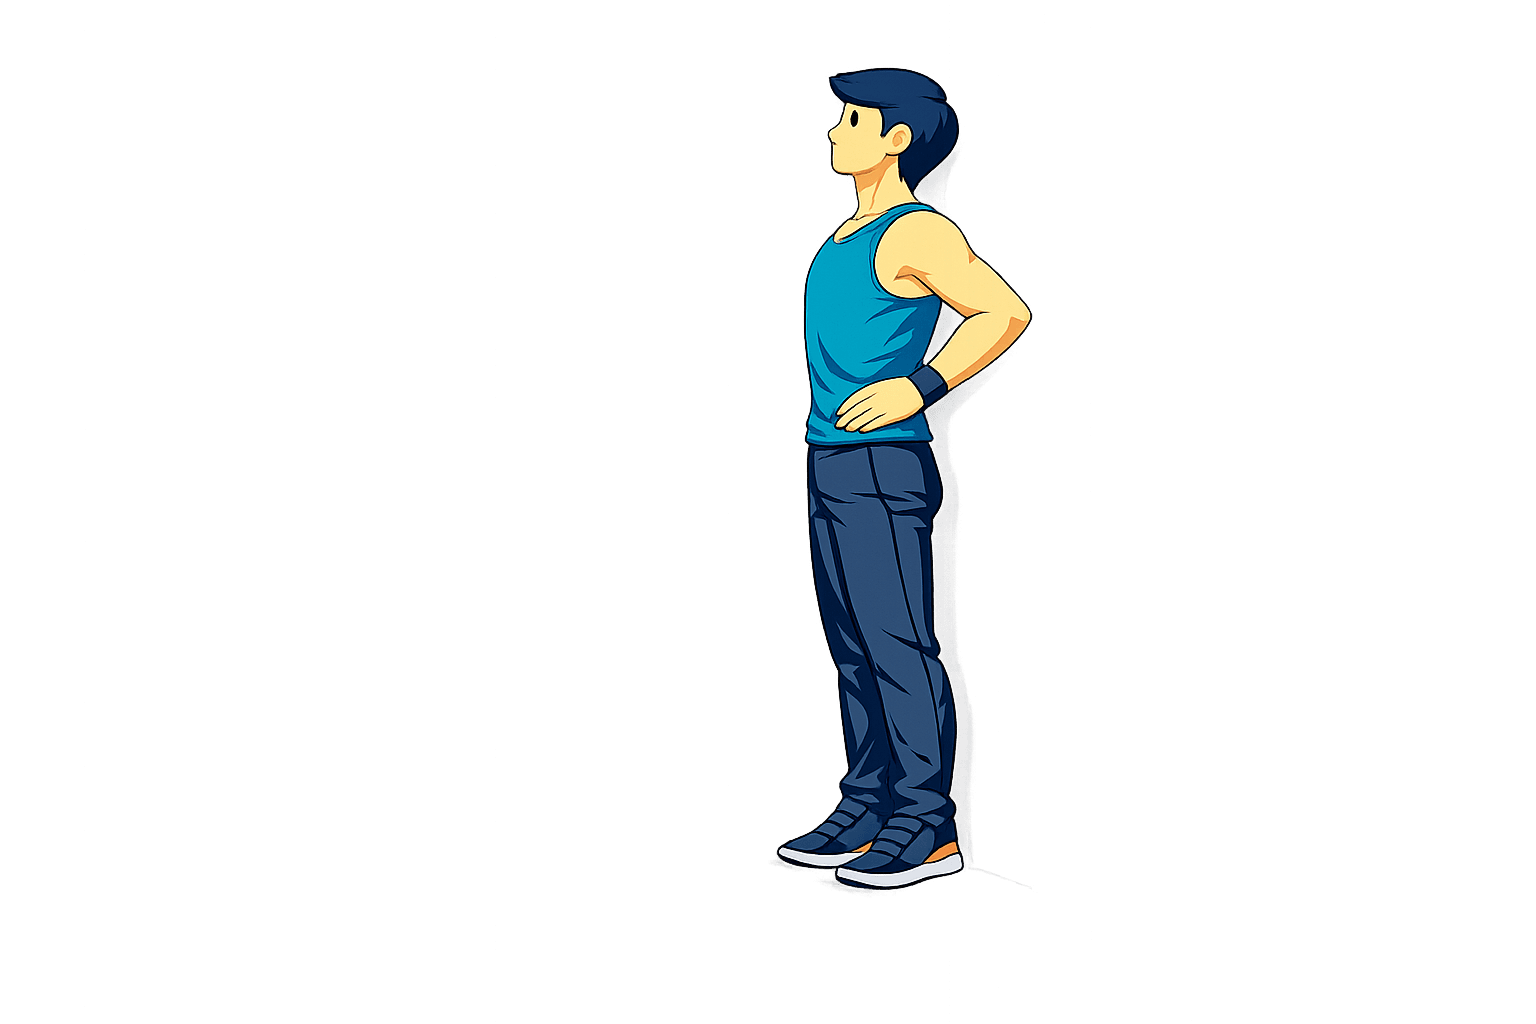
Neutral Spine Check
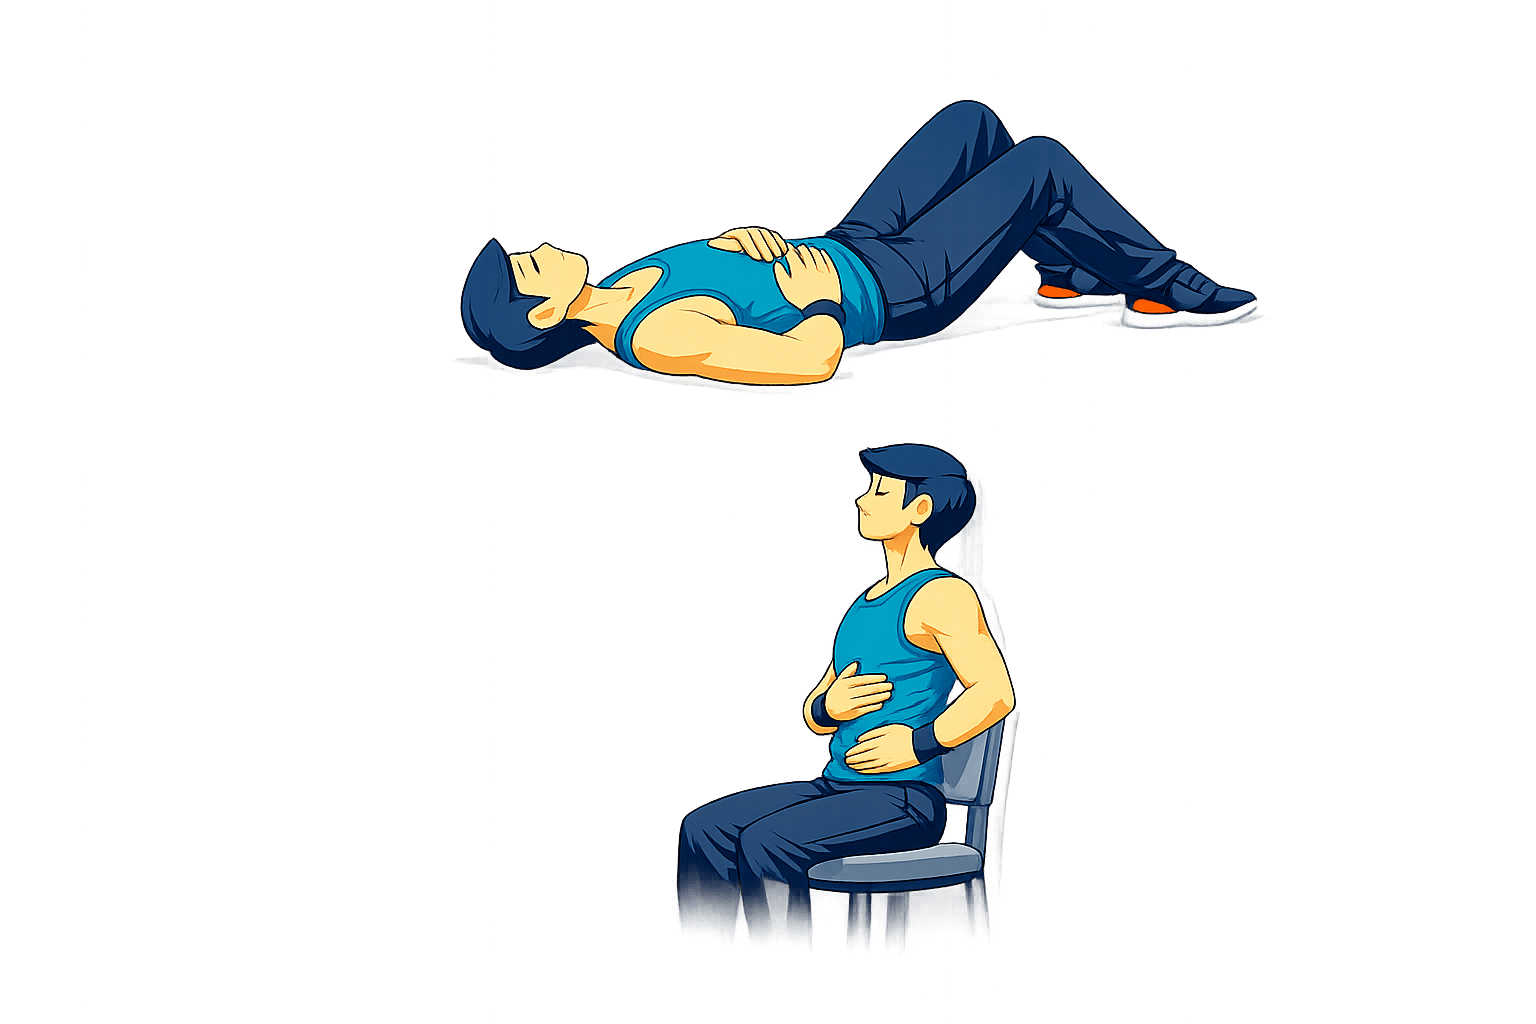
Diaphragmatic Breathing
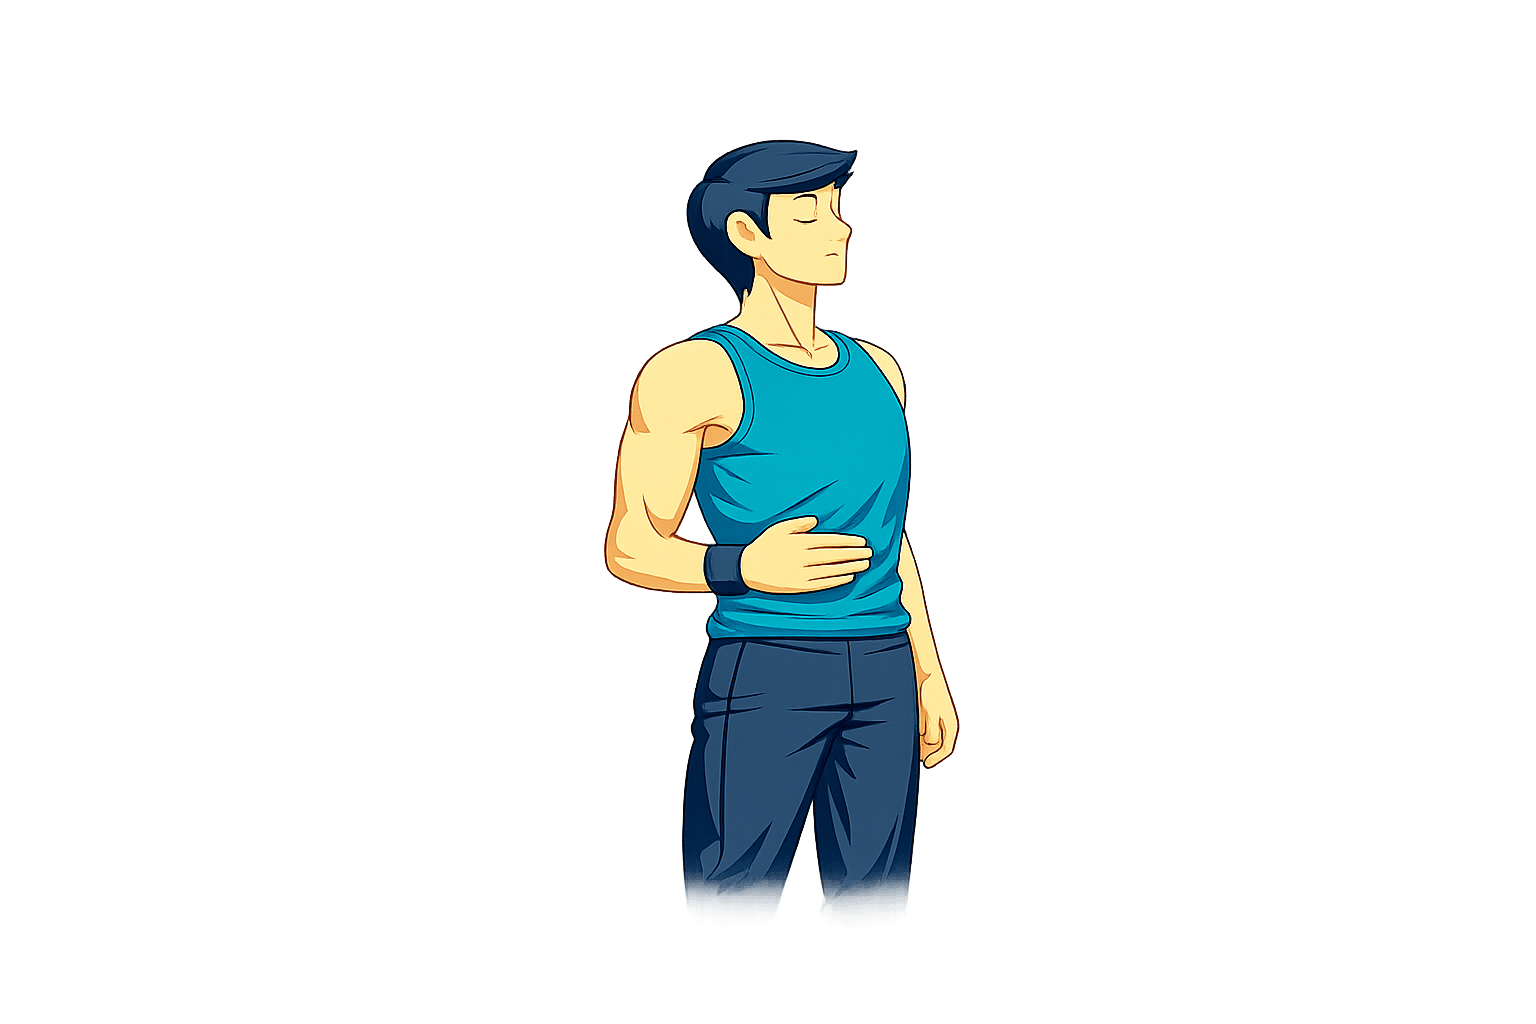
Shoulder Reset Breathing
Posture Workout App exercise instructions
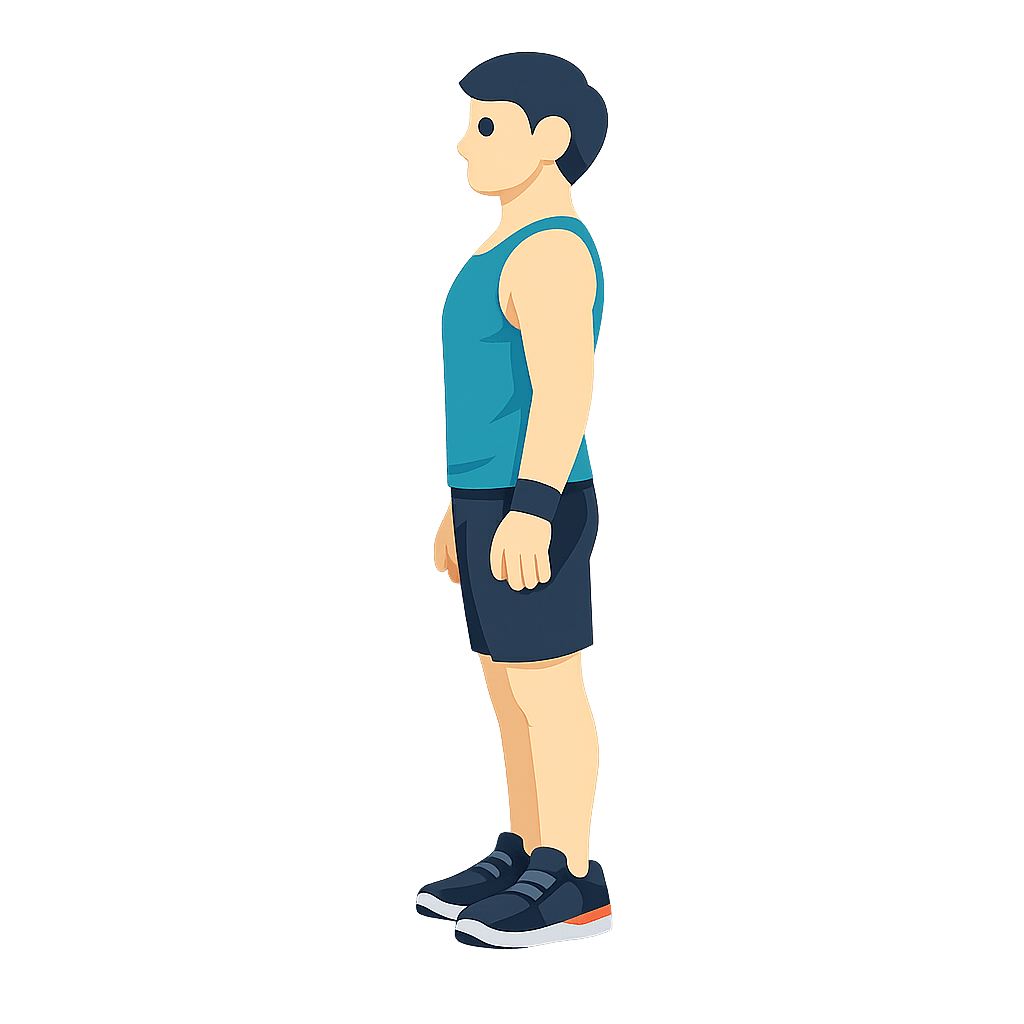
Chin Tuck
How to do it
- Sit or stand tall and look straight ahead.
- Slide your chin straight back, as if making a small double chin.
- Pause briefly, then return to neutral.
What to focus on
- Move the head backward, not downward.
- Keep the neck long and the jaw relaxed.
Make it easier
- Use a wall behind your head for light feedback.
- Make the movement smaller.
Avoid this
- Do not force the chin toward the chest.
- Do not poke the head forward between reps.
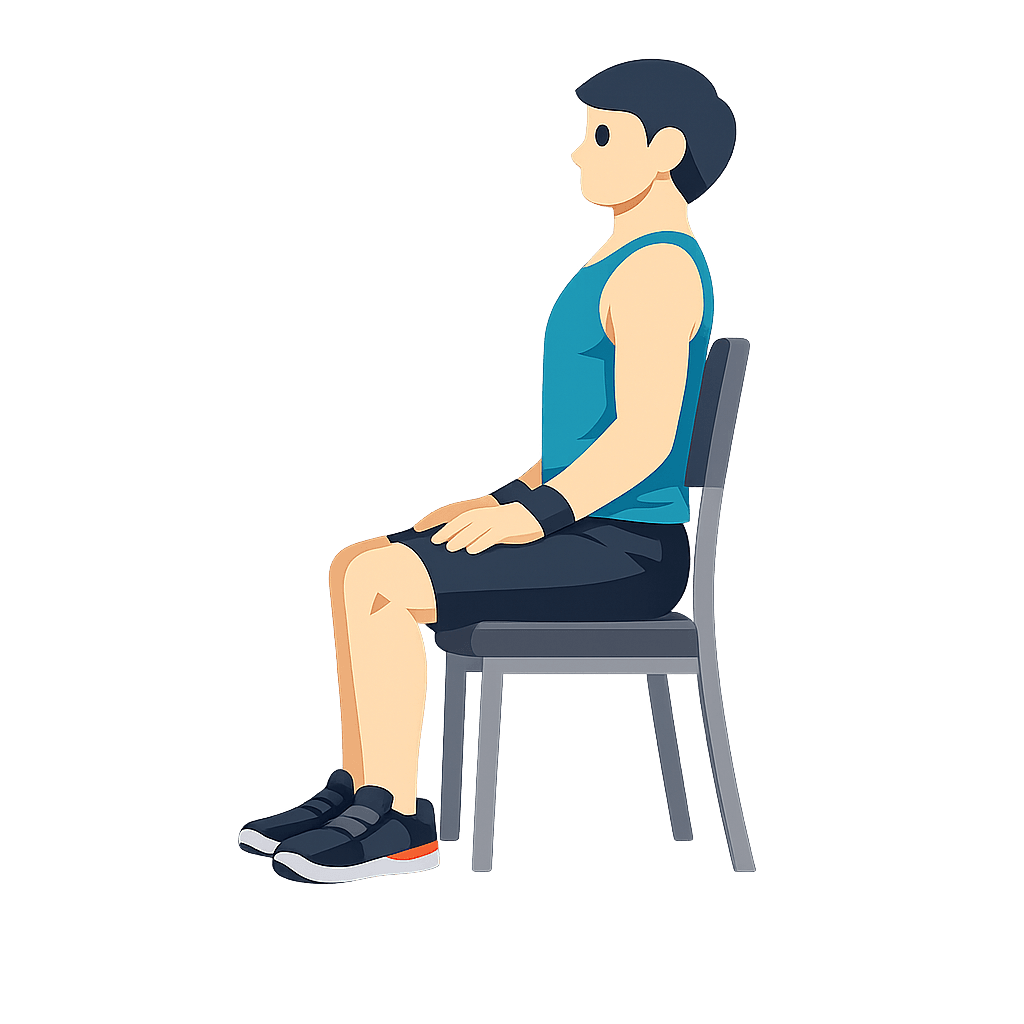
Seated Chin Tuck
How to do it
- Sit with both feet flat and your back away from the chair if possible.
- Look forward and gently draw your head back over your shoulders.
- Hold for a moment, then release.
What to focus on
- Keep your shoulders relaxed while the neck does the work.
- Think of gliding the head backward in a straight line.
Make it easier
- Sit against a chair back for support.
- Do fewer reps with slower movement.
Avoid this
- Do not tilt the head up or down.
- Do not tense the jaw or shrug.
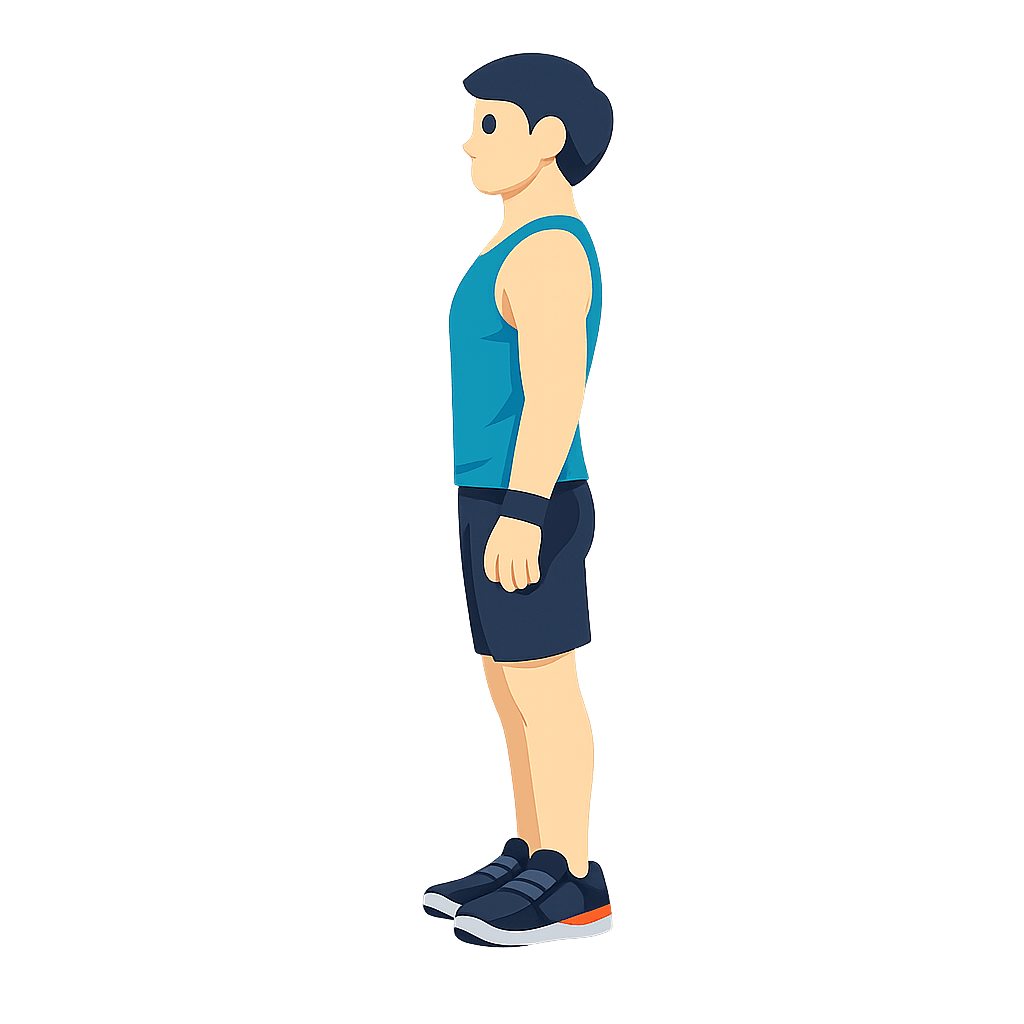
Neck Retraction Hold
How to do it
- Stand tall with ribs over hips.
- Draw your head straight back until your ears feel more lined up over your shoulders.
- Hold the position while breathing steadily.
What to focus on
- Keep the eyes level.
- Use a gentle hold instead of a hard pull.
Make it easier
- Perform it seated.
- Shorten the hold and repeat later.
Avoid this
- Do not crane the neck backward.
- Do not hold your breath.
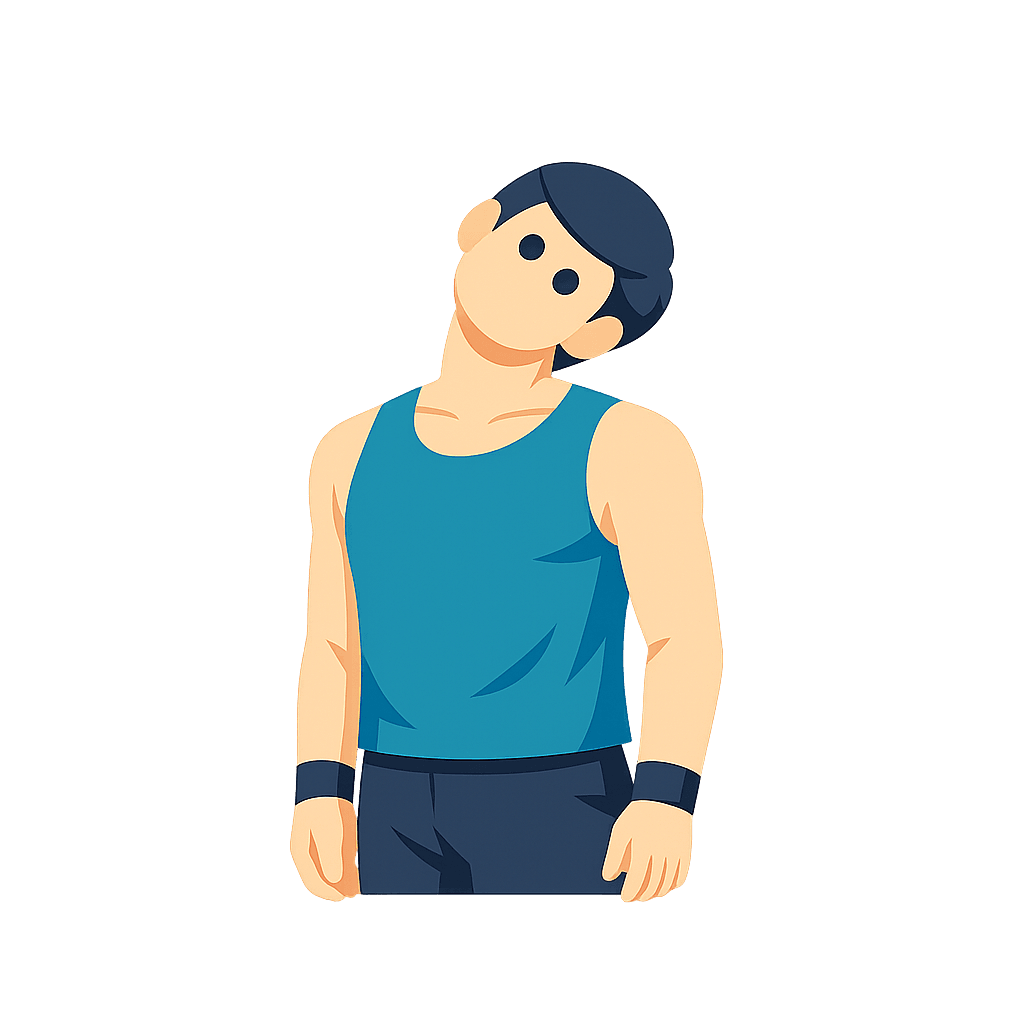
Neck Side Stretch
How to do it
- Sit or stand tall.
- Let one ear move gently toward the same-side shoulder.
- Hold, then return to center and repeat on the other side.
What to focus on
- Keep both shoulders low.
- Feel a light stretch along the side of the neck.
Make it easier
- Place the opposite hand behind your back.
- Use a shorter hold.
Avoid this
- Do not pull hard on the head.
- Do not twist the chin toward the floor.
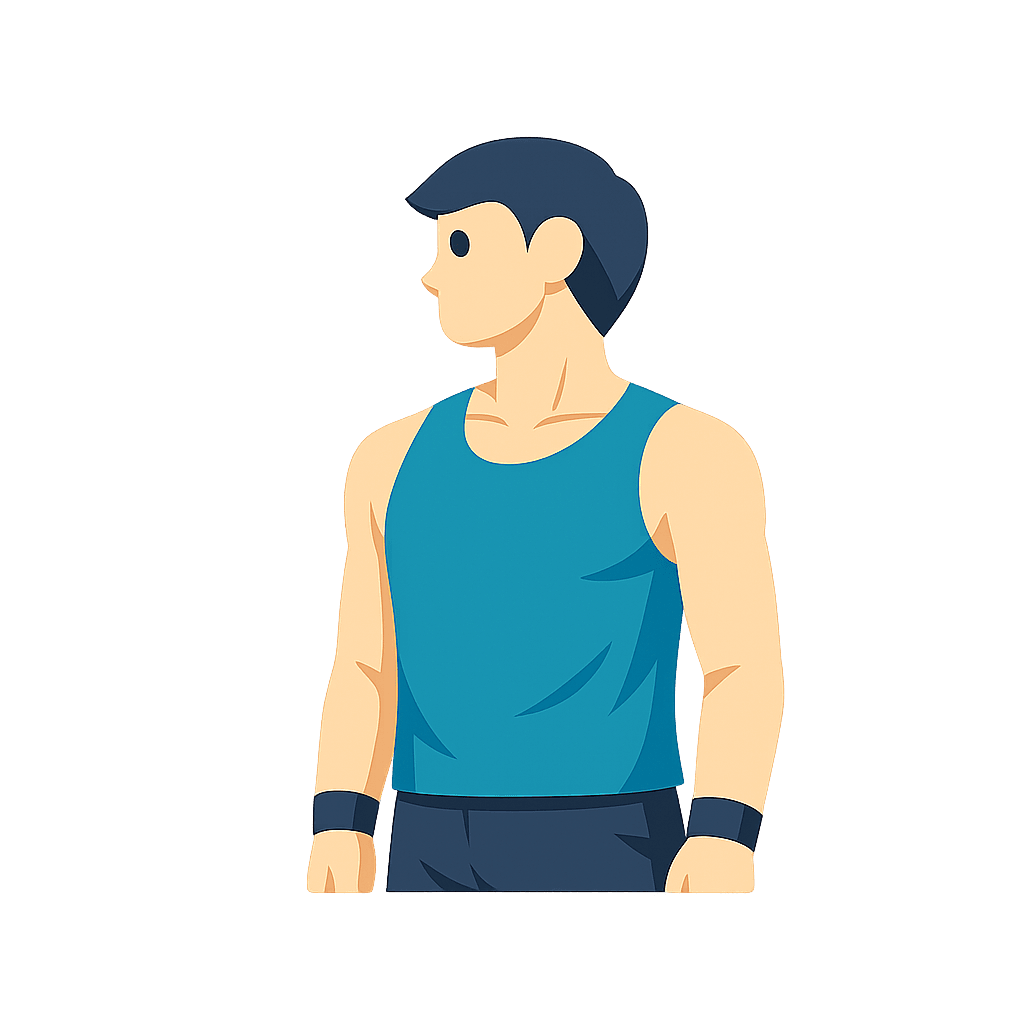
Neck Rotation
How to do it
- Sit or stand with your chest facing forward.
- Turn your head slowly to one side.
- Return through center and rotate to the other side.
What to focus on
- Move smoothly through a comfortable range.
- Keep the shoulders still.
Make it easier
- Use smaller turns.
- Pause at center between sides.
Avoid this
- Do not bounce at the end of the turn.
- Do not let the torso rotate with the head.
Upper Trap Stretch
How to do it
- Sit or stand tall with one hand resting by your side.
- Tilt your head away from that side.
- Hold, then switch sides.
What to focus on
- Keep the stretching-side shoulder heavy and relaxed.
- Use slow breathing to soften the neck.
Make it easier
- Do it seated with the hand lightly holding the chair.
- Reduce the tilt.
Avoid this
- Do not yank the head sideways.
- Do not lift the shoulder toward the ear.
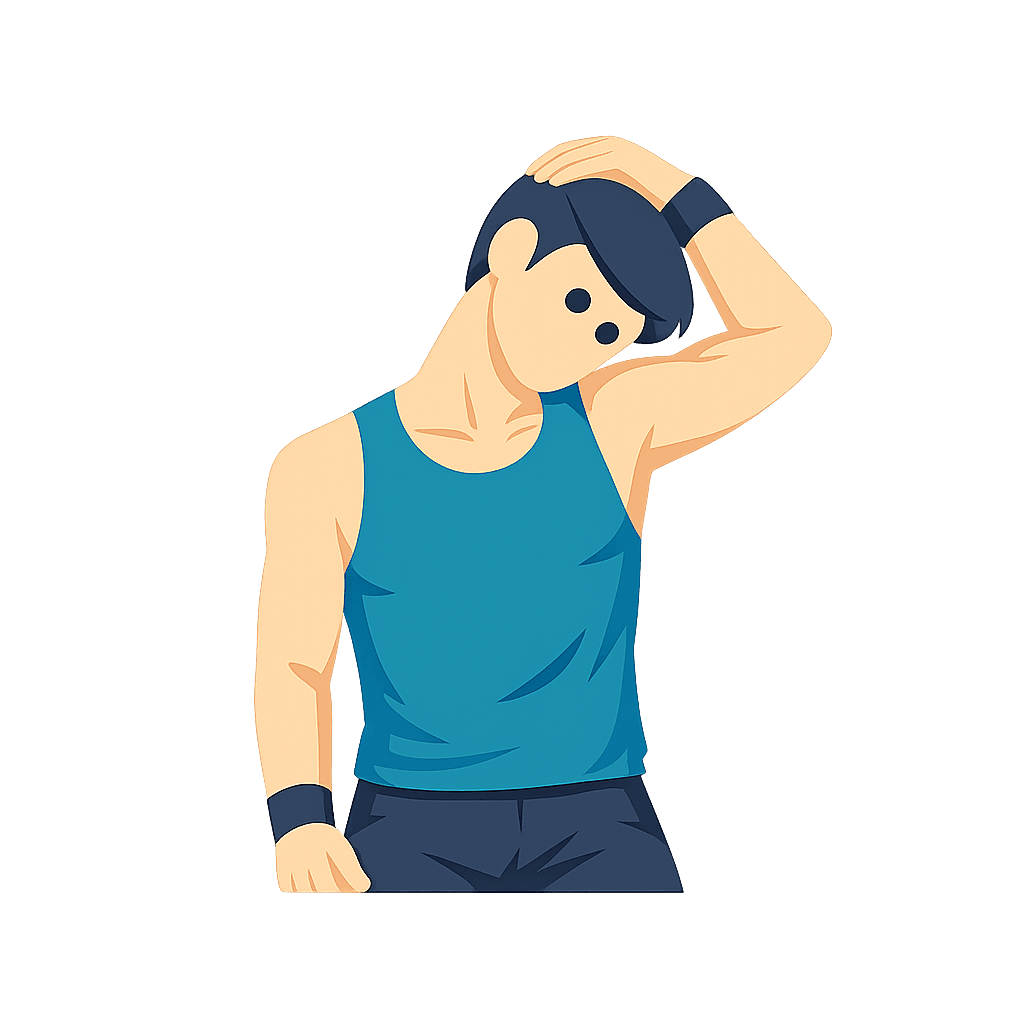
Levator Scapulae Stretch
How to do it
- Sit or stand tall.
- Turn your nose slightly toward one armpit, then lower the chin gently.
- Hold, return to center, and switch sides.
What to focus on
- Look for a stretch from the back of the neck toward the shoulder blade.
- Keep the opposite shoulder relaxed.
Make it easier
- Use a very small chin drop.
- Do it seated for better control.
Avoid this
- Do not round the whole upper back.
- Do not pull aggressively on the head.
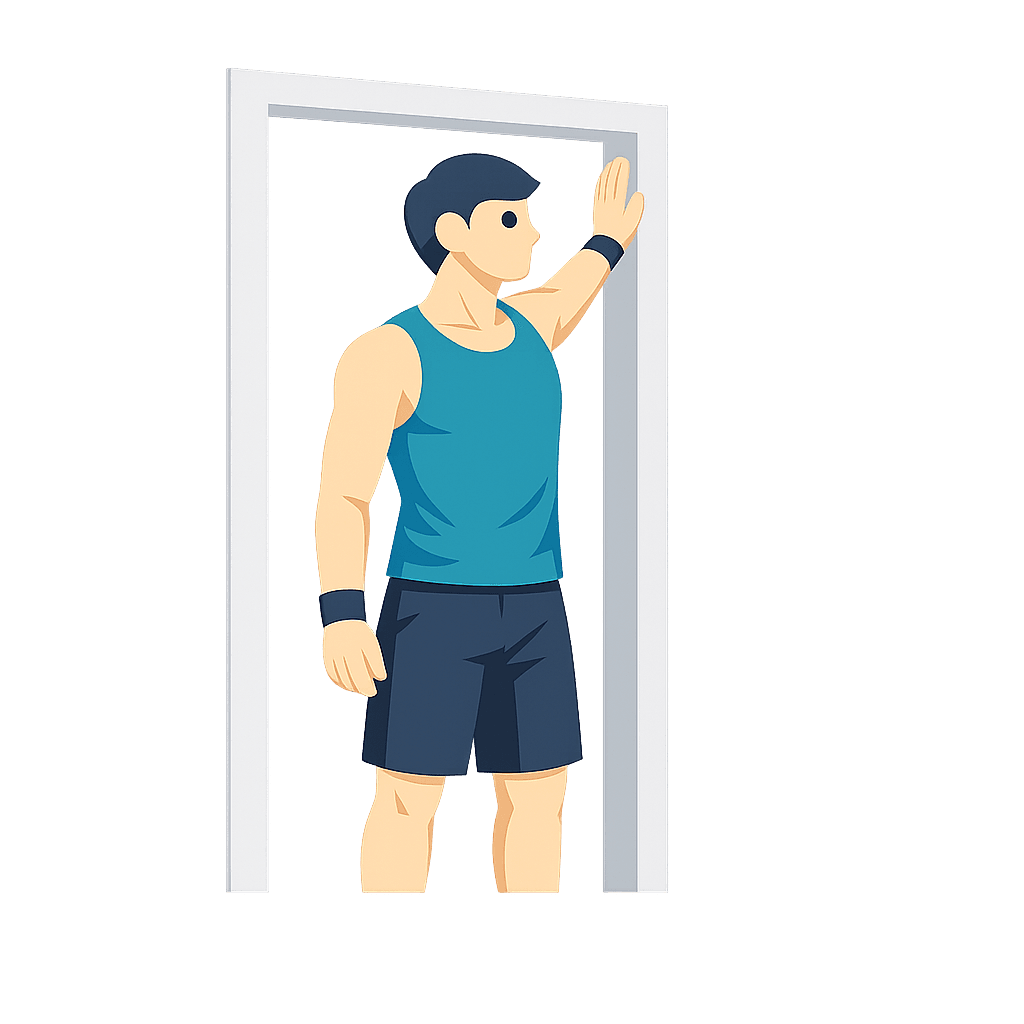
Doorway Chest Stretch
How to do it
- Stand in a doorway and place one forearm on the frame.
- Step the same-side foot slightly forward.
- Let the chest open gently, then switch sides if needed.
What to focus on
- Keep the ribs down and the neck relaxed.
- Feel the stretch across the chest, not in the front of the shoulder.
Make it easier
- Lower the elbow below shoulder height.
- Stand closer to the doorway.
Avoid this
- Do not arch the lower back.
- Do not force the shoulder behind you.
Wall Chest Stretch
How to do it
- Stand beside a wall and place one palm or forearm on it.
- Turn your chest slightly away from the wall.
- Hold, then repeat on the other side.
What to focus on
- Keep the shoulder blade settled, not jammed forward.
- Use a small rotation to control the stretch.
Make it easier
- Bend the elbow more.
- Place the hand lower on the wall.
Avoid this
- Do not twist through the lower back.
- Do not lock the elbow hard.
Seated Chest Opener
How to do it
- Sit tall near the front of a chair.
- Place your hands behind your head or clasp them lightly behind your back.
- Open the chest and breathe for the timer.
What to focus on
- Lift through the chest without flaring the ribs.
- Let the shoulder blades move gently together.
Make it easier
- Keep hands on your hips instead.
- Use a smaller chest lift.
Avoid this
- Do not crank the neck backward.
- Do not arch only from the lower back.
Shoulder Rolls
How to do it
- Sit or stand tall.
- Lift the shoulders up, roll them back, then let them drop.
- Repeat slowly, then reverse direction if desired.
What to focus on
- Make the circles smooth and controlled.
- Let the shoulder blades move, not just the arms.
Make it easier
- Use smaller circles.
- Do the movement seated.
Avoid this
- Do not rush the reps.
- Do not tense the neck.
Arm Circles
How to do it
- Stand tall and extend your arms out to the sides.
- Make small circles with both arms.
- Change direction halfway through the reps or timer.
What to focus on
- Keep the shoulders low and the ribs steady.
- Use controlled circles rather than momentum.
Make it easier
- Bend the elbows slightly.
- Make the circles smaller.
Avoid this
- Do not swing the arms wildly.
- Do not shrug toward the ears.
Wall Angels
How to do it
- Stand with your back near a wall and feet slightly forward.
- Bring elbows and hands toward the wall in a goalpost shape.
- Slide arms up and down while keeping the movement controlled.
What to focus on
- Keep the ribs from popping forward.
- Move only as high as you can without losing control.
Make it easier
- Stand a few centimeters away from the wall.
- Slide only the elbows, not the full arms.
Avoid this
- Do not force wrists flat to the wall.
- Do not arch the back to gain range.
Wall Slides
How to do it
- Face a wall with forearms lightly against it.
- Slide the forearms upward, then pull them back down.
- Keep the movement slow and even.
What to focus on
- Let the shoulder blades rotate upward as the arms rise.
- Keep the neck relaxed.
Make it easier
- Use a shorter slide.
- Step closer to the wall.
Avoid this
- Do not press hard into the wall.
- Do not flare the ribs or lean back.
Shoulder Blade Squeeze
How to do it
- Sit or stand tall with arms relaxed by your sides.
- Draw your shoulder blades gently back and slightly down.
- Hold briefly, then release fully.
What to focus on
- Think of widening the collarbones.
- Keep the movement small and clean.
Make it easier
- Do it lying face down with arms by your sides.
- Use shorter holds.
Avoid this
- Do not pinch as hard as possible.
- Do not lift the shoulders toward the ears.
Cat-Cow
How to do it
- Start on hands and knees.
- Round your back upward, then slowly arch through the spine.
- Move between the two shapes with steady breathing.
What to focus on
- Let the movement travel through the whole spine.
- Keep hands under shoulders and knees under hips.
Make it easier
- Place a folded towel under the knees.
- Make the range smaller.
Avoid this
- Do not collapse into the shoulders.
- Do not move so fast that the spine feels uncontrolled.
Seated Cat-Cow
How to do it
- Sit tall with feet flat and hands on thighs.
- Round the upper back and tuck the chin slightly.
- Then lift the chest and gently arch the back.
What to focus on
- Use the chair as support, not something to slump into.
- Move with the breath.
Make it easier
- Keep the hands on the chair seat for support.
- Use smaller spinal movement.
Avoid this
- Do not throw the head backward.
- Do not force the lower back into a deep arch.
Thoracic Extension on Chair
How to do it
- Sit with the upper back against the top edge of a chair back.
- Support your head lightly with your hands.
- Lean the upper back over the chair, then return upright.
What to focus on
- Aim the movement through the upper back.
- Keep the lower ribs from flaring too much.
Make it easier
- Use a chair with a lower backrest.
- Make the lean smaller.
Avoid this
- Do not push hard on the neck.
- Do not let the chair tip or slide.
Open Book Stretch
How to do it
- Lie on one side with knees bent and stacked.
- Reach the top arm forward, then rotate it open toward the floor behind you.
- Return slowly and repeat before switching sides.
What to focus on
- Keep the knees stacked to guide rotation into the upper back.
- Follow the moving hand with your eyes if comfortable.
Make it easier
- Place a pillow under the head.
- Open only halfway.
Avoid this
- Do not force the shoulder to the floor.
- Do not roll the hips backward with the arm.
Seated Thoracic Rotation
How to do it
- Sit tall with feet flat.
- Cross your arms over your chest or hold the chair lightly.
- Rotate the upper body to one side, return to center, then switch.
What to focus on
- Turn from the ribs and upper back.
- Keep both sitting bones heavy on the chair.
Make it easier
- Use a smaller turn.
- Place hands on thighs instead of crossing arms.
Avoid this
- Do not twist from the lower back only.
- Do not pull hard with the arms.
Thread the Needle
How to do it
- Start on hands and knees.
- Slide one arm under the other arm and let the shoulder move toward the floor.
- Hold briefly, then come back and switch sides.
What to focus on
- Feel the rotation through the upper back and shoulder area.
- Keep the hips roughly over the knees.
Make it easier
- Rest the head on a block, pillow, or folded towel.
- Use a shorter reach.
Avoid this
- Do not dump weight into the neck.
- Do not let the hips drift far to one side.
Childs Pose Reach
How to do it
- Start on hands and knees, then sit your hips back toward your heels.
- Reach both arms forward on the floor.
- Breathe into the upper back and sides of the ribs.
What to focus on
- Let the shoulders lengthen without forcing them.
- Keep the forehead supported if it reaches the floor.
Make it easier
- Place a pillow under the chest or hips.
- Keep knees wider for more space.
Avoid this
- Do not push into knee discomfort.
- Do not hold tension in the hands.
Prone Y Raise
How to do it
- Lie face down with arms overhead in a Y shape.
- Lift the arms slightly from the floor with thumbs pointing up.
- Lower with control and repeat.
What to focus on
- Start the lift from the shoulder blades.
- Keep the neck long and eyes toward the floor.
Make it easier
- Lift one arm at a time.
- Keep the forehead resting on a towel.
Avoid this
- Do not swing the arms.
- Do not crank the head up.
Prone T Raise
How to do it
- Lie face down with arms out to the sides in a T shape.
- Turn thumbs slightly upward.
- Lift the arms a little, squeeze the shoulder blades, then lower.
What to focus on
- Keep the lift small and controlled.
- Feel the upper back working more than the neck.
Make it easier
- Bend the elbows slightly.
- Do fewer reps with a longer pause.
Avoid this
- Do not shrug during the lift.
- Do not arch the lower back to raise the arms.
Reverse Snow Angels
How to do it
- Lie face down with arms by your sides.
- Lift the hands slightly, then sweep the arms out and overhead like a slow snow angel.
- Return to the start position with control.
What to focus on
- Keep the movement smooth through the shoulders.
- Keep the chest and legs relaxed unless the routine says otherwise.
Make it easier
- Keep hands closer to the floor.
- Work through only half the range.
Avoid this
- Do not rush through sticky points.
- Do not lift the head to watch your hands.
Superman Hold
How to do it
- Lie face down with arms forward or by your sides.
- Lift the chest, arms, and legs slightly from the floor.
- Hold for the timer, then lower slowly.
What to focus on
- Use a small lift and steady breathing.
- Keep the neck in line with the spine.
Make it easier
- Lift only the chest and arms, or only the legs.
- Shorten the hold.
Avoid this
- Do not over-arch the lower back.
- Do not hold your breath.
Bird Dog
How to do it
- Start on hands and knees.
- Reach one arm forward and the opposite leg back.
- Pause, return to center, and switch sides.
What to focus on
- Keep the hips level.
- Reach long instead of lifting high.
Make it easier
- Move only the legs or only the arms.
- Tap the hand and knee down between reps.
Avoid this
- Do not twist the pelvis open.
- Do not let the lower back sag.
Band Pull-Apart
How to do it
- Hold a resistance band in front of your chest with both hands.
- Keep arms mostly straight and pull the band apart.
- Return slowly until the hands come back in front.
What to focus on
- Lead with the shoulder blades moving back.
- Keep the ribs stacked over the hips.
Make it easier
- Use a lighter band or hold it wider.
- Bend the elbows slightly.
Avoid this
- Do not snap the band back.
- Do not lean backward to finish the rep.
Pelvic Tilt
How to do it
- Lie on your back with knees bent and feet flat.
- Gently tilt the pelvis to flatten the lower back toward the floor.
- Release back to neutral and repeat.
What to focus on
- Move from the pelvis, not by pushing through the feet.
- Keep the movement slow and small.
Make it easier
- Place hands on the front of the hips to feel the tilt.
- Use fewer reps.
Avoid this
- Do not lift the hips off the floor.
- Do not brace so hard that breathing stops.
Glute Bridge
How to do it
- Lie on your back with knees bent and feet flat.
- Press through the feet and lift the hips until the body forms a gentle line from shoulders to knees.
- Lower slowly and repeat.
What to focus on
- Use the glutes to lift, not the lower back.
- Keep knees pointing forward.
Make it easier
- Lift only halfway.
- Pause less at the top.
Avoid this
- Do not over-arch at the top.
- Do not let the knees collapse inward.
Hip Flexor Stretch
How to do it
- Start in a half-kneeling position with one knee on the floor.
- Shift your hips slightly forward while keeping the torso tall.
- Hold, then switch sides.
What to focus on
- Feel the stretch in the front of the back-leg hip.
- Keep the pelvis gently tucked.
Make it easier
- Place padding under the back knee.
- Keep the stride shorter.
Avoid this
- Do not lean far forward with the chest.
- Do not arch the lower back to create the stretch.
Standing Hip Flexor Stretch
How to do it
- Stand in a short split stance with one foot behind you.
- Bend the front knee slightly and tuck the pelvis under.
- Hold, then switch sides.
What to focus on
- Keep the back-leg hip gently lengthened.
- Stay tall through the chest.
Make it easier
- Use a wall or chair for balance.
- Make the stance shorter.
Avoid this
- Do not turn it into a deep lunge.
- Do not let the lower back arch.
Figure-Four Stretch
How to do it
- Lie on your back with knees bent.
- Cross one ankle over the opposite thigh.
- Draw the legs slightly toward you, then switch sides.
What to focus on
- Keep the crossed foot gently flexed.
- Look for a stretch around the outer hip.
Make it easier
- Keep the bottom foot on the floor.
- Use a towel behind the thigh.
Avoid this
- Do not pull the knee aggressively toward the chest.
- Do not twist the pelvis.
Hamstring Stretch
How to do it
- Lie on your back or sit tall with one leg extended.
- Lengthen through the back of the thigh while keeping the spine long.
- Hold, then switch sides.
What to focus on
- Keep the stretch steady and comfortable.
- Point the kneecap upward instead of letting the leg roll out.
Make it easier
- Bend the knee slightly.
- Use a towel behind the thigh or foot.
Avoid this
- Do not round the back deeply to reach farther.
- Do not bounce.
Dead Bug
How to do it
- Lie on your back with arms up and knees over hips.
- Slowly lower one arm and the opposite leg away from each other.
- Return to center and switch sides.
What to focus on
- Keep the ribs heavy and the lower back controlled.
- Move slowly enough to stay steady.
Make it easier
- Move only the legs, or tap one heel down at a time.
- Use a smaller range.
Avoid this
- Do not let the back arch off the floor.
- Do not speed through the reps.
Standing Back Extension
How to do it
- Stand tall with hands on hips or lower back.
- Gently lift the chest and lean back a small amount.
- Return to upright and repeat or hold briefly.
What to focus on
- Open the front of the body without collapsing the lower back.
- Keep the movement controlled.
Make it easier
- Use a smaller lean.
- Place hands on a desk for support.
Avoid this
- Do not throw the head backward.
- Do not force a deep backbend.
Desk Shoulder Rolls
How to do it
- Sit tall with feet on the floor.
- Roll the shoulders up, back, and down.
- Repeat slowly, then reverse direction if useful.
What to focus on
- Let the shoulder blades move around the rib cage.
- Keep the jaw and hands relaxed.
Make it easier
- Use smaller circles.
- Pause between rolls.
Avoid this
- Do not hunch higher with each rep.
- Do not rush because it is a desk move.
Seated Twist
How to do it
- Sit tall near the front of the chair.
- Place one hand on the opposite thigh or chair side.
- Rotate the upper body gently, return to center, and switch sides.
What to focus on
- Keep the spine tall while turning.
- Use the breath to soften the rotation.
Make it easier
- Keep both hands on the thighs.
- Turn only a little.
Avoid this
- Do not yank with the arms.
- Do not let one hip lift from the chair.
Chair Chest Opener
How to do it
- Sit tall and place hands behind your head or lightly behind your back.
- Draw the elbows back as the chest opens.
- Hold for the timer while breathing evenly.
What to focus on
- Open across the chest without over-arching the lower back.
- Keep the shoulders away from the ears.
Make it easier
- Place hands on the sides of the chair instead.
- Use a smaller elbow movement.
Avoid this
- Do not push the head forward.
- Do not force the elbows far behind you.
Chair Neck Reset
How to do it
- Sit with feet flat and shoulders relaxed.
- Do a slow chin tuck, then gently rotate the head side to side.
- Return to a neutral head position.
What to focus on
- Keep the movement small and controlled.
- Let the neck reset without rushing.
Make it easier
- Do only the chin tuck portion.
- Reduce the rotation range.
Avoid this
- Do not combine fast circles with the neck.
- Do not lift the shoulders while moving.
Standing Desk Reset
How to do it
- Stand up from the desk and place feet hip-width apart.
- Roll the shoulders back, gently tuck the chin, and take a few steady breaths.
- Finish by reaching the arms overhead or opening them to the sides.
What to focus on
- Reset the whole posture, not just one body part.
- Keep the ribs, hips, and head stacked.
Make it easier
- Keep hands on hips instead of reaching overhead.
- Do it beside the chair for balance.
Avoid this
- Do not turn it into a fast stretch sequence.
- Do not lock the knees.
Wrist and Forearm Stretch
How to do it
- Extend one arm forward with the palm facing down or up.
- Use the other hand to gently guide the fingers back.
- Hold, then switch sides and repeat the other wrist direction if useful.
What to focus on
- Keep the elbow mostly straight but not locked.
- Feel the stretch through the forearm, not sharp pressure in the wrist.
Make it easier
- Bend the elbow slightly.
- Use a lighter hand pull.
Avoid this
- Do not force the fingers backward.
- Do not press into wrist pain.
Standing Posture Check
How to do it
- Stand with feet about hip-width apart.
- Stack hips, ribs, shoulders, and head as evenly as possible.
- Take a few slow breaths while holding the position.
What to focus on
- Notice where the head and ribs naturally drift.
- Use a tall but relaxed stance.
Make it easier
- Do it seated if standing is inconvenient.
- Use a mirror for quick feedback.
Avoid this
- Do not stiffen the whole body.
- Do not force a military-style posture.
Wall Posture Check
How to do it
- Stand with your back near a wall and feet slightly forward.
- Bring the back of the head, upper back, and hips toward the wall as comfortable.
- Hold the position and breathe.
What to focus on
- Use the wall as feedback, not as something to force into.
- Keep the chin gently tucked.
Make it easier
- Stand a little farther from the wall.
- Let only the upper back and hips touch.
Avoid this
- Do not jam the head backward.
- Do not arch the lower back to reach the wall.
Neutral Spine Check
How to do it
- Sit or stand tall and place one hand on the ribs and one on the pelvis.
- Adjust until the ribs feel stacked over the hips.
- Hold that position while taking a few breaths.
What to focus on
- Find a balanced position between slumping and over-arching.
- Keep the neck and shoulders relaxed.
Make it easier
- Do it seated with back support.
- Use a mirror or wall for reference.
Avoid this
- Do not force a rigid posture.
- Do not lift the chest so much that the ribs flare.
Diaphragmatic Breathing
How to do it
- Sit or lie down comfortably.
- Place one hand on the belly and one on the chest.
- Breathe slowly, letting the lower ribs and belly expand gently.
What to focus on
- Keep the shoulders quiet while breathing.
- Let the exhale be unforced.
Make it easier
- Breathe through the nose if comfortable, or use any relaxed breathing pattern.
- Shorten the timer.
Avoid this
- Do not strain to take huge breaths.
- Do not turn it into breath-holding.
Shoulder Reset Breathing
How to do it
- Sit or stand tall with arms relaxed.
- Inhale and gently widen across the chest.
- Exhale and let the shoulders drop away from the ears.
What to focus on
- Use the breath to release shoulder tension.
- Keep the head balanced over the chest.
Make it easier
- Place hands on the ribs for feedback.
- Do fewer breaths.
Avoid this
- Do not exaggerate the chest lift.
- Do not shrug on every inhale.
Build a Posture Workout That Fits Your Day
A posture workout app is most useful when it helps you turn good intentions into a routine you can actually follow. The Posture Workout App builder is designed for short, repeatable posture routines you can use during the workday, after long screen sessions, in the morning, or whenever you want a simple reset.
Instead of giving you one fixed posture plan, the builder lets you create your own routine from posture exercises, stretches, mobility drills, and desk-friendly movements. You can start with a preset such as a tech neck reset, rounded shoulders routine, desk posture break, or full posture workout, then adjust it before saving.
This makes the routine practical. A person who works from a laptop all day may need chin tucks, chest openers, and upper-back mobility. Someone else may want more wall exercises, hip flexor work, or gentle core support. The builder gives you a structured starting point without locking you into one program.
Why Use Checklist for Posture Routines?
Posture work is usually not a one-time task. It is the kind of routine that works best when it is simple enough to repeat. Checklist is built around that repeatable routine model: create the steps once, save them, run them again, and adjust the routine when it no longer fits.
That is different from reading a static article with a list of posture exercises. In Checklist, each exercise becomes a step in a runnable checklist. You can add or remove steps, reorder them, set timers or reps, and keep the instructions close to the exercise while you are following it.
It also fits naturally beside other routines. A posture reset can be part of your workday checklist, morning routine, workout warm up, travel reset, or after-work recovery routine. You do not need a separate system for every small repeatable habit. The same Checklist structure can hold posture routines, stretching routines, workouts, home tasks, travel lists, and work processes.
How the Posture Workout Builder Works
The builder is meant to help you create a usable routine without starting from a blank page.
- Choose a preset or start from the exercise list.
- Filter exercises by goal, body area, position, routine type, level, equipment, or situation.
- Select the posture exercises you want to include.
- Adjust timing, reps, sets, rest, and notes where they apply.
- Reorder, add, or remove steps until the sequence feels realistic.
- Create a checklist session or save the result as a reusable routine/template.
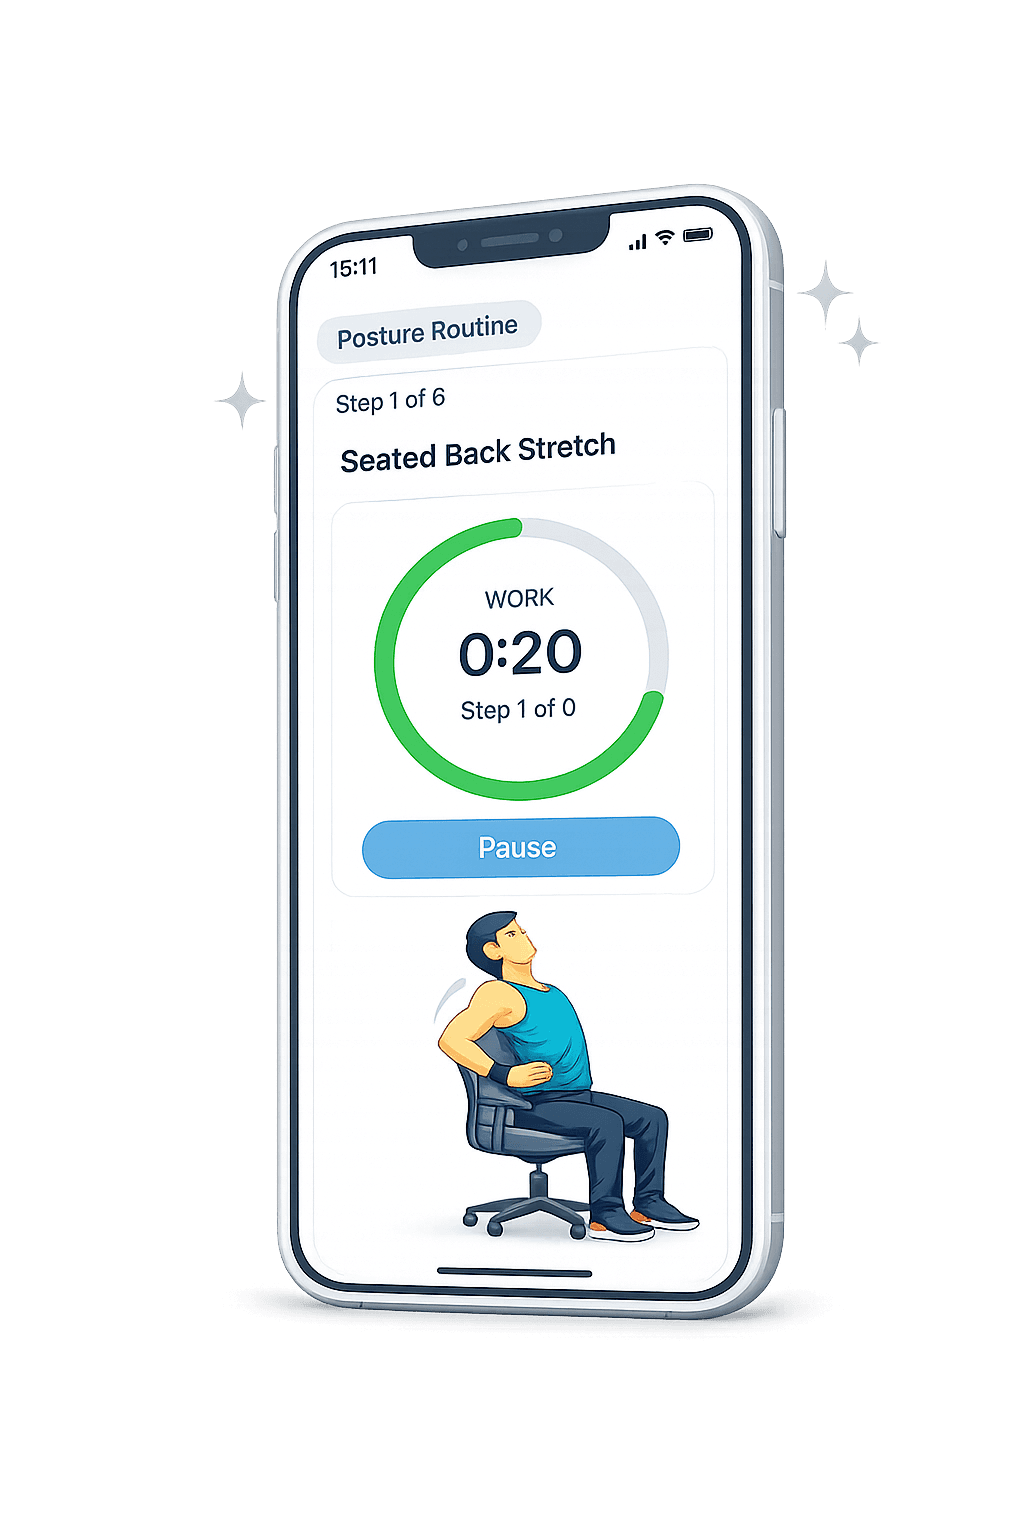
- Run the posture workout step by step in Play Mode.
The exercise library is shaped around common posture use cases: tech neck, forward head posture, rounded shoulders, desk posture, upper-back stiffness, lower-back and pelvis resets, and full posture routines. It includes standing, seated, chair, wall, mat, and no-equipment options so the routine can fit different locations.
For example, a desk break might use seated chin tucks, shoulder rolls, a chair chest opener, and a standing desk reset. A rounded shoulders routine might use doorway chest stretch, wall angels, shoulder blade squeezes, and prone upper-back activation. A longer posture workout can combine neck, shoulders, chest, upper back, hips, and core support in one sequence.
Posture Routine Ideas
Use the builder to create routines that match the moment, not just the category. Useful posture routine ideas include:
- Quick posture reset for a short break between work sessions
- Tech neck reset after long phone or laptop use
- Rounded shoulders routine with chest opening and shoulder blade work
- Desk posture break using chair and standing exercises
- Upper back opener for thoracic mobility and shoulder movement
- Lower back and pelvis reset with hip and core support exercises
- Morning posture routine before starting the day
- After work posture reset after sitting or screen time
- No-equipment posture workout for home, office, or travel
- Full posture workout for a broader 10-15 minute session
The best routine is usually the one you are likely to repeat. A short 5-minute posture reset that you run several times a week may be more useful than a long routine you rarely start. The builder supports both short and longer routines, so you can create different templates for different situations.
Save, Run, and Repeat the Routine
Saving the routine matters because posture work often depends on consistency. Once you have a sequence that fits your day, you can save it as a reusable Checklist template and run it again without rebuilding it.
You might save one routine for workdays, one for mornings, and one for after travel. Each routine can have its own steps, timing, and instructions. If a step is not useful, you can remove it. If a routine feels too long, you can shorten it. If you want more upper-back work, you can add it.
Play Mode helps turn the routine into an active session. Instead of scrolling through a page of exercises, you move through the routine one step at a time. Timers, reps, sets, rest, and notes can guide the session where they are relevant.
Scheduling also fits this builder well. A posture routine can be scheduled as a daily reset, a recurring work break, a morning routine, or an after-work session. Completed checklist sessions can be saved, giving you a simple history of what you have run over time. Completed sessions give you a simple record of the routines you have run, while the current value is already clear: build the routine, run it, and repeat it.
Who This Builder Is For
This builder is mainly for people who spend a lot of time at a desk, laptop, or phone and want a practical way to create repeatable posture routines. That includes remote workers, office workers, students, freelancers, and anyone whose posture habits are shaped by screens and sitting.
It is also useful for beginners who do not want a complicated fitness app, and for people who already know some exercises but want a better way to organize them. Fitness users can use it for posture accessory work, warm ups, or light resets. Travelers can create no-equipment routines for hotel rooms, airports, or long laptop days.
The focus is practical routine building. The builder helps you choose exercises, structure them, save them, and run them. It is not trying to be a medical assessment tool, wearable tracker, or coaching program. Its strength is turning posture exercises into repeatable checklists that fit into real life.
Start With a Preset or Build Your Own
The fastest way to begin is to choose a preset routine and edit it. Start with Tech Neck Reset if your main issue is screen posture, Rounded Shoulders Routine if you want more chest opening and upper-back activation, Desk Posture Break if you need a short routine near your chair, or Full Posture Workout if you want a broader sequence.
From there, customize the routine. Remove exercises you do not want, add steps that fit better, adjust timers or reps, and save the result as your own posture workout template. Once saved, you can run it step by step whenever you need it, schedule it for repeat use, and keep improving the routine over time.