
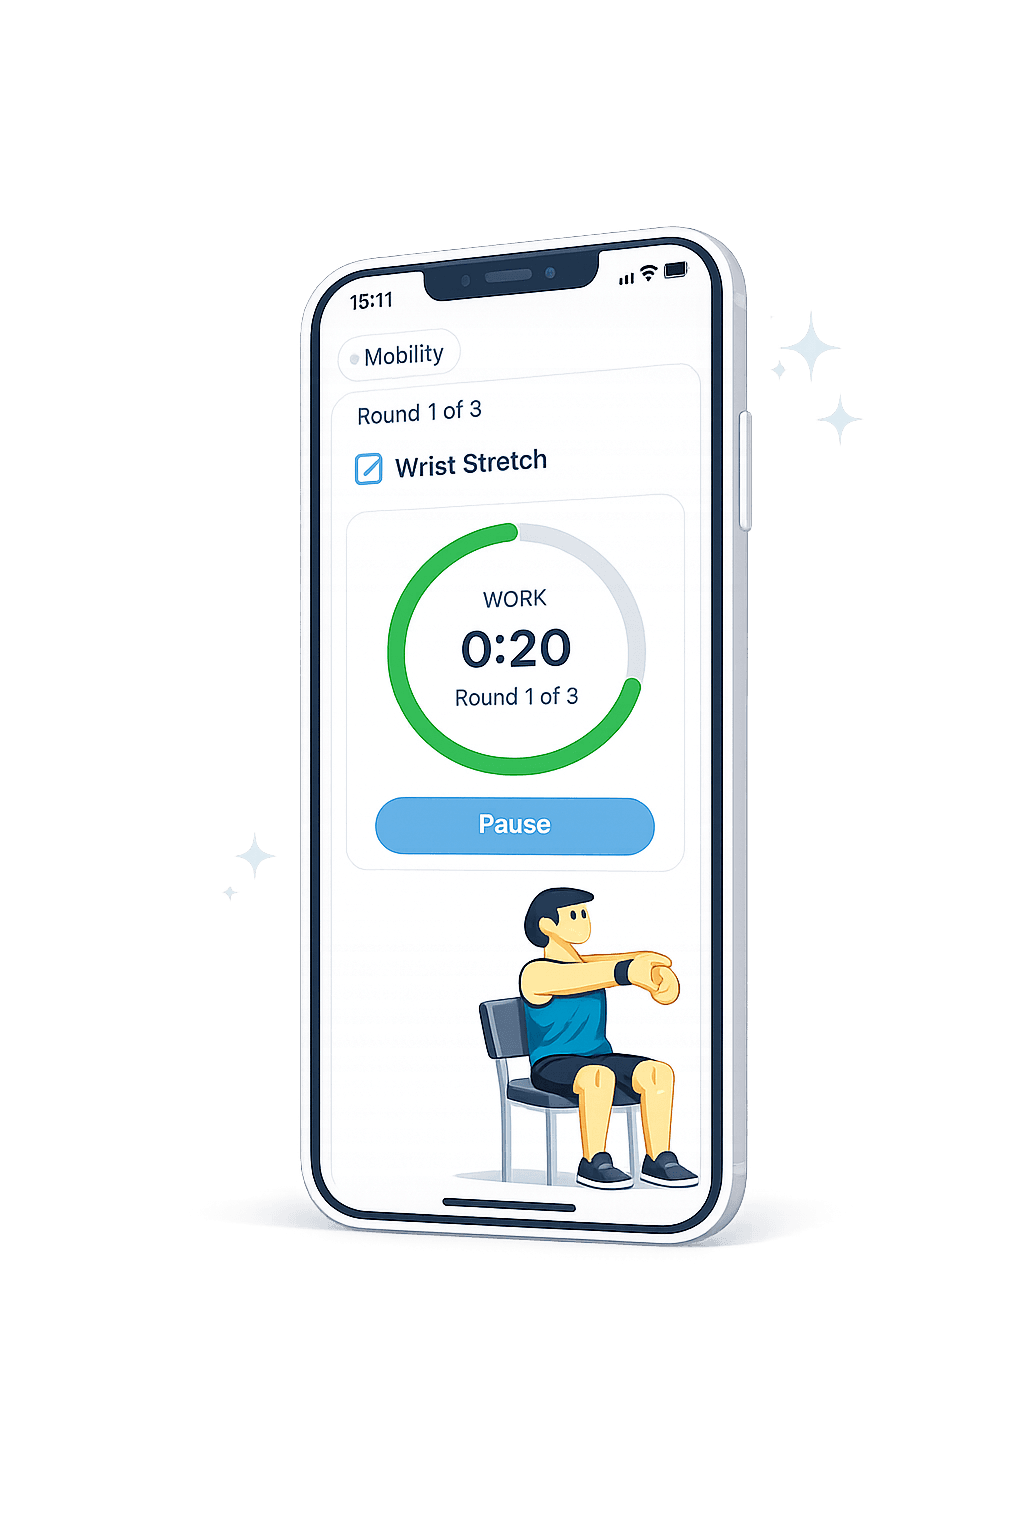
Your checklist
No exercises selected yet
Choose a preset above or add exercises from the list below.
Choose more exercises
Add optional exercises to your routine.
47 exercises currently match
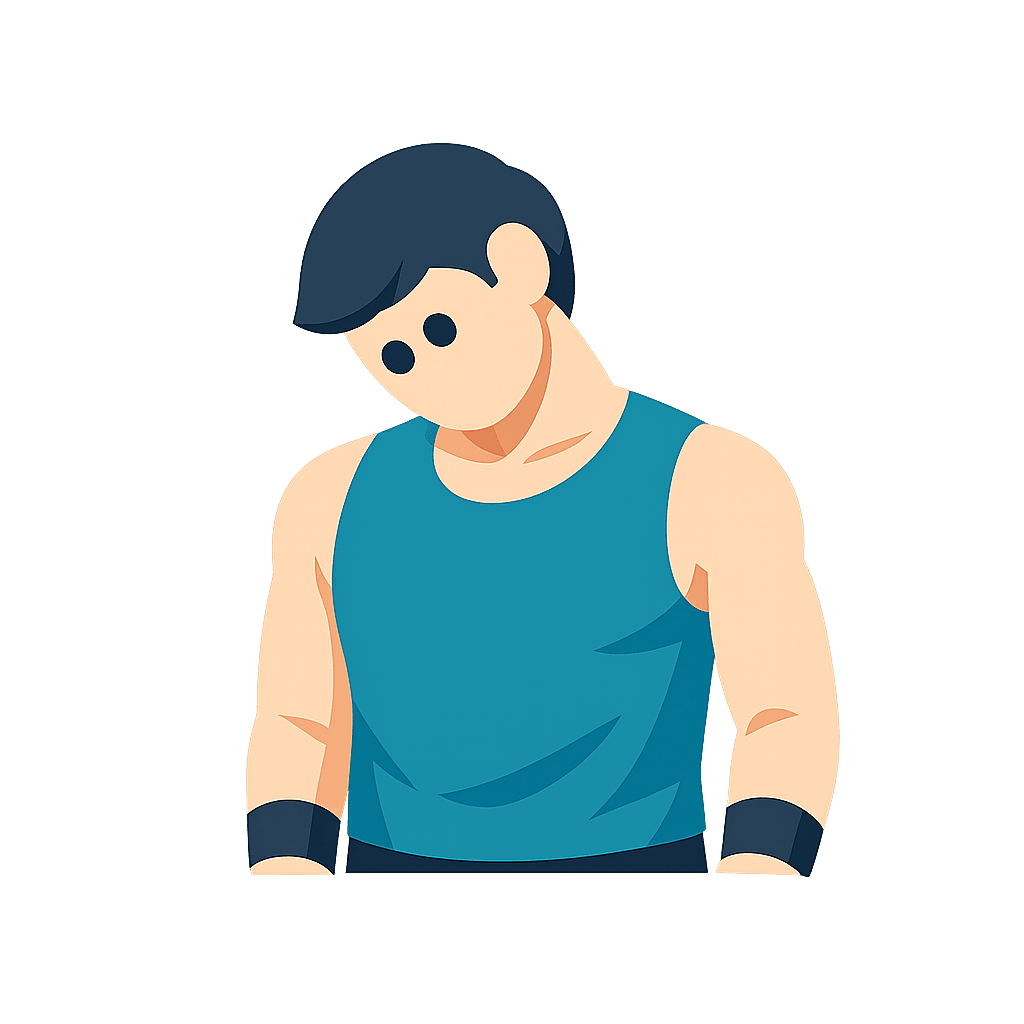
Neck CARs
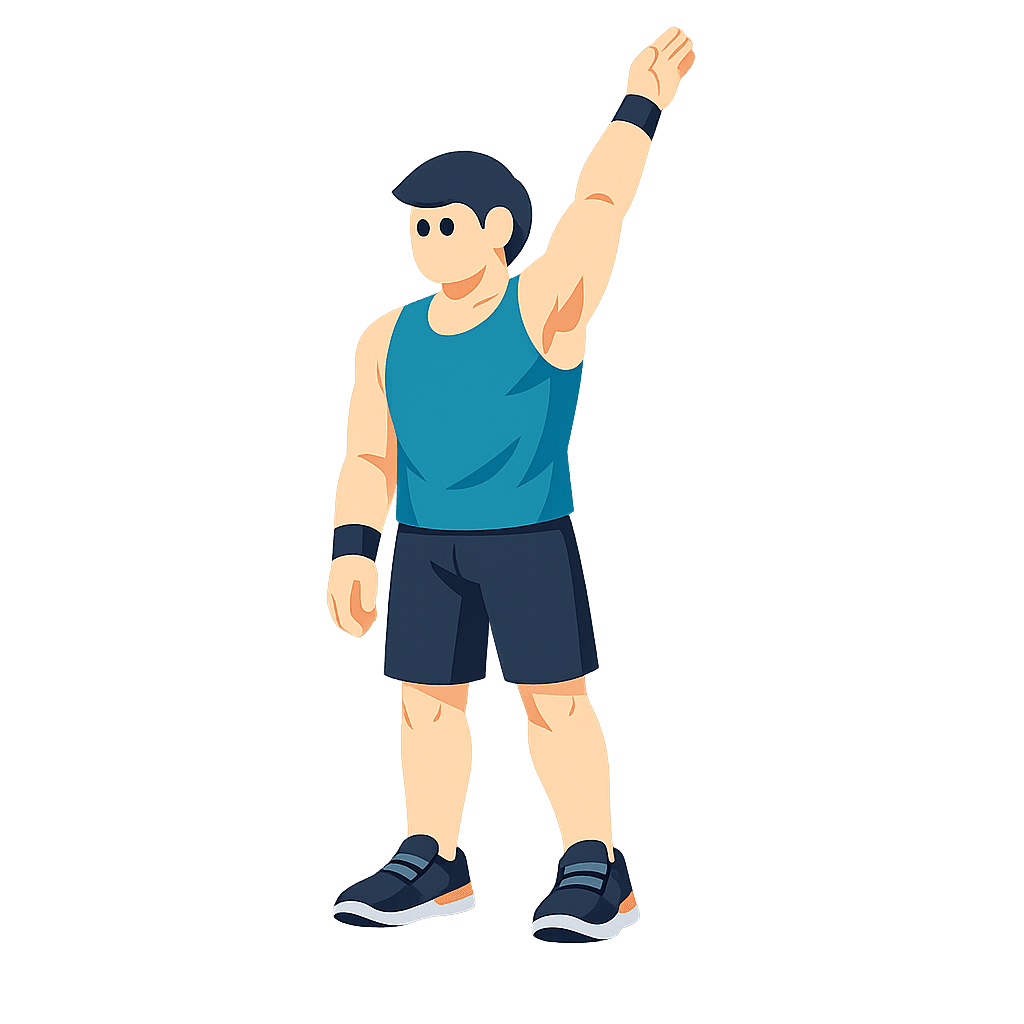
Shoulder CARs
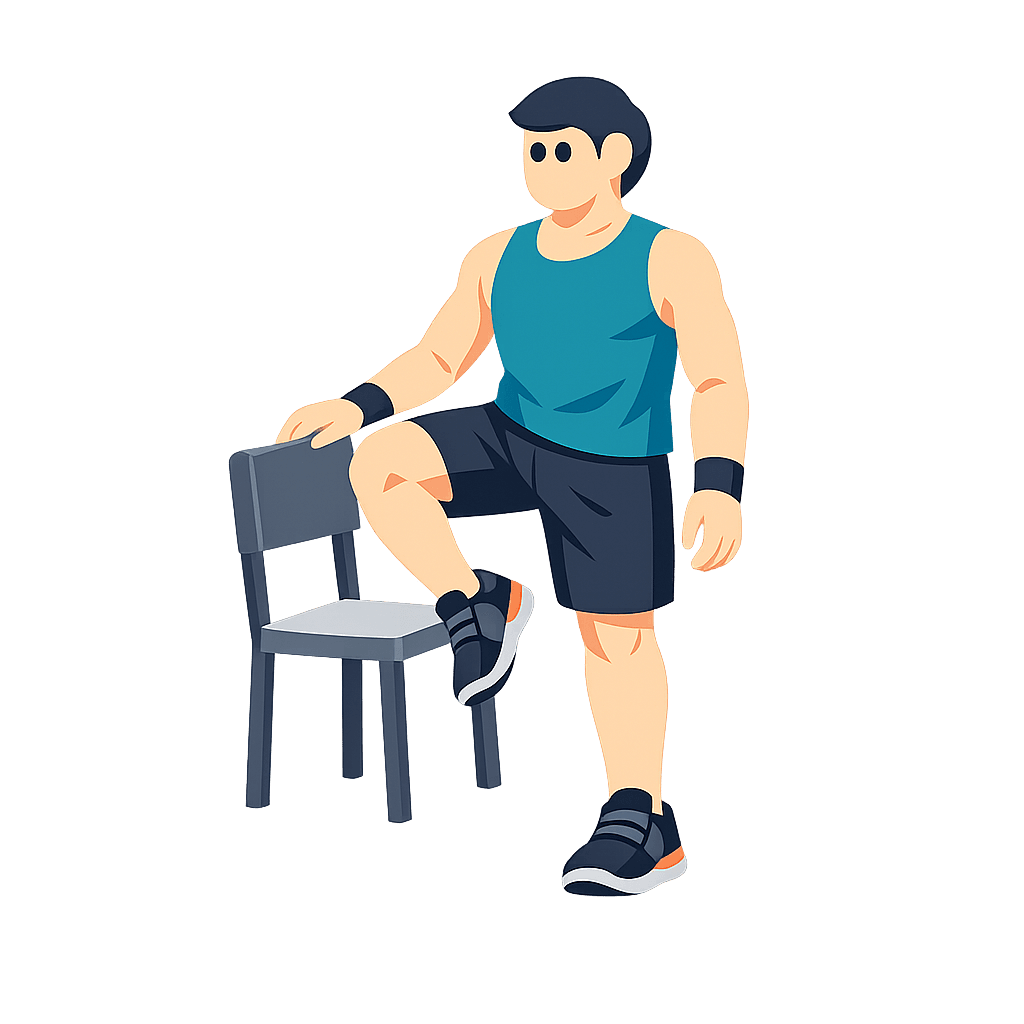
Hip CARs
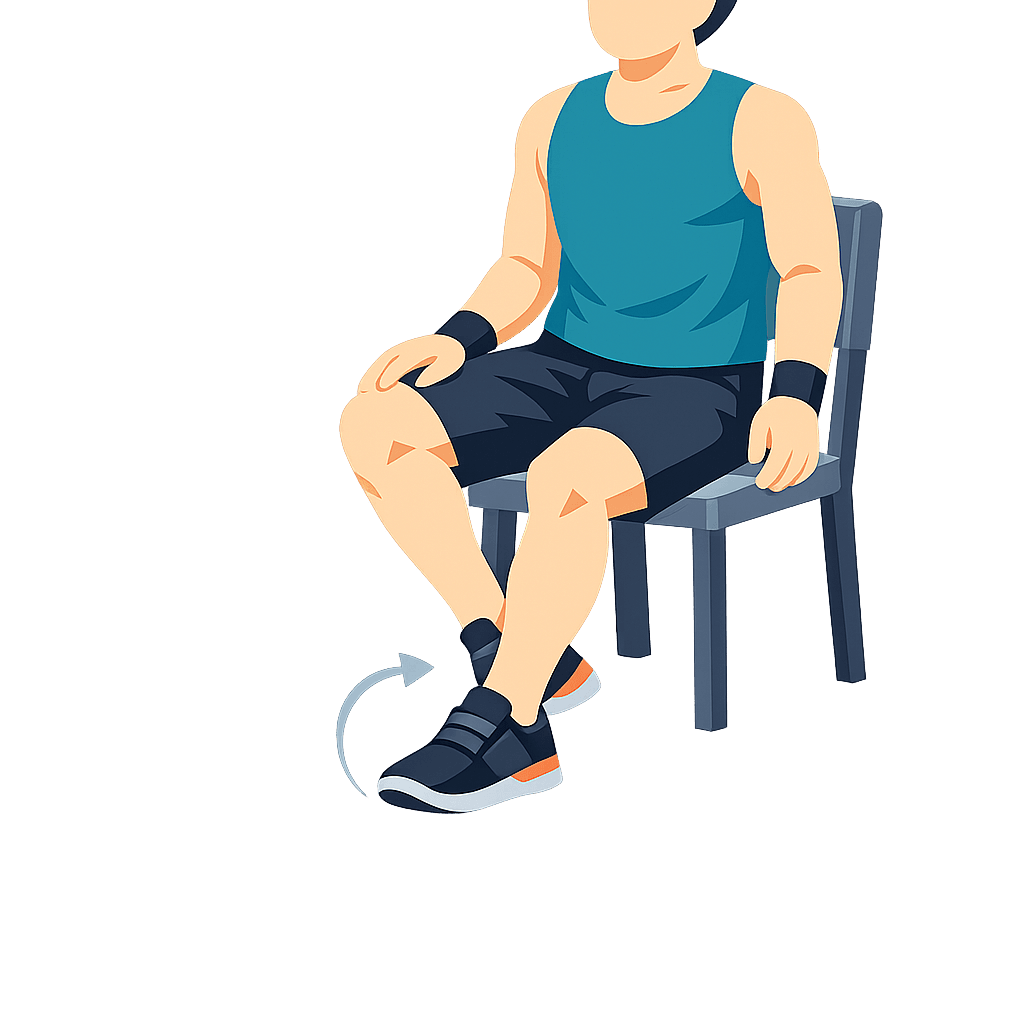
Ankle CARs
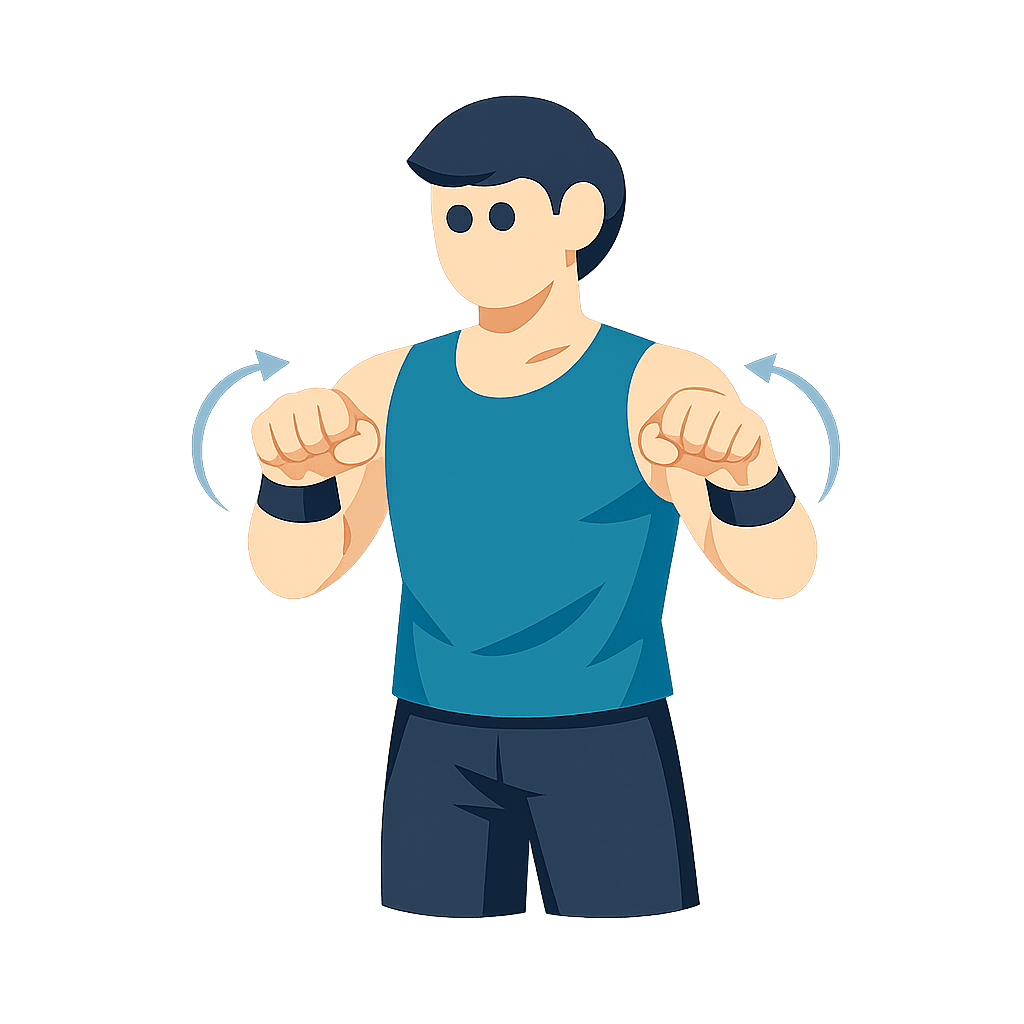
Wrist Circles
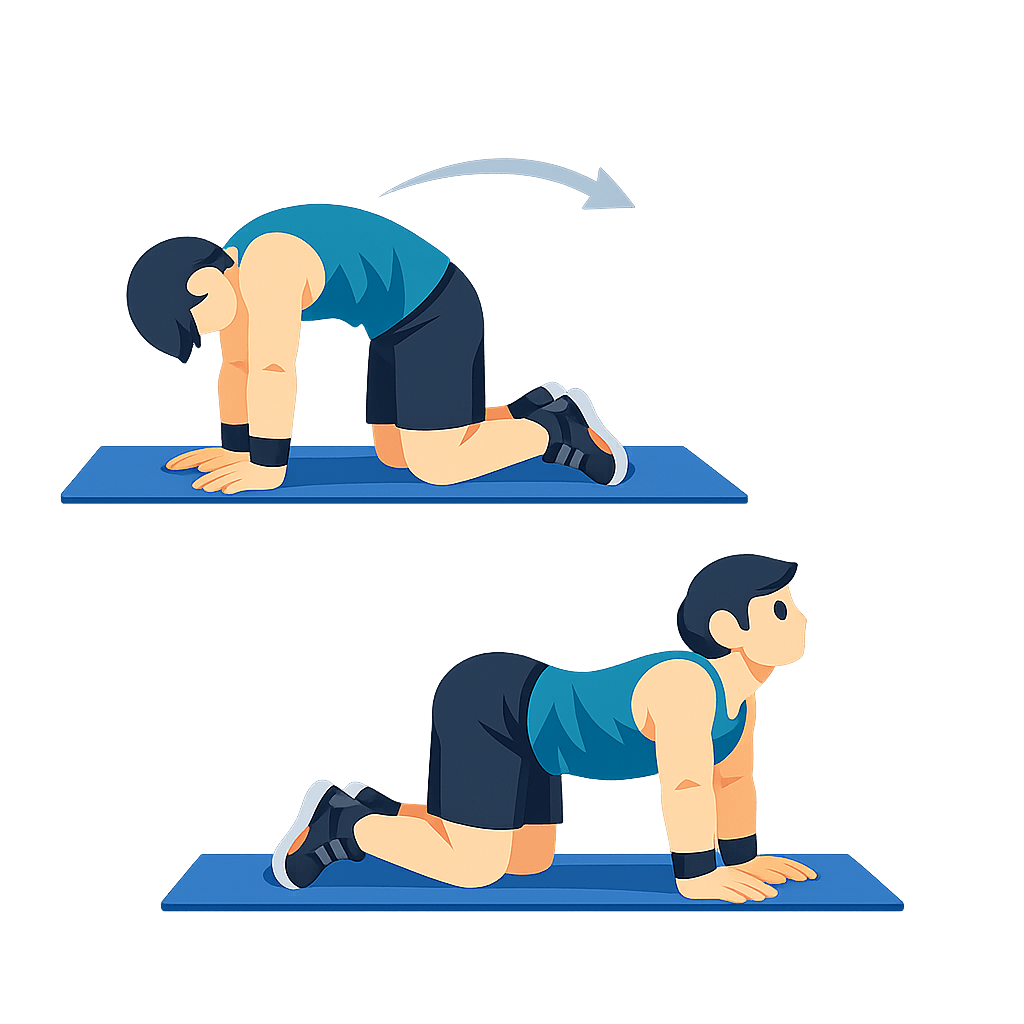
Cat-Cow
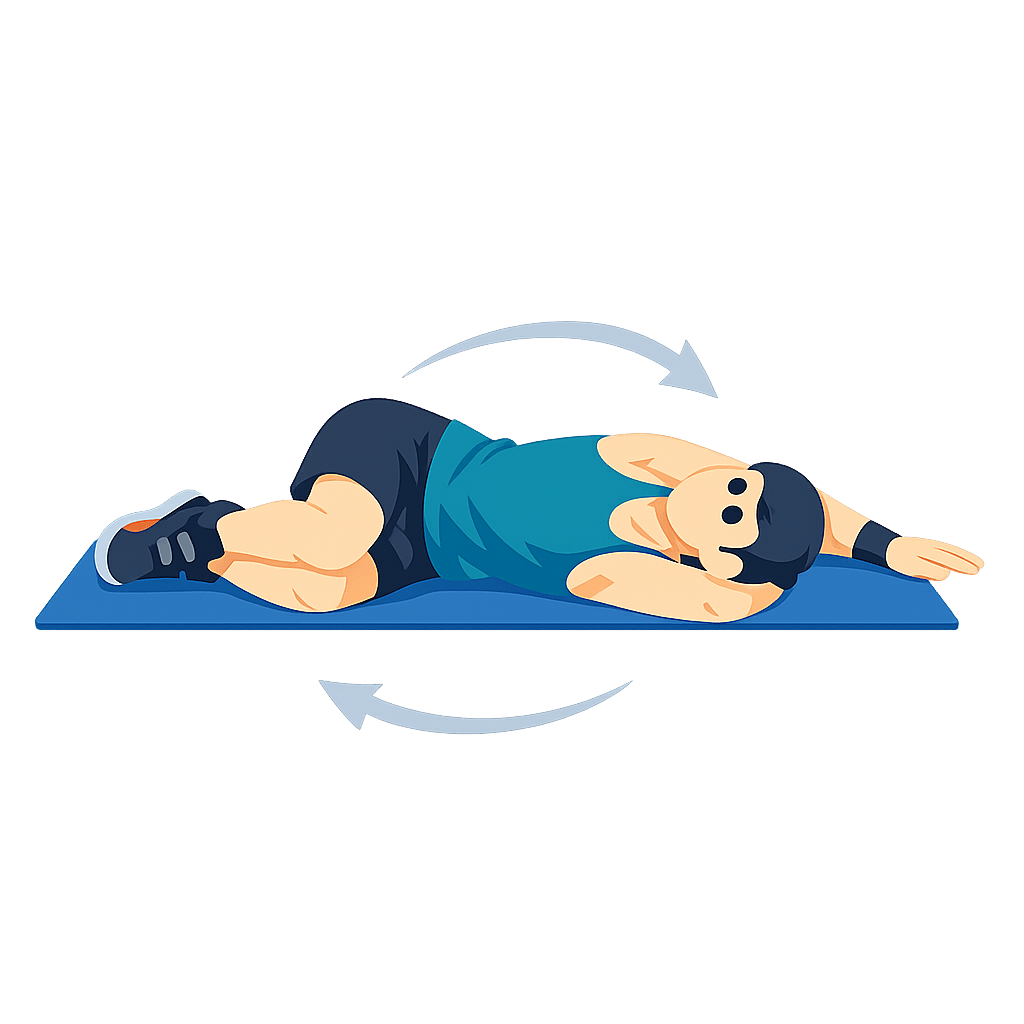
Thoracic Open Book
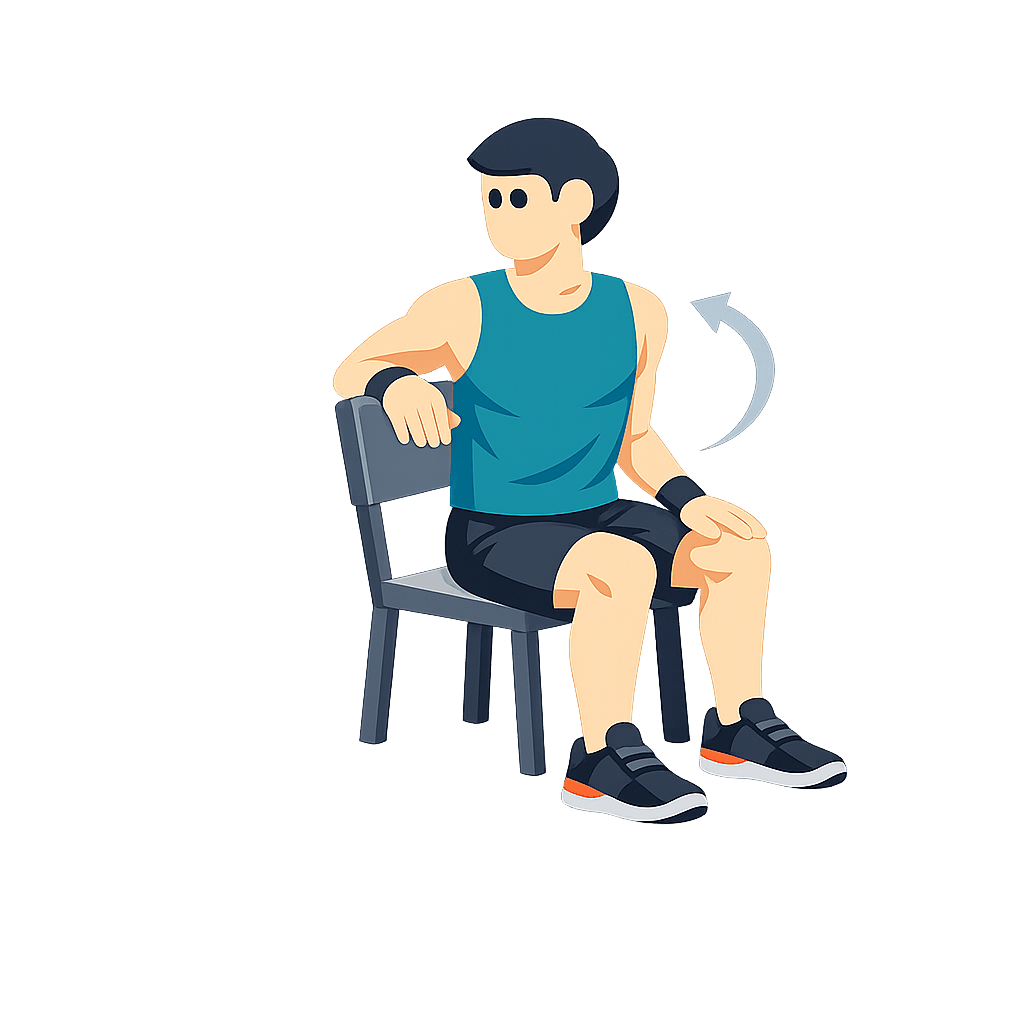
Seated Spinal Rotation
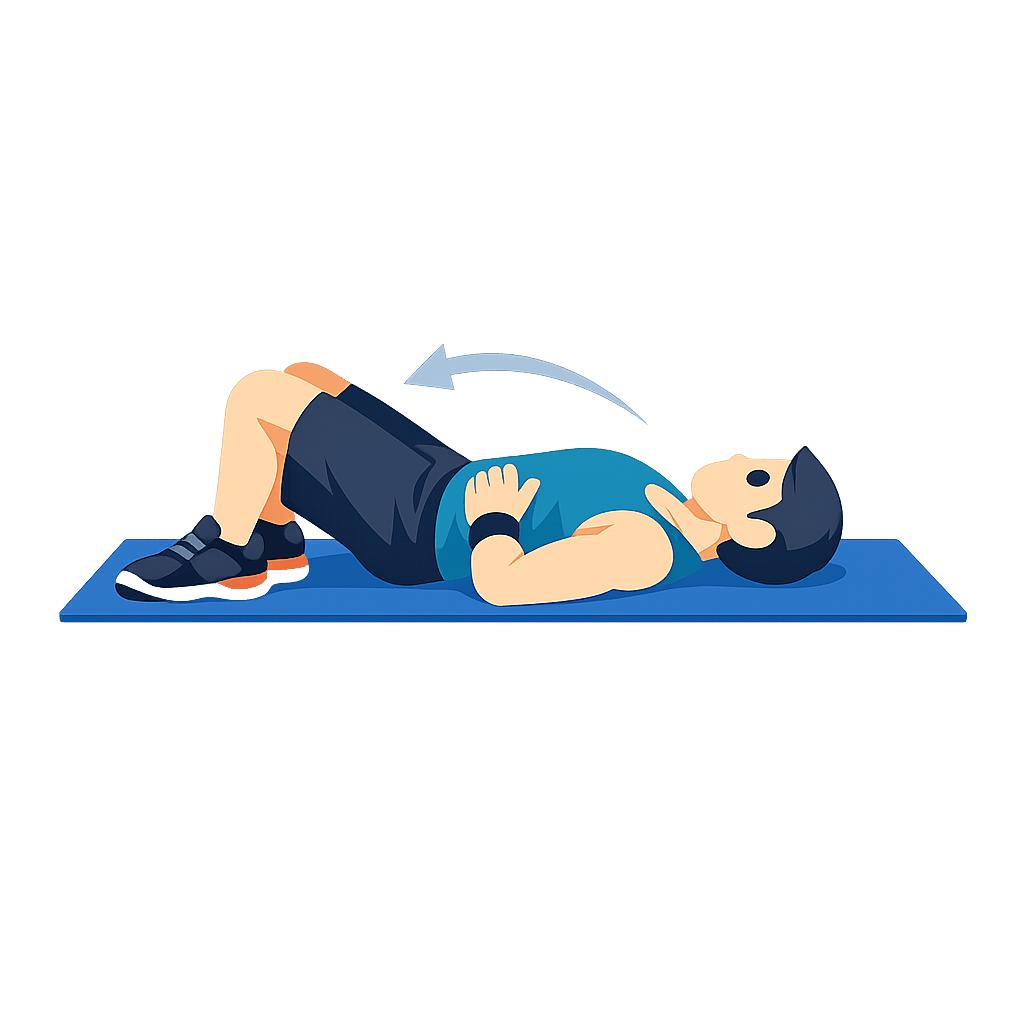
Pelvic Tilts
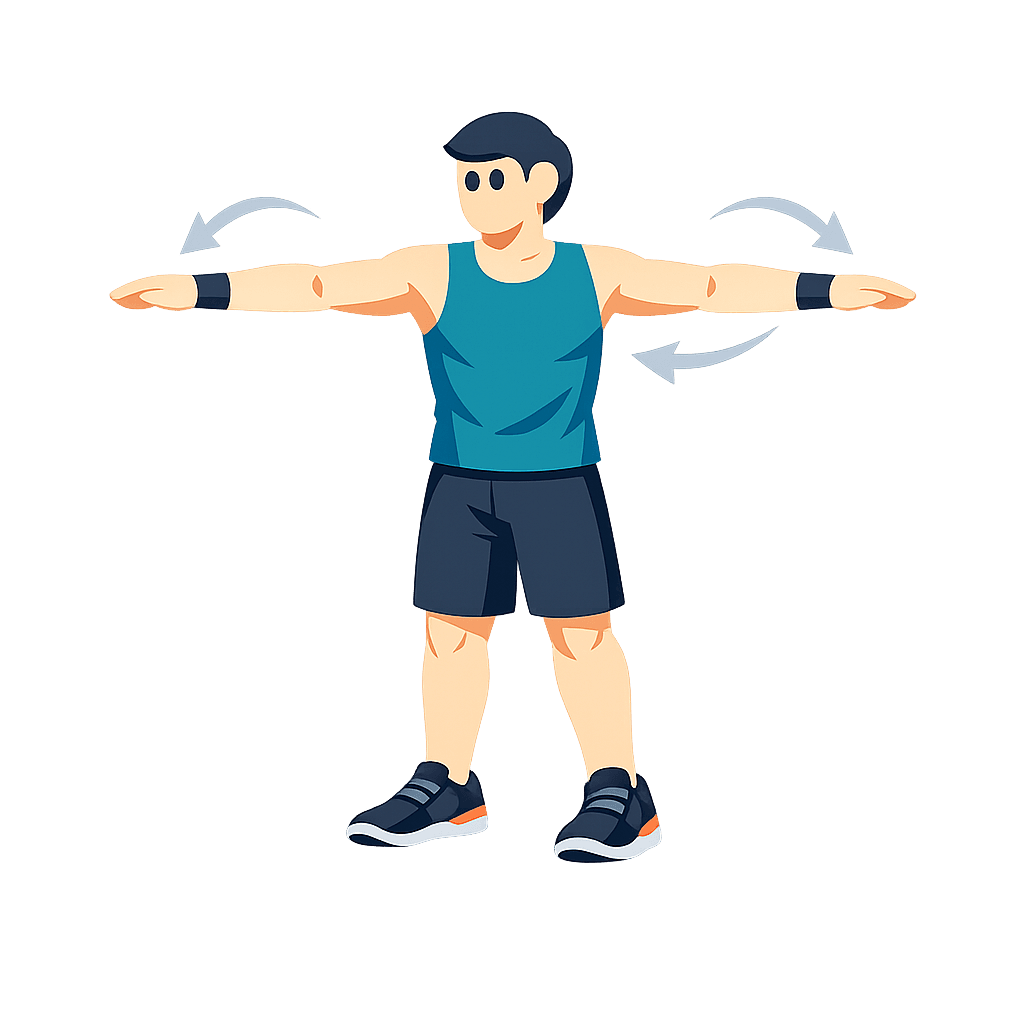
Arm Circles
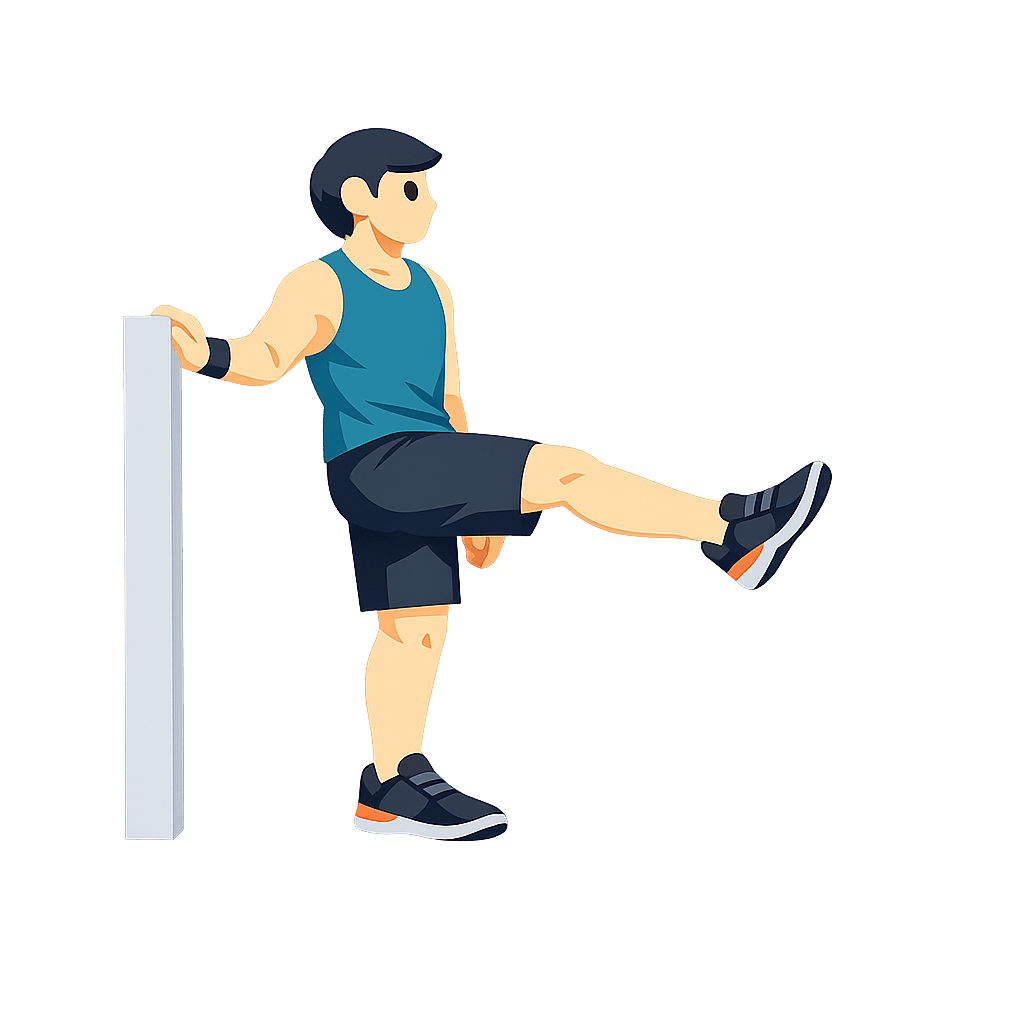
Leg Swings
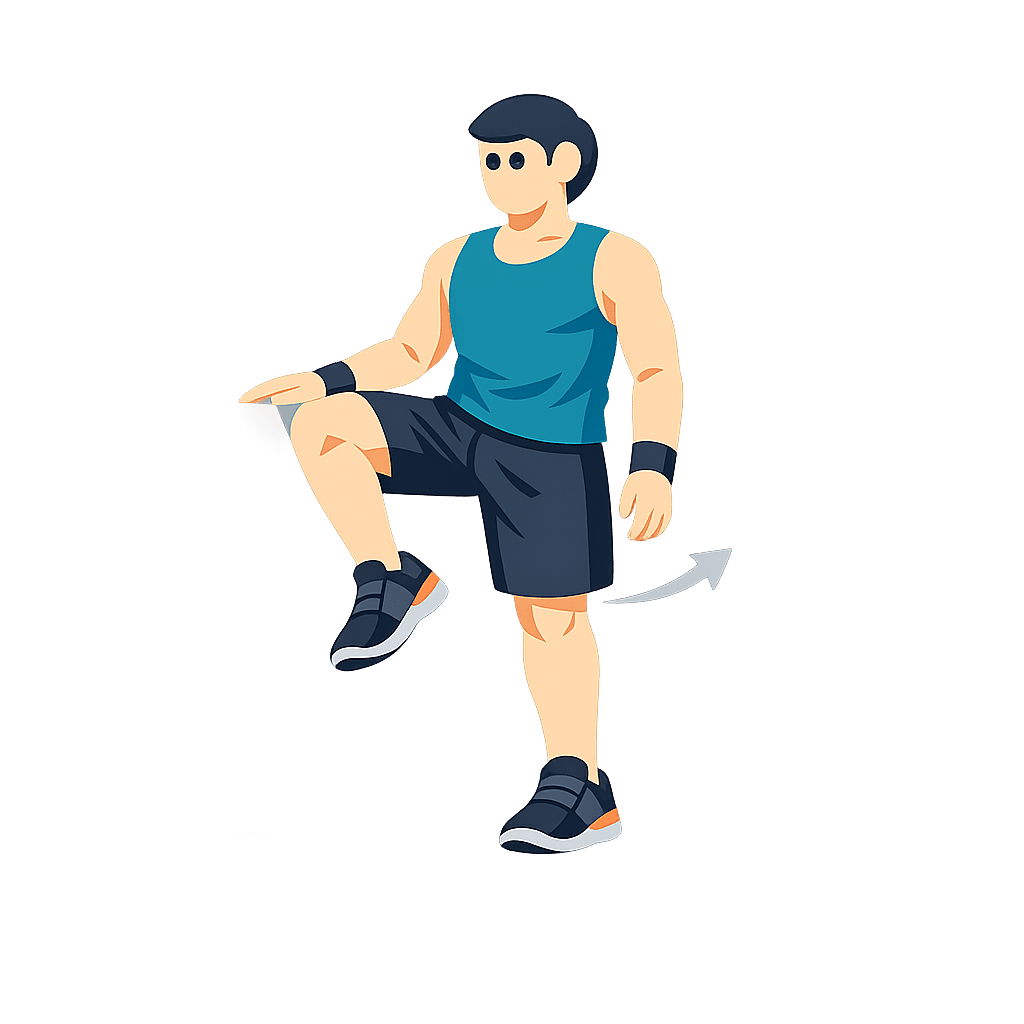
Hip Openers
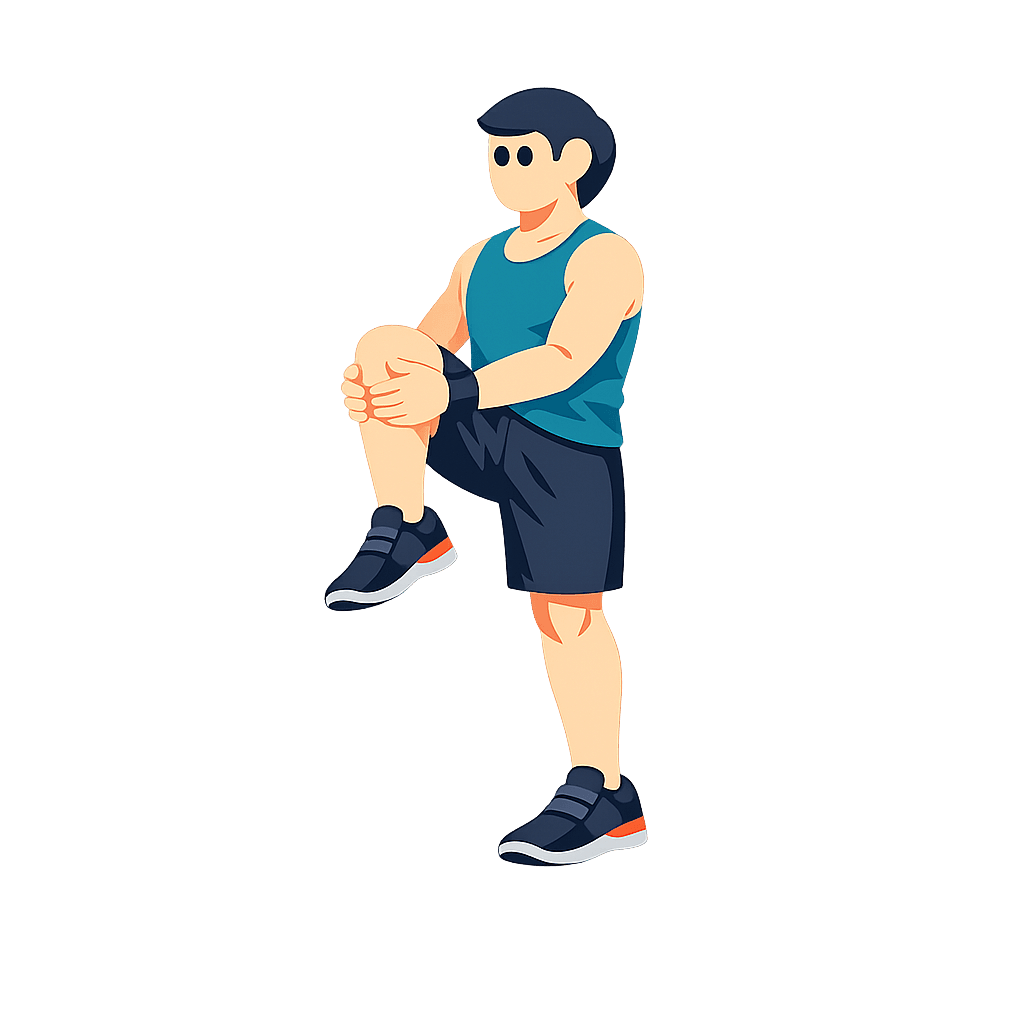
Walking Knee Hugs
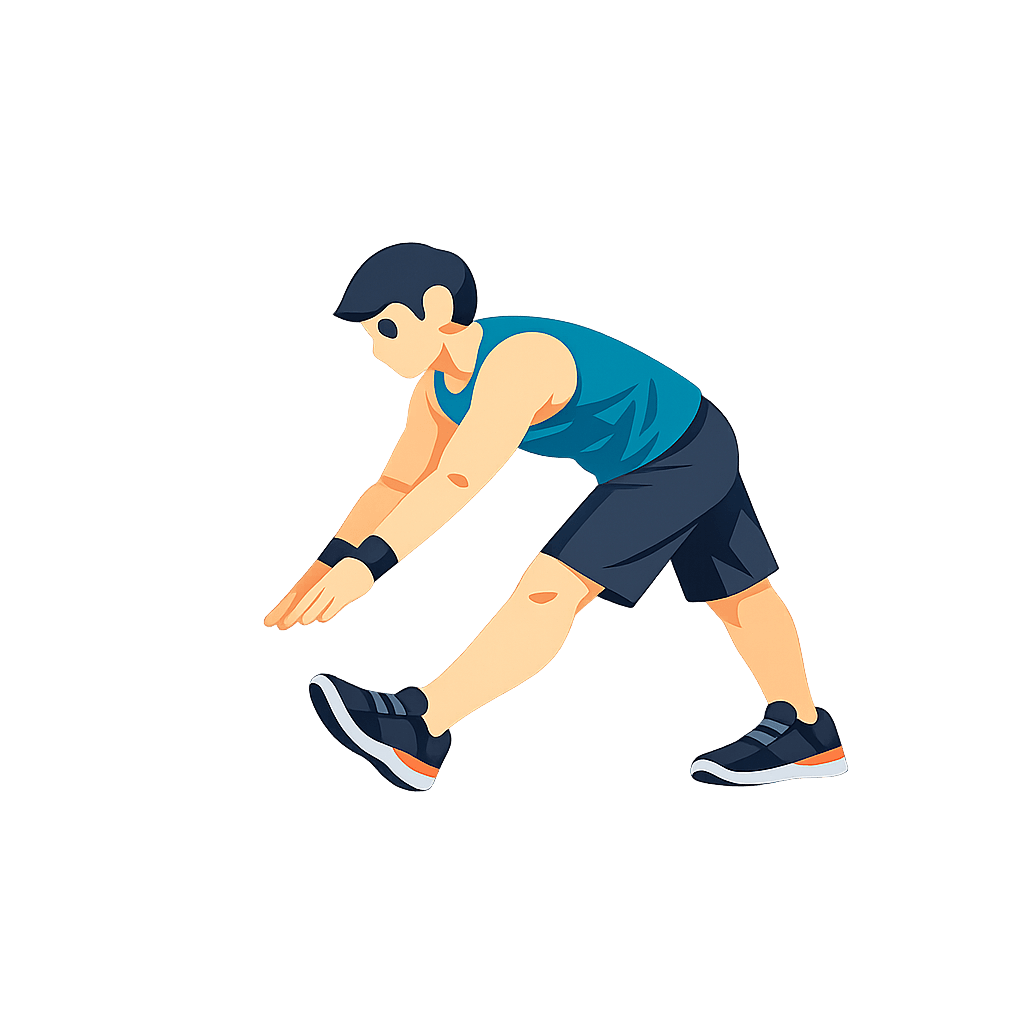
Dynamic Hamstring Sweep
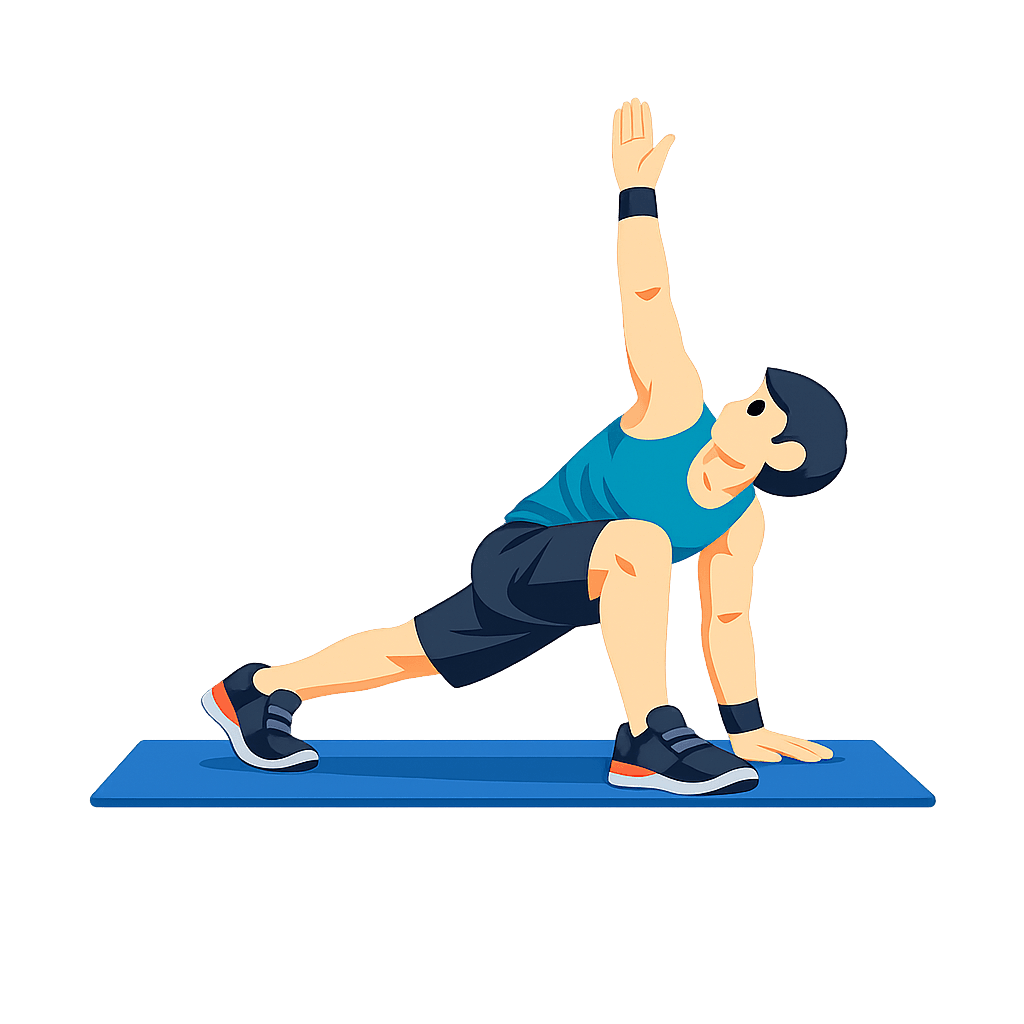
World's Greatest Stretch
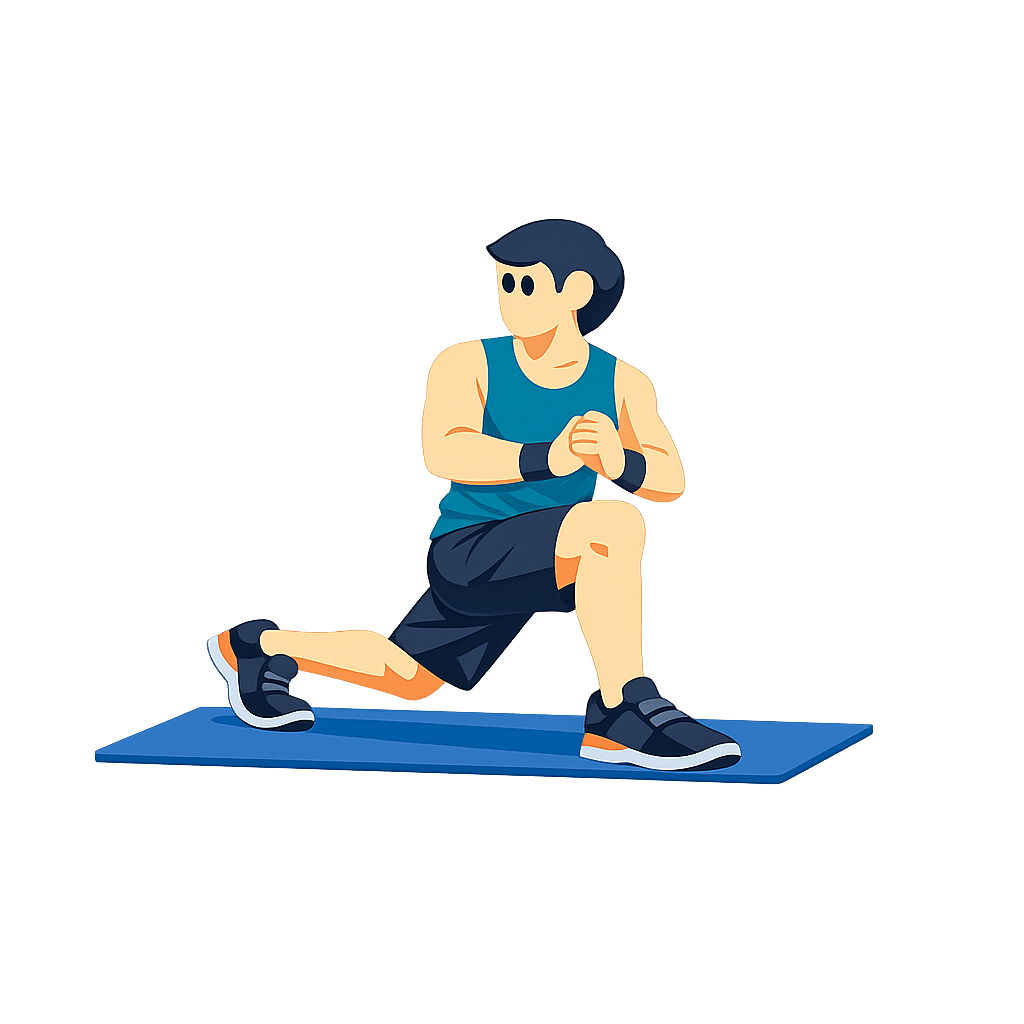
Lunge with Rotation
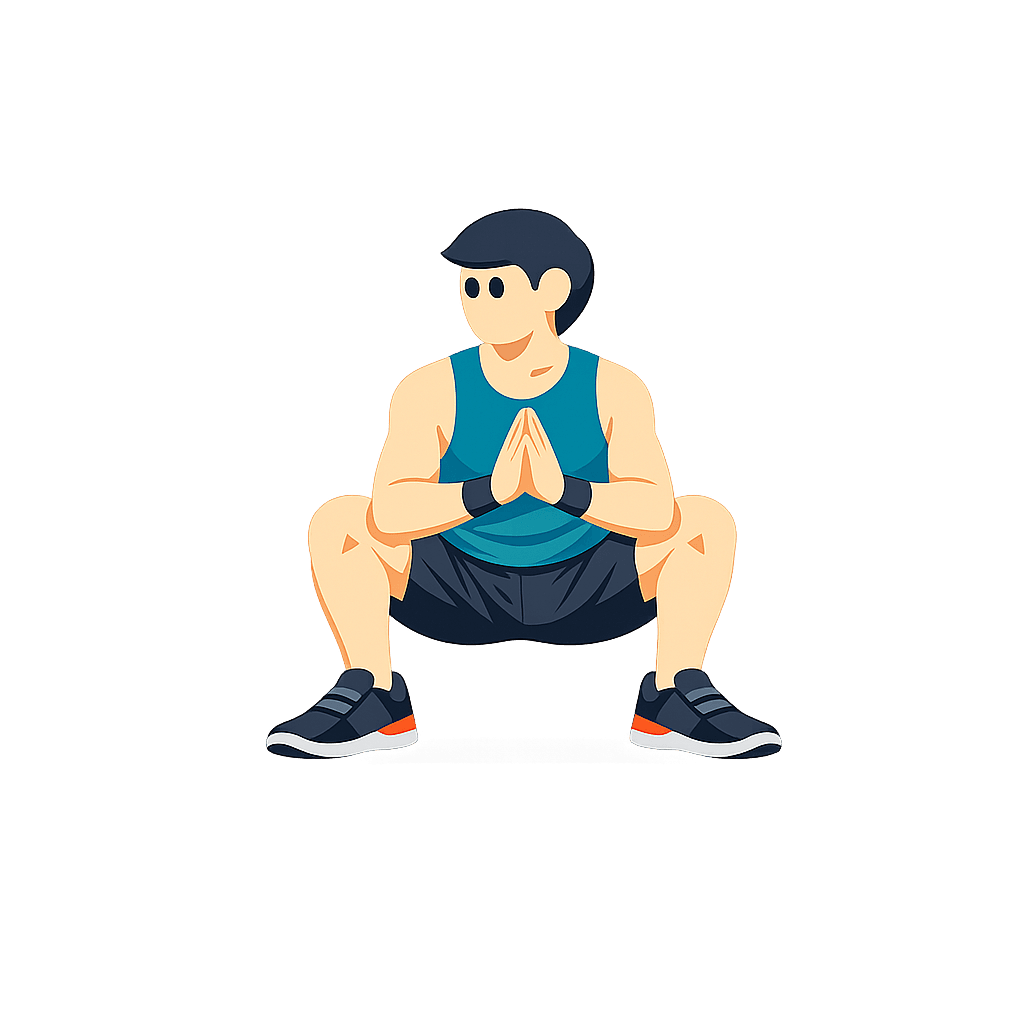
Deep Squat Pry
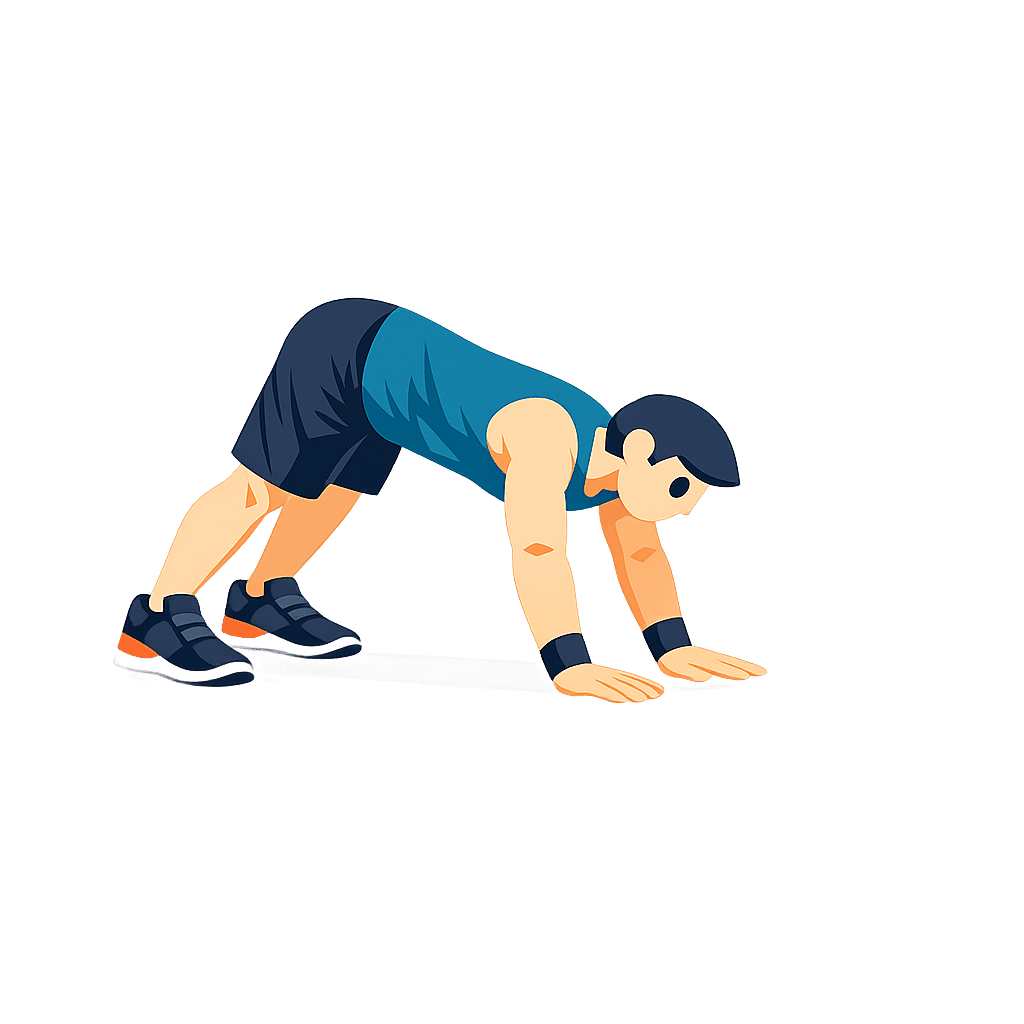
Inchworm Walkout
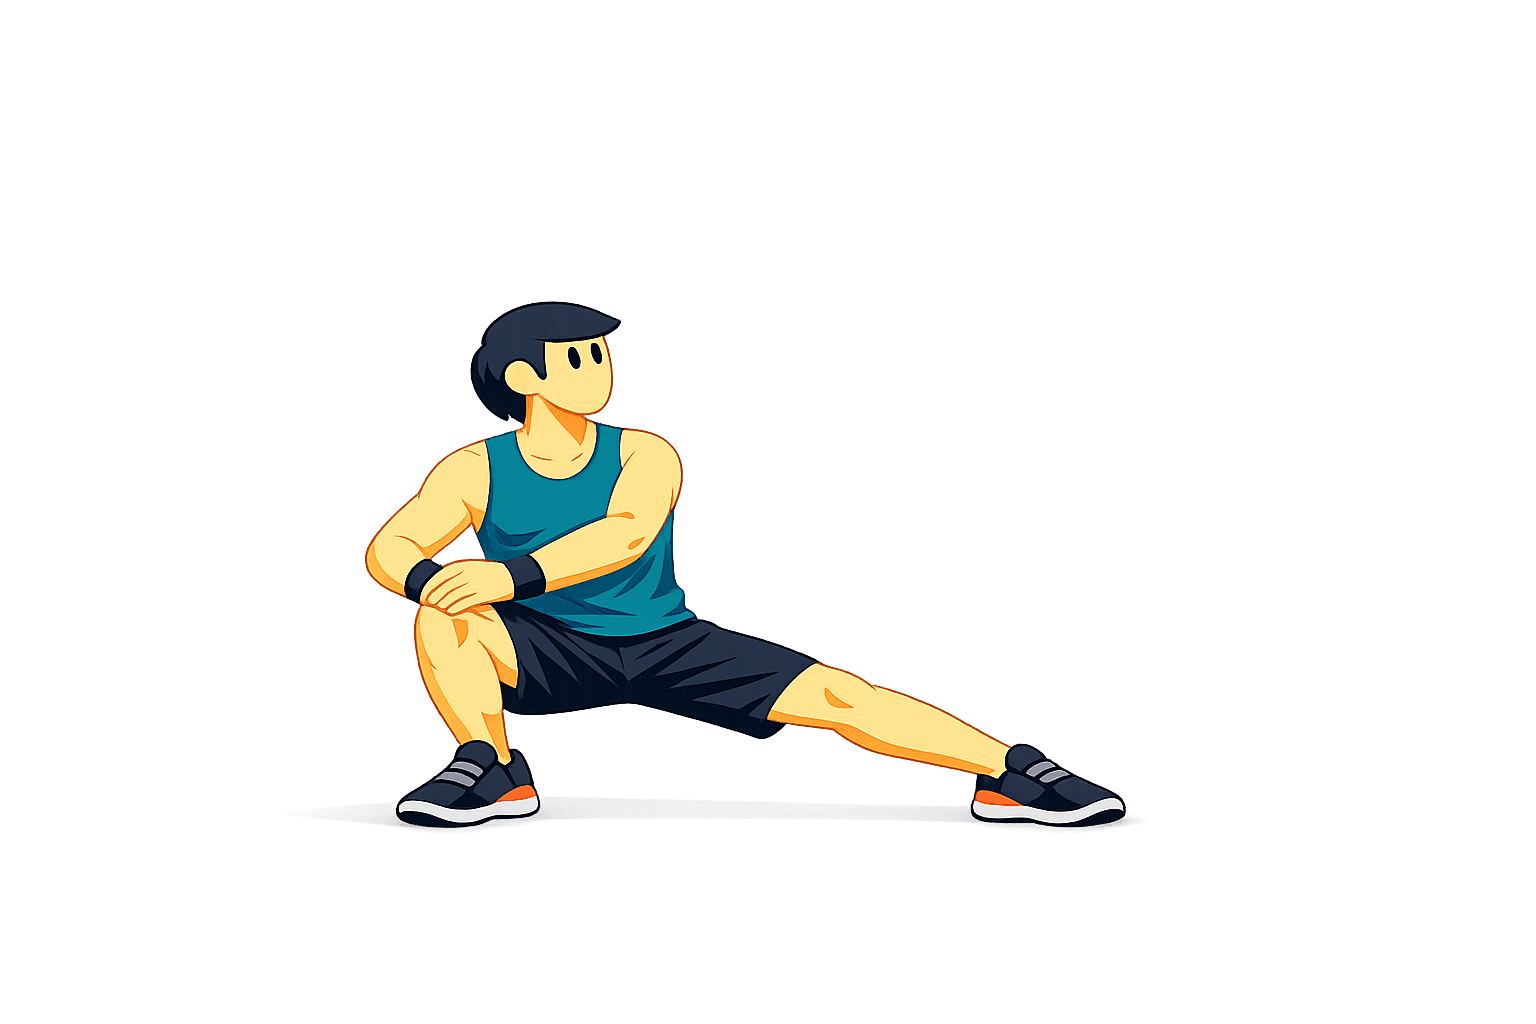
Lateral Lunge Shift
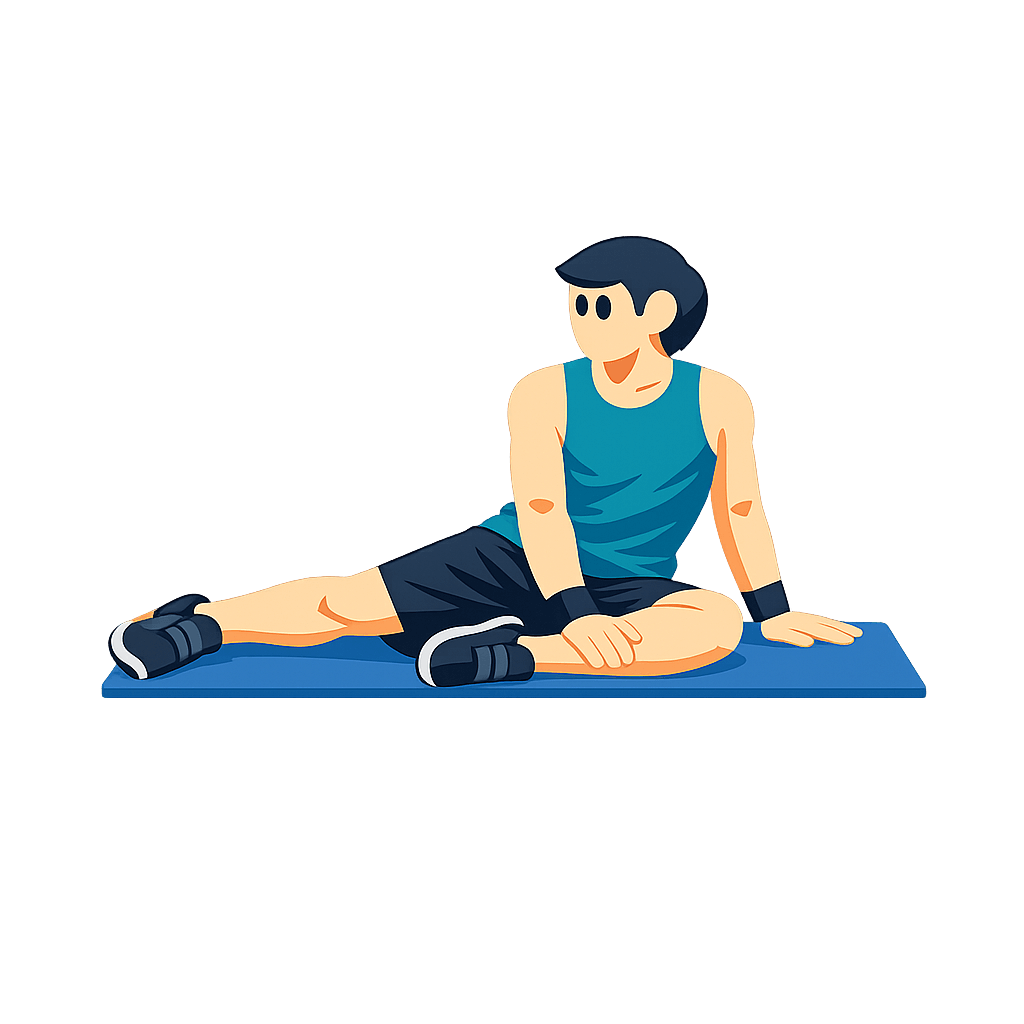
90/90 Hip Switch
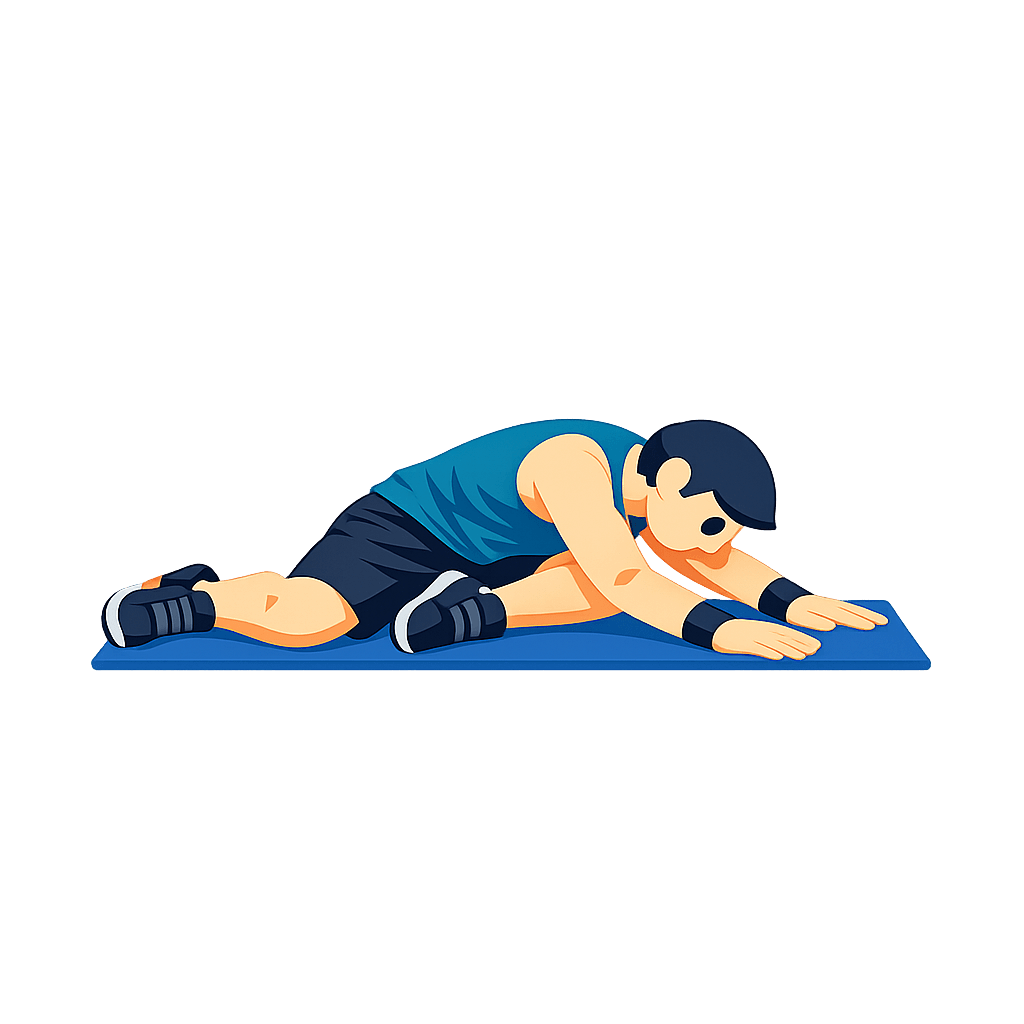
90/90 Forward Fold
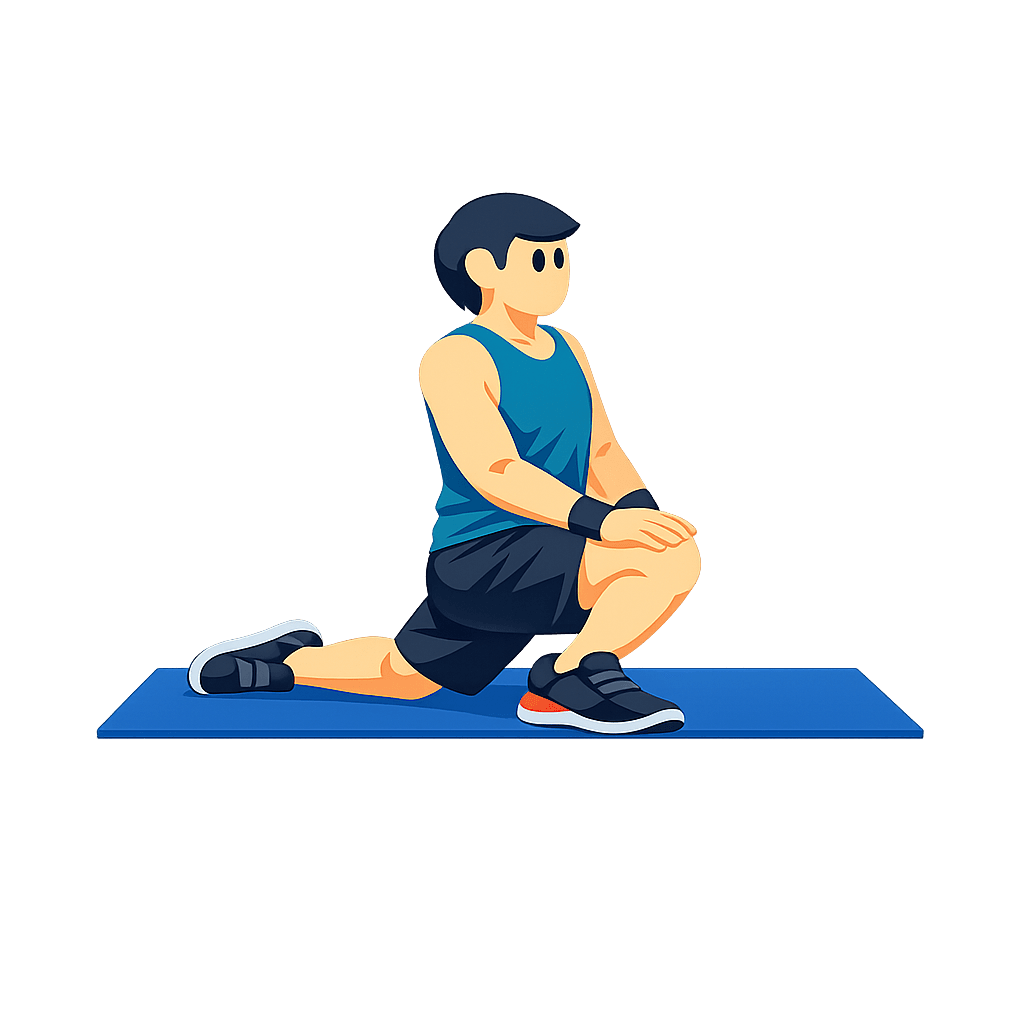
Half-Kneeling Hip Flexor Rock
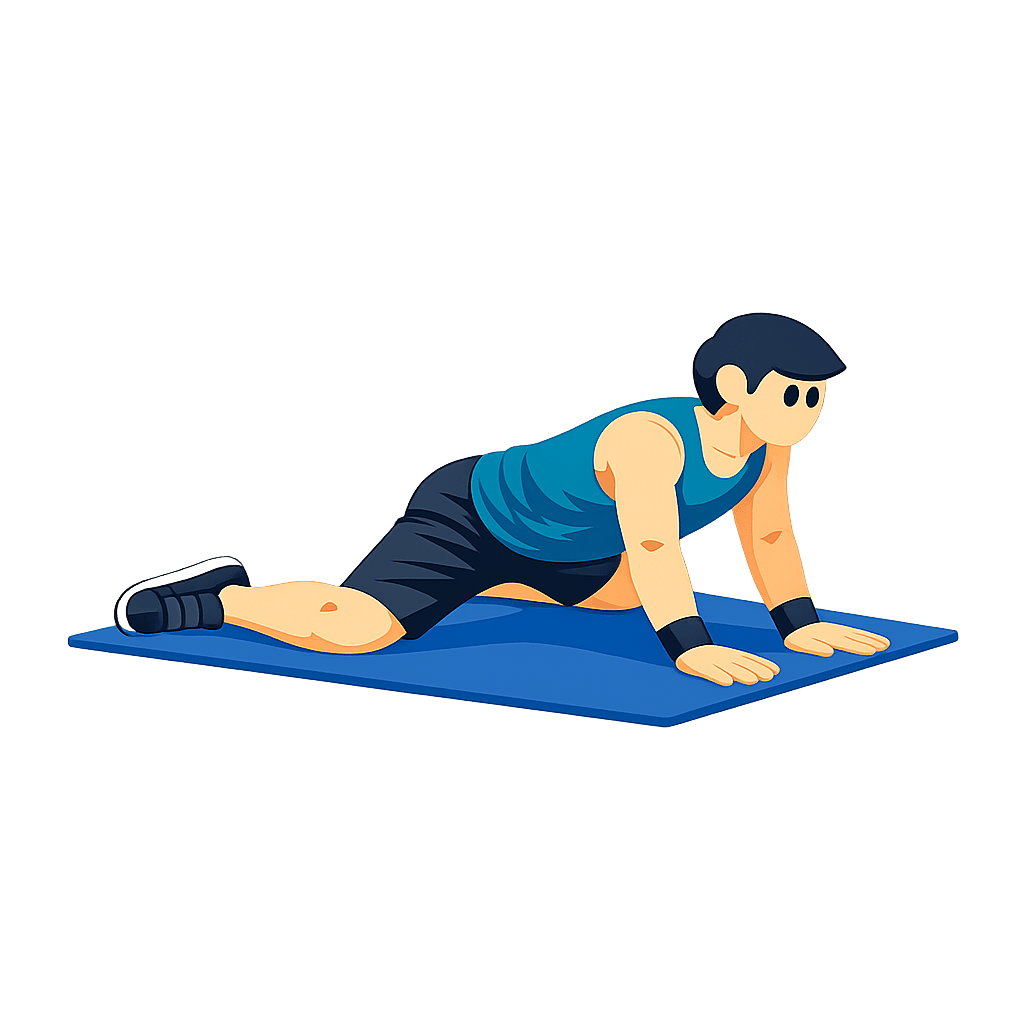
Frog Rockback
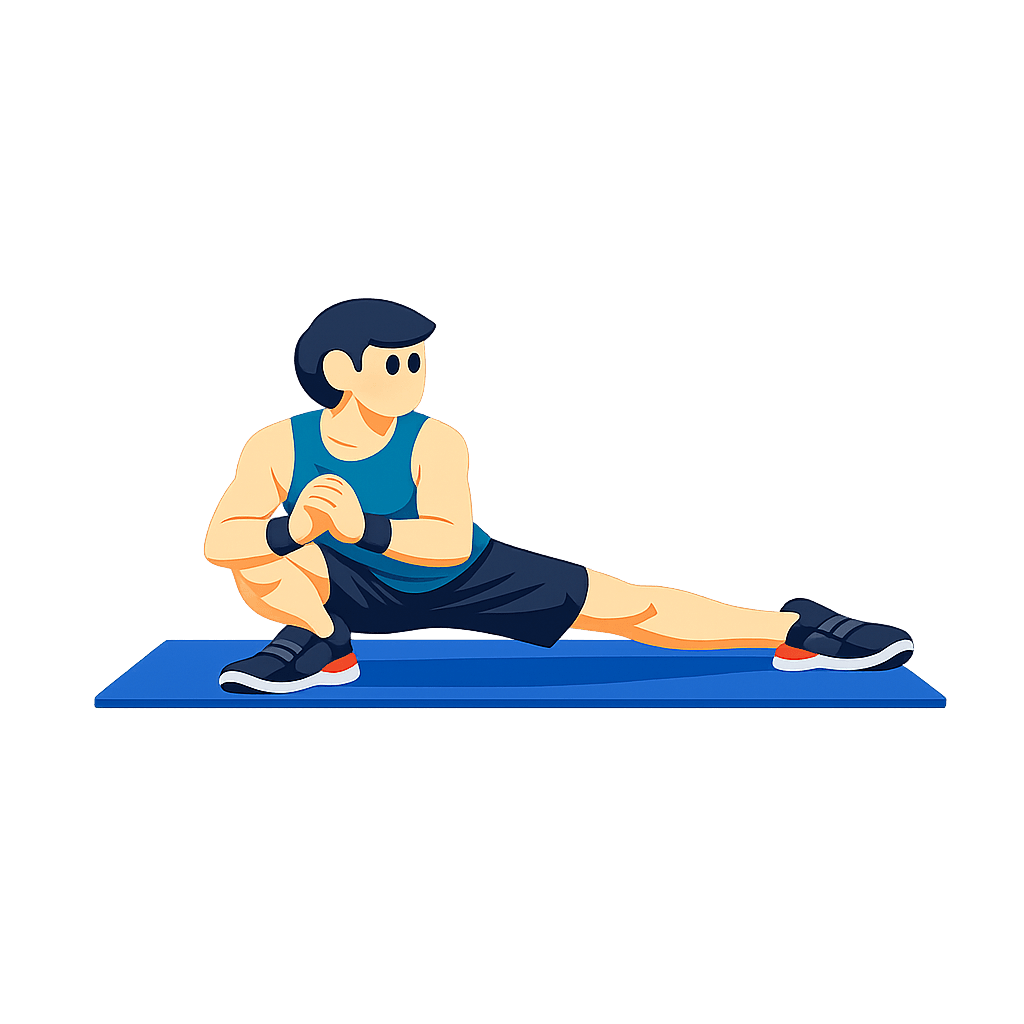
Cossack Shift
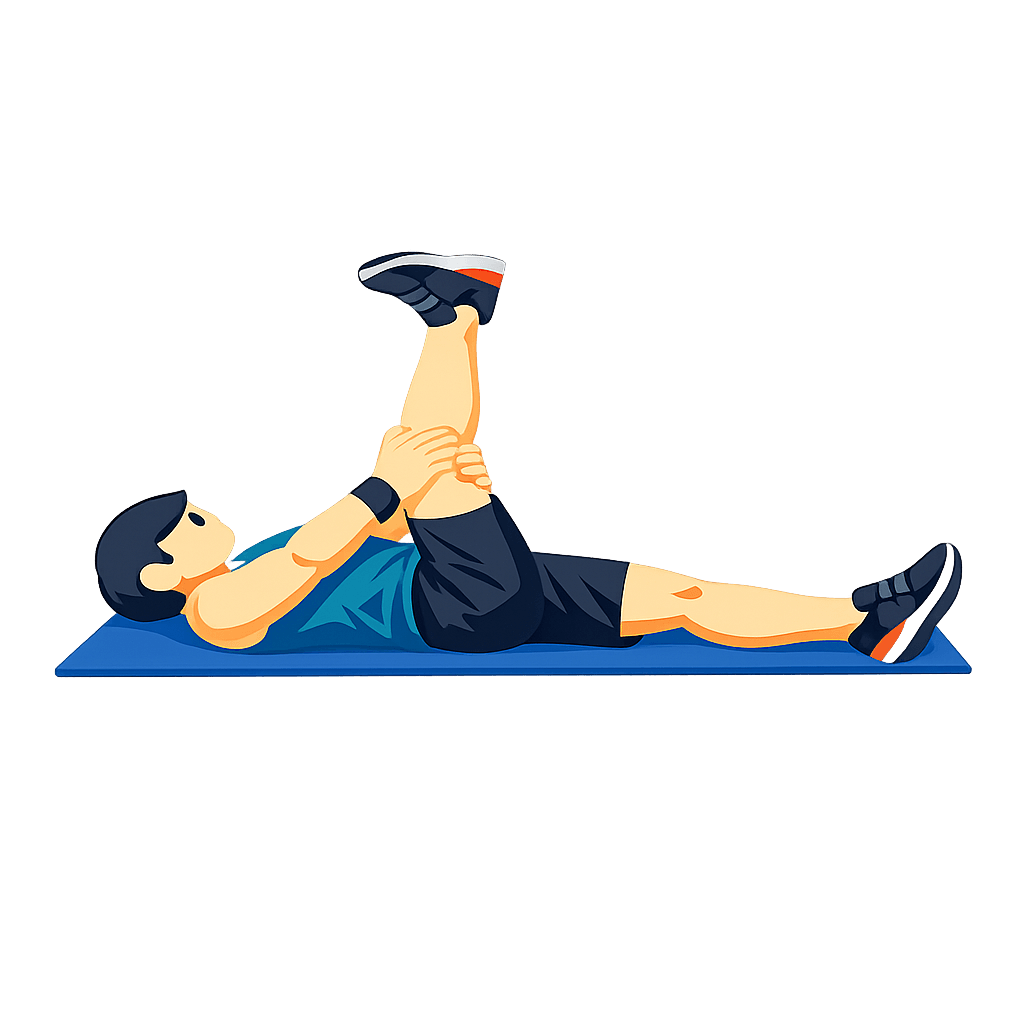
Active Hamstring Stretch
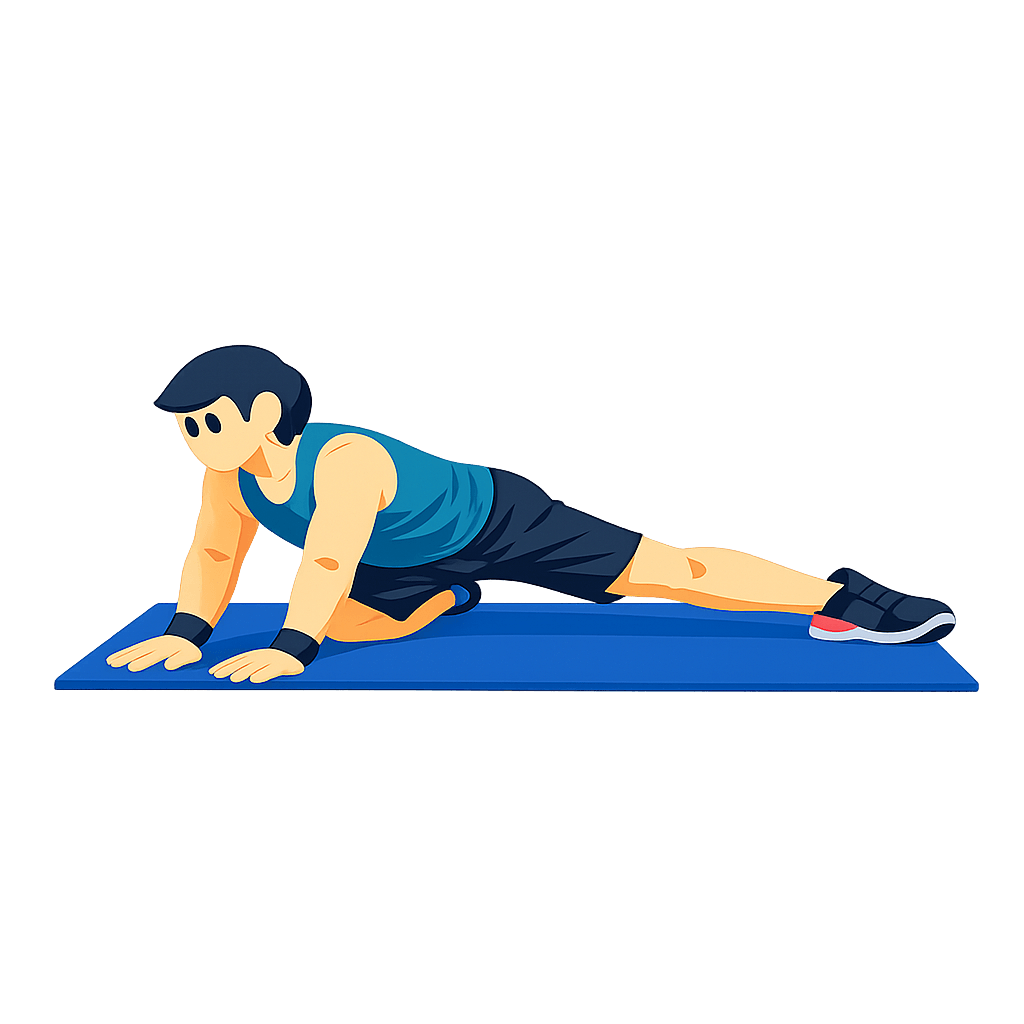
Kneeling Adductor Rockback
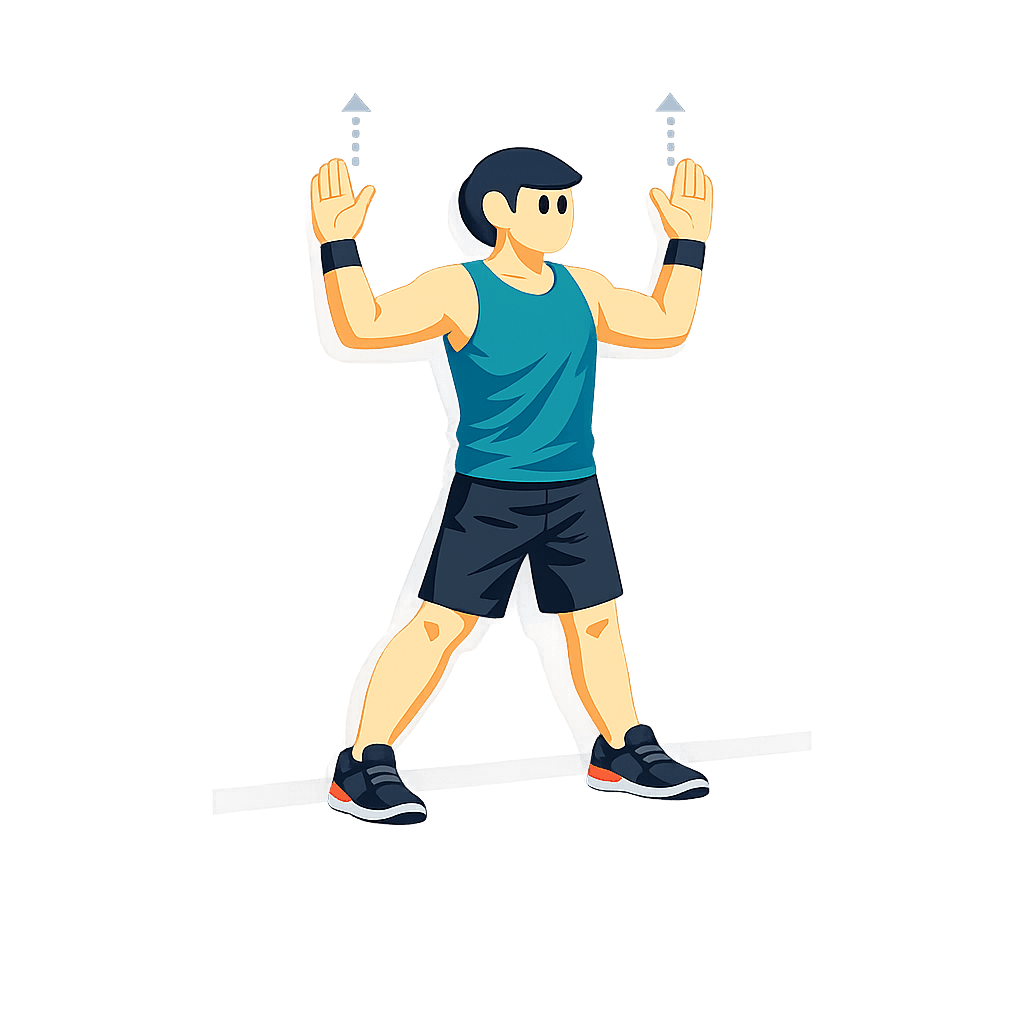
Wall Shoulder Slides
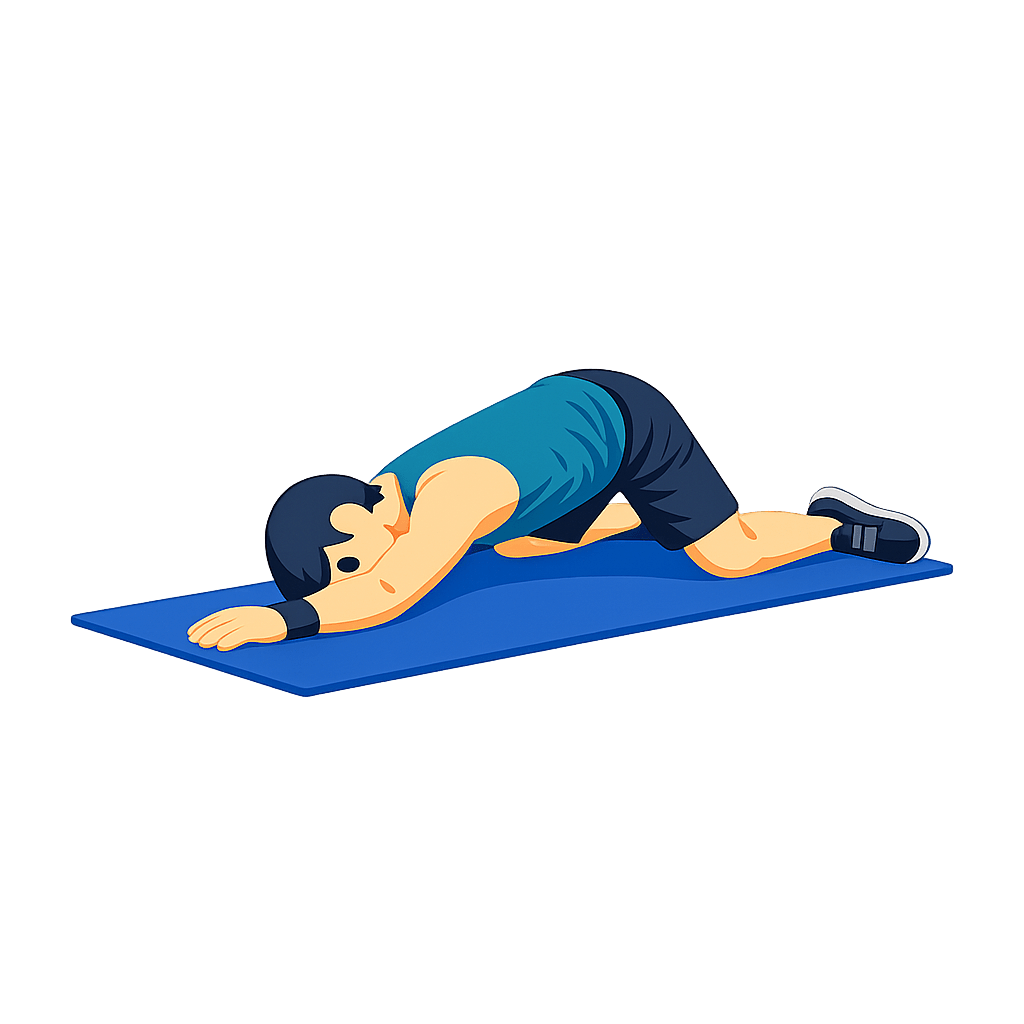
Thread the Needle
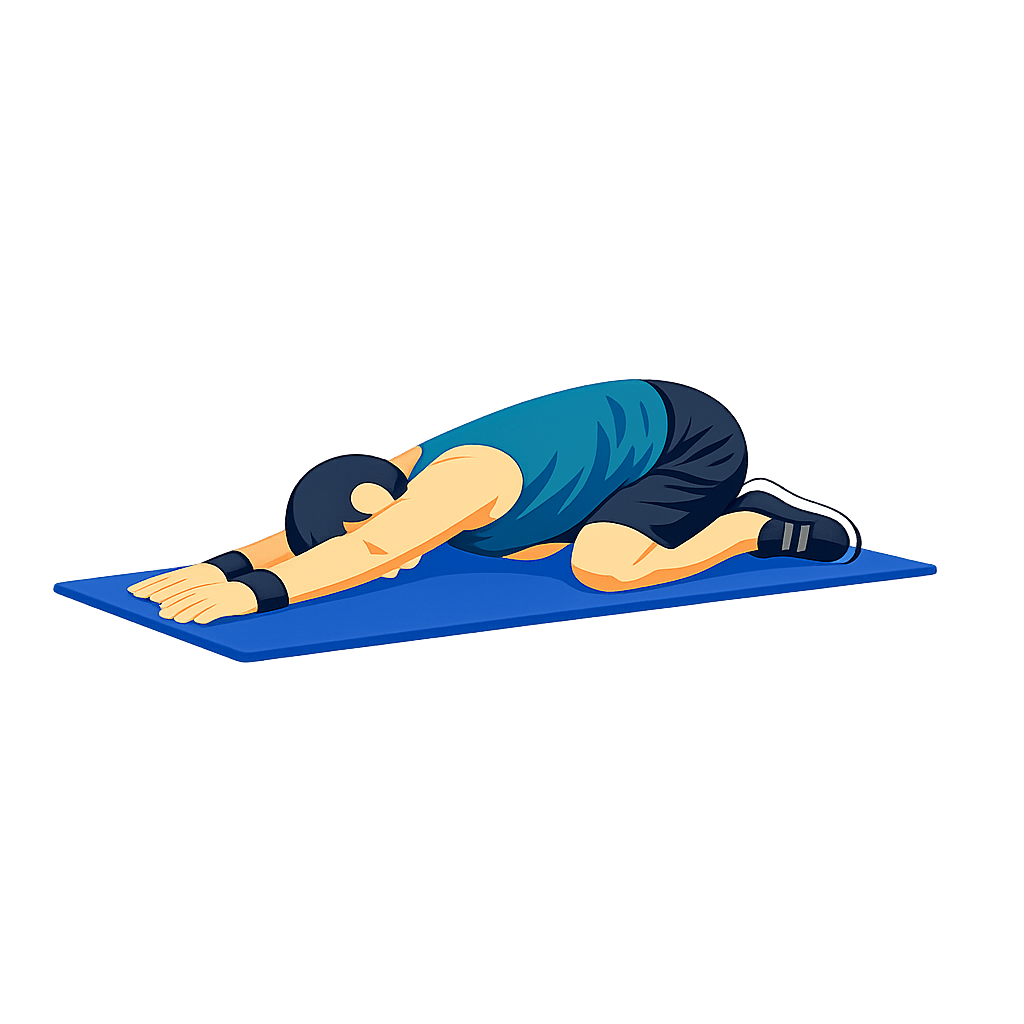
Child's Pose Reach
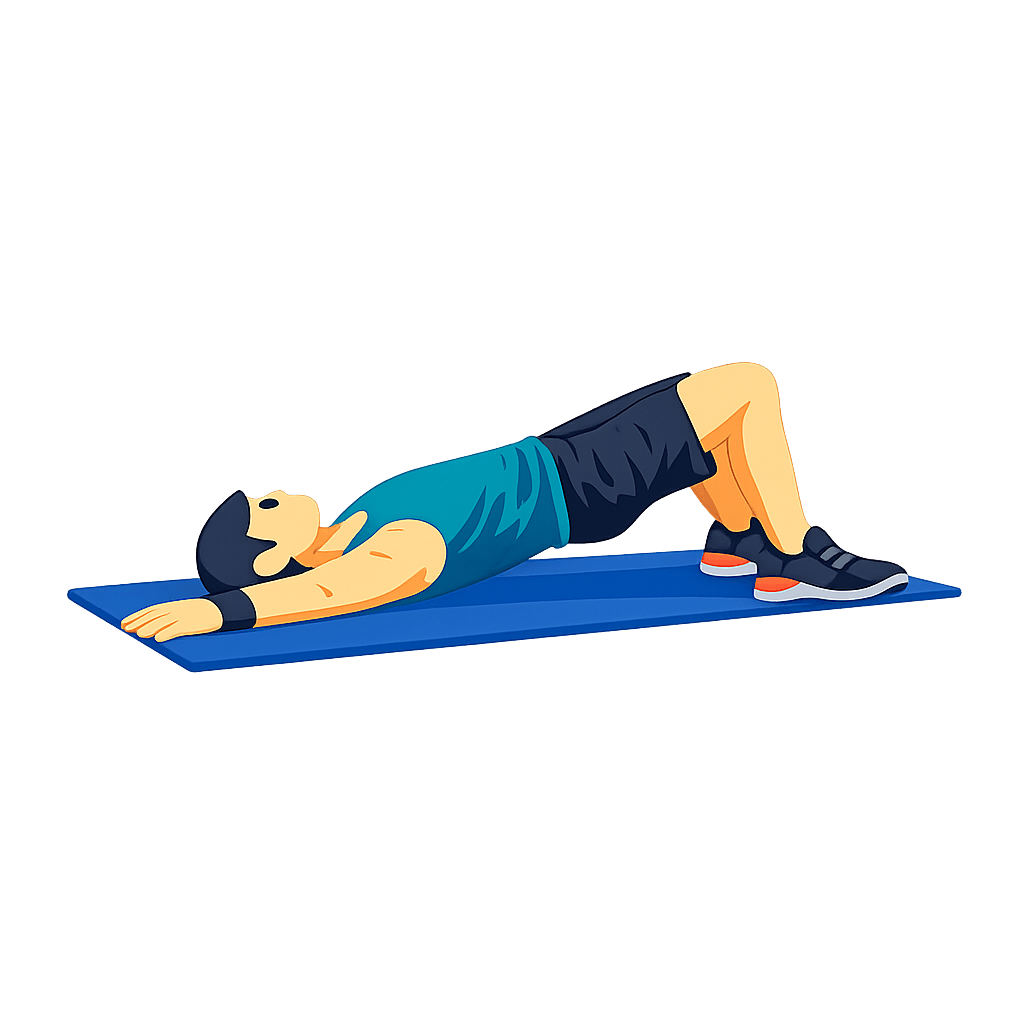
Glute Bridge
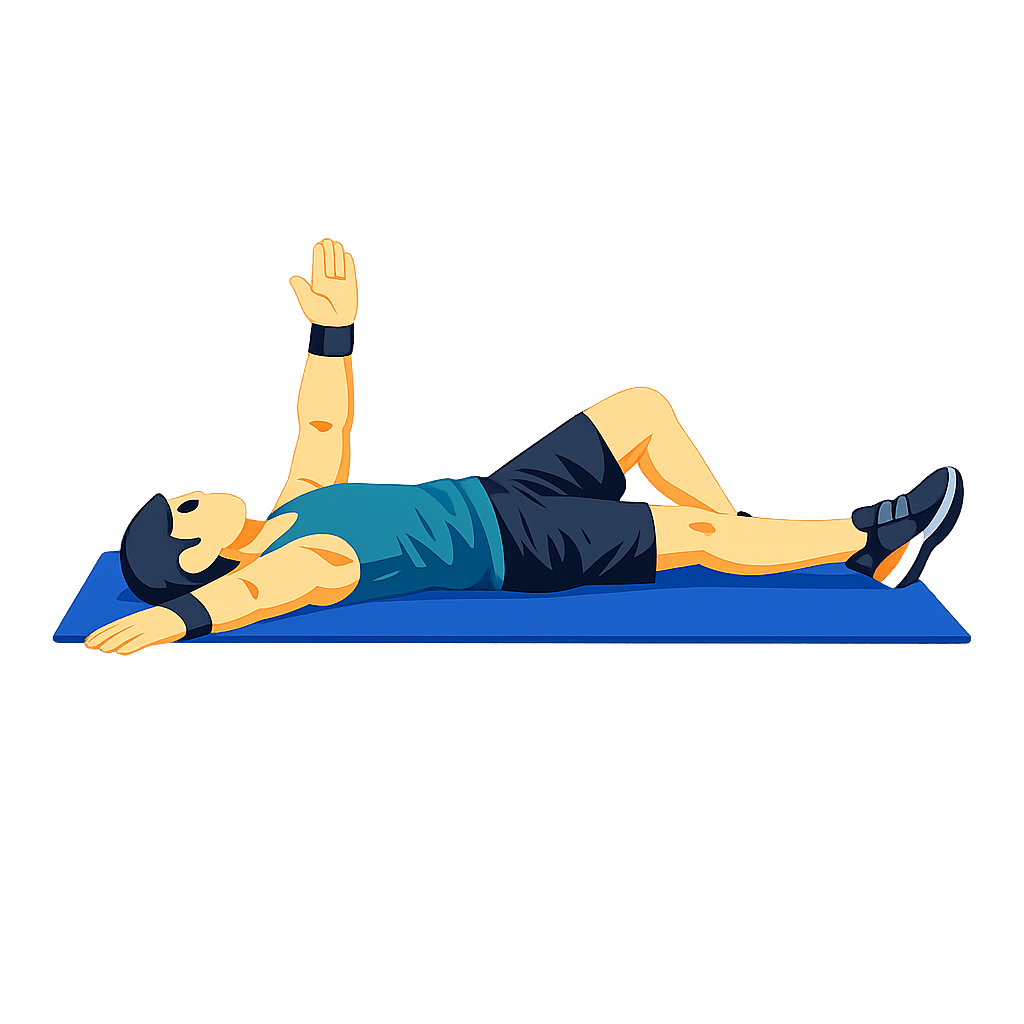
Dead Bug
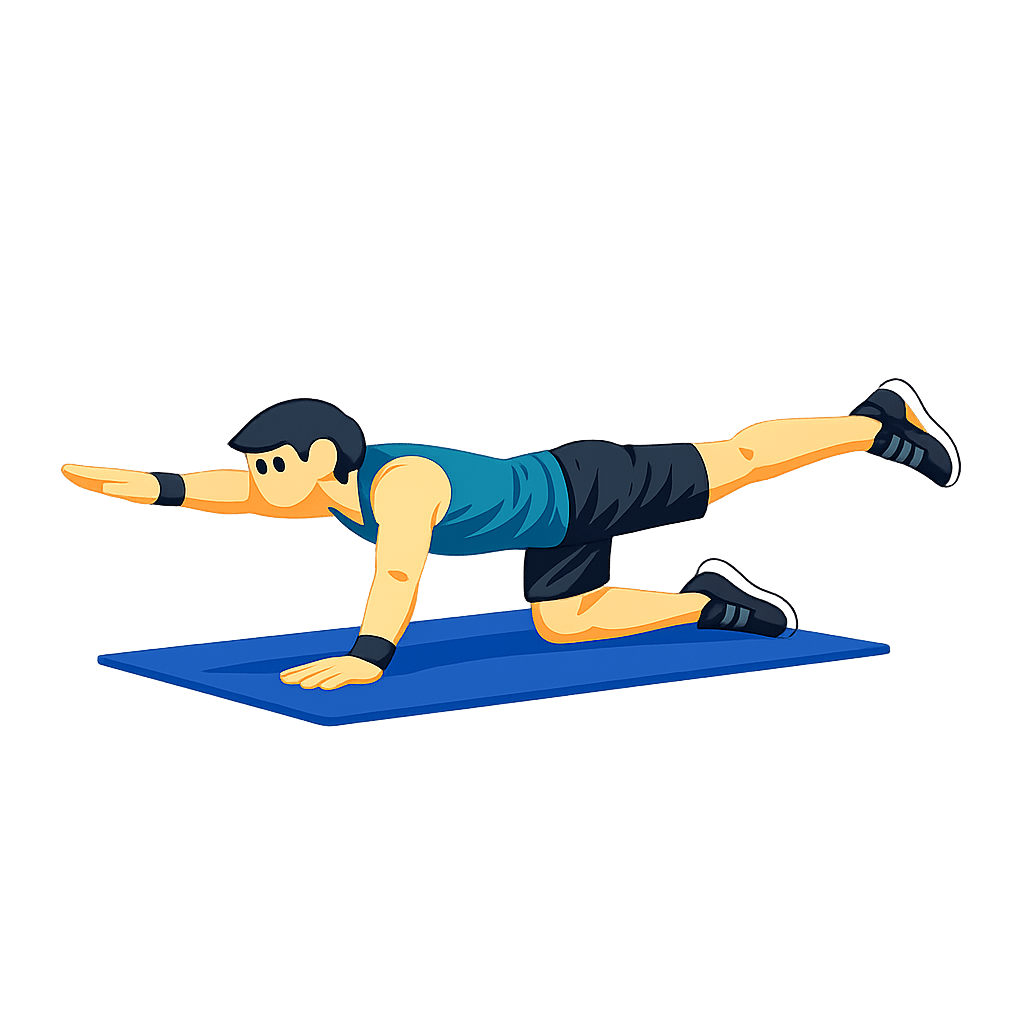
Bird Dog
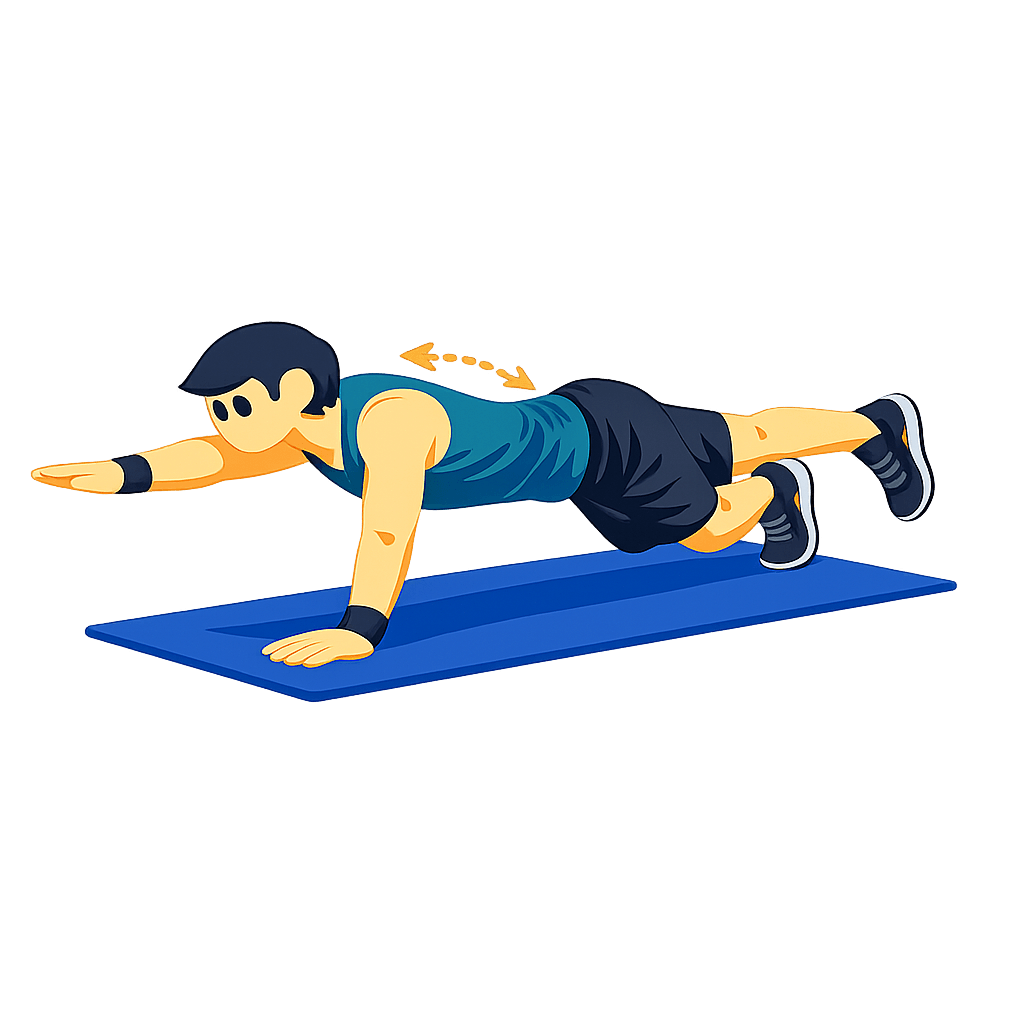
Scapular Push-Up
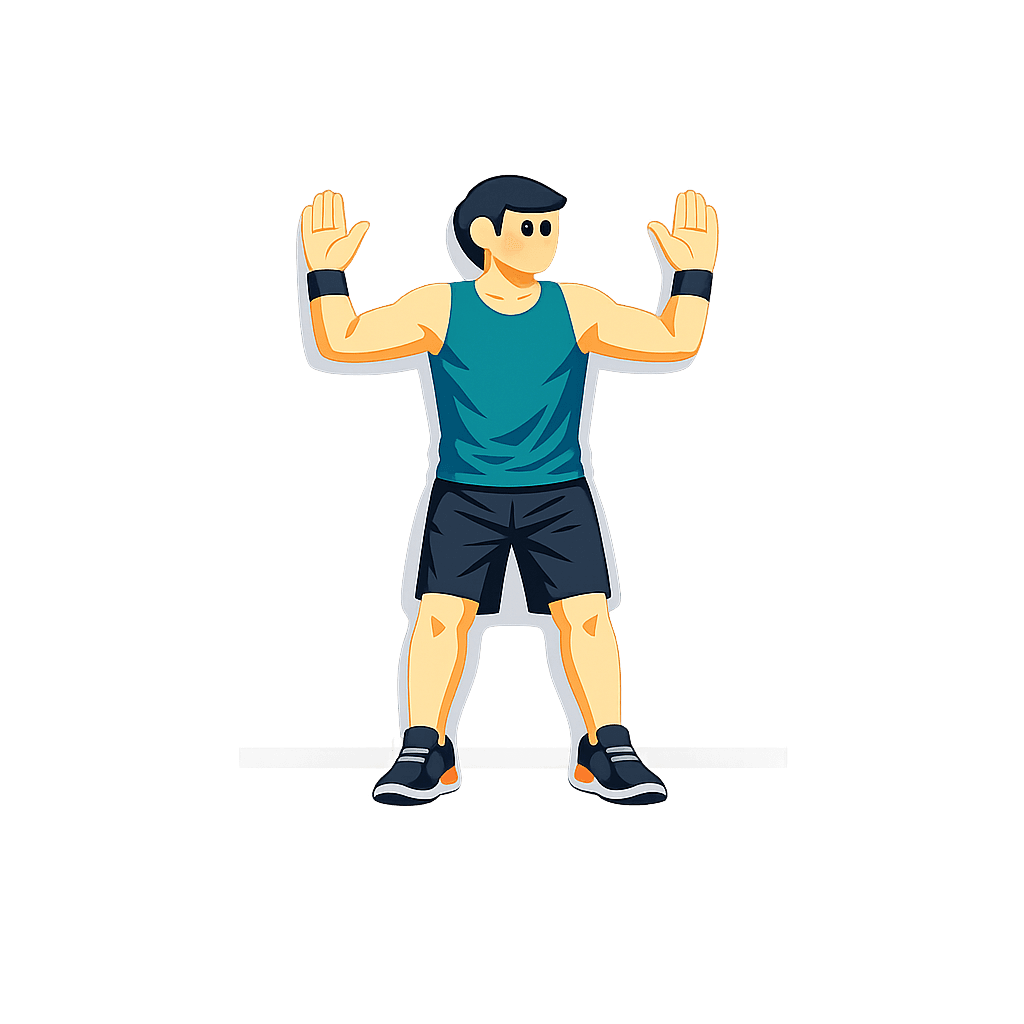
Wall Angels
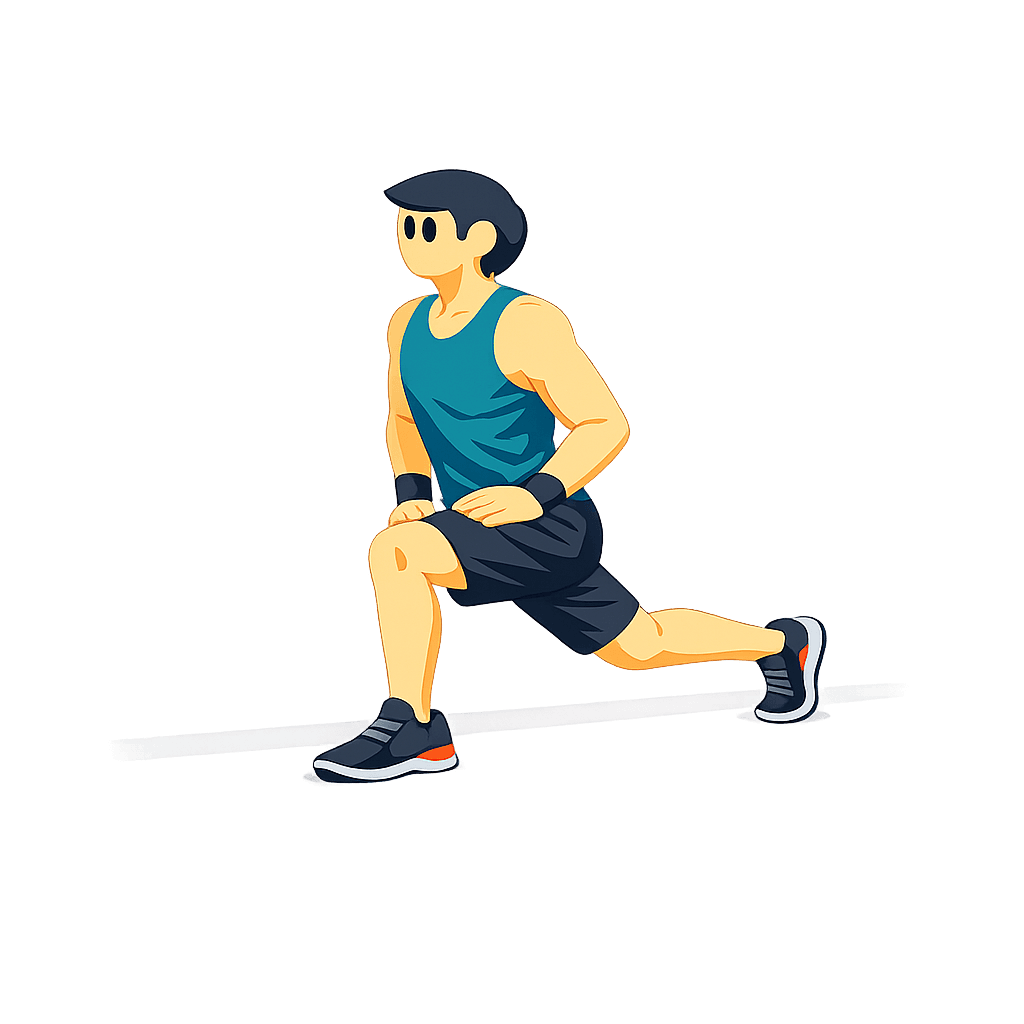
Split Squat Hold
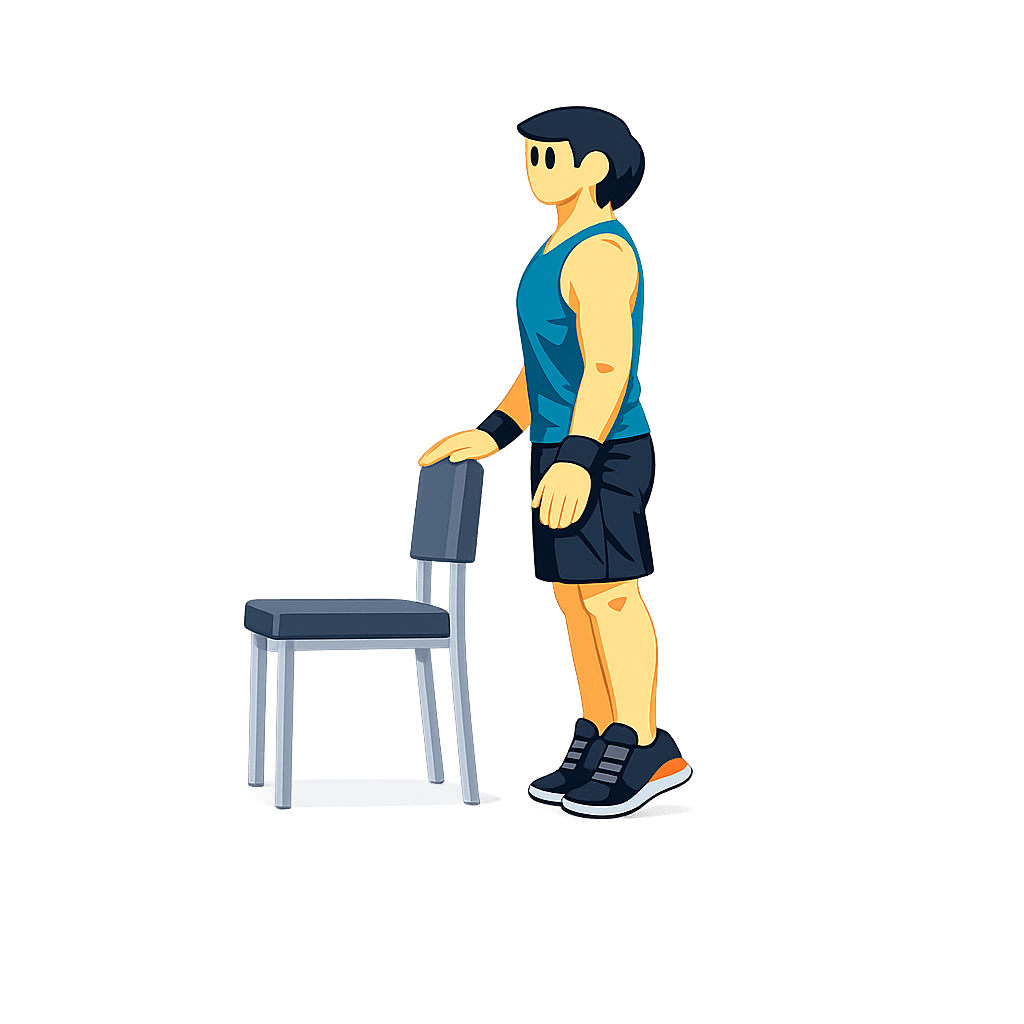
Calf Raise Hold
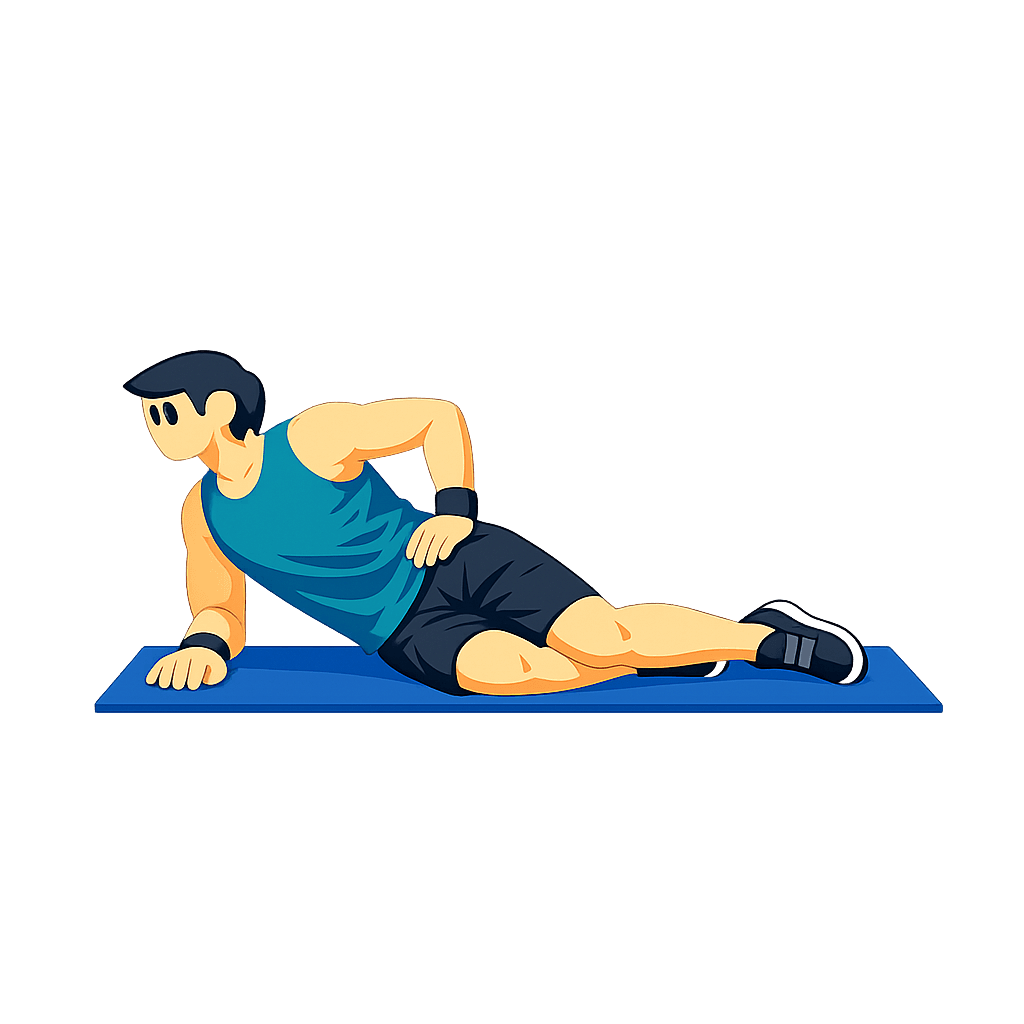
Side Plank Prep
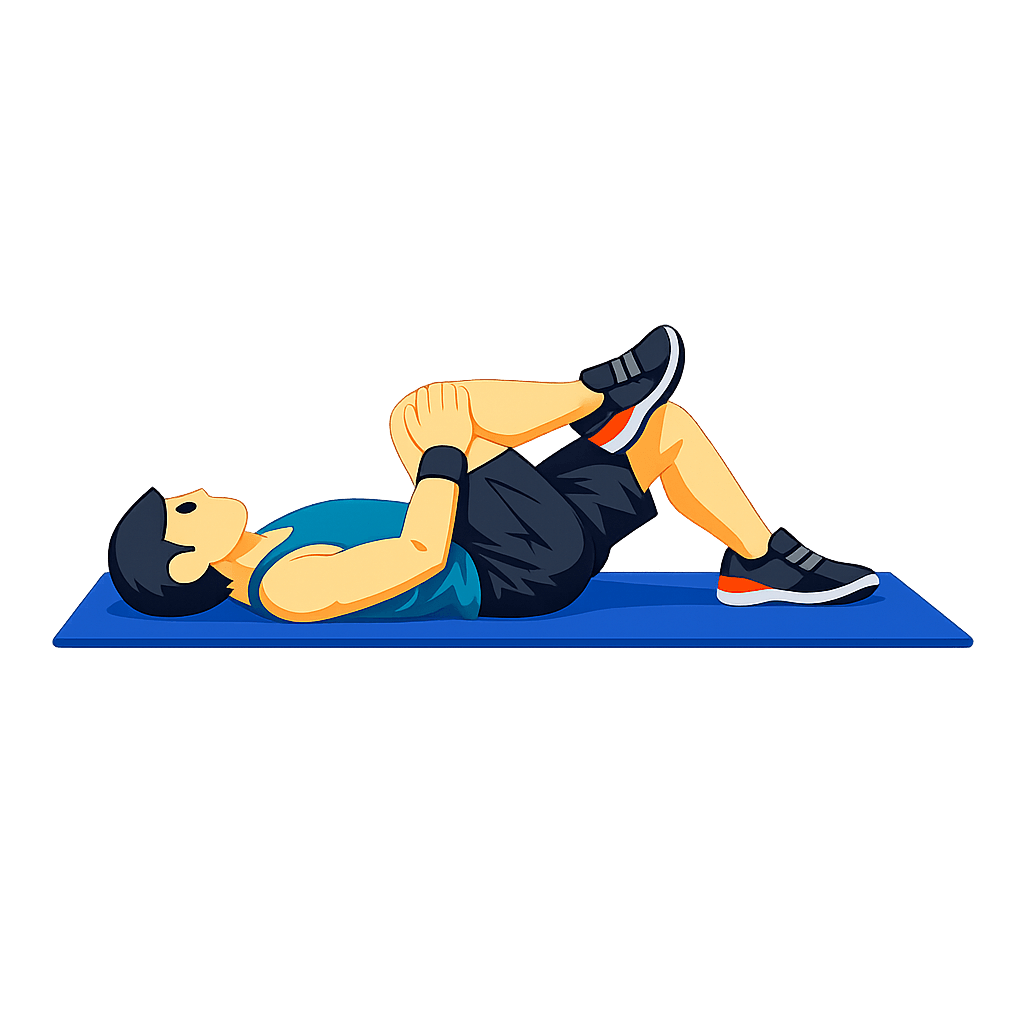
Figure Four Stretch
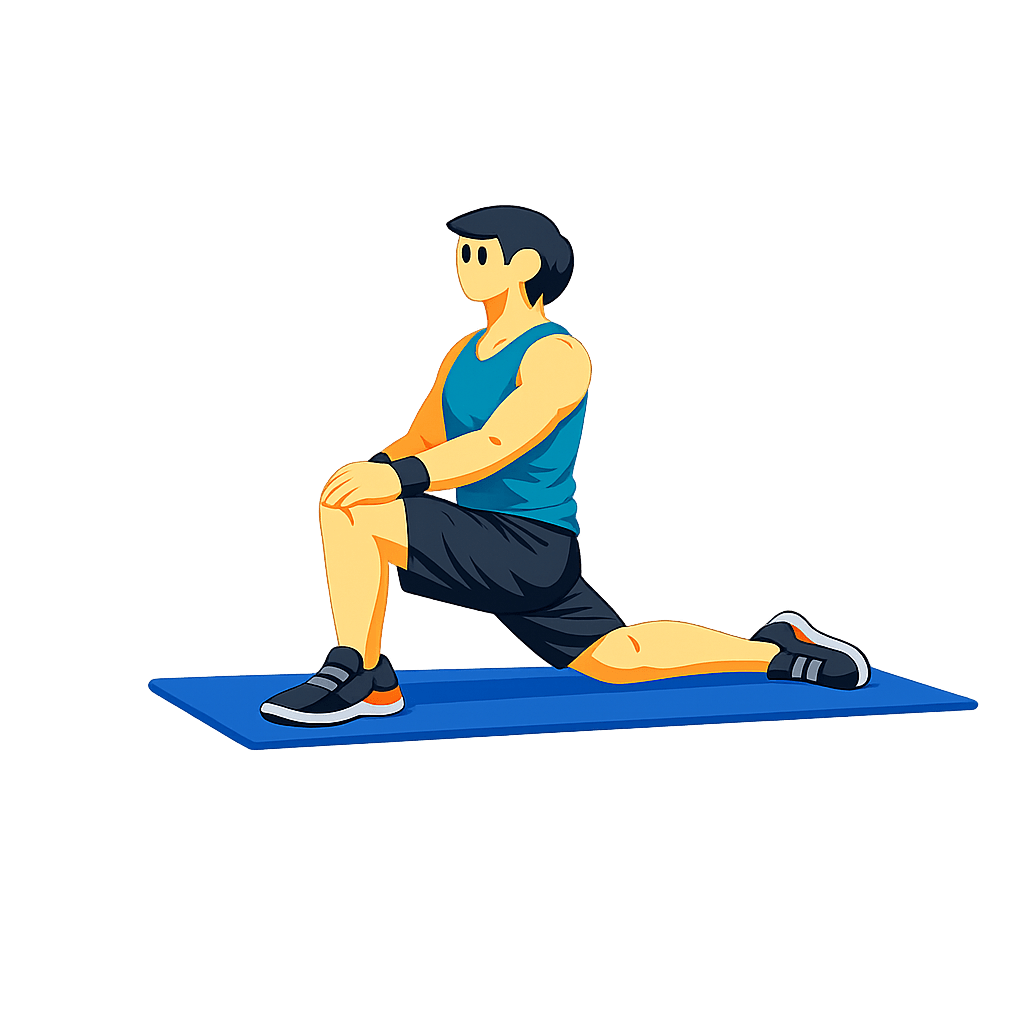
Low Lunge Hold
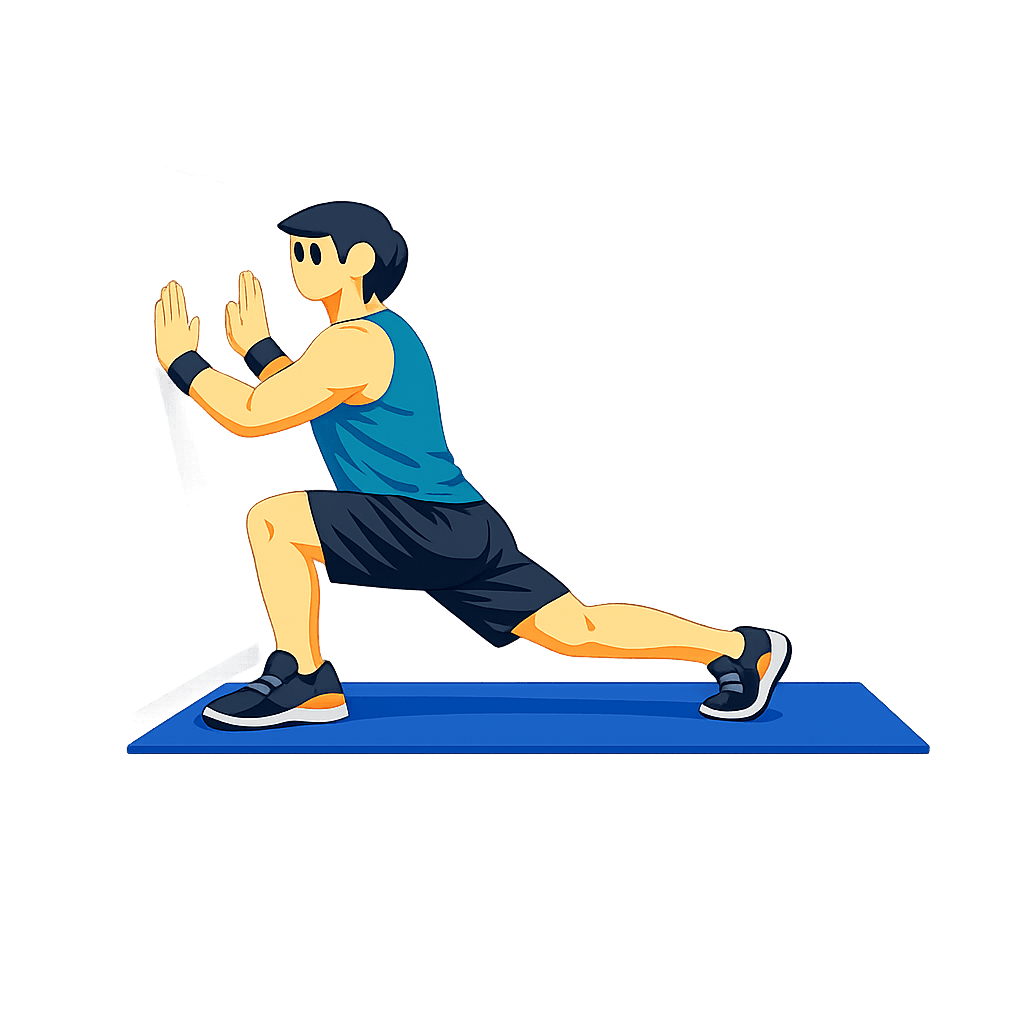
Calf Wall Stretch
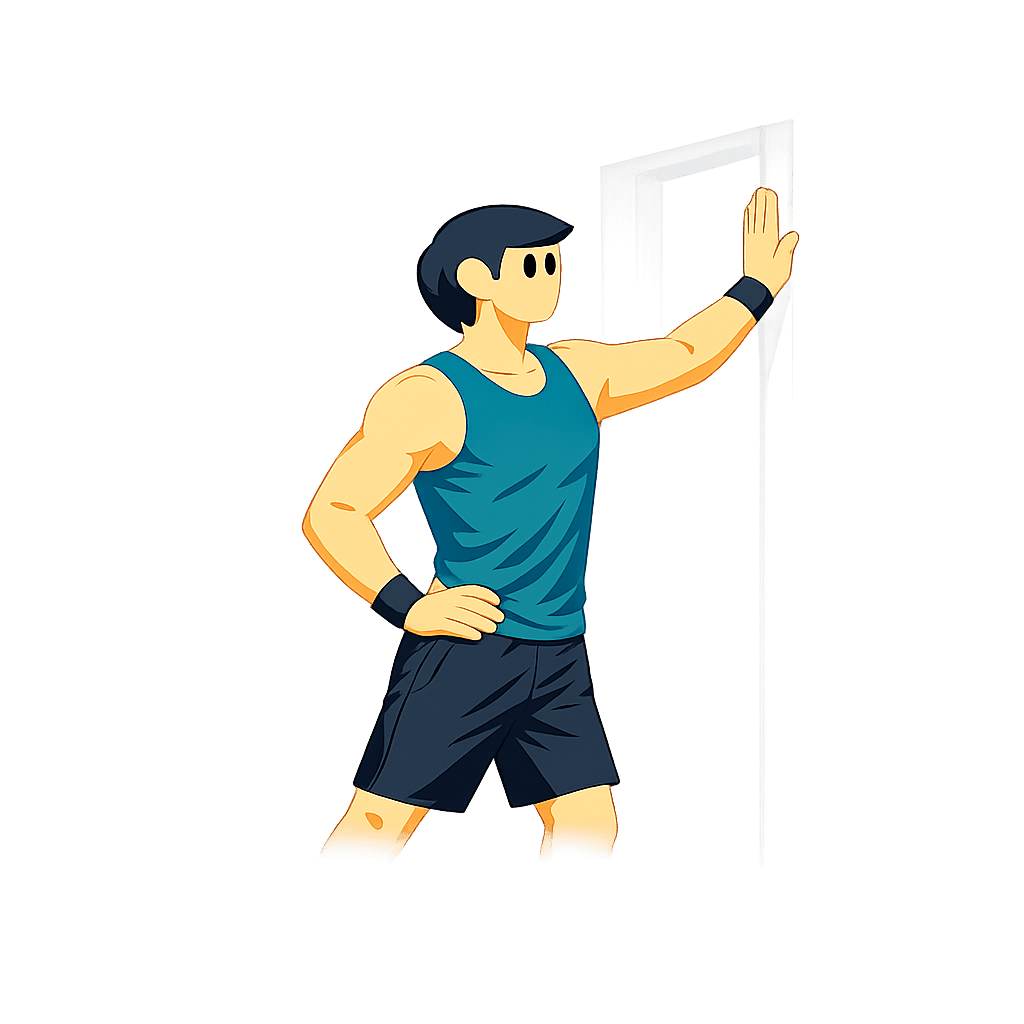
Doorway Chest Opener
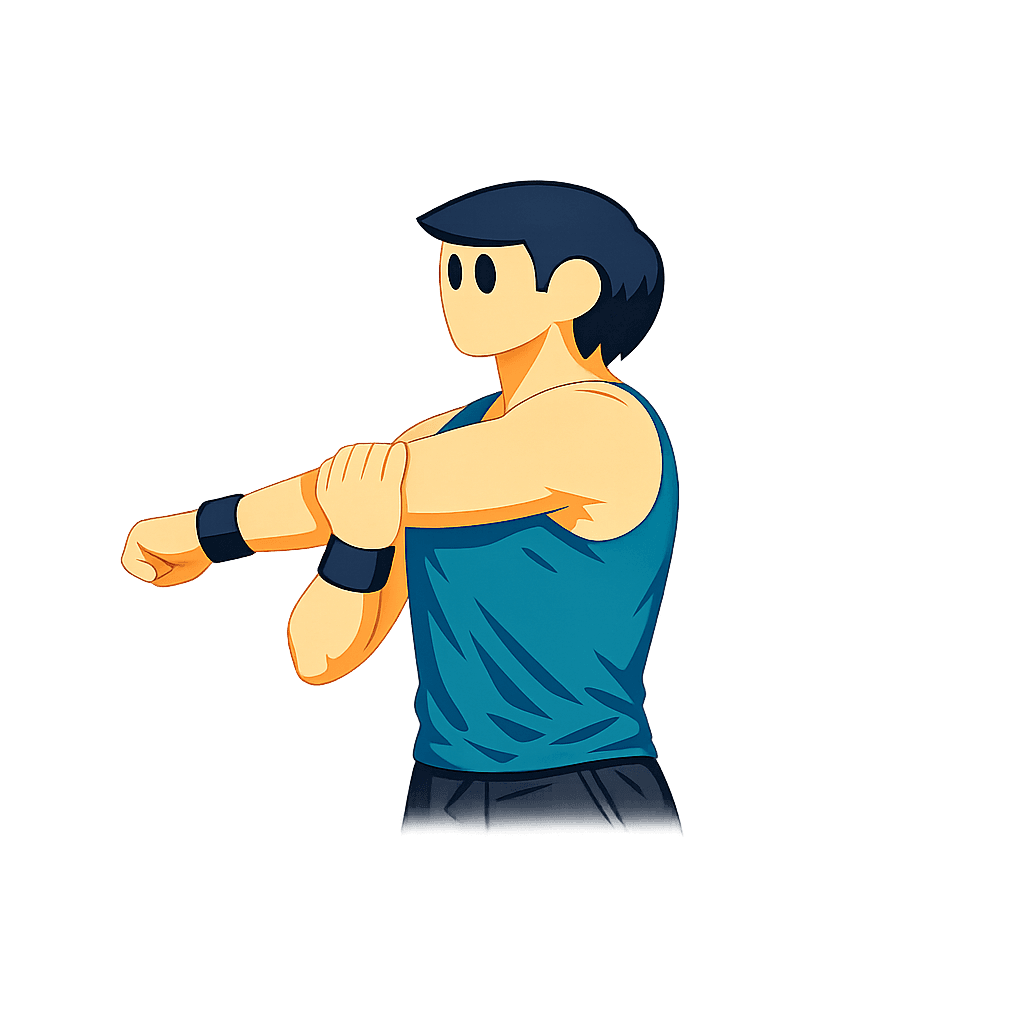
Cross-Body Shoulder Stretch
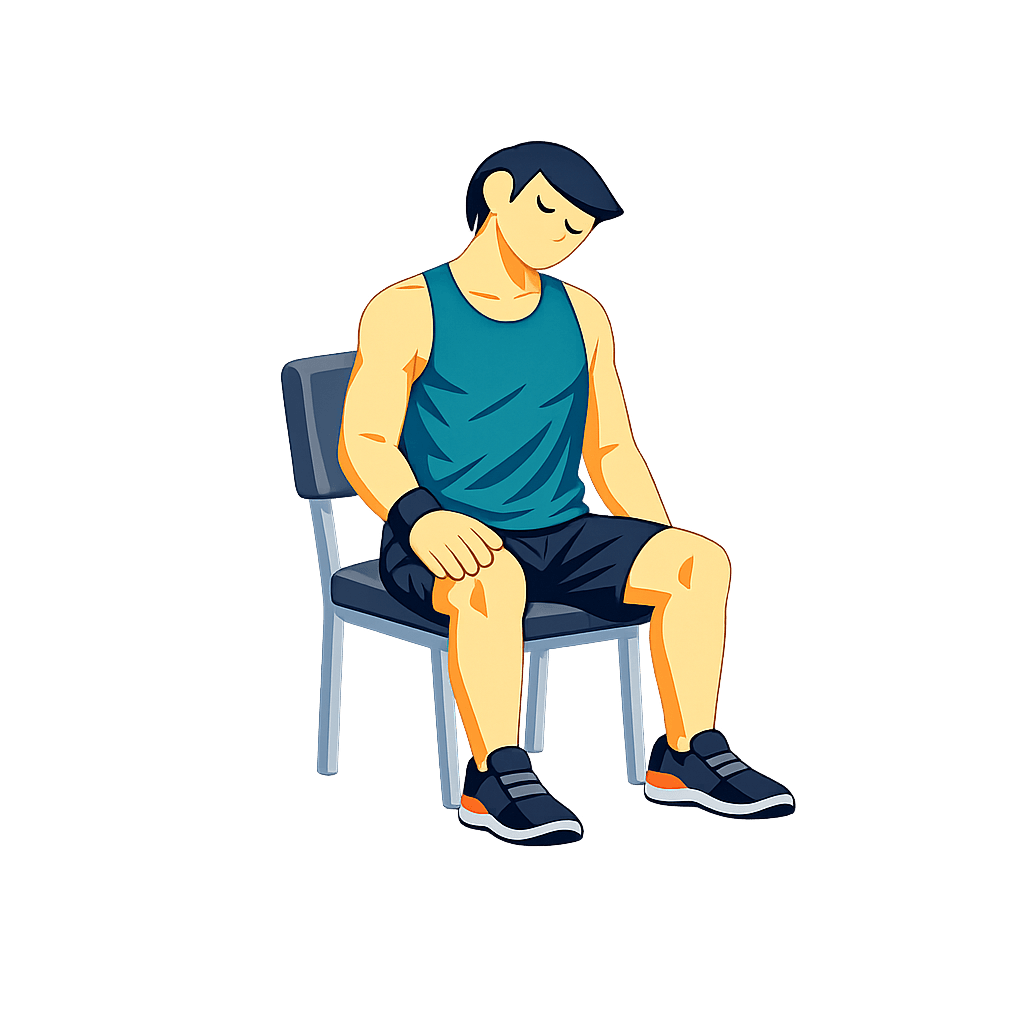
Seated Neck Stretch
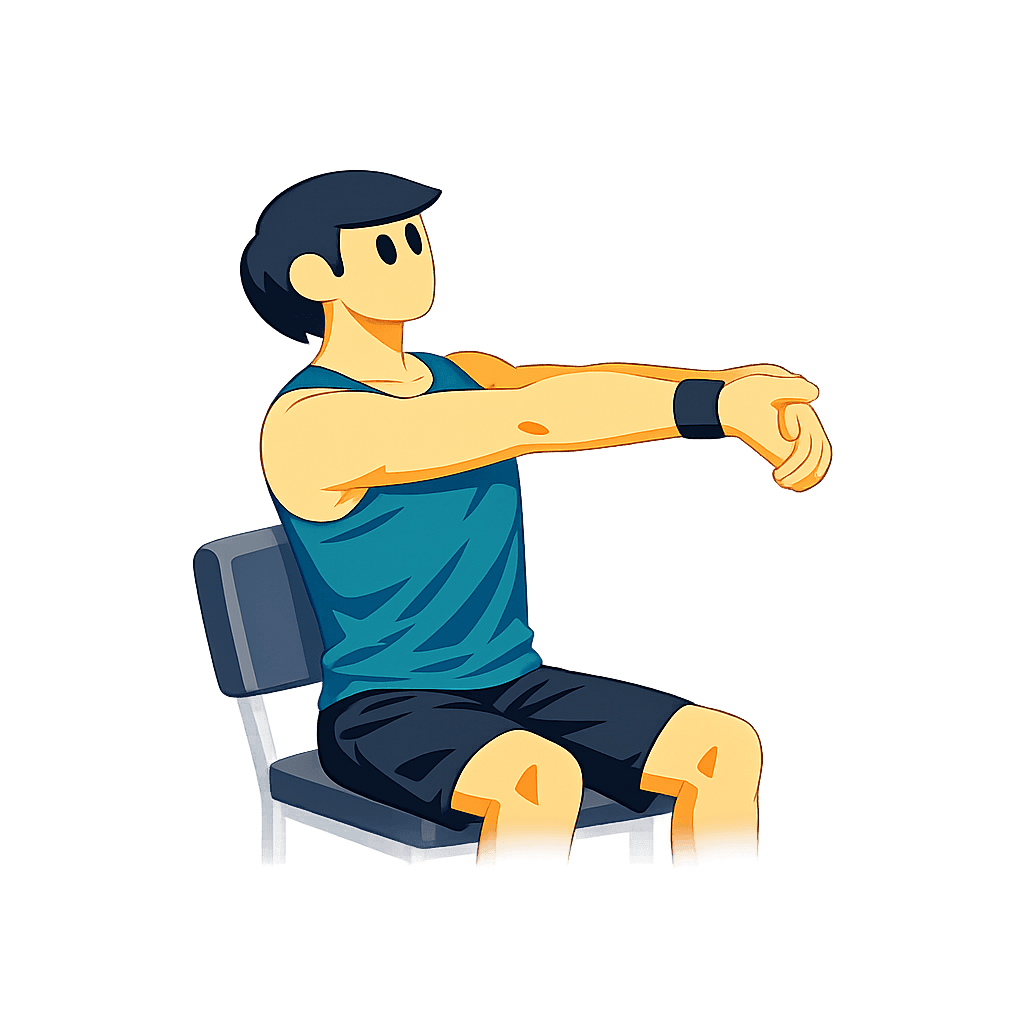
Seated Wrist Stretch
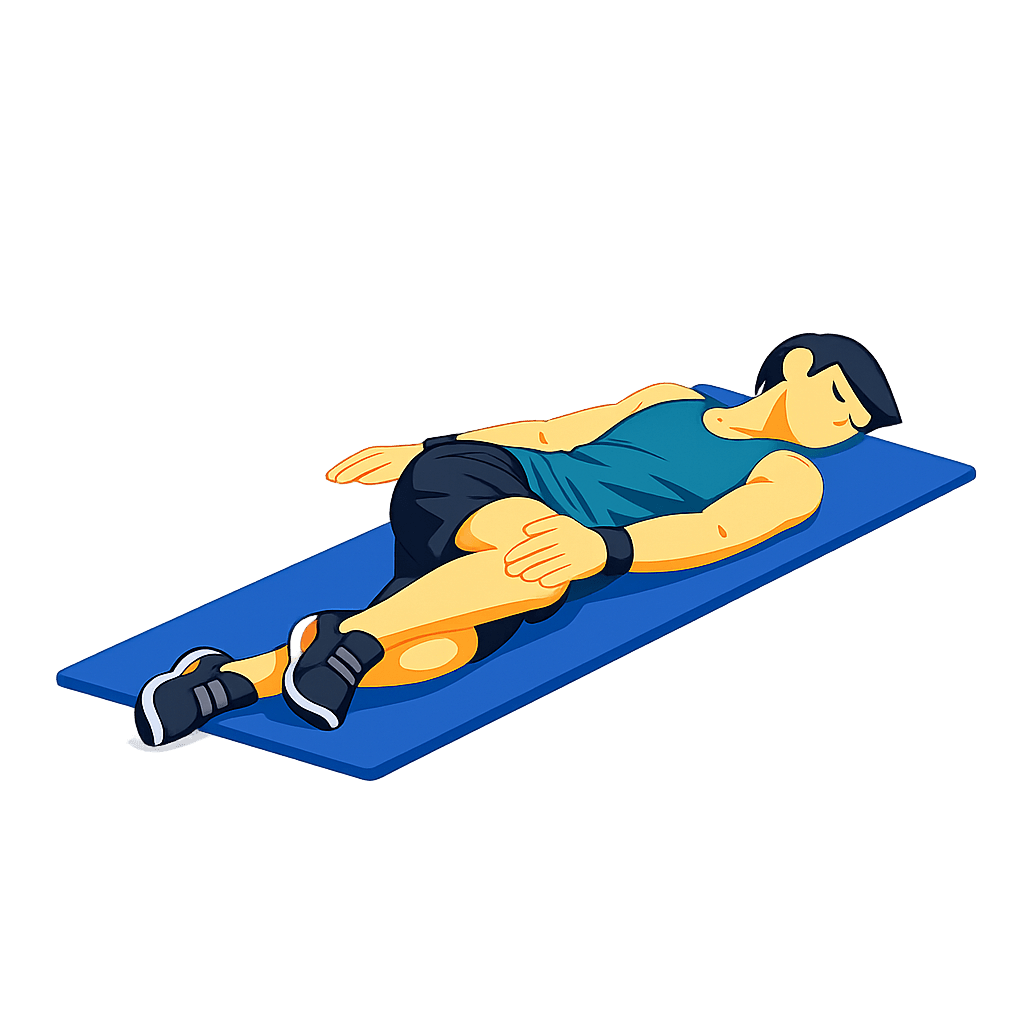
Supine Twist
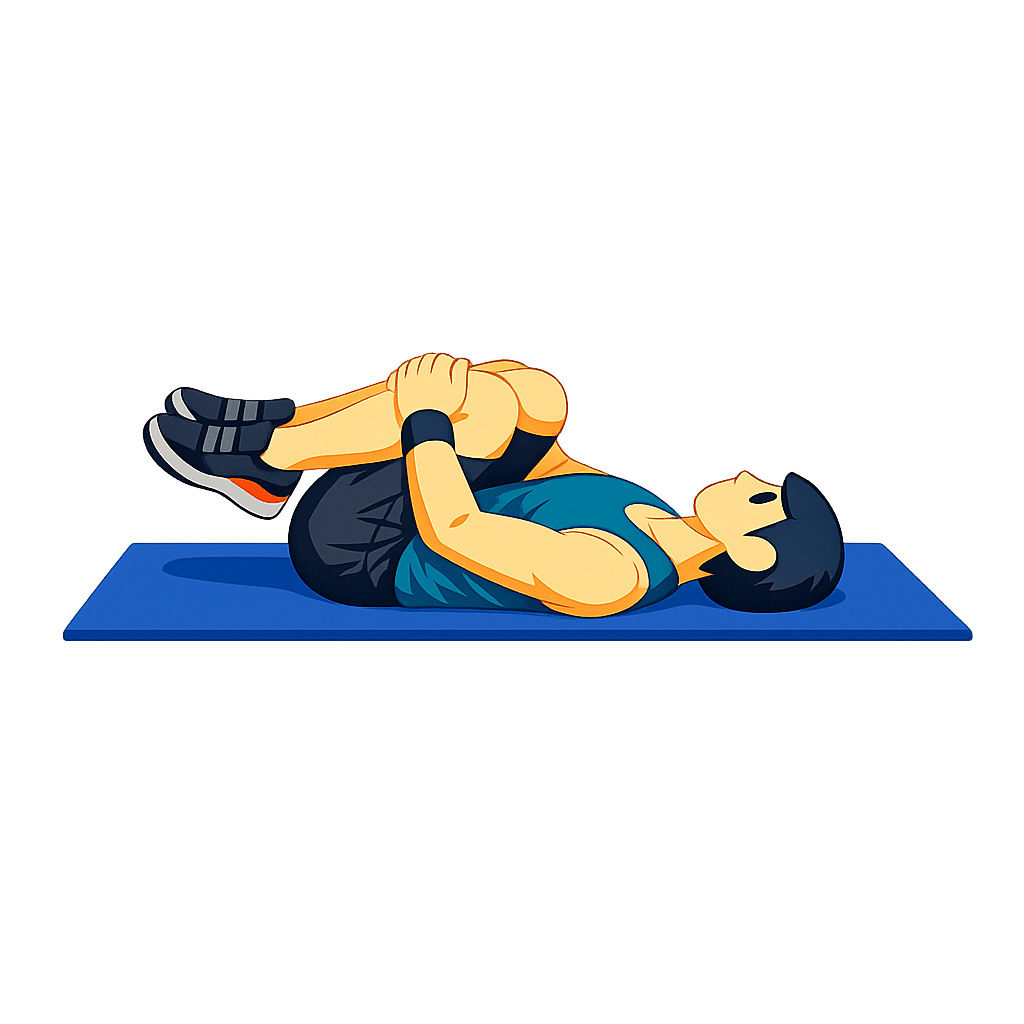
Knees-to-Chest
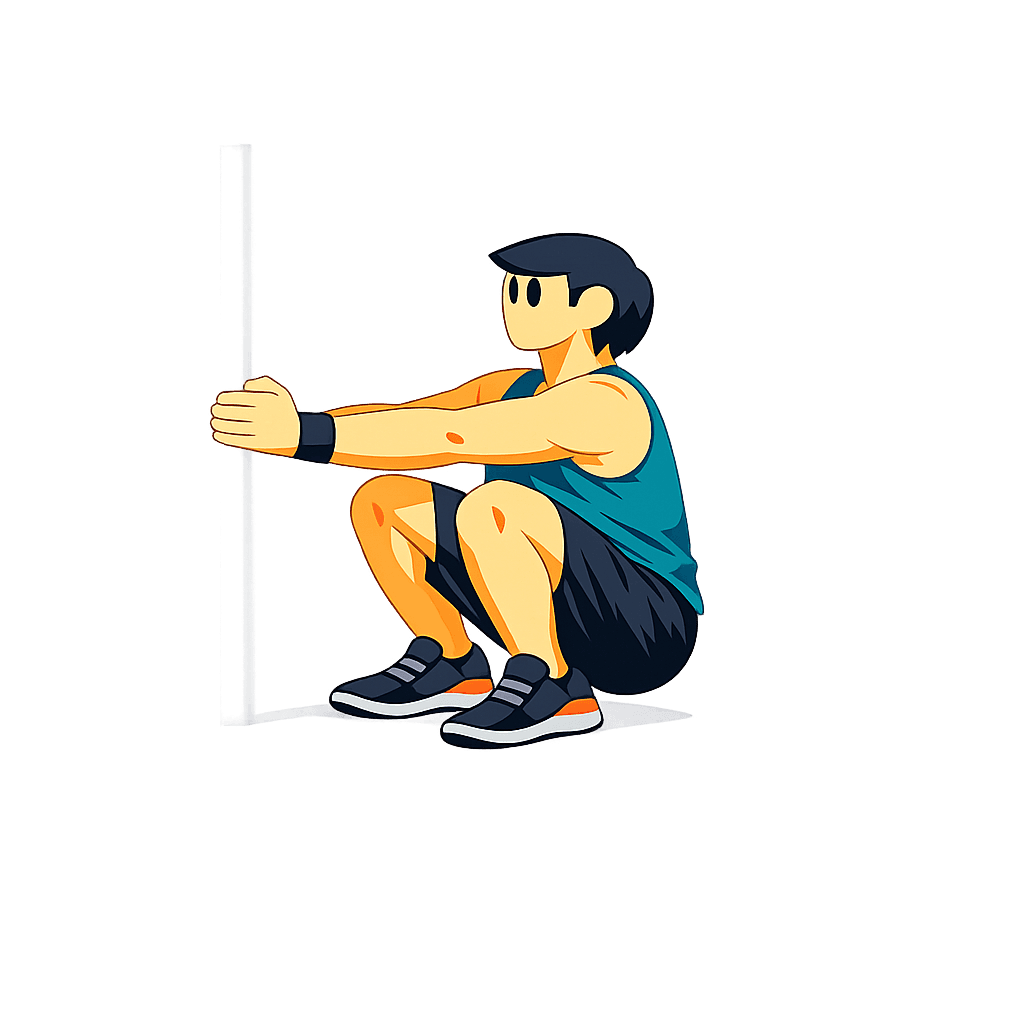
Supported Deep Squat Hold
Mobility Workout App exercise instructions
Neck CARs
How to do it
- Sit or stand tall with your shoulders relaxed.
- Slowly lower your chin, roll one ear toward the shoulder, look slightly upward, then continue the circle back to the start.
- Keep the circle small and smooth.
- Complete the reps in one direction, then reverse.
What to focus on
- Move the head slowly instead of swinging it.
- Keep the chest quiet and the shoulders down.
- Use a comfortable range you can control.
- Notice tight spots without forcing through them.
Make it easier
- Turn the circle into small half-circles.
- Do the movement seated with your back supported.
- Pause between directions if the neck feels tense.
Avoid this
- Dropping the head backward quickly.
- Making fast circles.
- Shrugging the shoulders.
- Pushing into dizziness, pinching, or sharp discomfort.
Shoulder CARs
How to do it
- Stand tall with one arm by your side.
- Reach the arm forward, overhead, around to the side, and back behind you in one slow circle.
- Keep the elbow mostly straight and the movement controlled.
- Complete the reps, then switch arms and reverse direction.
What to focus on
- Let the shoulder blade move naturally as the arm circles.
- Keep the ribs stacked instead of arching your back.
- Make the circle as large as you can control.
- Move slowly through the sticky parts.
Make it easier
- Bend the elbow slightly.
- Make a smaller circle.
- Stand beside a wall or chair if balance distracts you.
Avoid this
- Swinging the arm with momentum.
- Forcing through a shoulder pinch.
- Leaning or twisting the torso to fake more range.
- Shrugging the shoulder toward the ear.
Hip CARs
How to do it
- Stand tall and hold a wall or chair.
- Lift one knee in front of you.
- Open the knee out to the side, circle the thigh back, then return the foot to the floor.
- Complete the reps slowly, then switch sides.
What to focus on
- Move from the hip instead of the low back.
- Keep the standing leg steady.
- Keep the pelvis as level as possible.
- Use a slow circle you can control.
Make it easier
- Make the circle smaller.
- Keep the lifted foot closer to the floor.
- Use both hands on a support.
Avoid this
- Leaning far to the side.
- Twisting the whole body with the leg.
- Rushing through the back half of the circle.
- Forcing the hip into a pinch.
Ankle CARs
How to do it
- Sit or stand with one foot slightly lifted.
- Draw slow circles with the ankle.
- Move through the full comfortable circle, then reverse direction.
- Switch feet after completing the reps.
What to focus on
- Move the ankle, not the whole leg.
- Keep the toes relaxed but active.
- Make each circle smooth and controlled.
- Notice whether one direction feels harder.
Make it easier
- Sit down and rest the thigh on a chair.
- Make smaller circles.
- Move one direction at a time with a short pause between.
Avoid this
- Snapping or flicking the ankle.
- Turning the movement into knee circles.
- Rushing the reps.
- Forcing through sharp ankle discomfort.
Wrist Circles
How to do it
- Hold your hands in front of you with elbows relaxed.
- Make slow circles with both wrists.
- Reverse direction halfway through.
- Keep the rest of the arms quiet.
What to focus on
- Let the movement come from the wrists.
- Keep the fingers loose.
- Use an even pace.
- Feel the forearms warm up without gripping hard.
Make it easier
- Circle one wrist at a time.
- Keep the elbows closer to your sides.
- Make smaller circles.
Avoid this
- Clenching the fists tightly.
- Forcing the wrists into extreme angles.
- Moving so fast the forearms tense up.
- Locking the elbows.
Cat-Cow
How to do it
- Start on hands and knees with hands under shoulders and knees under hips.
- Round your back upward and let your head follow.
- Slowly arch the spine, lift the chest, and look slightly forward.
- Move back and forth for the reps.
What to focus on
- Move through the whole spine, not just the neck or low back.
- Keep the arms steady.
- Match the movement with calm breathing.
- Move slowly enough to feel each transition.
Make it easier
- Place a folded towel under the knees.
- Keep the range smaller.
- Move only between neutral and a mild round.
Avoid this
- Collapsing into the shoulders.
- Forcing a deep low-back arch.
- Rushing the movement.
- Holding your breath.
Thoracic Open Book
How to do it
- Lie on your side with knees bent and stacked.
- Reach both arms forward.
- Open the top arm across your body and rotate your chest toward the ceiling.
- Return slowly, complete the reps, then switch sides.
What to focus on
- Keep the knees together so the rotation comes from the upper back.
- Follow the moving hand with your eyes if comfortable.
- Keep the shoulder relaxed as the arm opens.
- Move slowly at the end of the rotation.
Make it easier
- Place a pillow under your head.
- Put a pillow between the knees.
- Open the arm only halfway.
Avoid this
- Letting the hips roll back with the arm.
- Pulling the shoulder toward the floor.
- Forcing the twist from the low back.
- Moving quickly through the return.
Seated Spinal Rotation
How to do it
- Sit tall near the front of a chair.
- Place your hands lightly on your ribs, thighs, or the chair.
- Rotate your chest to one side, pause, then return to center.
- Alternate sides for the reps.
What to focus on
- Keep both sitting bones heavy on the chair.
- Turn the ribs and chest, not just the neck.
- Sit tall before each rotation.
- Use a smooth pause at the end range.
Make it easier
- Keep the hands on your ribs.
- Make the rotation smaller.
- Sit with your back lightly supported.
Avoid this
- Yanking yourself around with the chair.
- Slumping while you rotate.
- Twisting sharply through the low back.
- Letting the knees shift side to side.
Pelvic Tilts
How to do it
- Lie on your back with knees bent and feet flat.
- Gently tilt the pelvis so the low back moves closer to the floor.
- Release back to neutral without lifting the hips.
- Repeat slowly for the reps.
What to focus on
- Keep the movement small.
- Feel the pelvis roll rather than the whole body rocking.
- Keep the feet relaxed on the floor.
- Breathe normally while you move.
Make it easier
- Slow the reps down.
- Place a small pillow under the head.
- Use your hands on the hips to feel the movement.
Avoid this
- Turning it into a full bridge.
- Squeezing aggressively.
- Pushing the ribs upward.
- Holding your breath.
Arm Circles
How to do it
- Stand tall with arms extended or slightly bent.
- Circle both arms forward for the reps.
- Reverse and circle backward.
- Start small, then increase the range if it feels controlled.
What to focus on
- Keep the shoulders relaxed as the arms move.
- Stay tall through the spine.
- Use a steady rhythm.
- Keep the ribs from flaring as the arms rise.
Make it easier
- Make smaller circles.
- Circle one arm at a time.
- Bend the elbows slightly.
Avoid this
- Swinging hard.
- Shrugging toward the ears.
- Arching the back to lift higher.
- Moving through a shoulder pinch.
Leg Swings
How to do it
- Stand beside a wall or chair for support.
- Swing one leg forward and back in a controlled arc.
- Keep the standing foot grounded.
- Complete the reps, then switch sides.
What to focus on
- Let the hip move freely without twisting the torso.
- Start with a small range and build gradually.
- Keep the swing smooth, not jerky.
- Stand tall between reps.
Make it easier
- Tap the swinging foot down between reps.
- Use a smaller swing.
- Hold support with both hands.
Avoid this
- Kicking aggressively.
- Leaning backward on the forward swing.
- Rotating the pelvis on every rep.
- Losing control of the standing knee.
Hip Openers
How to do it
- Stand tall with feet under the hips.
- Lift one knee in front of you.
- Open the knee out to the side and step the foot back down.
- Alternate sides for the reps.
What to focus on
- Keep the standing leg steady.
- Open from the hip, not by twisting the low back.
- Use a controlled step down.
- Keep the torso upright.
Make it easier
- Hold a wall or chair.
- Lift the knee lower.
- Slow down and reset between sides.
Avoid this
- Swinging the leg without control.
- Letting the standing knee collapse inward.
- Leaning to create more range.
- Rushing the step down.
Walking Knee Hugs
How to do it
- Step forward and lift one knee toward your chest.
- Lightly hug the shin or behind the thigh.
- Release the leg and step forward.
- Alternate sides as you move.
What to focus on
- Stand tall during the knee lift.
- Keep the support foot stable.
- Pull gently, not forcefully.
- Move with balance between steps.
Make it easier
- Do the reps in place.
- Hold behind the thigh instead of the shin.
- Pause after each step to reset.
Avoid this
- Rounding the back heavily.
- Pulling the knee sharply.
- Leaning backward to lift higher.
- Moving faster than you can balance.
Dynamic Hamstring Sweep
How to do it
- Step one heel forward with the toes lifted.
- Hinge at the hips and sweep your hands toward the front foot.
- Stand back up and step through to the next side.
- Alternate sides for the reps.
What to focus on
- Keep the front leg long but not locked.
- Move from the hips instead of collapsing the chest.
- Keep the sweep light and controlled.
- Feel the back of the leg lengthen as you hinge.
Make it easier
- Bend the front knee more.
- Reach only toward the shin.
- Slow down and reset between sides.
Avoid this
- Bouncing at the bottom.
- Locking the front knee hard.
- Rounding deeply to reach the floor.
- Throwing the arms with momentum.
World's Greatest Stretch
How to do it
- Step into a long lunge with both hands near the front foot.
- Reach the inside arm toward the ceiling and rotate the chest open.
- Return the hand to the floor.
- Step back and switch sides.
What to focus on
- Keep the front foot grounded.
- Rotate through the upper back.
- Keep the movement deliberate between positions.
- Use the lunge as a stable base before twisting.
Make it easier
- Lower the back knee to the floor.
- Place hands on blocks or a sturdy support.
- Skip the rotation and hold the lunge.
Avoid this
- Rushing the transition.
- Letting the front knee cave inward.
- Forcing the twist from the low back.
- Dropping into a lunge you cannot control.
Lunge with Rotation
How to do it
- Step into a lunge.
- Bring the hands together or place one hand near the front leg.
- Rotate your chest toward the front leg.
- Return to center, step back, and switch sides.
What to focus on
- Find balance before rotating.
- Keep the front knee tracking over the foot.
- Turn the chest, not just the head.
- Keep the back leg active.
Make it easier
- Shorten the lunge.
- Lower the back knee.
- Keep the hands on the front thigh.
Avoid this
- Twisting before the lunge is stable.
- Letting the front knee drift inward.
- Collapsing the chest forward.
- Forcing a large rotation.
Deep Squat Pry
How to do it
- Stand with feet slightly wider than hip-width.
- Lower into a comfortable squat.
- Use your elbows or hands to gently guide the knees outward.
- Shift lightly side to side or hold the bottom position.
What to focus on
- Keep both feet grounded.
- Let the hips settle without bouncing.
- Keep the chest as lifted as you can.
- Explore the position with small controlled shifts.
Make it easier
- Hold a door frame or sturdy support.
- Place the heels on a small support.
- Stay higher in the squat.
Avoid this
- Forcing depth.
- Bouncing aggressively.
- Letting the arches collapse.
- Rounding heavily just to get lower.
Inchworm Walkout
How to do it
- Stand tall, then hinge forward and place your hands on the floor.
- Walk the hands out to a plank.
- Pause briefly.
- Walk the hands or feet back in and stand up.
What to focus on
- Bend the knees enough to move well.
- Keep the plank short and controlled.
- Move the hands deliberately.
- Feel the hamstrings and shoulders warm up.
Make it easier
- Bend the knees more.
- Walk out only partway.
- Skip the full plank and return sooner.
Avoid this
- Dropping the hips in plank.
- Rushing the walkout.
- Forcing straight legs.
- Letting the shoulders collapse.
Lateral Lunge Shift
How to do it
- Stand in a wide stance.
- Bend one knee and shift your hips toward that side.
- Keep the other leg long.
- Move through center and repeat to the other side.
What to focus on
- Keep the bent knee aligned with the foot.
- Sit the hips back slightly.
- Keep both feet grounded.
- Move smoothly from side to side.
Make it easier
- Use a narrower stance.
- Keep the hips higher.
- Hold a support in front of you.
Avoid this
- Dropping too low too soon.
- Letting the bent knee cave inward.
- Lifting the heel.
- Turning it into a fast side-to-side bounce.
90/90 Hip Switch
How to do it
- Sit with both knees bent in a 90/90 position.
- Keep the torso tall.
- Rotate both knees to switch to the other side.
- Continue switching with control.
What to focus on
- Move from the hips, not by throwing the upper body.
- Keep the switch slow and deliberate.
- Try to land softly on each side.
- Keep the chest lifted as much as possible.
Make it easier
- Place both hands behind you.
- Make the switch smaller.
- Sit on a folded towel.
Avoid this
- Slamming the knees down.
- Forcing the hips into the floor.
- Rushing the transition.
- Twisting the low back to finish the movement.
90/90 Forward Fold
How to do it
- Sit in a 90/90 position with one shin in front.
- Turn your chest toward the front leg.
- Hinge forward from the hips.
- Hold, breathe, then switch sides.
What to focus on
- Keep the front hip heavy.
- Fold with a long spine before rounding.
- Keep the stretch in the hip, not the knee.
- Use steady breathing during the hold.
Make it easier
- Sit on a folded towel.
- Keep the hands behind you.
- Fold only slightly forward.
Avoid this
- Pressing the knee down.
- Pulling yourself into the fold.
- Collapsing sharply through the back.
- Holding a position that irritates the knee.
Half-Kneeling Hip Flexor Rock
How to do it
- Start in a half-kneeling lunge.
- Gently tuck the pelvis so the front of the back hip lengthens.
- Shift forward a little, then rock back.
- Repeat before switching sides.
What to focus on
- Keep the ribs stacked over the hips.
- Feel the movement at the front of the back hip.
- Keep the front foot flat.
- Make the forward shift small and controlled.
Make it easier
- Place padding under the back knee.
- Shorten the stance.
- Keep one hand on a chair or thigh.
Avoid this
- Arching the low back.
- Pushing the front knee too far forward.
- Leaning back to fake more stretch.
- Squeezing into a painful kneeling position.
Frog Rockback
How to do it
- Start on hands and knees.
- Move the knees wider and keep the feet in line with the knees.
- Rock the hips back slowly, then return forward.
- Repeat through a comfortable range.
What to focus on
- Keep the movement slow.
- Let the inner thighs lengthen gradually.
- Keep the hands pressing lightly into the floor.
- Stop before the position feels forced.
Make it easier
- Bring the knees closer together.
- Use extra padding under the knees.
- Rock back only a short distance.
Avoid this
- Bouncing into the stretch.
- Forcing the hips all the way back.
- Letting the low back collapse.
- Holding tension in the shoulders.
Cossack Shift
How to do it
- Stand with feet wide.
- Shift your weight to one side and bend that knee.
- Keep the other leg long as you sit the hips back.
- Return through center and switch sides.
What to focus on
- Keep the bent knee following the toes.
- Stay controlled at the lowest point.
- Keep the long-leg heel grounded if possible.
- Use the hips, not momentum, to move side to side.
Make it easier
- Keep the hips higher.
- Use a chair or wall for balance.
- Narrow the stance.
Avoid this
- Dropping into a depth you cannot control.
- Letting the knee cave inward.
- Rolling onto the inside edge of the foot.
- Forcing the straight leg to stay completely locked.
Active Hamstring Stretch
How to do it
- Lie on your back and lift one leg.
- Hold behind the thigh.
- Slowly straighten and bend the knee.
- Complete the reps, then switch sides.
What to focus on
- Keep the pelvis steady.
- Move the knee slowly instead of pulling the leg closer.
- Keep the opposite leg relaxed.
- Feel the back of the thigh lengthen with each rep.
Make it easier
- Keep the raised knee more bent.
- Use a towel behind the thigh.
- Keep the opposite knee bent.
Avoid this
- Pulling behind the knee joint.
- Locking the leg hard.
- Lifting the hips off the floor.
- Forcing the foot toward your face.
Kneeling Adductor Rockback
How to do it
- Start on hands and knees.
- Extend one leg out to the side with the foot flat or heel down.
- Rock the hips back slowly, then return forward.
- Complete the reps, then switch sides.
What to focus on
- Keep the extended leg steady.
- Move the hips straight back.
- Keep the range controlled.
- Feel the inner thigh without forcing it.
Make it easier
- Bring the extended leg closer.
- Use padding under the kneeling knee.
- Rock back only slightly.
Avoid this
- Twisting the pelvis.
- Bouncing at the back of the movement.
- Letting the hands slide too far forward.
- Forcing the inner thigh stretch.
Wall Shoulder Slides
How to do it
- Stand with your back near a wall.
- Bend the elbows into a goalpost shape.
- Slide the arms upward, then back down.
- Keep the movement slow and controlled.
What to focus on
- Keep the ribs from flaring.
- Let the shoulder blades move smoothly.
- Keep the neck relaxed.
- Use only the range you can control.
Make it easier
- Step slightly away from the wall.
- Slide the arms only halfway.
- Keep the elbows lower.
Avoid this
- Forcing the wrists or elbows flat.
- Arching the low back.
- Shrugging as the arms rise.
- Moving through a shoulder pinch.
Thread the Needle
How to do it
- Start on hands and knees.
- Slide one arm under the opposite arm.
- Rotate the upper back and let the shoulder move toward the floor.
- Return to the start and switch sides.
What to focus on
- Keep the hips mostly steady.
- Rotate through the upper back.
- Let the moving arm glide smoothly.
- Keep weight light on the head and neck.
Make it easier
- Reduce how far the arm reaches.
- Rest the shoulder on a pillow.
- Keep the movement dynamic instead of holding.
Avoid this
- Collapsing onto the neck.
- Forcing the shoulder to the floor.
- Shifting the hips far to one side.
- Rushing the return.
Child's Pose Reach
How to do it
- Start on hands and knees.
- Sit the hips back toward the heels.
- Reach the arms forward.
- Walk the hands slightly to one side, hold, then switch sides.
What to focus on
- Reach long through the arms and ribs.
- Keep the breath steady.
- Let the hips settle only as far as comfortable.
- Feel the side body and shoulders lengthen.
Make it easier
- Place a pillow between hips and heels.
- Keep the knees closer together.
- Rest the forearms instead of reaching far.
Avoid this
- Forcing the hips to the heels.
- Jamming the shoulders.
- Holding the breath.
- Letting the position become painful in the knees.
Glute Bridge
How to do it
- Lie on your back with knees bent and feet flat.
- Press through the feet and lift the hips.
- Pause briefly at the top.
- Lower with control and repeat.
What to focus on
- Keep the knees pointing forward.
- Lift from the glutes, not by over-arching the back.
- Keep the ribs calm.
- Lower slowly instead of dropping.
Make it easier
- Lift only halfway.
- Reduce the reps.
- Place the feet a little closer to the hips.
Avoid this
- Pushing mostly through the toes.
- Flaring the ribs upward.
- Letting the knees fall outward or inward.
- Turning the top position into a backbend.
Dead Bug
How to do it
- Lie on your back with arms up and knees bent over the hips.
- Slowly lower one arm and the opposite leg.
- Return to the start.
- Alternate sides for the reps.
What to focus on
- Keep the low back controlled against the floor.
- Move slowly enough to stay steady.
- Reach long through the arm and leg.
- Exhale as you extend if that helps control.
Make it easier
- Move only the legs.
- Keep the knees more bent.
- Tap the heel down instead of extending fully.
Avoid this
- Arching the back.
- Rushing the reps.
- Letting the ribs pop up.
- Holding your breath.
Bird Dog
How to do it
- Start on hands and knees.
- Reach one arm forward and the opposite leg back.
- Pause briefly.
- Return to the floor and switch sides.
What to focus on
- Keep the hips level.
- Reach long instead of lifting high.
- Keep the neck in line with the spine.
- Move with control on the return.
Make it easier
- Move only the legs.
- Move only the arms.
- Keep the toes close to the floor.
Avoid this
- Rotating the hips open.
- Sagging through the low back.
- Kicking the leg high.
- Shifting weight suddenly from side to side.
Scapular Push-Up
How to do it
- Start in a plank or hands-and-knees position.
- Keep the elbows straight.
- Glide the shoulder blades apart to push the floor away.
- Let the shoulder blades come slightly together, then repeat.
What to focus on
- Move from the shoulder blades.
- Keep the neck long.
- Keep the elbows straight but not locked aggressively.
- Use a small, controlled range.
Make it easier
- Do it on hands and knees.
- Use a wall or countertop.
- Reduce the range of movement.
Avoid this
- Bending the elbows like a push-up.
- Sinking the low back.
- Shrugging toward the ears.
- Moving too fast to feel the shoulder blades.
Wall Angels
How to do it
- Stand with your back near a wall.
- Bend the arms into a goalpost shape.
- Slowly move the arms up and down like a snow angel.
- Stay within a smooth range.
What to focus on
- Keep the ribs from lifting.
- Keep the neck relaxed.
- Let the shoulder blades rotate.
- Move evenly on both sides.
Make it easier
- Step a little away from the wall.
- Keep the arms lower.
- Use a smaller range.
Avoid this
- Forcing the arms flat to the wall.
- Arching the low back.
- Shrugging.
- Pushing through a shoulder pinch.
Split Squat Hold
How to do it
- Step into a staggered stance.
- Bend both knees and lower into a controlled split squat.
- Hold the bottom position briefly.
- Stand back up and switch sides.
What to focus on
- Keep the front foot grounded.
- Keep the torso tall.
- Let the back hip open without leaning far forward.
- Keep the front knee tracking with the toes.
Make it easier
- Shorten the stance.
- Hold a wall or chair.
- Lower only partway.
Avoid this
- Letting the front knee collapse inward.
- Dropping quickly into the bottom.
- Leaning heavily onto the front thigh.
- Forcing depth before you have control.
Calf Raise Hold
How to do it
- Stand tall with feet about hip-width apart.
- Rise onto the balls of the feet.
- Pause briefly at the top.
- Lower slowly and repeat.
What to focus on
- Control the lowering phase.
- Keep the ankles from rolling outward.
- Press evenly through the big toe and little toe side.
- Stay tall through the body.
Make it easier
- Hold a wall or chair.
- Use a smaller lift.
- Do fewer reps.
Avoid this
- Bouncing at the bottom.
- Dropping the heels quickly.
- Letting the feet collapse inward.
- Leaning forward to finish the reps.
Side Plank Prep
How to do it
- Lie on one side with knees bent.
- Place the forearm under the shoulder.
- Lift the hips into a short side plank.
- Hold briefly, lower, then switch sides.
What to focus on
- Keep the shoulder stacked over the elbow.
- Make a straight line from head to knees.
- Press the floor away with the forearm.
- Keep the chest facing forward.
Make it easier
- Keep the bottom hip close to the floor.
- Shorten the hold.
- Place the top hand on the floor for support.
Avoid this
- Sinking into the shoulder.
- Rolling the chest toward the floor.
- Letting the hips drift backward.
- Holding after alignment is lost.
Figure Four Stretch
How to do it
- Lie on your back with knees bent.
- Cross one ankle over the opposite thigh.
- Draw the legs gently toward you.
- Hold, breathe, then switch sides.
What to focus on
- Keep the stretch in the outer hip.
- Keep the head and shoulders relaxed.
- Keep the crossed foot gently flexed.
- Use light, steady pressure.
Make it easier
- Keep the bottom foot on the floor.
- Hold behind the thigh with a towel.
- Move the legs farther away from the chest.
Avoid this
- Pressing directly on the knee.
- Pulling sharply.
- Lifting the head and neck.
- Forcing the hip into a pinchy position.
Low Lunge Hold
How to do it
- Start in a half-kneeling lunge.
- Shift the hips slightly forward.
- Keep the torso upright.
- Hold, breathe, then switch sides.
What to focus on
- Gently tuck the pelvis.
- Feel the front of the back hip lengthen.
- Keep the front foot planted.
- Keep the ribs stacked over the hips.
Make it easier
- Place padding under the back knee.
- Shorten the stance.
- Rest hands on the front thigh.
Avoid this
- Arching the low back.
- Pushing the front knee too far forward.
- Leaning back to create more stretch.
- Forcing the kneeling leg into discomfort.
Calf Wall Stretch
How to do it
- Place both hands on a wall.
- Step one foot back.
- Keep the back heel pressing toward the floor.
- Hold, then switch sides.
What to focus on
- Point the back foot forward.
- Keep the back leg long but not locked.
- Keep the hips facing the wall.
- Breathe into the stretch.
Make it easier
- Step the back foot closer.
- Bend the back knee slightly.
- Use lighter pressure into the wall.
Avoid this
- Turning the back foot outward.
- Bouncing.
- Letting the heel lift.
- Collapsing the front knee inward.
Doorway Chest Opener
How to do it
- Place one forearm on a doorway or wall.
- Keep the elbow around shoulder height or slightly lower.
- Gently turn the chest away from the arm.
- Hold, then switch sides.
What to focus on
- Keep the shoulder relaxed.
- Feel the stretch across the chest.
- Keep the ribs from flaring forward.
- Use light pressure against the wall.
Make it easier
- Lower the elbow.
- Stand closer to the doorway.
- Reduce the turn away from the arm.
Avoid this
- Forcing the arm behind the body.
- Shrugging the shoulder.
- Twisting sharply.
- Stretching into tingling or numbness.
Cross-Body Shoulder Stretch
How to do it
- Bring one arm across the chest.
- Use the opposite arm to support it.
- Hold with light pressure.
- Switch sides.
What to focus on
- Keep the stretched shoulder down.
- Keep the chest facing forward.
- Support the upper arm rather than pulling hard at the elbow.
- Keep the neck relaxed.
Make it easier
- Lower the arm slightly.
- Use less pressure.
- Do it seated.
Avoid this
- Pulling directly on the elbow joint.
- Twisting the torso.
- Hunching both shoulders.
- Forcing the arm into a sharp pinch.
Seated Neck Stretch
How to do it
- Sit tall with both feet on the floor.
- Tip one ear gently toward the same-side shoulder.
- Let the opposite shoulder stay heavy.
- Hold, then switch sides.
What to focus on
- Keep the stretch light.
- Keep the chin slightly tucked.
- Relax the jaw.
- Let the shoulder stay down.
Make it easier
- Use no hand pressure.
- Reduce the head tilt.
- Sit with your back supported.
Avoid this
- Pulling the head hard.
- Turning the chin sharply.
- Lifting the opposite shoulder.
- Holding through dizziness or sharp discomfort.
Seated Wrist Stretch
How to do it
- Sit tall and extend one arm forward.
- Gently draw the fingers back with the other hand.
- Turn the palm down and repeat.
- Switch sides.
What to focus on
- Keep the elbow soft.
- Stretch through the forearm, not just the fingers.
- Keep the shoulder relaxed.
- Use gentle pressure.
Make it easier
- Bend the elbow more.
- Use less pull on the fingers.
- Shorten the hold.
Avoid this
- Locking the elbow hard.
- Forcing the wrist angle.
- Pulling individual fingers aggressively.
- Shrugging the shoulder.
Supine Twist
How to do it
- Lie on your back.
- Bring one knee across the body.
- Let the opposite shoulder relax toward the floor.
- Hold, breathe, then switch sides.
What to focus on
- Keep the twist comfortable.
- Let the ribs and low back soften.
- Use the floor for support.
- Keep the neck relaxed.
Make it easier
- Place a pillow under the crossing knee.
- Keep the knee closer to center.
- Bend both knees before twisting.
Avoid this
- Forcing the knee to the floor.
- Twisting into sharp low-back discomfort.
- Holding tension in the shoulders.
- Pulling the leg aggressively across the body.
Knees-to-Chest
How to do it
- Lie on your back.
- Draw both knees gently toward the chest.
- Hold the shins or behind the thighs.
- Breathe slowly during the hold.
What to focus on
- Let the low back settle.
- Keep the neck and shoulders relaxed.
- Use gentle pressure.
- Keep the position comfortable and steady.
Make it easier
- Hold one knee at a time.
- Place a pillow under the head.
- Keep the knees farther from the chest.
Avoid this
- Yanking the knees in.
- Lifting the head and neck.
- Compressing the position uncomfortably.
- Rocking quickly side to side.
Supported Deep Squat Hold
How to do it
- Stand with feet slightly wider than hip-width.
- Hold a door frame, post, or sturdy support.
- Lower into a comfortable squat.
- Hold the position while breathing steadily.
What to focus on
- Keep the feet grounded.
- Let the knees track with the toes.
- Use the support to stay tall.
- Keep the depth manageable.
Make it easier
- Stay higher in the squat.
- Place the heels on a small support.
- Hold more weight through the hands.
Avoid this
- Collapsing the arches.
- Rounding heavily.
- Dropping below control.
- Forcing the hips or ankles into a painful range.
Build a Mobility Workout You Can Actually Repeat
Mobility work is most useful when it becomes a routine you can follow again, not a random list of exercises you have to rebuild every time. This builder helps you create a custom routine for hips, shoulders, ankles, back, wrists, or full-body movement, then turn it into a checklist you can run step by step.
You can use it for a short morning reset, a warm-up before training, a desk mobility break, a post-workout cooldown, or a focused routine for one area that feels tight or limited. Instead of relying on one fixed program, you can choose the exercises that fit the way you move and adjust the routine over time.
The goal is simple: create a clear sequence, save it, and make it easy to repeat.
Why Use Checklist for Mobility Routines?
Many mobility apps are built around guided video classes, assessments, scores, or coaching programs. Checklist is different. It works well when you want control over the structure of your routine: what goes in it, how long each step takes, what order the exercises follow, and when you want to run it again.
Each mobility exercise becomes a checklist step. Some steps can use a timer, others can use reps, sets, rest, preparation time, or notes. That makes the routine easier to follow in Play Mode because you are not jumping between a video, a notes app, and a timer.
Checklist also fits mobility into the rest of your routines. Your routine can sit next to your gym workout, stretching routine, yoga routine, morning checklist, travel checklist, or workday habits. If mobility is something you want to do regularly, saving it as a reusable routine or template is more practical than searching for the same exercises again.
How the Mobility Workout Builder Works
Start by choosing a preset routine or browsing the exercise list. Presets give you a useful starting point for common situations such as morning mobility, hip mobility, shoulder mobility, ankle mobility, back mobility, pre-workout mobility, or desk mobility breaks.
From there, you can customize the routine. Filter exercises by body area, goal, movement type, position, or equipment. For example, you might choose hip and ankle exercises for squat mobility, shoulder and upper-back exercises for overhead mobility, or seated and standing exercises for a quick desk reset.
After selecting exercises, adjust the routine before saving it. You can change the order, remove steps that do not fit, add extra movements, and edit practical fields such as duration, reps, sets, rest, preparation time, and notes where relevant.
When the routine is ready, you can create a one-time checklist session or save it as a reusable routine/template. Then you can run it step by step on iPhone, Android, or web.
Useful Routine Ideas
The builder works best when you create routines around real moments in your day or training week. Useful examples include:
- Morning Mobility - a short routine to loosen up after waking.
- Daily Mobility Reset - a balanced routine for general movement consistency.
- Hip Mobility - focused work for hips, glutes, hip flexors, and groin.
- Shoulder Mobility - shoulder, upper-back, chest, and overhead movement work.
- Ankle Mobility - ankle and calf exercises for squats, running, or general movement.
- Back Mobility - spinal rotation, cat-cow, twists, and lower-back-friendly reset movements.
- Desk Mobility Break - neck, wrist, shoulder, and spine movements you can do during the workday.
- Pre-Workout Mobility - dynamic movements, joint mobility, and activation before training.
- Post-Workout Recovery - slower holds and reset movements after exercise.
- Squat Mobility - hips, ankles, adductors, and deep squat practice.
- Overhead Mobility - shoulder, thoracic, lat, and chest-focused movement.
- Running Mobility - hips, calves, ankles, hamstrings, and glutes.
- Travel Mobility - simple movements for stiffness after sitting or moving between places.
These are starting points, not fixed plans. A routine can be short and practical, or more focused if you want to spend extra time on one area.
Save, Schedule, and Run It Again
A list of mobility exercises is useful once. A saved routine is more useful when you want to repeat it.
After creating a routine, you can save it as a template and run it again without rebuilding it. This is useful if you want separate routines for mornings, gym warm-ups, desk breaks, travel days, or recovery sessions. You can also update a saved routine later if an exercise stops fitting or you want to change the order.
Scheduling is especially useful for mobility because consistency matters more than making every session complicated. A short daily routine, a recurring desk break, or a regular pre-workout checklist is easier to follow when it already exists and can be repeated.
Completed checklist sessions are automatically saved, giving you a simple history of what you did. That history can support future review and progress features without turning the builder into a heavy analytics or coaching system.
Who This Mobility Builder Is For
This builder is useful for people who want mobility work to be practical and repeatable. It fits beginners who want simple guidance, office workers who need short movement breaks, gym users who want a warm-up, runners who want hip and ankle work, and active people who prefer a clear routine over a fixed video class.
It is also useful if you already know some mobility exercises but do not have a good way to organize them. You can turn the movements you like into a routine, add instructions, set timers or reps, and keep the sequence ready for next time.
For teams, coaches, families, or shared routines, the checklist format can also make a routine easier to copy, adjust, and share where relevant.
Start With a Preset or Build Your Own
Use the builder above to start with a preset routine or create your own from the exercise list. Choose the areas you care about, adjust the steps, and save the result as a checklist or reusable routine.
Keep the first version simple enough to use. A short routine you repeat is usually more valuable than a long routine you avoid. You can always improve it later by adding exercises, changing durations, or creating separate templates for different situations.