
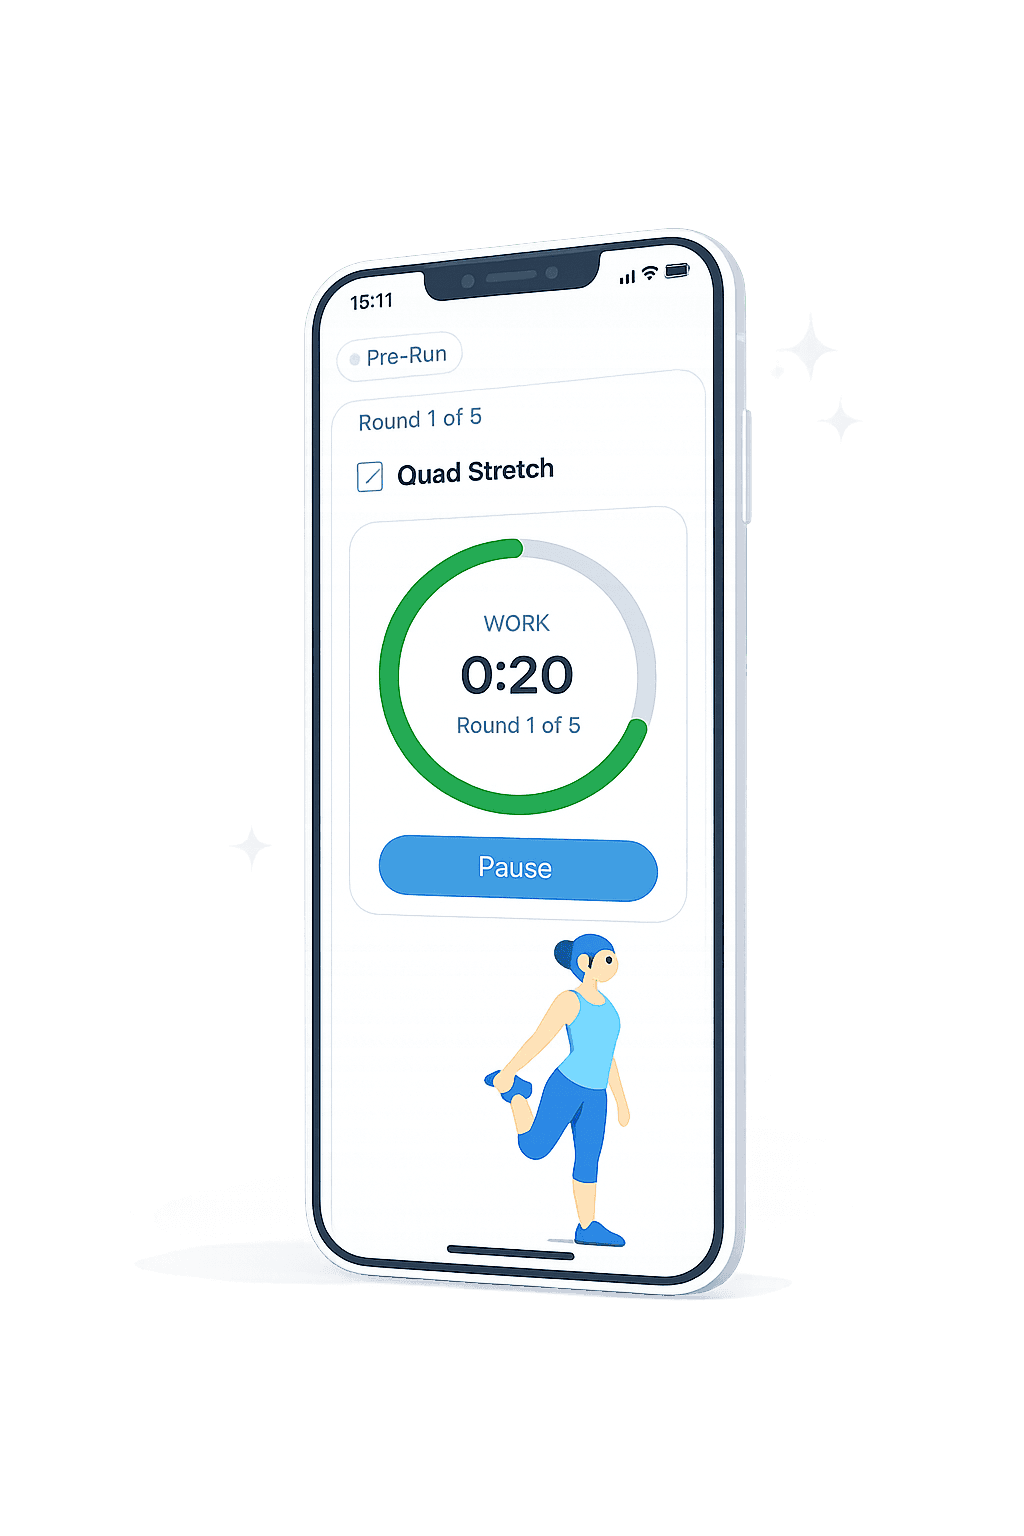
Your checklist
No exercises selected yet
Choose a preset above or add exercises from the list below.
Choose more exercises
Add optional exercises to your routine.
33 exercises currently match
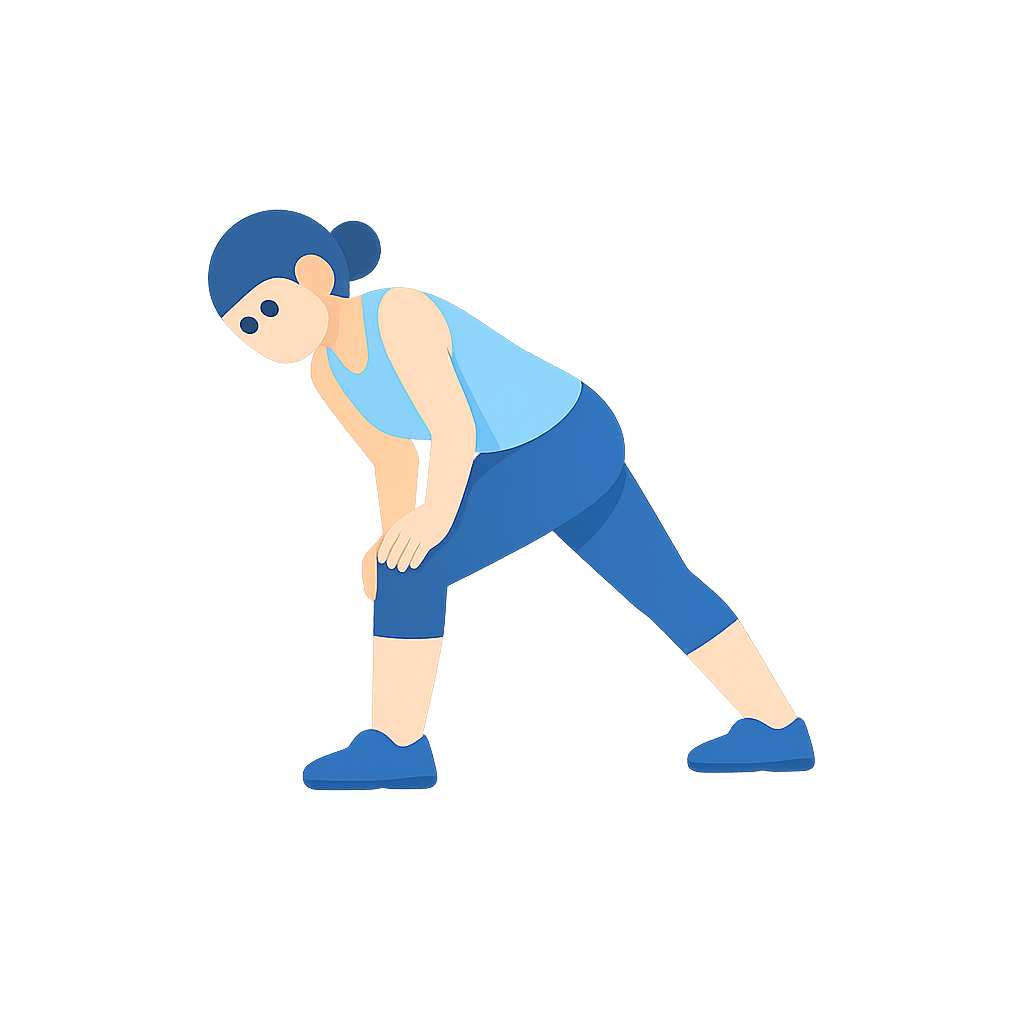
Standing Calf Hinge
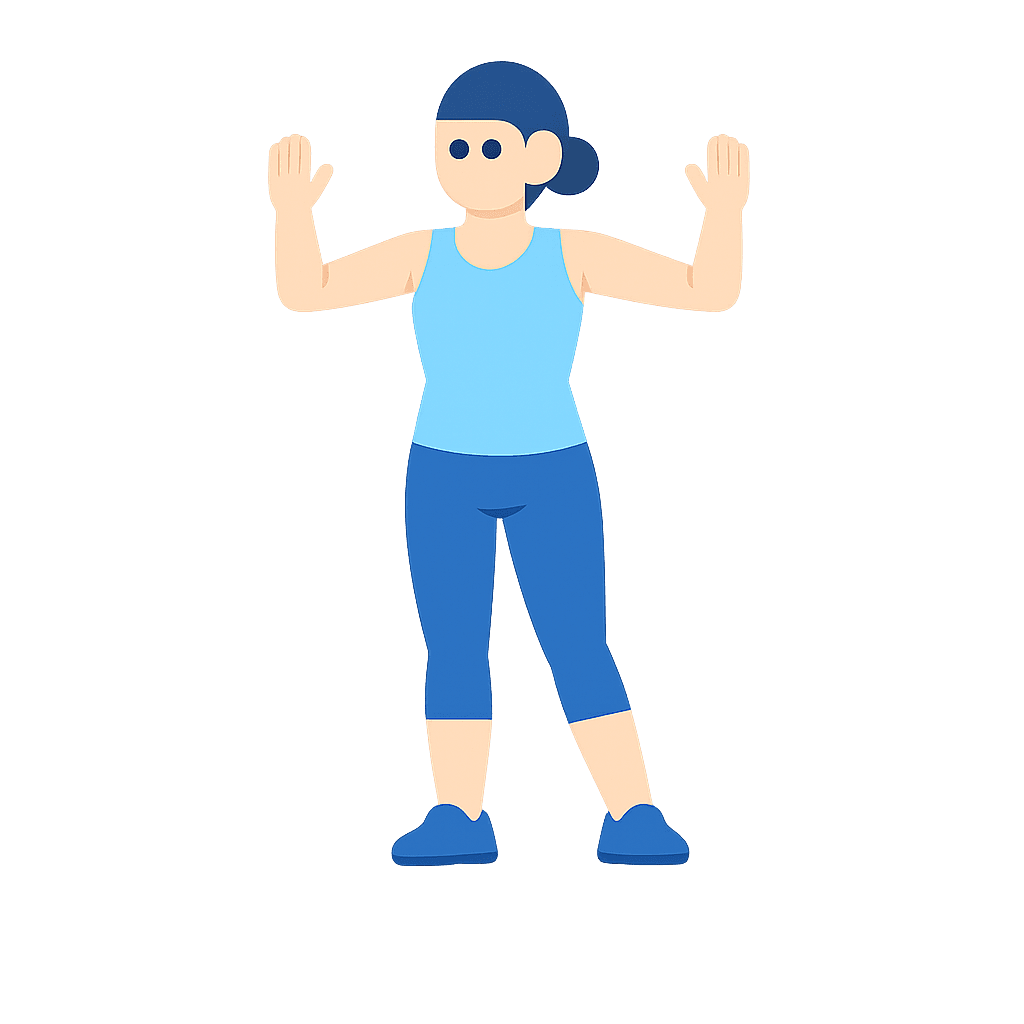
Cactus Arms
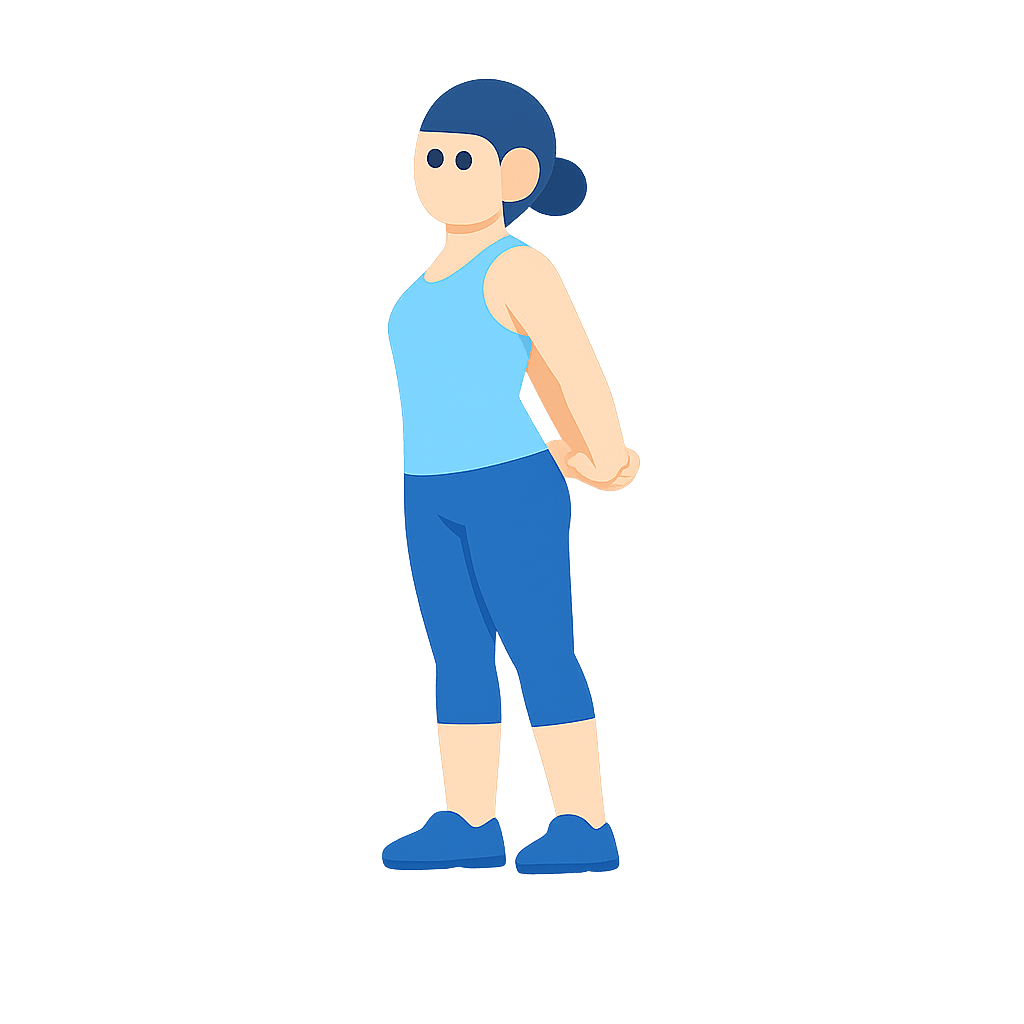
Back-Clasp Chest Opener
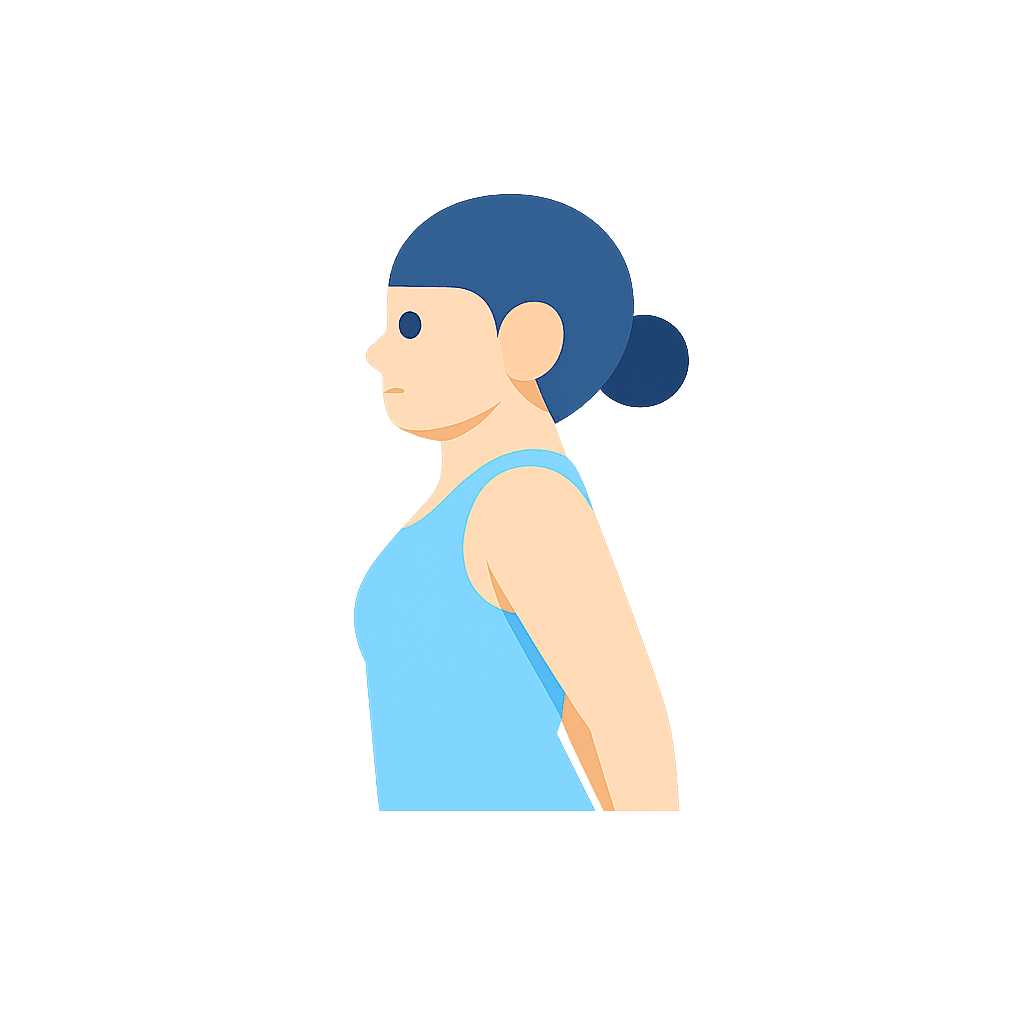
Chin Tucks
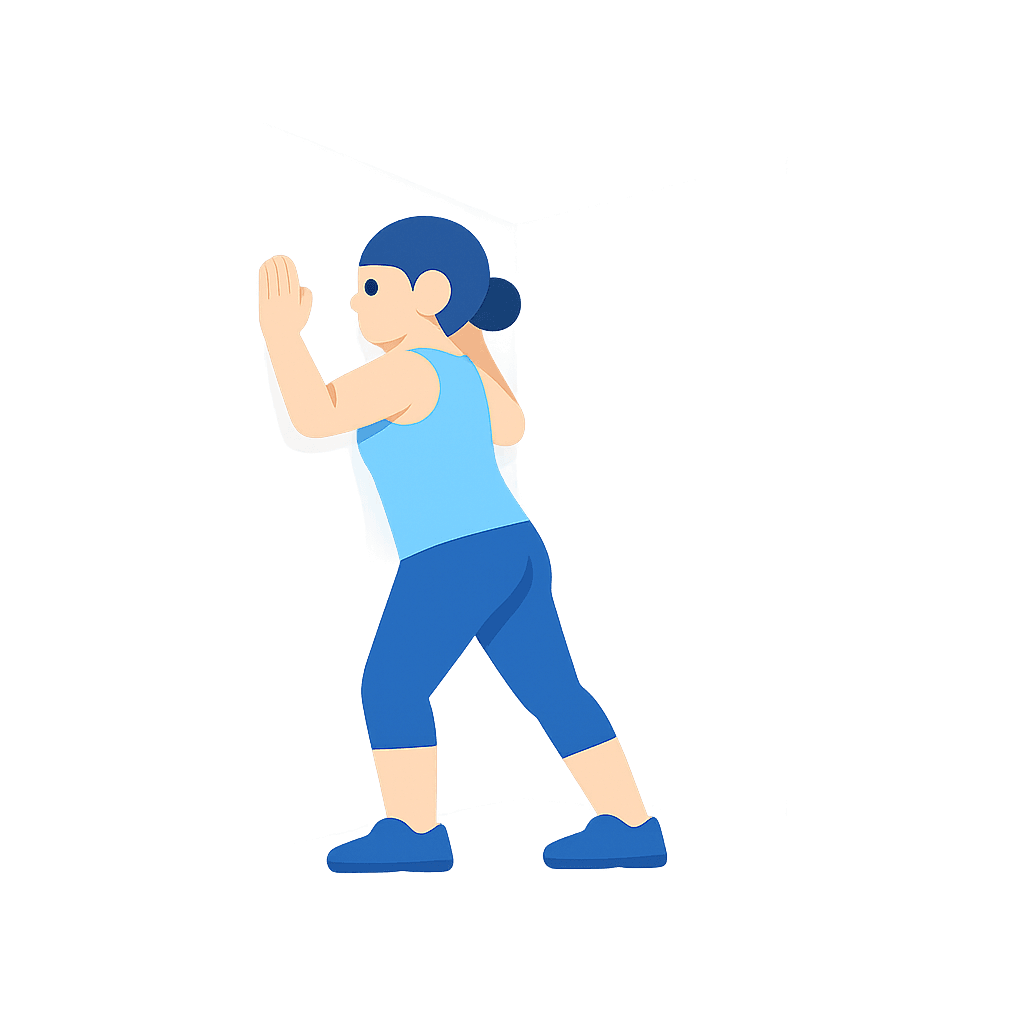
Corner Chest Opener
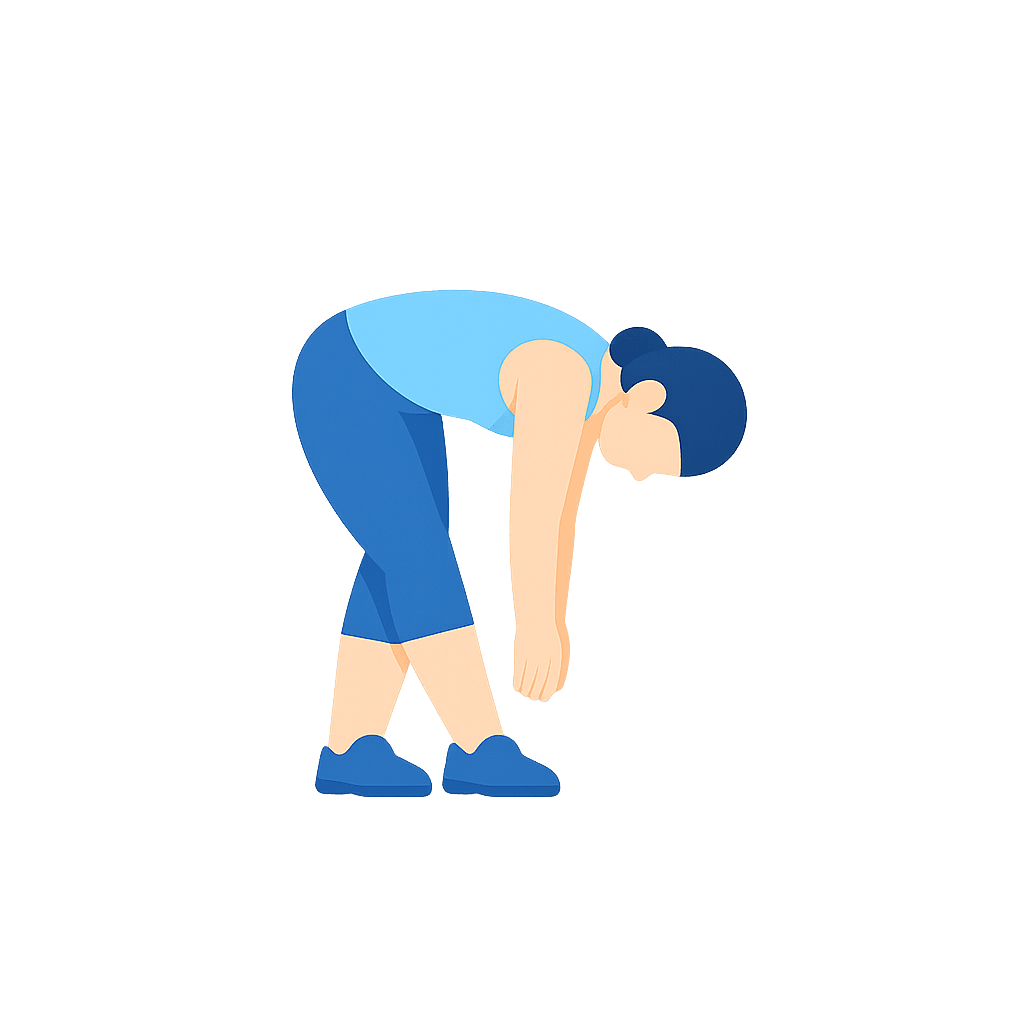
Cross-Leg Fold
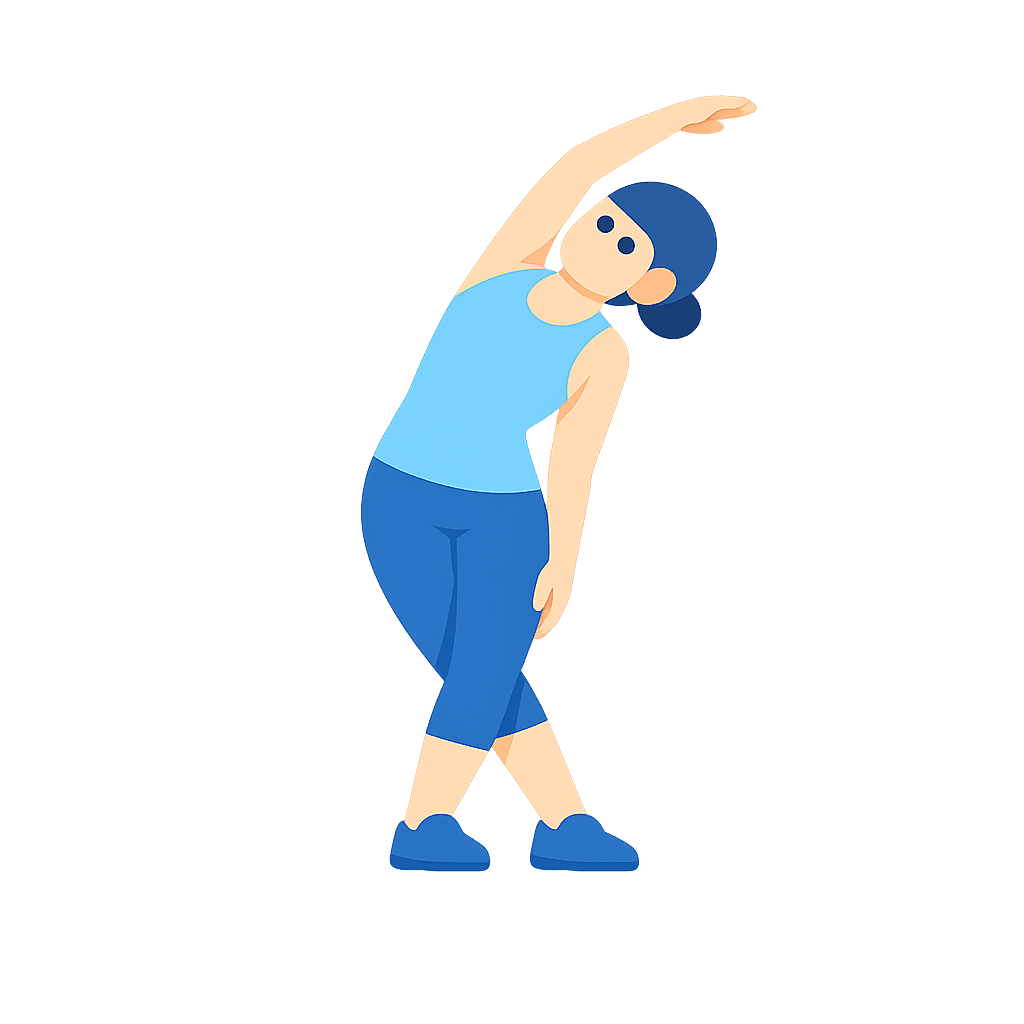
Cross Leg Side Bend
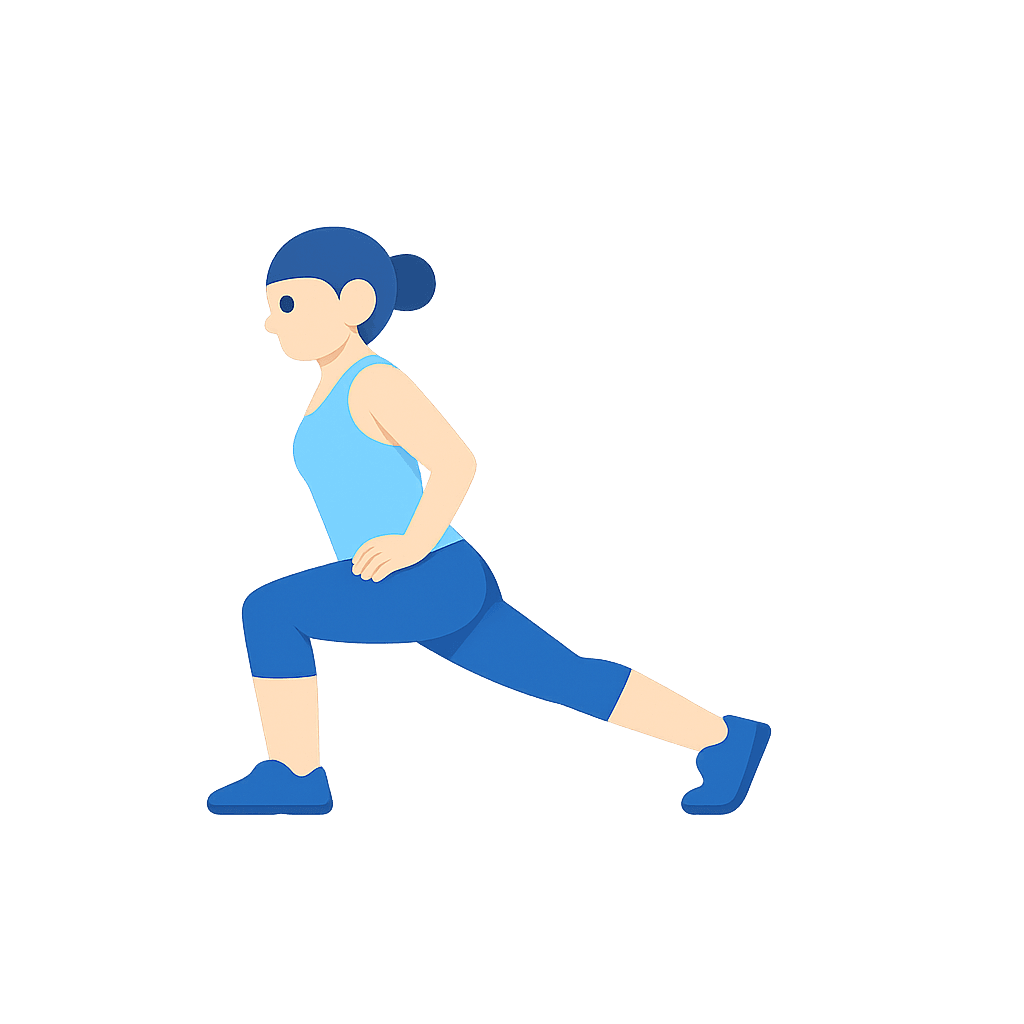
Split Squat Hold
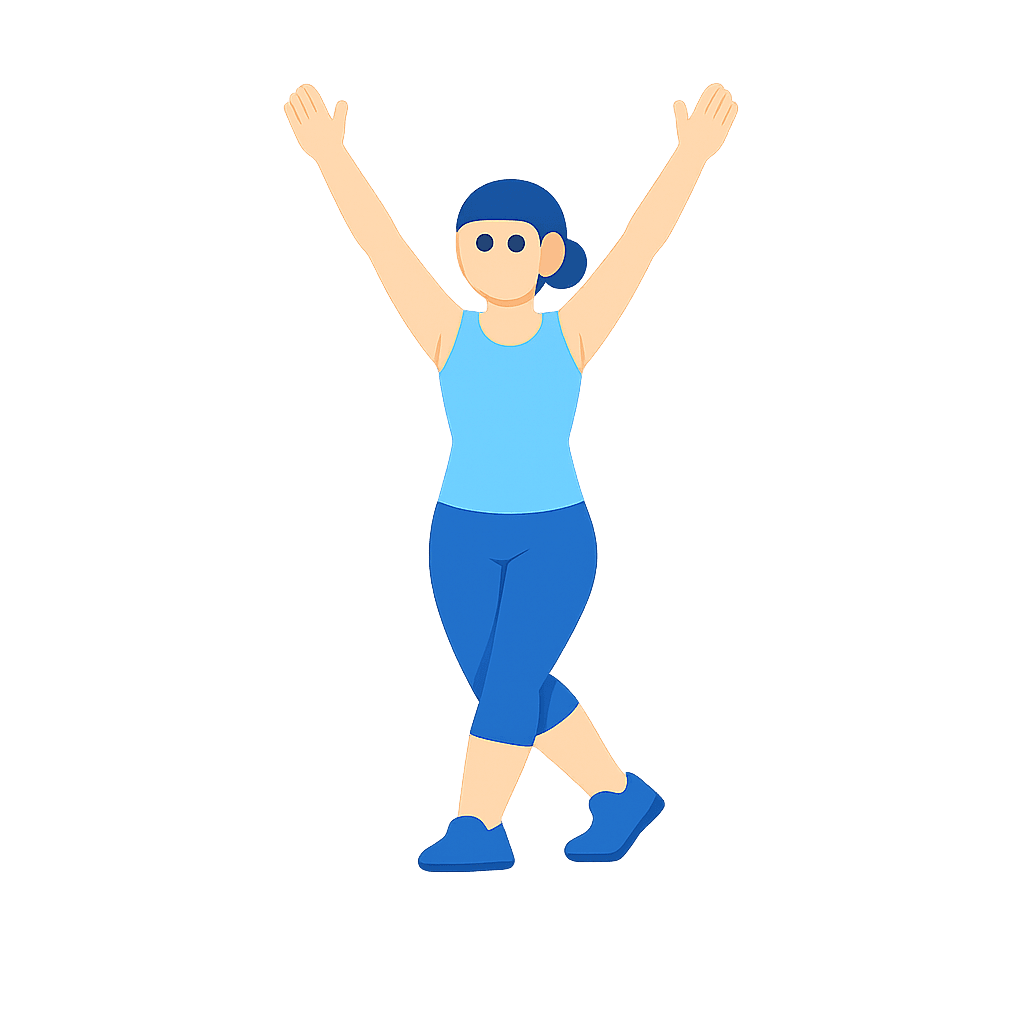
Arm Sweep
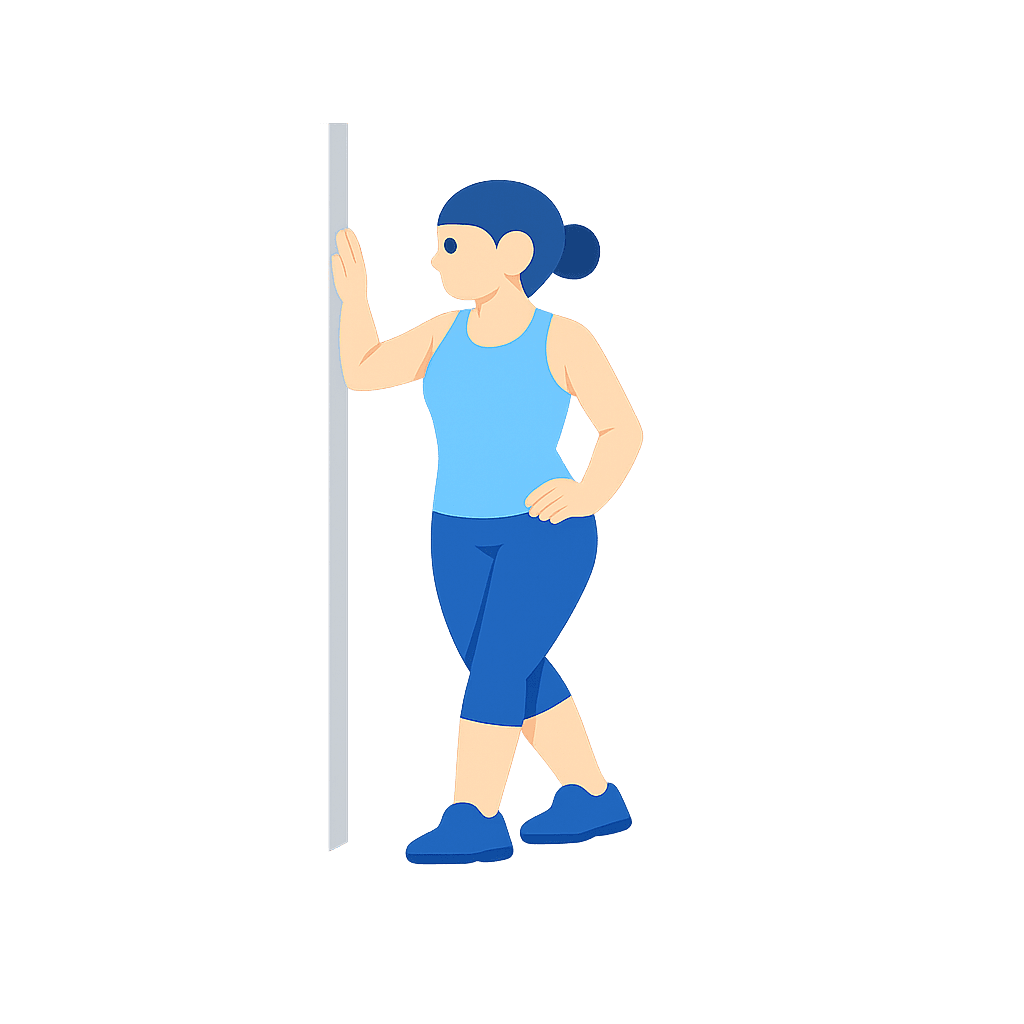
Doorway Chest Opener
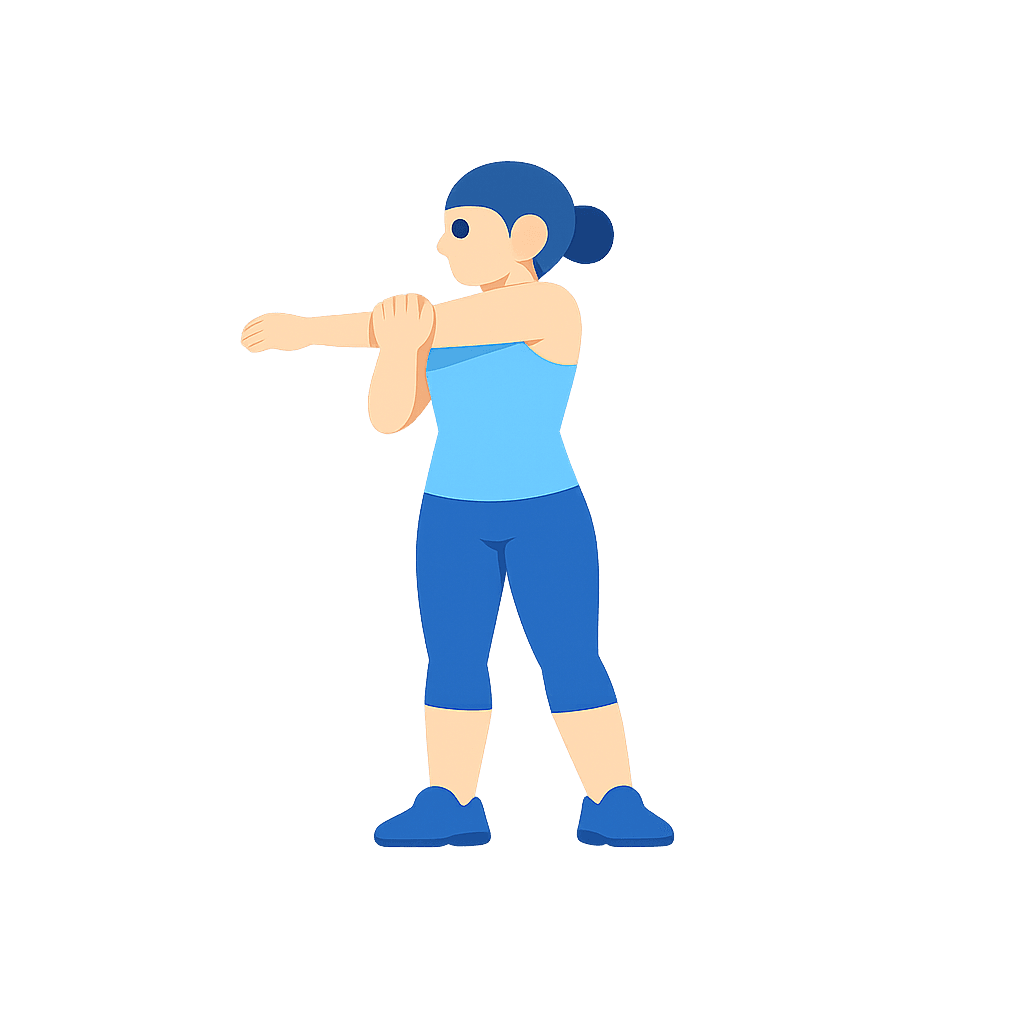
Cross-Body Shoulder
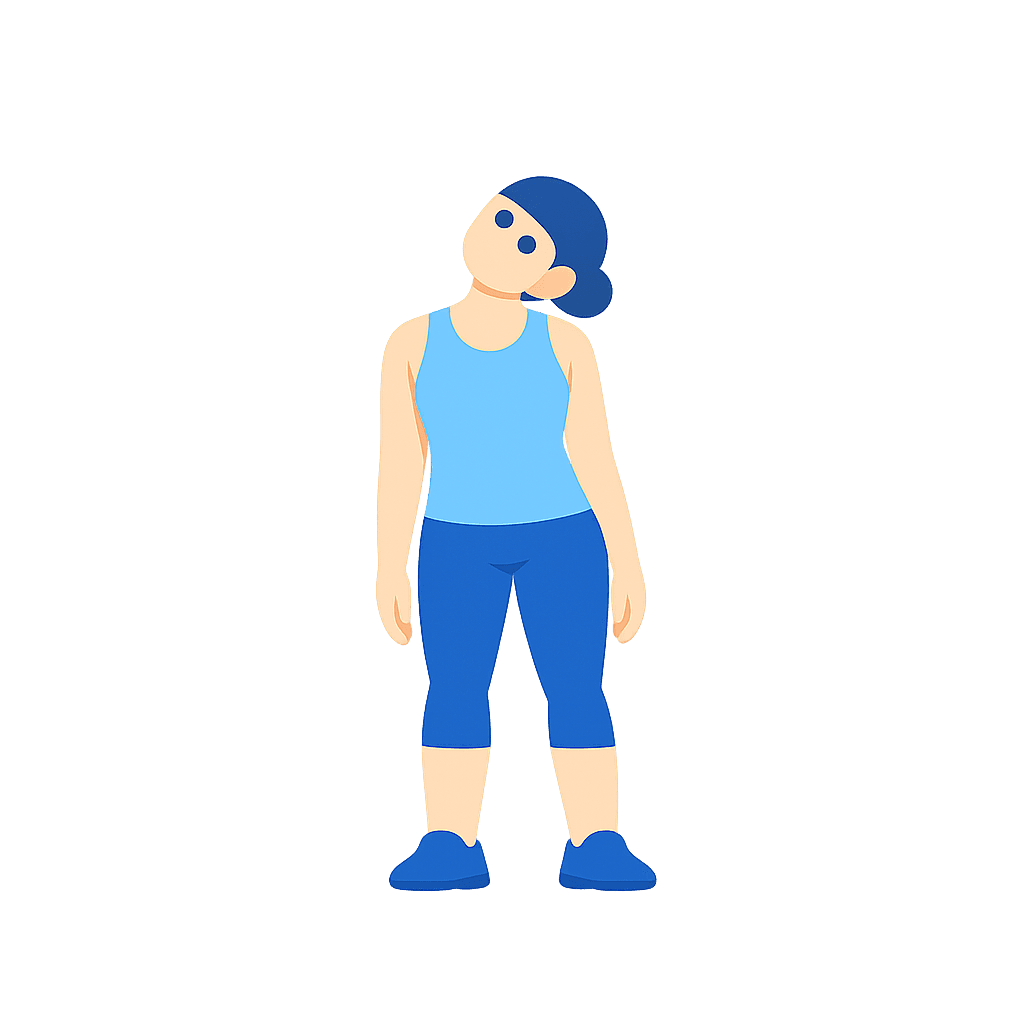
Lateral Neck
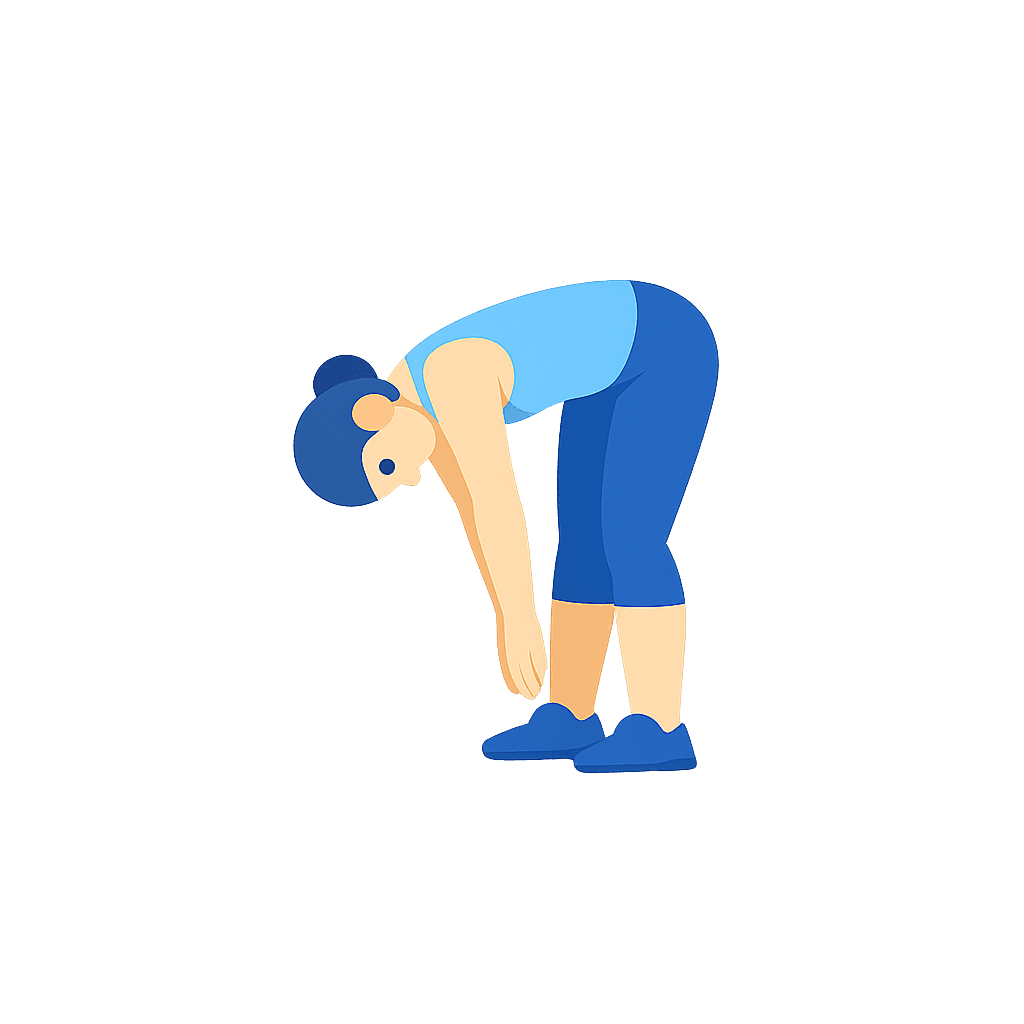
Forward Fold
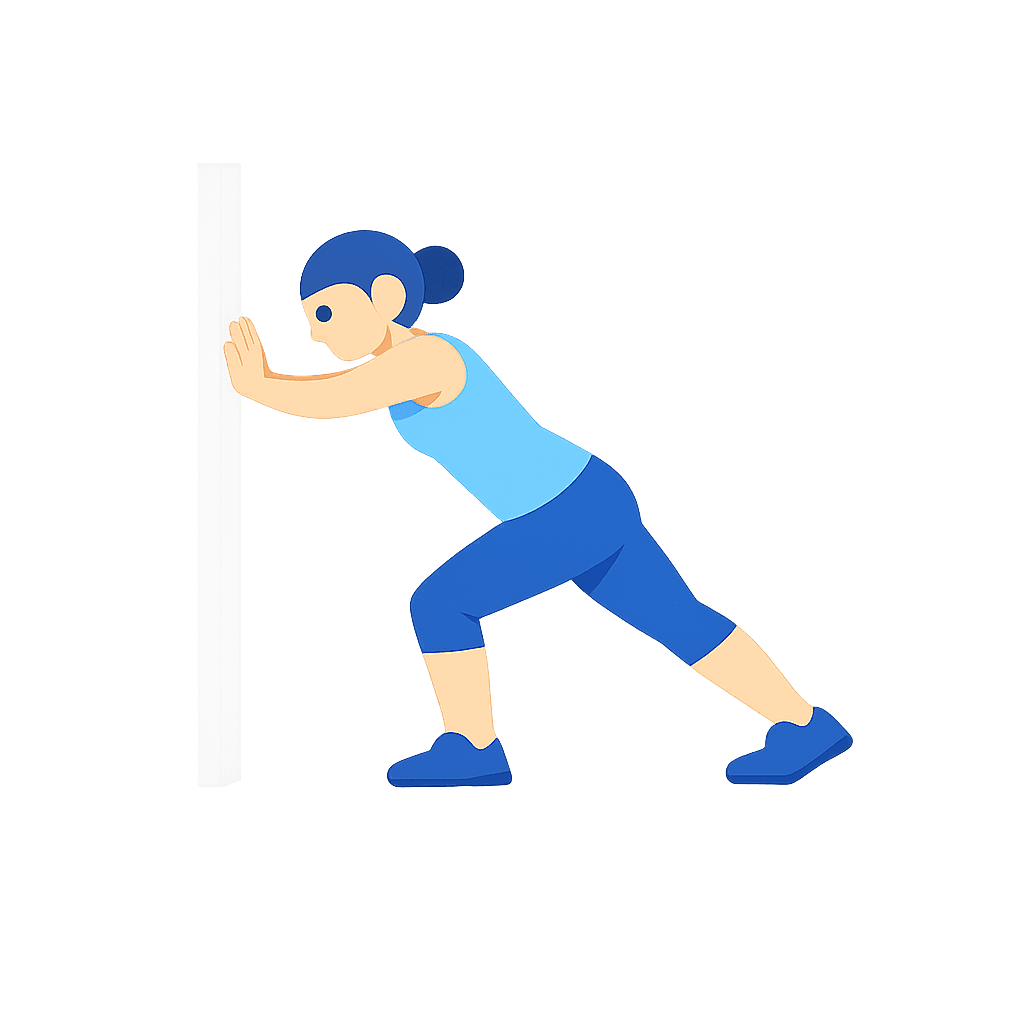
Leaning Calf
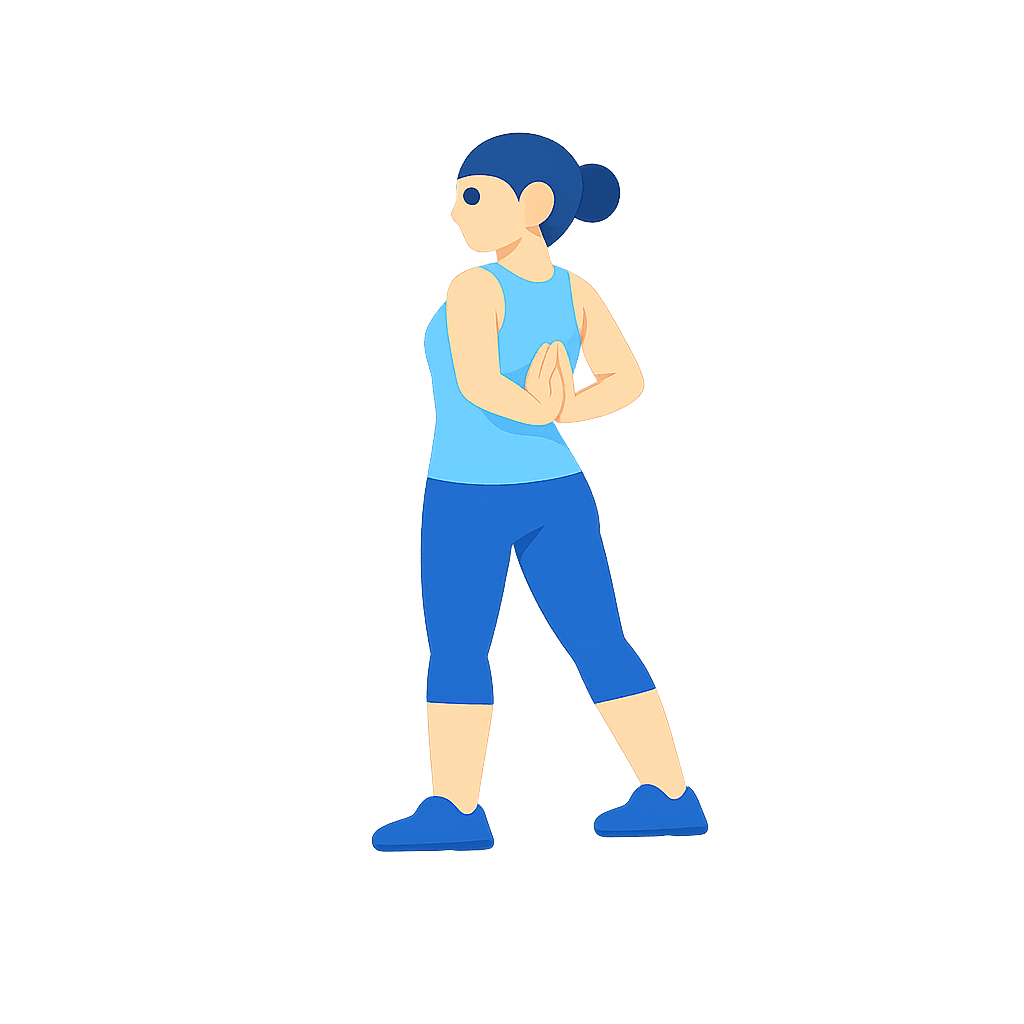
Low Reverse Prayer
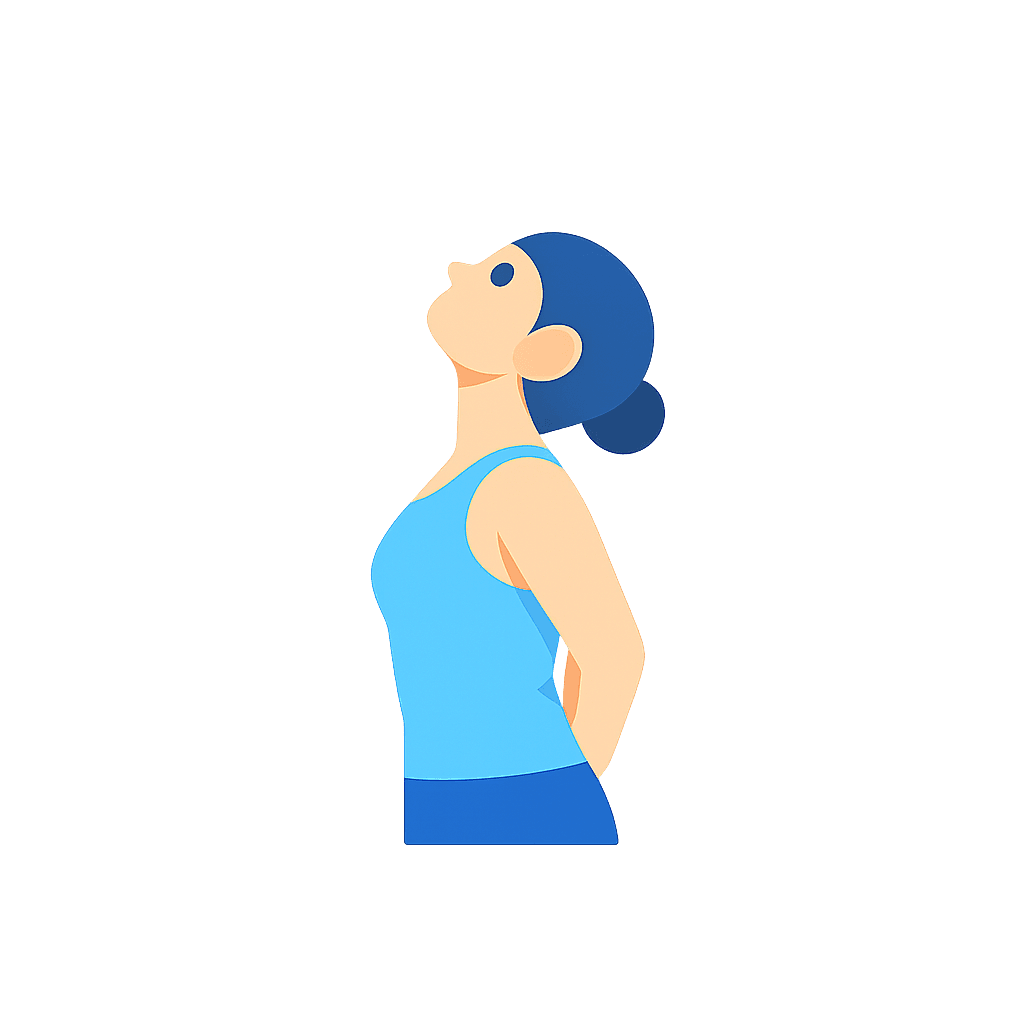
Neck Extension
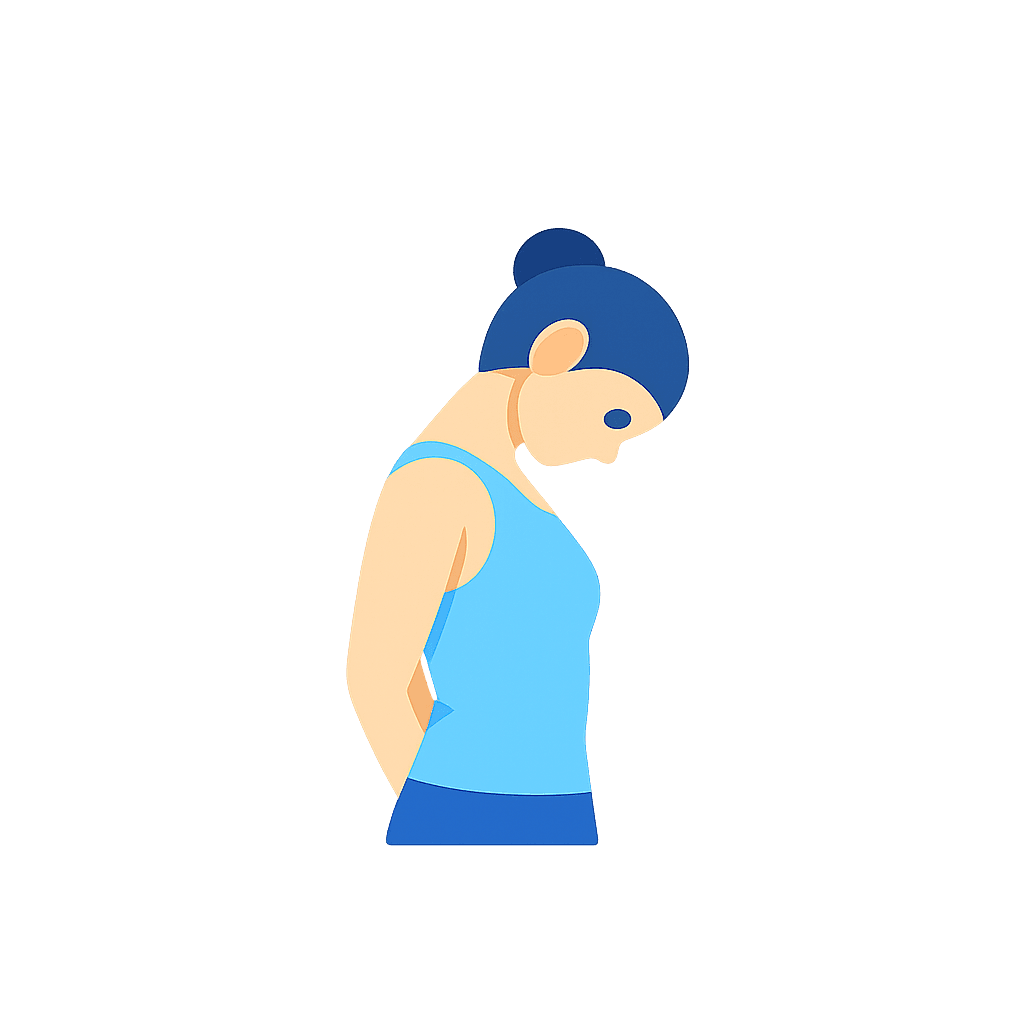
Neck Flexion
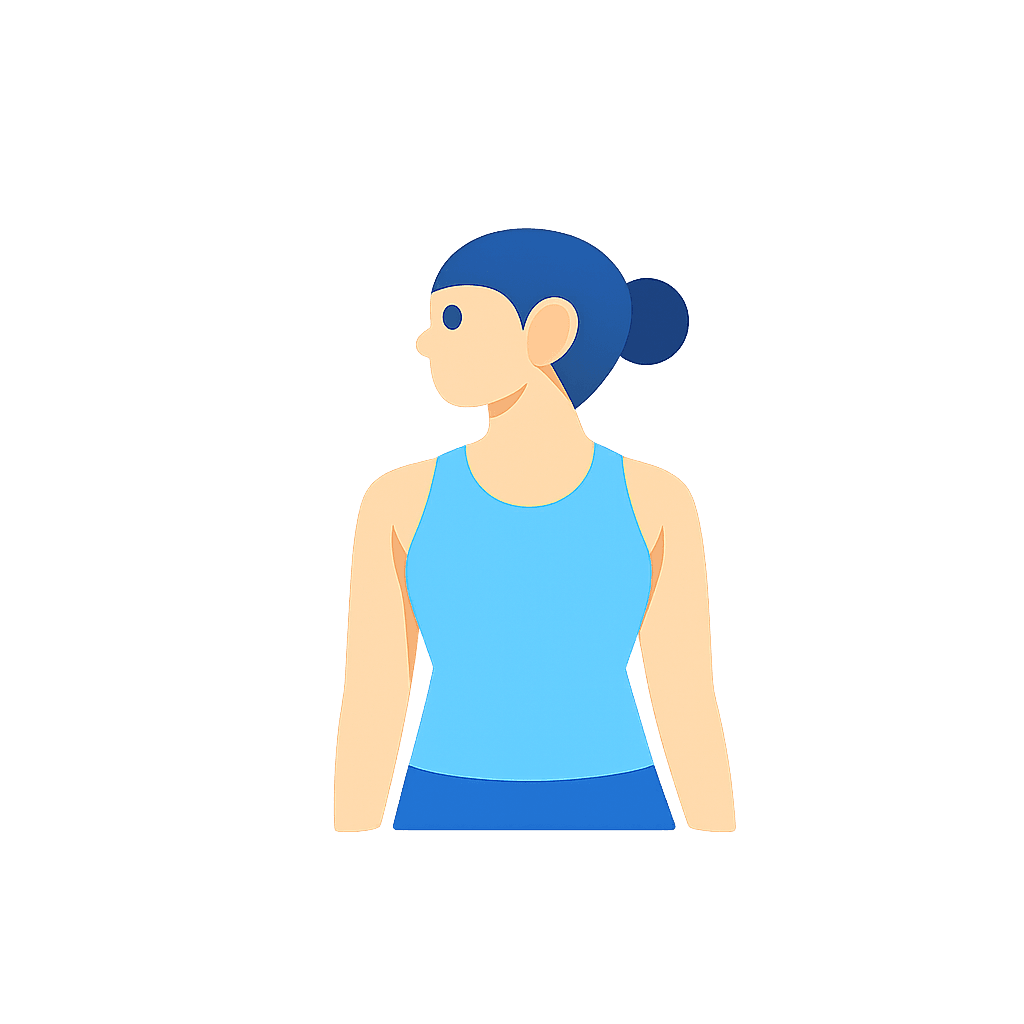
Neck Rotation
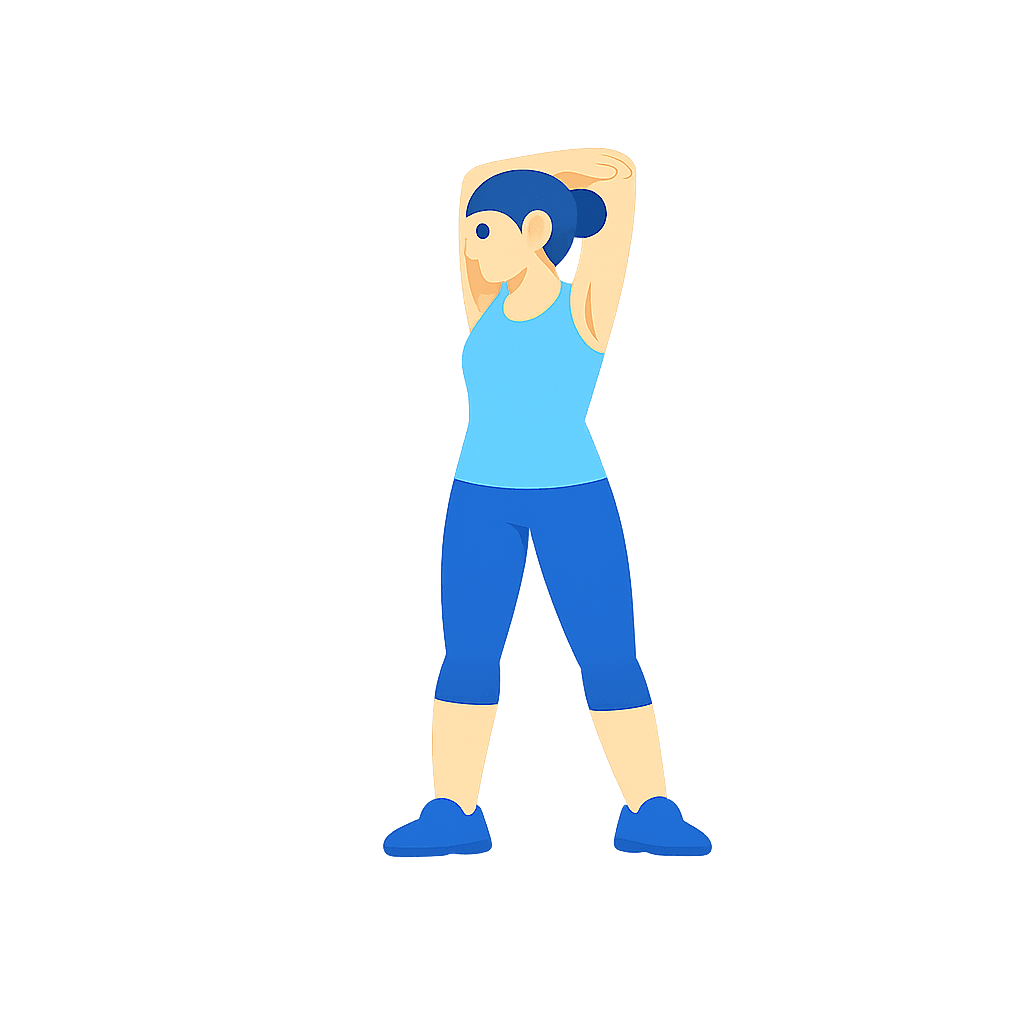
Overhead Triceps
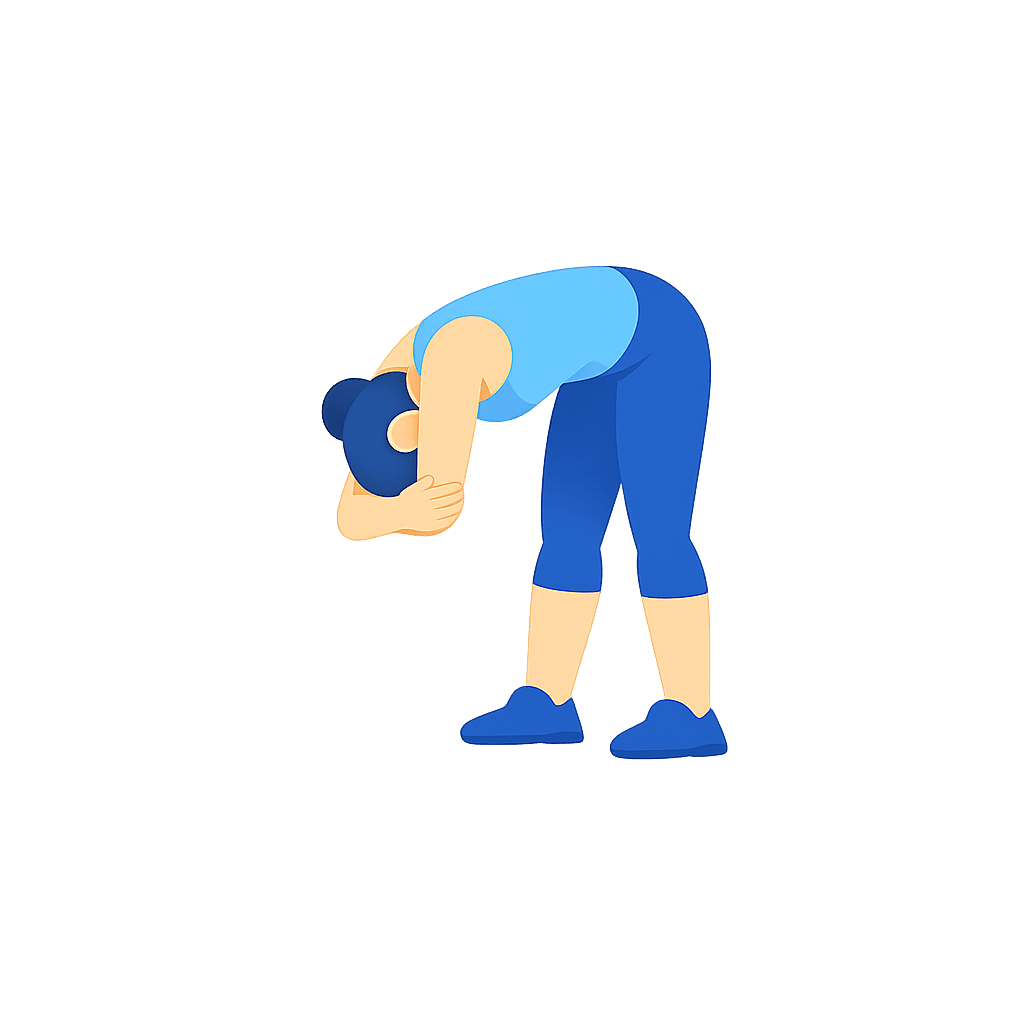
Rag Doll
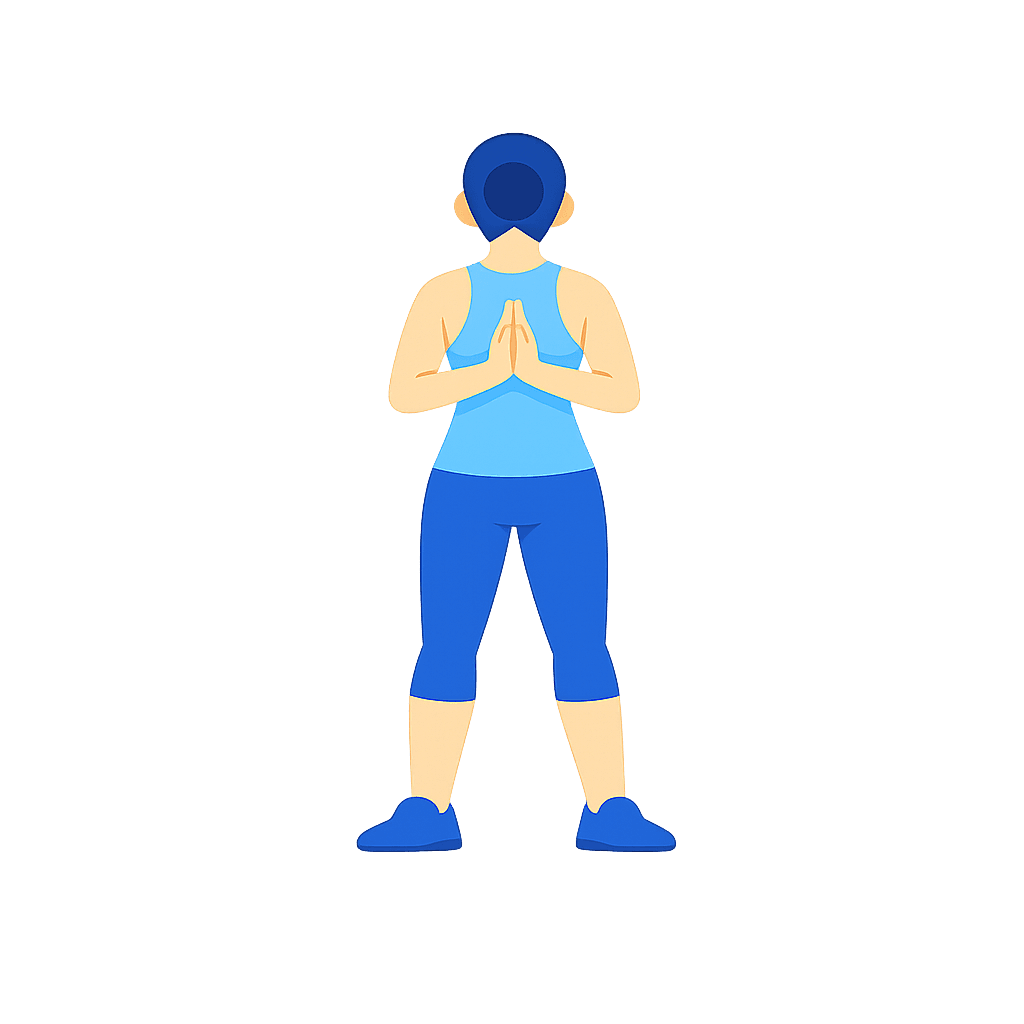
Reverse Prayer
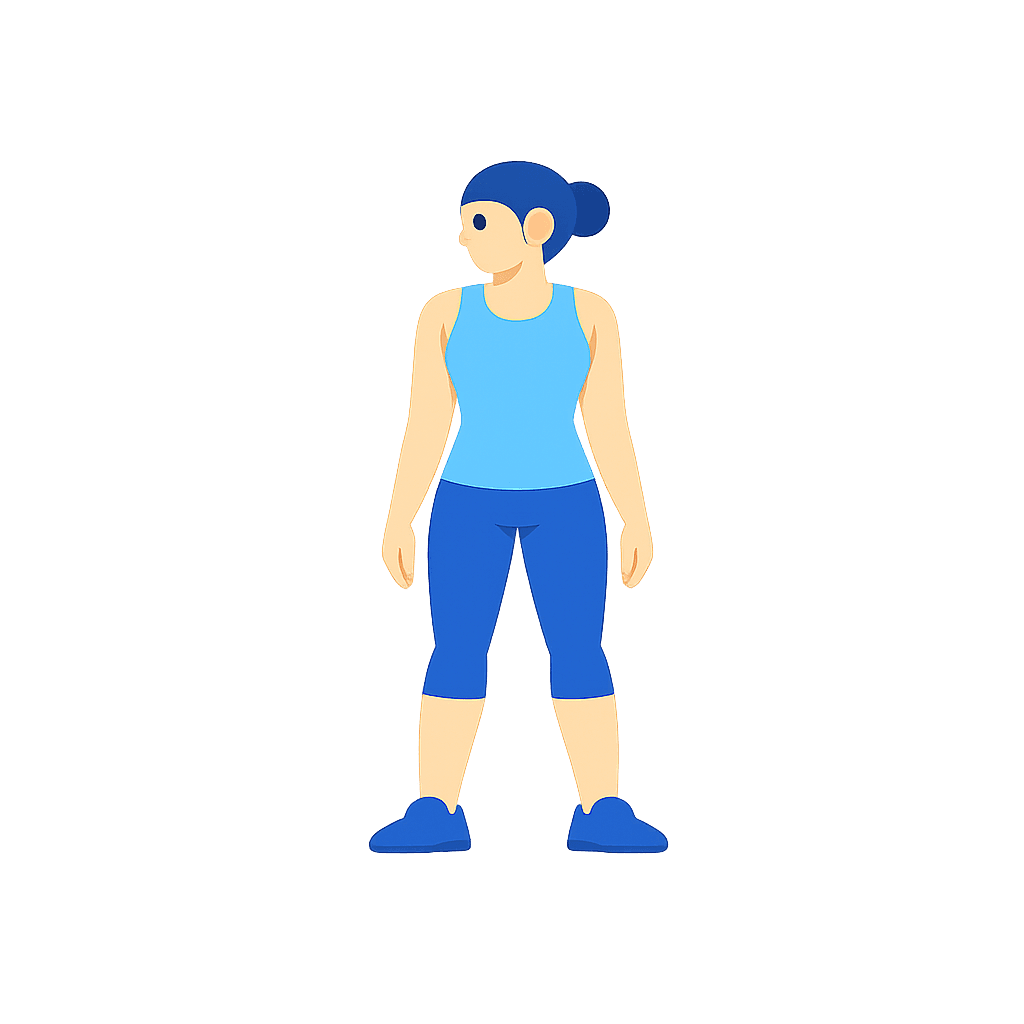
Shoulder Rolls
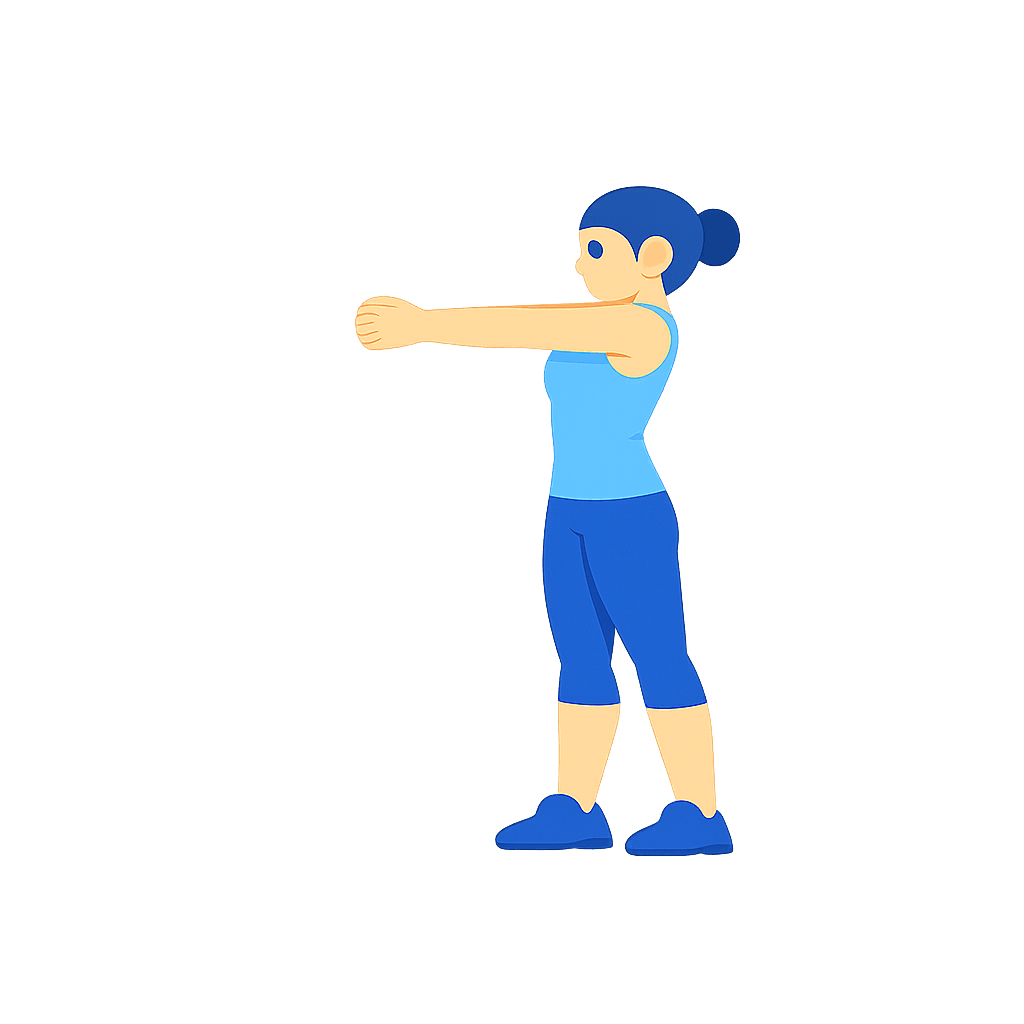
Upper Back Reach
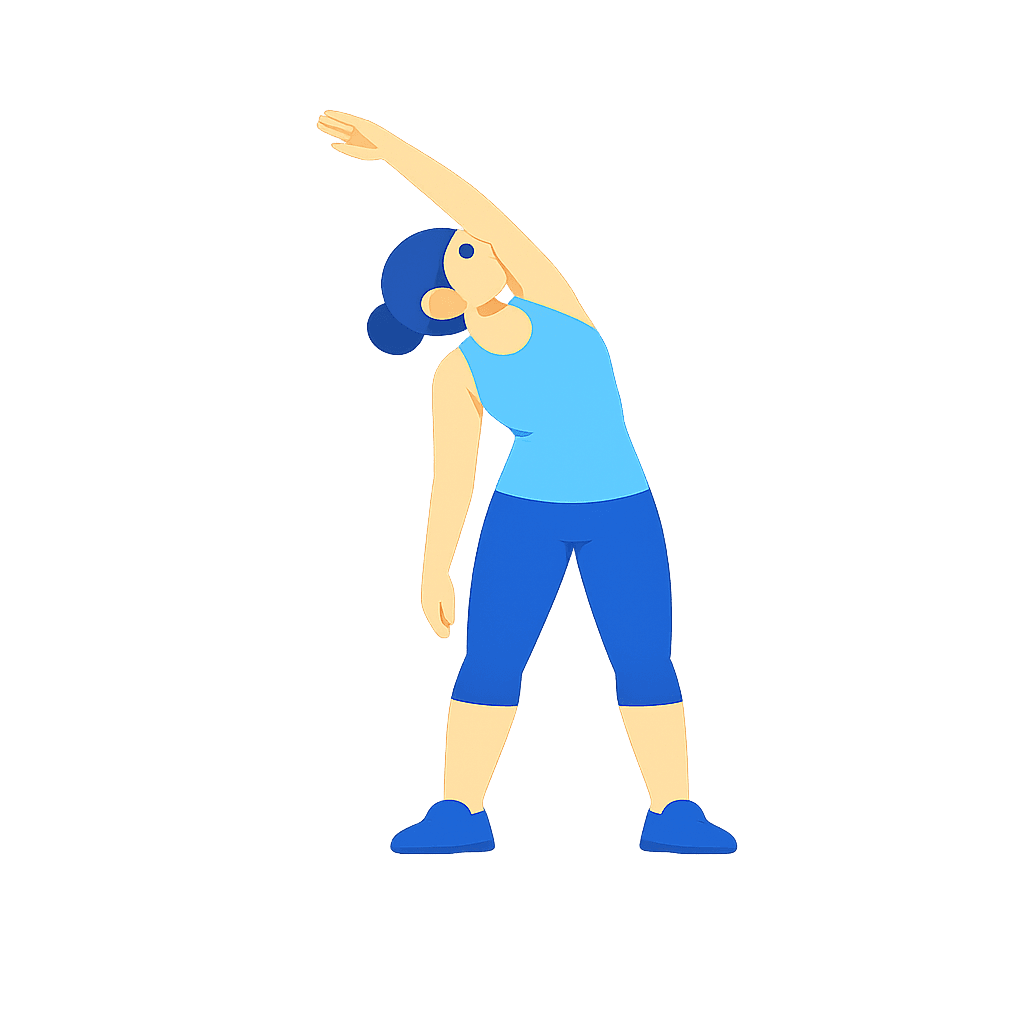
Side Bend
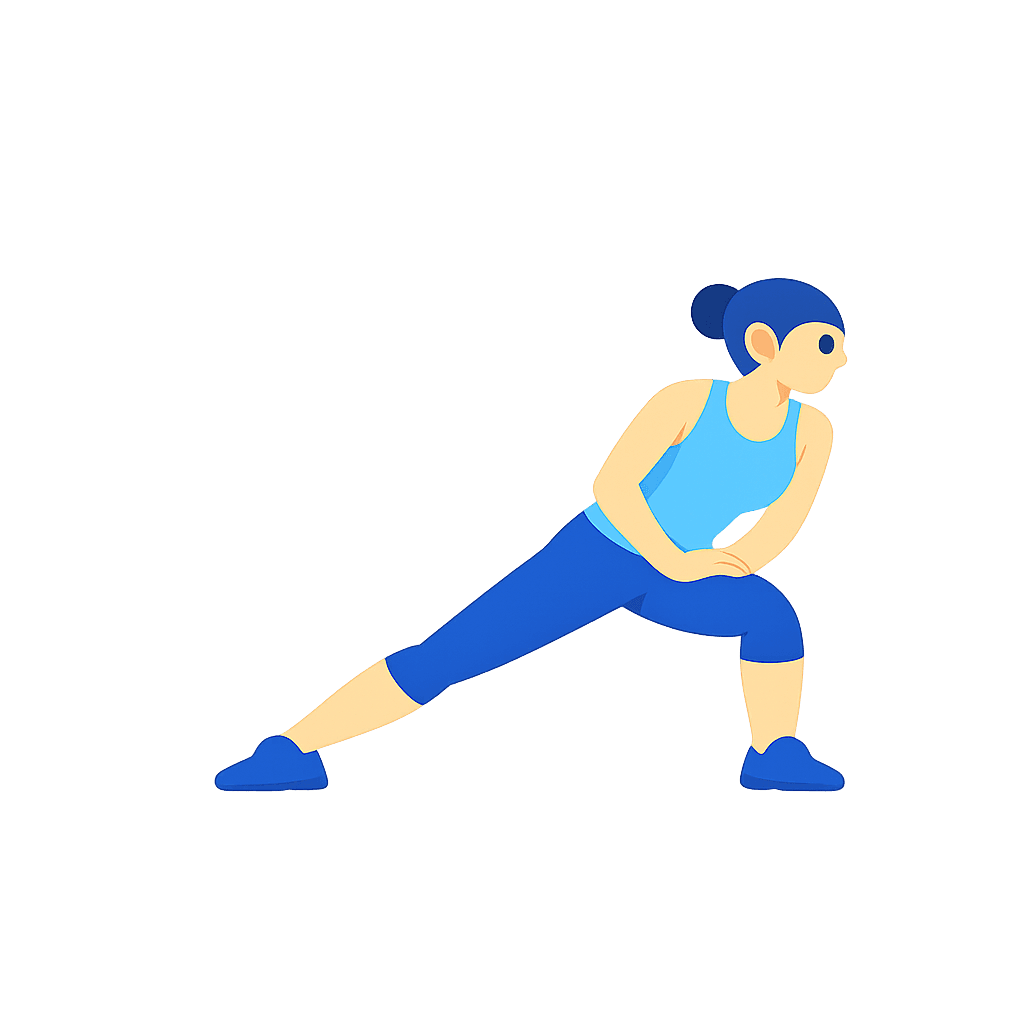
Side Lunge
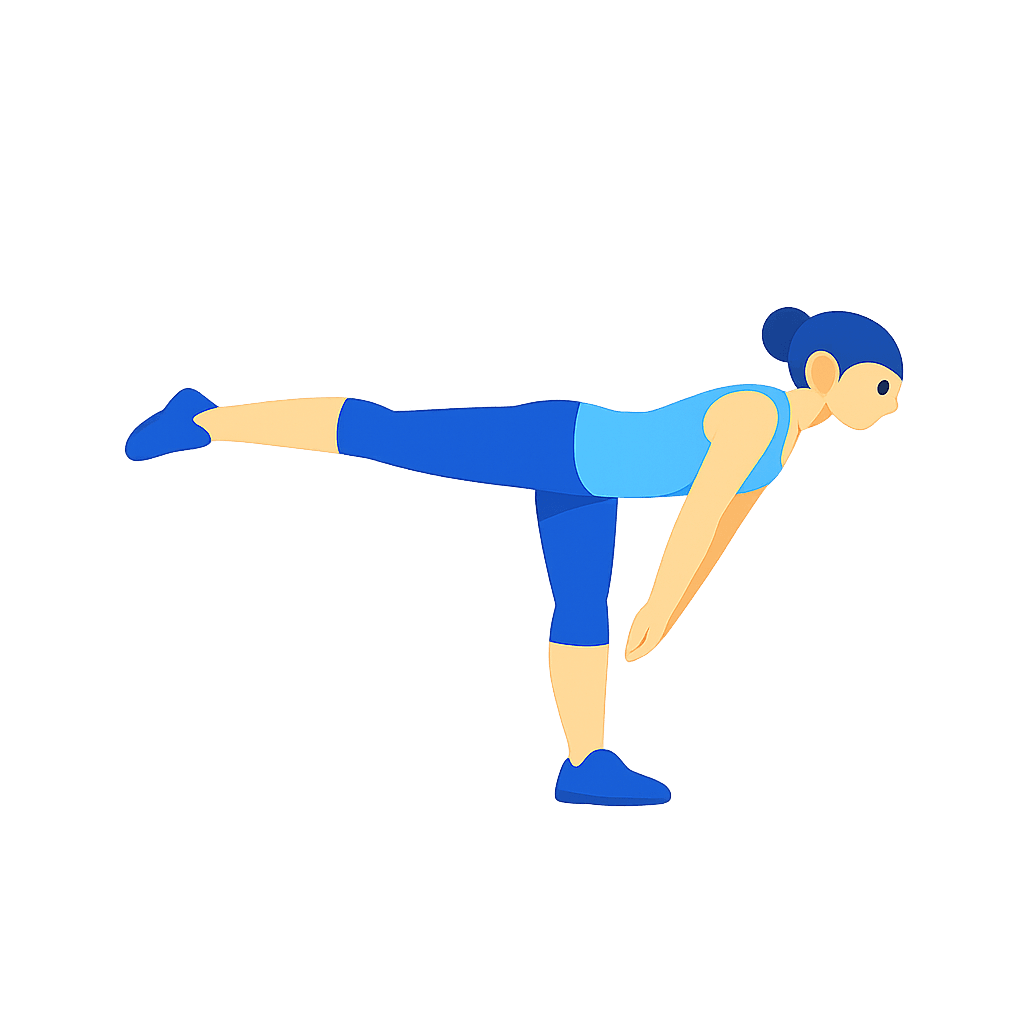
Single-Leg Balance Reach
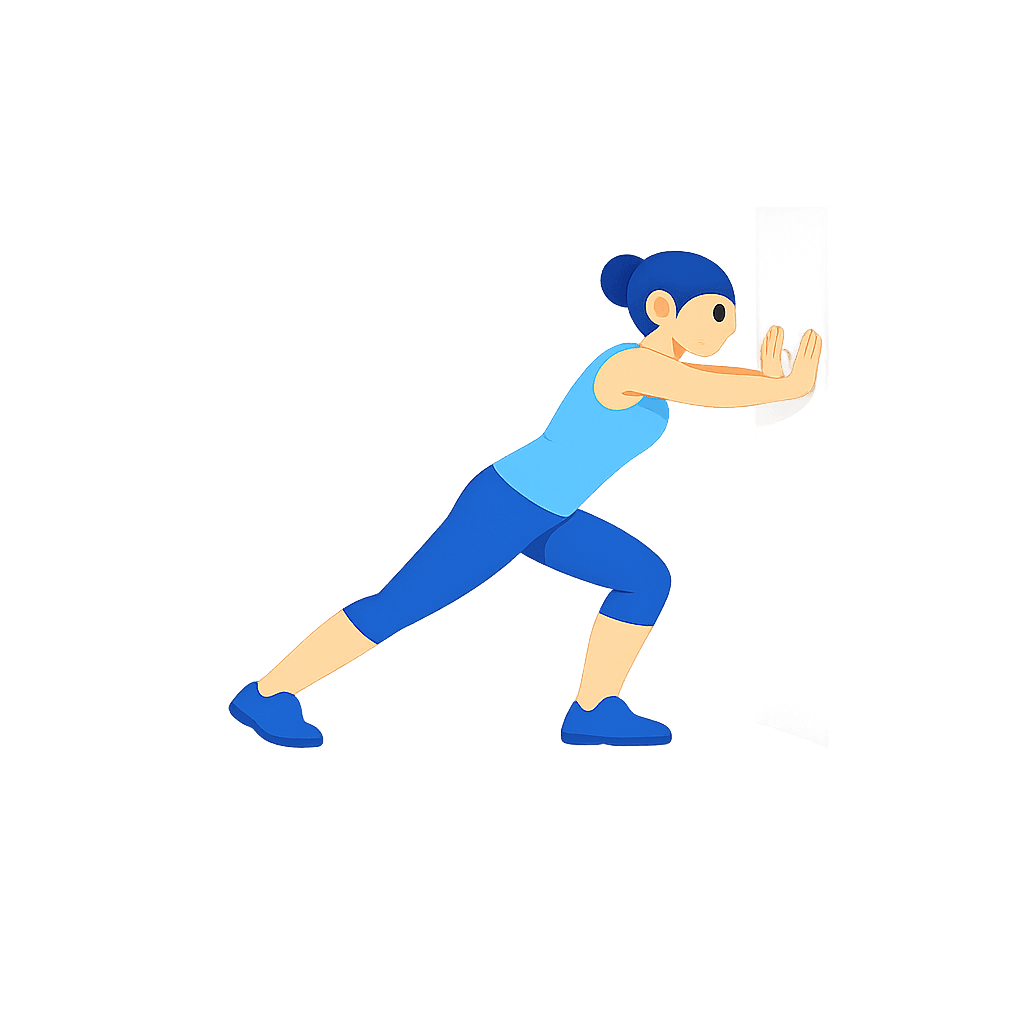
Bent-Knee Calf
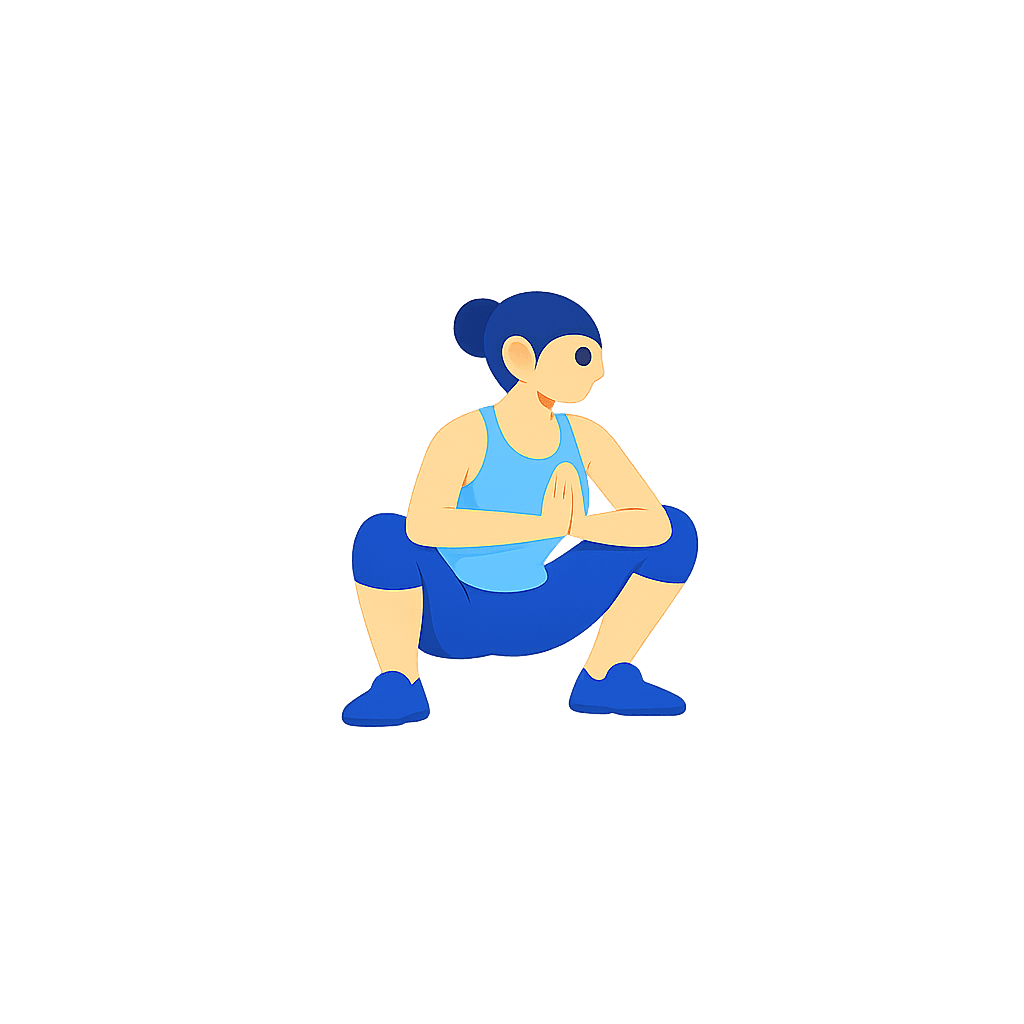
Deep Squat Hold
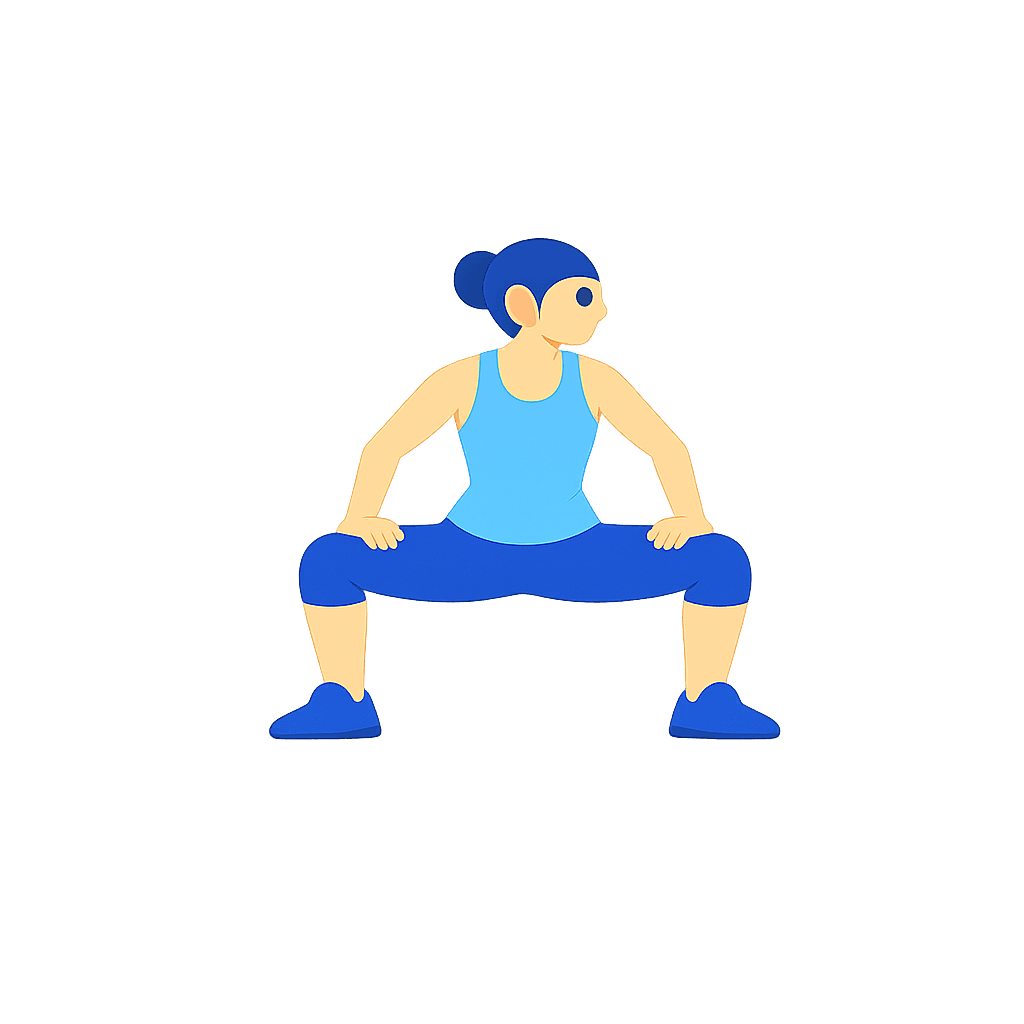
Wide Squat Hold
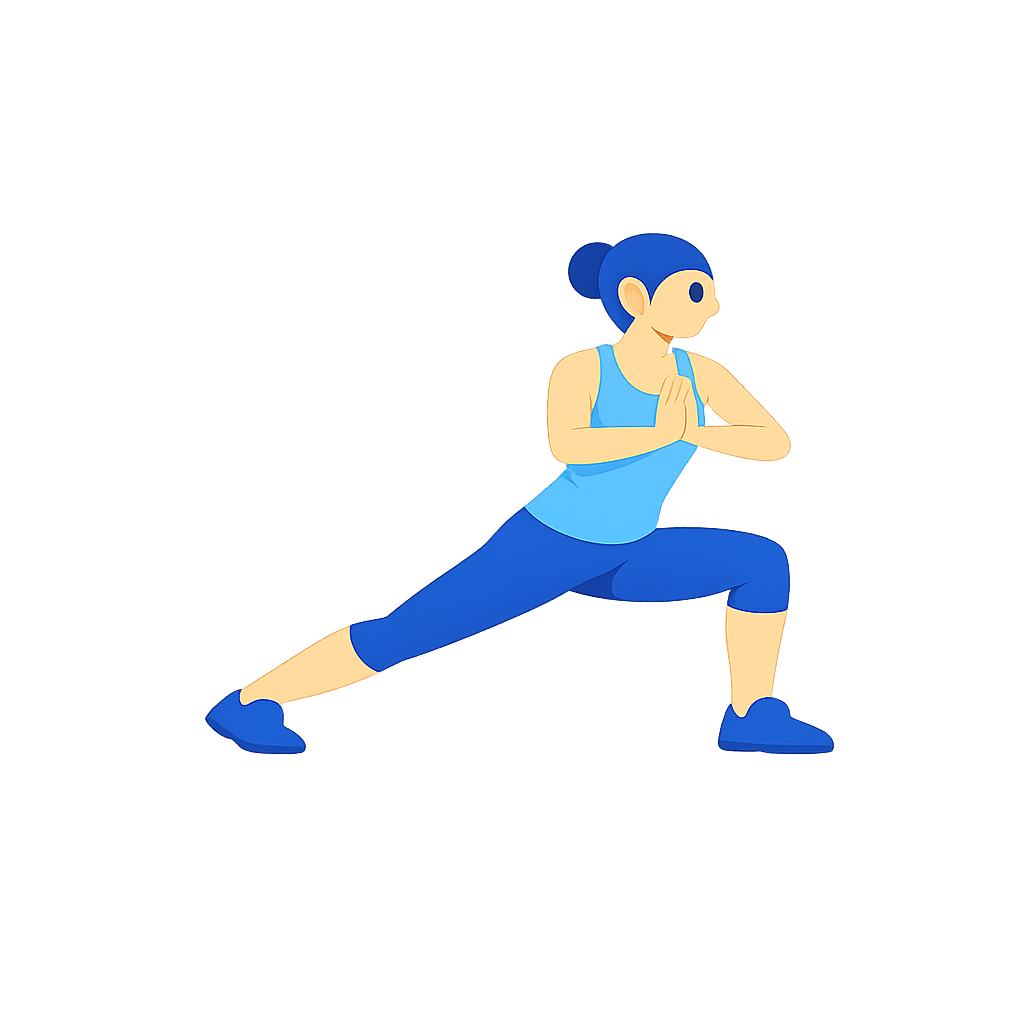
Lunge Twist
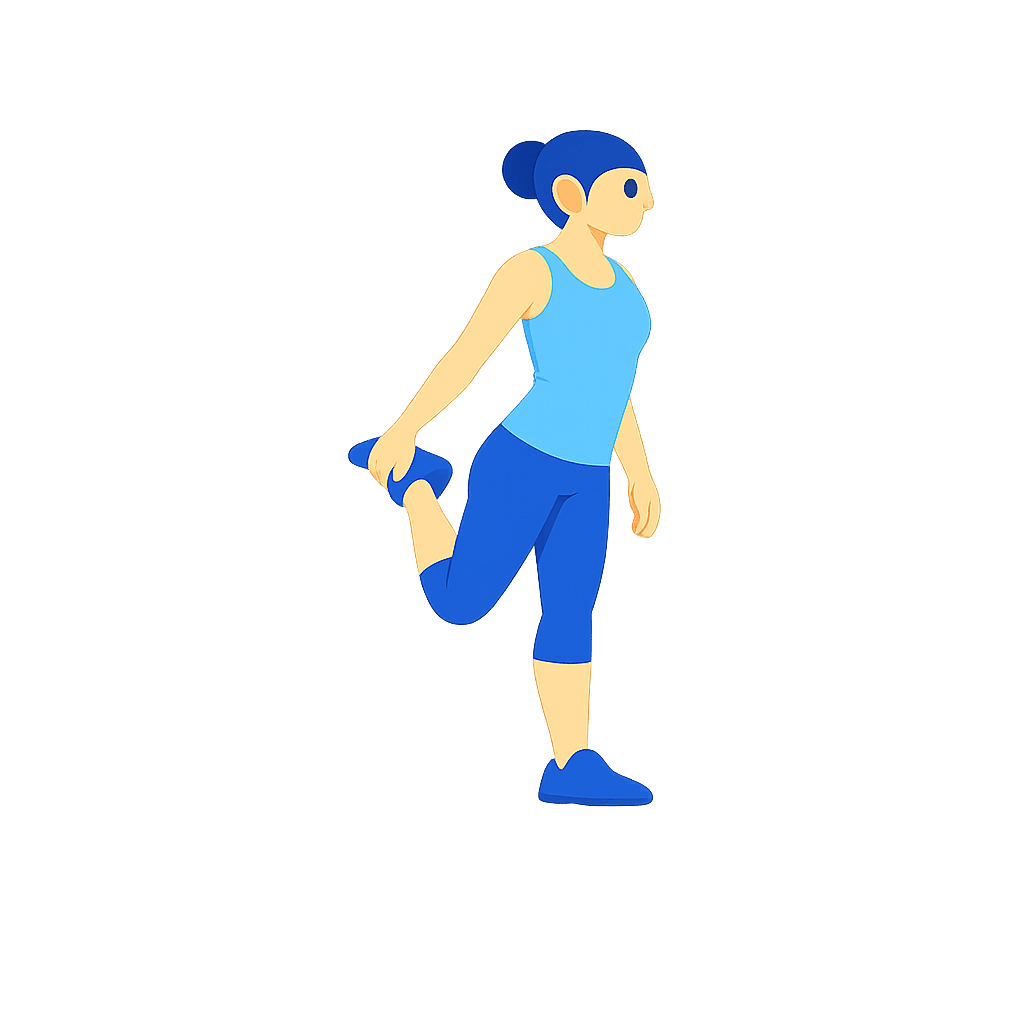
Standing Quad
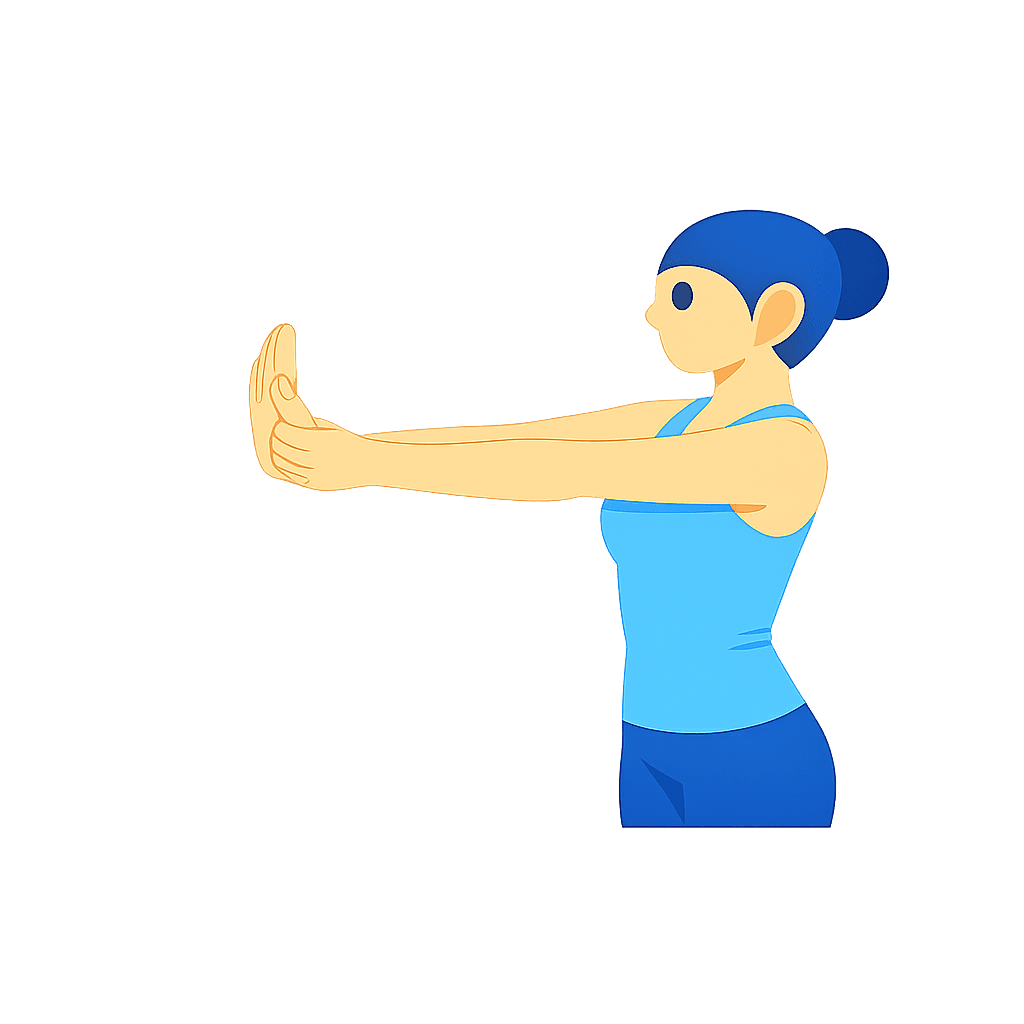
Wrist Extension
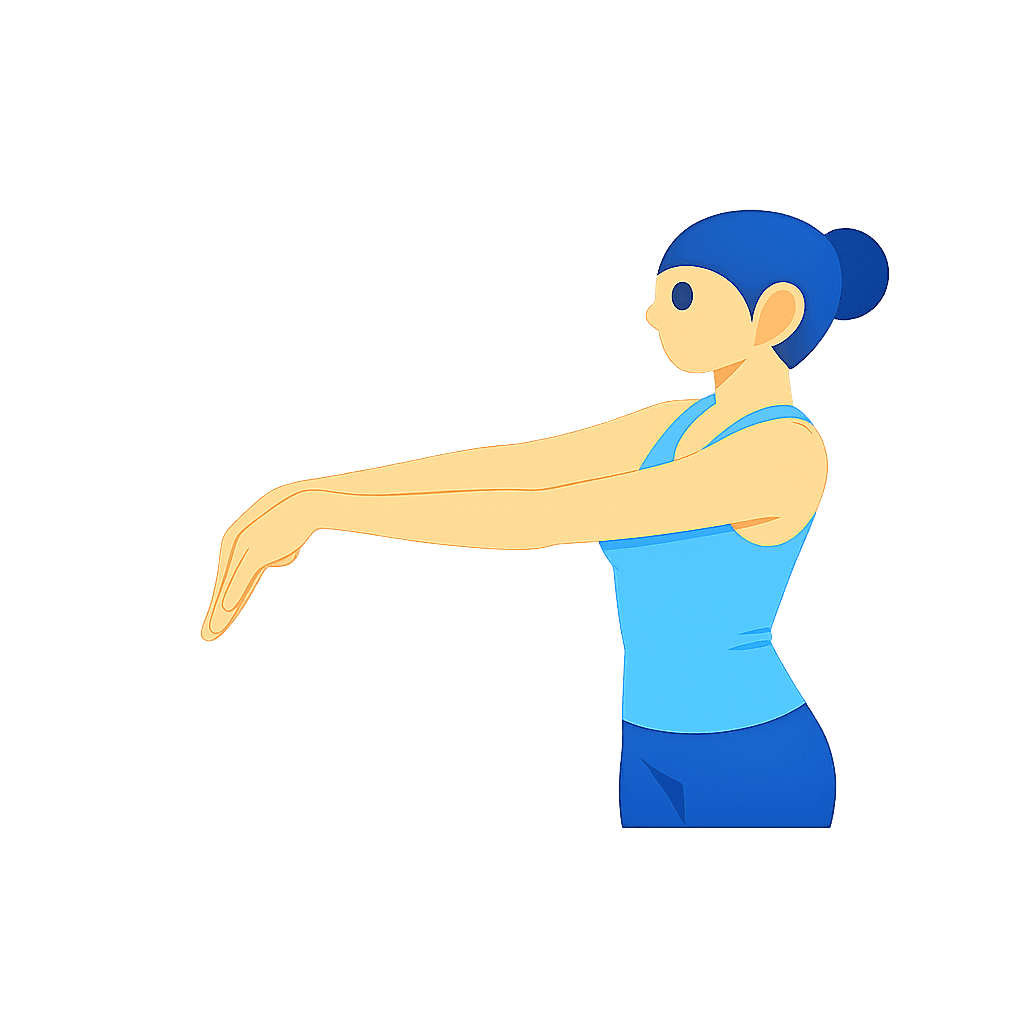
Wrist Flexion
Stretch Routine App exercise instructions
Standing Calf Hinge
How to do it
- Stand with one foot slightly in front of the other.
- Hinge forward from the hips and place your hands on your front thigh or a support.
- Keep the front leg mostly straight and the front heel grounded.
- Gently shift your hips back until you feel a stretch through the calf.
- Hold, breathe slowly, then switch sides.
What to focus on
- Keep your spine long instead of rounding heavily.
- Press the heel of the stretched leg into the floor.
- Feel the stretch through the back of the lower leg.
- Keep the movement steady and controlled.
Make it easier
- Bend the front knee a little.
- Use a wall, chair, or countertop for support.
- Shorten the stance so the position feels less intense.
Avoid this
- Letting the heel lift off the floor.
- Rounding the back to chase more depth.
- Locking the knee aggressively.
- Bouncing into the stretch.
Cactus Arms
How to do it
- Stand tall with your ribs stacked over your hips.
- Lift your arms out to the sides and bend the elbows to about 90 degrees.
- Open the chest by drawing the elbows slightly back.
- Keep the forearms upright and the neck relaxed.
- Hold with slow breaths.
What to focus on
- Feel the stretch across the chest and front of the shoulders.
- Keep your lower ribs from flaring forward too much.
- Lengthen through the crown of the head.
- Let the shoulder blades move gently toward each other.
Make it easier
- Lower the elbows a little below shoulder height.
- Stand with your back lightly against a wall for support.
- Reduce how far back you open the arms.
Avoid this
- Arching the lower back to create range.
- Shrugging the shoulders upward.
- Forcing the elbows behind the body.
- Holding tension in the jaw or neck.
Back-Clasp Chest Opener
How to do it
- Stand tall with your feet grounded.
- Clasp your hands behind your back or hold a strap if needed.
- Gently straighten the arms and lift the chest.
- Draw the shoulders back and slightly down.
- Hold while breathing evenly.
What to focus on
- Feel the stretch across the chest and fronts of the shoulders.
- Keep your neck long and your gaze neutral.
- Lift through the sternum without collapsing the low back.
- Let the movement come from the shoulders, not from leaning forward.
Make it easier
- Keep a soft bend in the elbows.
- Hold a towel or strap between the hands.
- Reduce how high you lift the arms.
Avoid this
- Locking the elbows hard.
- Throwing the ribs forward.
- Pinching the shoulder joints.
- Forcing the hands close together if that strains the shoulders.
Chin Tucks
How to do it
- Sit or stand tall with your eyes looking straight ahead.
- Keep your chin level and gently draw your head straight back.
- Think about making a small double chin without tipping the head up or down.
- Pause briefly, then return to neutral.
- Repeat slowly for the set number of reps.
What to focus on
- Move the head straight back, not downward.
- Keep the shoulders relaxed and the chest open.
- Feel a light effort deep in the front of the neck.
- Make each rep small and controlled.
Make it easier
- Do the movement seated with your back supported.
- Reduce the range and make the motion very subtle.
- Practice against a wall for feedback.
Avoid this
- Tilting the chin up.
- Dropping the head forward between reps.
- Tensing the jaw or shoulders.
- Jamming the head back forcefully.
Corner Chest Opener
How to do it
- Stand facing the corner of a room.
- Place your forearms or palms on each wall with elbows around shoulder height.
- Step one foot slightly forward.
- Gently lean your chest toward the corner until you feel a stretch across the chest.
- Hold, breathe, and ease out slowly.
What to focus on
- Keep the neck relaxed and the shoulders away from the ears.
- Feel the stretch across the chest and front shoulders.
- Keep the lean smooth and moderate.
- Maintain steady breathing instead of bracing.
Make it easier
- Lower the elbows below shoulder height.
- Step less far into the corner.
- Hold for a shorter time.
Avoid this
- Forcing the chest deeply into the corner.
- Letting the low back arch excessively.
- Shrugging the shoulders.
- Pushing into numbness or sharp shoulder pain.
Cross-Leg Fold
How to do it
- Stand tall and cross one leg in front of the other.
- Keep both feet grounded and hinge forward from the hips.
- Let your arms hang or place your hands on a support.
- Soften the knees slightly if needed.
- Hold, then uncross and repeat with the other leg in front.
What to focus on
- Feel the stretch along the outer hamstring and lower back.
- Keep more weight balanced across both feet.
- Lengthen the spine as you fold.
- Let the head and neck stay relaxed.
Make it easier
- Bend both knees a little.
- Rest your hands on a chair, blocks, or thighs.
- Fold only partway down.
Avoid this
- Locking the knees rigidly.
- Pulling yourself down with force.
- Twisting the hips heavily to one side.
- Bouncing at the bottom of the fold.
Cross Leg Side Bend
How to do it
- Stand with one leg crossed in front of the other.
- Reach one arm overhead while the other arm stays by your side or rests on your hip.
- Gently bend your torso away from the back leg.
- Keep both feet grounded and your chest open.
- Hold, then switch sides and leg position.
What to focus on
- Feel the stretch along the side waist and ribs.
- Keep the bend long and lifted, not collapsed.
- Let the lower body stay steady while the torso arcs.
- Breathe into the side of the body.
Make it easier
- Keep the top arm lower.
- Use a smaller side bend.
- Uncross the legs slightly if balance feels awkward.
Avoid this
- Turning the movement into a forward fold.
- Collapsing through the chest.
- Letting both feet roll inward or outward.
- Forcing the bend into the low back.
Split Squat Hold
How to do it
- Step into a long staggered stance.
- Bend both knees and lower into a deep split squat with your torso upright.
- Keep the front foot flat and the back heel lifted.
- Pause at the bottom or move in and out slowly, depending on the routine.
- Push through the legs to come back up.
What to focus on
- Feel a stretch through the hip flexors, quads, and front of the hips.
- Keep the front knee tracking over the foot.
- Stay tall through the torso.
- Move with control instead of dropping quickly.
Make it easier
- Shorten the stance.
- Lower only partway down.
- Hold onto a wall or chair for balance.
Avoid this
- Letting the front knee collapse inward.
- Leaning far forward to compensate.
- Slamming into the bottom position.
- Forcing depth beyond comfortable control.
Arm Sweep
How to do it
- Stand tall with your arms by your sides.
- Sweep both arms forward and up in a smooth arc.
- Continue the motion out and down, as if drawing large circles with the arms.
- Move slowly and evenly for each rep.
- Keep the rest of the body relaxed.
What to focus on
- Let the movement stay smooth through the shoulders.
- Keep the neck long and the jaw relaxed.
- Feel the upper back and shoulders warming up.
- Breathe naturally with the motion.
Make it easier
- Make the circles smaller.
- Slow the pace down.
- Alternate one arm at a time if both together feels too much.
Avoid this
- Shrugging the shoulders toward the ears.
- Swinging with momentum.
- Arching the low back as the arms rise.
- Forcing range that feels pinchy in the shoulders.
Doorway Chest Opener
How to do it
- Stand in a doorway and place one forearm on the frame with the elbow around shoulder height.
- Step the same-side foot slightly forward or gently turn your body away.
- Keep the chest lifted and the shoulder relaxed.
- Hold the stretch across the chest and front shoulder.
- Repeat on the other side.
What to focus on
- Feel the stretch in the chest rather than in the front of the shoulder joint.
- Keep the shoulder blade settled down the back.
- Maintain a soft bend in the knees and easy breathing.
- Use a slow setup instead of pushing into the doorway.
Make it easier
- Lower the elbow below shoulder height.
- Step less far forward.
- Use lighter pressure against the frame.
Avoid this
- Letting the shoulder roll forward aggressively.
- Twisting sharply through the torso.
- Forcing the arm too far behind the body.
- Stretching through pain or tingling.
Cross-Body Shoulder
How to do it
- Stand tall with your shoulders relaxed.
- Bring one arm across your body at chest height.
- Use the opposite arm to support and gently press the upper arm closer.
- Keep the chest facing forward.
- Hold, then switch sides.
What to focus on
- Feel the stretch across the back and side of the shoulder.
- Keep the shoulder of the stretched arm down.
- Maintain a long spine and relaxed neck.
- Keep the pressure steady and light.
Make it easier
- Lower the arm slightly.
- Support closer to the upper arm instead of pulling hard.
- Do the stretch seated.
Avoid this
- Twisting your torso to create more range.
- Pressing directly on the elbow.
- Hunching the shoulders.
- Forcing the arm into a sharp pinch.
Lateral Neck
How to do it
- Sit or stand tall with your shoulders relaxed.
- Gently tip one ear toward the same-side shoulder.
- Let the opposite arm hang heavy or reach lightly toward the floor.
- Keep your face looking forward.
- Hold, then repeat on the other side.
What to focus on
- Feel the stretch along the side of the neck.
- Keep both shoulders level.
- Make the movement small and calm.
- Breathe slowly and let tension soften.
Make it easier
- Rest the stretching-side hand lightly on your head without pulling.
- Do the stretch seated for more support.
- Reduce the angle of the head tilt.
Avoid this
- Turning the chin up or down too much.
- Pulling the head forcefully with the hand.
- Lifting the opposite shoulder.
- Stretching into nerve-like pain, tingling, or dizziness.
Forward Fold
How to do it
- Stand with your feet about hip-width apart.
- Hinge from the hips and fold your torso forward.
- Let your hands rest on your legs, the floor, or a support.
- Keep a soft bend in the knees if needed.
- Hold with relaxed breathing.
What to focus on
- Feel the stretch in the hamstrings and lower back.
- Let the fold come from the hips more than the waist.
- Keep the neck and jaw relaxed.
- Lengthen the front of the torso before settling deeper.
Make it easier
- Bend the knees more.
- Place your hands on a chair, blocks, or thighs.
- Fold only halfway down.
Avoid this
- Locking the knees straight.
- Yanking yourself deeper with the arms.
- Bouncing in the stretch.
- Forcing your chest to the legs.
Leaning Calf
How to do it
- Face a wall or sturdy surface and place your hands on it.
- Step one foot back and keep that leg mostly straight.
- Press the back heel into the floor as you bend the front knee.
- Lean forward slightly until you feel a stretch in the back calf.
- Hold, then switch sides.
What to focus on
- Keep the back foot pointing mostly forward.
- Feel the stretch in the upper calf of the back leg.
- Keep both hips facing ahead.
- Use steady pressure through the heel.
Make it easier
- Shorten the distance between your feet.
- Bend the back knee a little.
- Reduce how far you lean into the wall.
Avoid this
- Letting the back heel lift.
- Turning the back foot far outward.
- Bouncing through the stretch.
- Twisting the hips or shoulders.
Low Reverse Prayer
How to do it
- Stand tall and bring your hands behind your back.
- Place the backs of the fingers or palms together as comfortably as possible.
- Slide the hands upward a little if that feels available.
- Gently draw the shoulders back and lift the chest.
- Hold with slow breaths.
What to focus on
- Feel the stretch through the chest, wrists, and fronts of the shoulders.
- Keep the shoulders relaxed rather than forced back.
- Stand tall without flaring the ribs.
- Use the hand position that lets the stretch stay calm.
Make it easier
- Keep the hands lower on the back.
- Use only the backs of the fingers together.
- Try one hand higher than the other instead of matching both evenly.
Avoid this
- Forcing the palms flat if your shoulders resist it.
- Jamming the shoulders backward.
- Holding tension in the neck.
- Pushing through wrist pain.
Neck Extension
How to do it
- Sit or stand tall with your shoulders relaxed.
- Gently lift your chin and look slightly upward.
- Keep the movement small and smooth.
- Pause where you feel a light stretch in the front of the neck.
- Return slowly to neutral.
What to focus on
- Move from the neck without collapsing the upper back.
- Keep the jaw relaxed.
- Feel only a mild stretch through the front of the neck.
- Make the range smaller than you think you need.
Make it easier
- Lift the chin only a little.
- Do the movement seated with back support.
- Place one hand on the chest to stay grounded.
Avoid this
- Throwing the head far back.
- Compressing the back of the neck.
- Holding the breath.
- Continuing if you feel dizziness or sharp pain.
Neck Flexion
How to do it
- Sit or stand tall with your spine long.
- Gently lower your chin toward your chest.
- Let the back of the neck lengthen without collapsing the shoulders.
- Keep the movement light and controlled.
- Hold, then return to neutral slowly.
What to focus on
- Feel the stretch along the back of the neck.
- Keep the shoulders down and relaxed.
- Let the chin move down, not the whole chest caving in.
- Breathe calmly.
Make it easier
- Lower the chin only partway.
- Do the stretch seated with your hands resting on your thighs.
- Add a small towel roll behind the upper back for support if seated.
Avoid this
- Forcing the chin tightly into the chest.
- Pulling down hard with your hands.
- Rounding the whole torso forward.
- Stretching through tingling or sharp discomfort.
Neck Rotation
How to do it
- Sit or stand tall with your chin level.
- Slowly turn your head to one side as if looking over your shoulder.
- Pause briefly when you feel a gentle limit.
- Return to center and repeat on the other side.
- Continue with smooth, controlled reps.
What to focus on
- Keep the movement slow and even.
- Let the rotation come from the neck, not the torso.
- Keep the shoulders relaxed.
- Stay within a comfortable range.
Make it easier
- Make each turn smaller.
- Do the movement seated with your back supported.
- Pause less at the end range.
Avoid this
- Forcing the head farther with your hand.
- Lifting or twisting the shoulders.
- Snapping quickly from side to side.
- Pushing into pain or dizziness.
Overhead Triceps
How to do it
- Stand tall and raise one arm overhead.
- Bend the elbow so the hand drops behind your head or upper back.
- Use the opposite hand to gently support the bent elbow.
- Guide the elbow slightly upward and inward.
- Hold, then switch arms.
What to focus on
- Feel the stretch along the triceps and side of the shoulder.
- Keep the ribs softly down and the spine tall.
- Relax the neck.
- Let the elbow point mostly upward.
Make it easier
- Skip the assisting hand and hold the position lightly.
- Keep the elbow a little more forward.
- Sit down for a steadier setup.
Avoid this
- Pulling hard on the elbow.
- Arching the lower back.
- Forcing the hand deep down the spine.
- Letting the head push forward.
Rag Doll
How to do it
- Stand with your feet about hip-width apart and fold forward from the hips.
- Let your head, neck, and arms hang heavy.
- Hold opposite elbows or simply let the hands dangle.
- Keep a soft bend in the knees so the spine can relax.
- Stay still and breathe slowly.
What to focus on
- Feel the stretch through the hamstrings and the release in the lower back.
- Let gravity do most of the work.
- Keep more weight toward the front of the feet without lifting the heels.
- Allow the neck to fully relax.
Make it easier
- Bend the knees more.
- Rest your forearms on your thighs or a chair.
- Widen the feet slightly.
Avoid this
- Locking the knees straight.
- Pulling yourself down with the arms.
- Tensing the neck.
- Swaying or bouncing aggressively.
Reverse Prayer
How to do it
- Stand tall and bring your hands behind your back.
- Turn the palms toward each other and press them together if available.
- Slide the hands upward between the shoulder blades as comfort allows.
- Gently open the chest and draw the shoulders back.
- Hold with calm breathing.
What to focus on
- Feel the stretch in the chest, shoulders, and wrists.
- Keep the movement steady and controlled.
- Stand tall without leaning forward.
- Use the highest hand position you can maintain comfortably.
Make it easier
- Start with the hands lower on the back.
- Try the modified version with backs of the fingers together.
- Hold for less time.
Avoid this
- Forcing the palms fully together.
- Jamming the hands up the spine.
- Letting the shoulders tense toward the ears.
- Pushing through wrist or shoulder pain.
Shoulder Rolls
How to do it
- Stand tall with your arms relaxed by your sides or lightly bent.
- Roll the shoulders forward, up, back, and down in a smooth circle.
- Complete the planned number of reps.
- Reverse the direction and repeat.
- Keep the rest of the body relaxed.
What to focus on
- Move slowly enough to feel each part of the circle.
- Let the shoulder blades glide, not just the arms.
- Keep the neck relaxed and the jaw soft.
- Use a range that feels smooth, not crunchy or forced.
Make it easier
- Make the circles smaller.
- Do one shoulder at a time.
- Sit in a chair if standing feels tiring.
Avoid this
- Moving too fast.
- Throwing the chest forward with each circle.
- Tensing the neck.
- Forcing through a pinching sensation.
Upper Back Reach
How to do it
- Stand tall and bring both hands together in front of you at shoulder height.
- Interlace the fingers or hold opposite hands.
- Reach the arms forward and gently round the upper back.
- Let the shoulder blades spread apart.
- Hold while keeping the shoulders relaxed.
What to focus on
- Feel the stretch between the shoulder blades and across the upper back.
- Keep the chin slightly tucked and the neck long.
- Reach forward without collapsing your whole posture.
- Breathe into the upper back.
Make it easier
- Bend the elbows slightly.
- Sit down and rest the feet firmly on the floor.
- Reduce how much you round the upper back.
Avoid this
- Shrugging the shoulders toward the ears.
- Rounding hard through the lower back.
- Locking the elbows aggressively.
- Pulling the arms so far forward that the shoulders pinch.
Side Bend
How to do it
- Stand tall with your feet grounded.
- Reach one arm overhead or place the hand lightly behind the head.
- Bend your torso gently to the opposite side.
- Keep both sides of the waist long rather than collapsing.
- Hold, then switch sides.
What to focus on
- Feel the stretch along the side waist, ribs, and obliques.
- Keep the chest open instead of folding forward.
- Let the hips stay mostly level.
- Breathe into the stretched side.
Make it easier
- Keep the top arm lower.
- Use a smaller bend.
- Stand with your back near a wall for alignment.
Avoid this
- Twisting instead of side bending.
- Leaning the whole body forward.
- Jamming the movement into the low back.
- Locking the knees rigidly.
Side Lunge
How to do it
- Stand with your feet wider than hip-width apart.
- Shift your weight to one side and bend that knee while the other leg stays long.
- Sit the hips back as you move into the lunge.
- Push through the bent leg to return to center.
- Alternate sides or repeat on one side as directed.
What to focus on
- Feel the stretch through the inner thigh, groin, and hips.
- Keep the bent knee tracking over the foot.
- Keep the chest lifted and the spine long.
- Move with control both into and out of the lunge.
Make it easier
- Take a narrower stance.
- Do a shallower bend.
- Hold onto a chair or wall for balance.
Avoid this
- Letting the bent knee collapse inward.
- Dropping the chest heavily forward.
- Forcing the straight leg to stay fully locked.
- Rushing through the reps.
Single-Leg Balance Reach
How to do it
- Stand tall and shift your weight onto one leg.
- Hinge forward from the hips as the other leg extends behind you.
- Reach your hands toward the floor or keep them at your sides.
- Pause when your torso and back leg form a long line.
- Return to standing with control, then repeat.
What to focus on
- Feel the standing-side hamstring and glute working and lengthening.
- Keep the hips as level as possible.
- Move from the hip hinge instead of rounding the back.
- Keep a soft bend in the standing knee.
Make it easier
- Tap the back toes lightly to the floor between reps.
- Hold onto a wall or chair.
- Reduce how far you hinge.
Avoid this
- Twisting the hips open.
- Locking the standing knee.
- Reaching so low that the spine rounds.
- Moving too fast and losing balance.
Bent-Knee Calf
How to do it
- Stand facing a wall or support.
- Step one foot back and keep both heels on the floor.
- Bend both knees, especially the back knee.
- Lean slightly forward until you feel a stretch lower in the back calf.
- Hold, then switch sides.
What to focus on
- Feel the stretch deep and low in the calf of the back leg.
- Keep the back heel grounded.
- Let the front knee bend enough to help the position.
- Keep the body square to the front.
Make it easier
- Shorten the stance.
- Lean less far forward.
- Hold the wall more firmly for support.
Avoid this
- Straightening the back knee too much.
- Letting the back heel lift.
- Twisting the back foot outward.
- Bouncing through the position.
Deep Squat Hold
How to do it
- Stand with your feet slightly wider than hip-width apart.
- Lower into a deep squat as far as comfortable.
- Keep your heels down if possible and your chest lifted.
- Rest your elbows lightly inside the knees if that helps open the hips.
- Pause or move gently in and out of the position.
What to focus on
- Feel the hips, ankles, and groin opening together.
- Keep the spine as long as possible.
- Let the knees track in line with the feet.
- Breathe and allow the position to settle gradually.
Make it easier
- Place a rolled towel or small lift under the heels.
- Hold onto a sturdy support in front of you.
- Stay in a higher squat.
Avoid this
- Collapsing the chest forward.
- Letting the knees cave inward.
- Forcing the heels down if that causes strain.
- Dropping abruptly into the bottom position.
Wide Squat Hold
How to do it
- Stand with your feet wider than hip-width apart and toes turned out slightly.
- Bend the knees and lower into a wide squat or supported wide stance.
- Place your hands on your thighs for support.
- Gently press the knees outward as you keep the chest lifted.
- Hold and breathe into the hips and groin.
What to focus on
- Feel the stretch through the inner thighs and groin.
- Keep the spine long and the chest open.
- Let the hips sink only as far as you can control.
- Use the hands on the thighs for light support, not force.
Make it easier
- Take a slightly narrower stance.
- Stay higher in the squat.
- Hold onto a chair, wall, or countertop.
Avoid this
- Forcing the knees outward aggressively.
- Rounding the back.
- Letting the feet roll inward.
- Sinking so low that balance is lost.
Lunge Twist
How to do it
- Step into a split stance with one foot forward and one foot back.
- Bend the front knee and keep the back leg active.
- Bring your hands together at chest height.
- Rotate your torso toward the front leg in a controlled twist.
- Return to center and repeat, then switch sides if needed.
What to focus on
- Feel the front of the hip opening while the spine rotates gently.
- Keep the twist tall rather than collapsed.
- Let the hips stay mostly facing forward.
- Move slowly and keep breathing.
Make it easier
- Shorten the stance.
- Make the twist smaller.
- Keep the back knee slightly bent or use a wall for support.
Avoid this
- Letting the front knee drift inward.
- Forcing the twist with the arms.
- Leaning far forward over the front thigh.
- Moving so fast that balance is lost.
Standing Quad
How to do it
- Stand tall and shift your weight onto one leg.
- Bend the other knee and bring the heel toward your glutes.
- Hold the ankle or top of the foot with the same-side hand.
- Keep the knees close together and gently press the hip forward.
- Hold, then switch sides.
What to focus on
- Feel the stretch along the front of the thigh.
- Keep the torso upright and the core lightly engaged.
- Let the standing leg stay soft, not rigid.
- Use a small hip tuck to increase the stretch instead of pulling harder.
Make it easier
- Hold onto a wall or chair.
- Keep the lifted knee a little forward.
- Use a strap around the foot if reaching is difficult.
Avoid this
- Pulling the foot hard into the glutes.
- Letting the lifted knee flare far out to the side.
- Arching the lower back.
- Locking the standing knee.
Wrist Extension
How to do it
- Extend one arm in front of you with the elbow straight but not locked.
- Turn the palm forward or upward depending on comfort.
- Use the other hand to gently draw the fingers back.
- Hold until you feel a stretch through the wrist and forearm.
- Repeat on the other side.
What to focus on
- Feel the stretch in the forearm, not pain in the wrist joint.
- Keep the shoulder relaxed.
- Use gentle pressure and steady breathing.
- Keep the arm long without overlocking the elbow.
Make it easier
- Bend the elbow slightly.
- Pull the fingers back less.
- Rest the elbow against your body for support.
Avoid this
- Forcing the hand back sharply.
- Twisting the wrist awkwardly.
- Holding your breath.
- Continuing through tingling, numbness, or joint pain.
Wrist Flexion
How to do it
- Extend one arm in front of you.
- Turn the palm down.
- Use the other hand to gently bend the hand downward so the fingers point toward the floor.
- Keep the elbow long and the shoulder relaxed.
- Hold, then repeat on the other side.
What to focus on
- Feel the stretch along the top of the forearm and wrist.
- Keep the movement light and controlled.
- Let the shoulder stay down and away from the ear.
- Breathe steadily.
Make it easier
- Bend the elbow slightly.
- Reduce the angle at the wrist.
- Support the arm on a table or against your torso.
Avoid this
- Pulling forcefully on the hand.
- Locking the elbow hard.
- Letting the shoulder tense upward.
- Stretching through sharp wrist pain or numbness.
Build a Stretch Routine That Fits Your Day
Stretching is easier to keep doing when the routine is simple, clear, and realistic. With Checklist, you can start from a preset stretch routine or choose the individual stretches you want. Then you can adjust the exercises, duration, repetitions, and order before turning it into a checklist you can follow again.
Use it for a quick morning stretch, a desk break, a pre-run warm up, a post-workout cool down, or a longer full body flexibility session. The goal is not to force you into one fixed plan. It is to help you build a stretch routine that matches your body, your time, and the reason you are stretching.
Why Use Checklist for Stretching?
Most stretching apps are made only for stretching. Checklist is built for repeatable routines. That means your stretching can sit next to your other checklists, workouts, habits, travel lists, home tasks, and work processes.
This is useful because stretching is often part of something bigger. You might stretch before running, after the gym, during a work break, or before going to sleep. Instead of installing a separate app for every small routine in your day, you can manage them in one place.
The checklist format also keeps things easy to edit. Each stretch is a step. You can add a stretch, remove one that does not work for you, change the order, or shorten the routine when you only have a few minutes.
How the Stretch Routine Builder Works
The stretch routine builder helps you create a routine without starting from an empty page.
- Choose a preset routine or start from scratch.
- Filter stretches by type, position, body area, difficulty, or goal.
- Select the exercises you want to include.
- Adjust duration, repetitions, or other details where needed.
- Create a checklist session or save the result as a reusable routine.
- Run the routine whenever you want to stretch.
You can keep it short and practical, or make it more focused. For example, you can build a neck and shoulder stretch for desk breaks, a hip mobility routine for training days, or a full body stretching routine for general flexibility.
Stretch Routine Ideas
Checklist can help you build different types of stretching routines, including:
- Morning stretch routine
- Full body stretch routine
- Pre-run warm up
- Post-run recovery stretch
- Desk stretch routine
- Neck and shoulder stretch routine
- Hip mobility routine
- Lower back stretch routine
- Flexibility routine
- Cool down routine
- Evening relaxation stretch
Start with one routine you are likely to repeat. A short routine you actually use is usually better than a long one you skip.
More Than a One-Time Stretch List
A list of stretches is helpful once. A saved routine is more useful if you want to stretch regularly. Checklist lets you prepare the routine once, save it, and come back to it later.
You might have one routine for mornings, one for after workouts, and one for travel days. Each one can have its own exercises, order, and timing. When something stops working, you can update the routine instead of starting over.
This is the main advantage of using Checklist for stretching: your routine is not locked into a fixed program. It can change with your schedule, your training, and the way your body feels.
Who This Stretch Routine App Is For
Checklist is useful for beginners who want clear steps, active people who need warm up or recovery routines, office workers who want short movement breaks, and anyone trying to build a more consistent stretching habit.
It is also useful if you already know which stretches you like but want a better way to organize them. Instead of searching for the same exercises again, you can save your own stretch routine and reuse it whenever you need it.
Start With a Preset or Build Your Own
Use the builder above to choose a preset, customize the exercises, and create a stretching checklist that works for you. Keep it simple enough to repeat, clear enough to follow, and flexible enough to adjust later.