
Your checklist
No exercises selected yet
Choose a preset above or add exercises from the list below.
Choose more exercises
Add optional exercises to your routine.
57 exercises currently match
Pilates Breathing
Neutral Spine Setup
Pelvic Clock
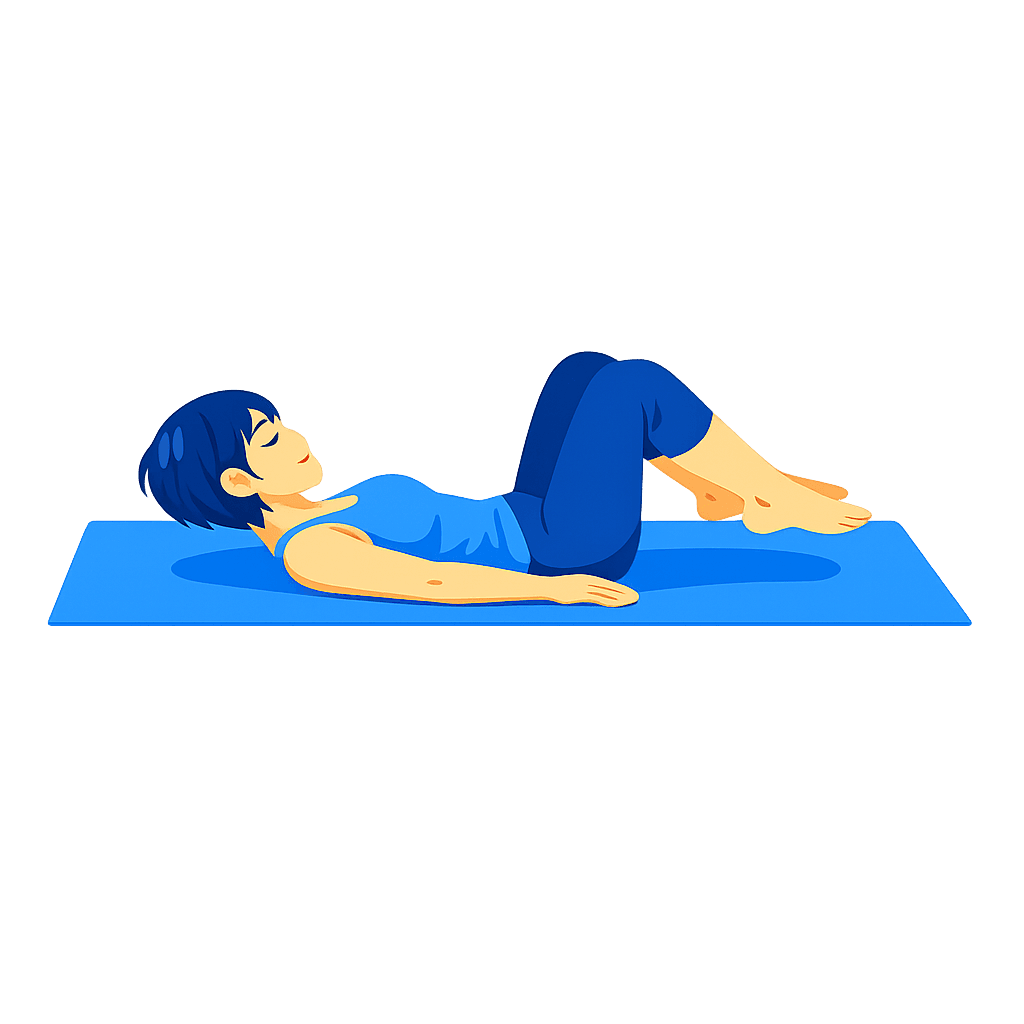
Hundred Prep
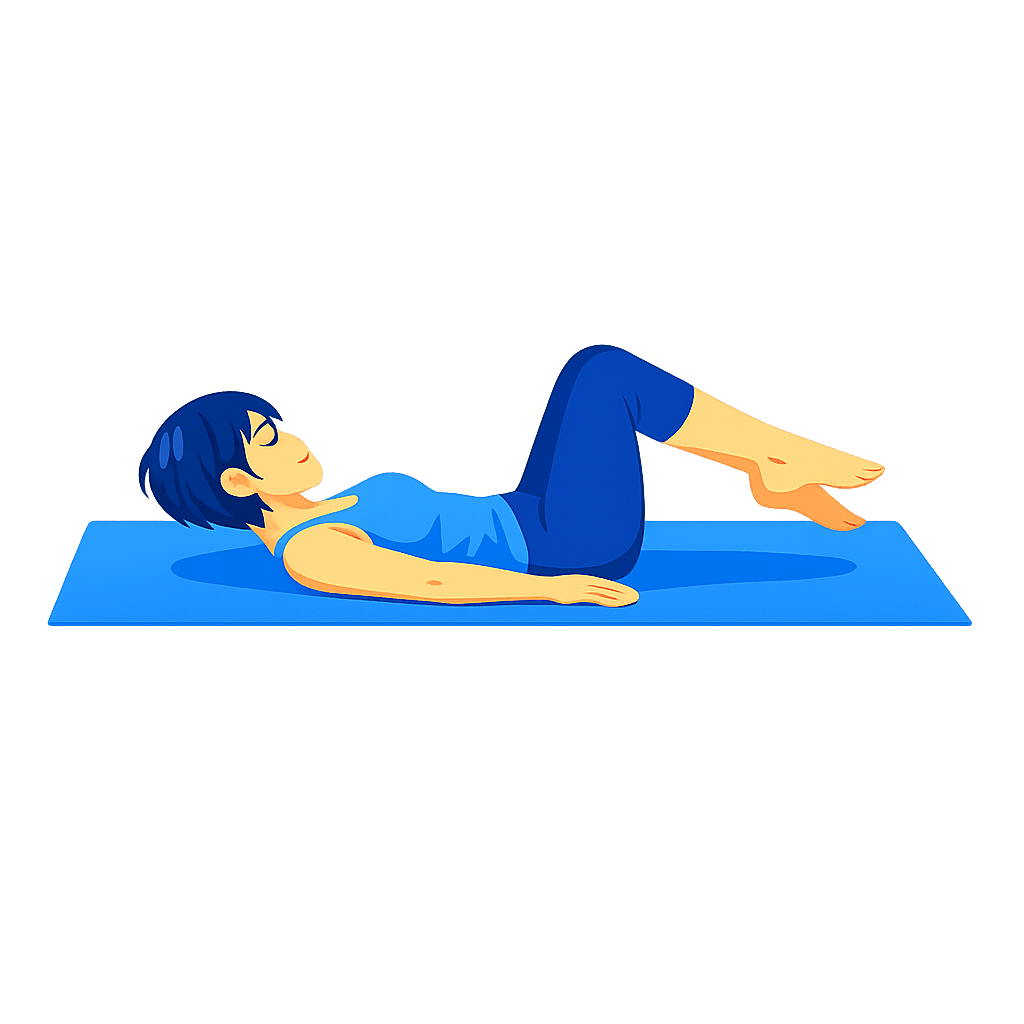
Toe Taps
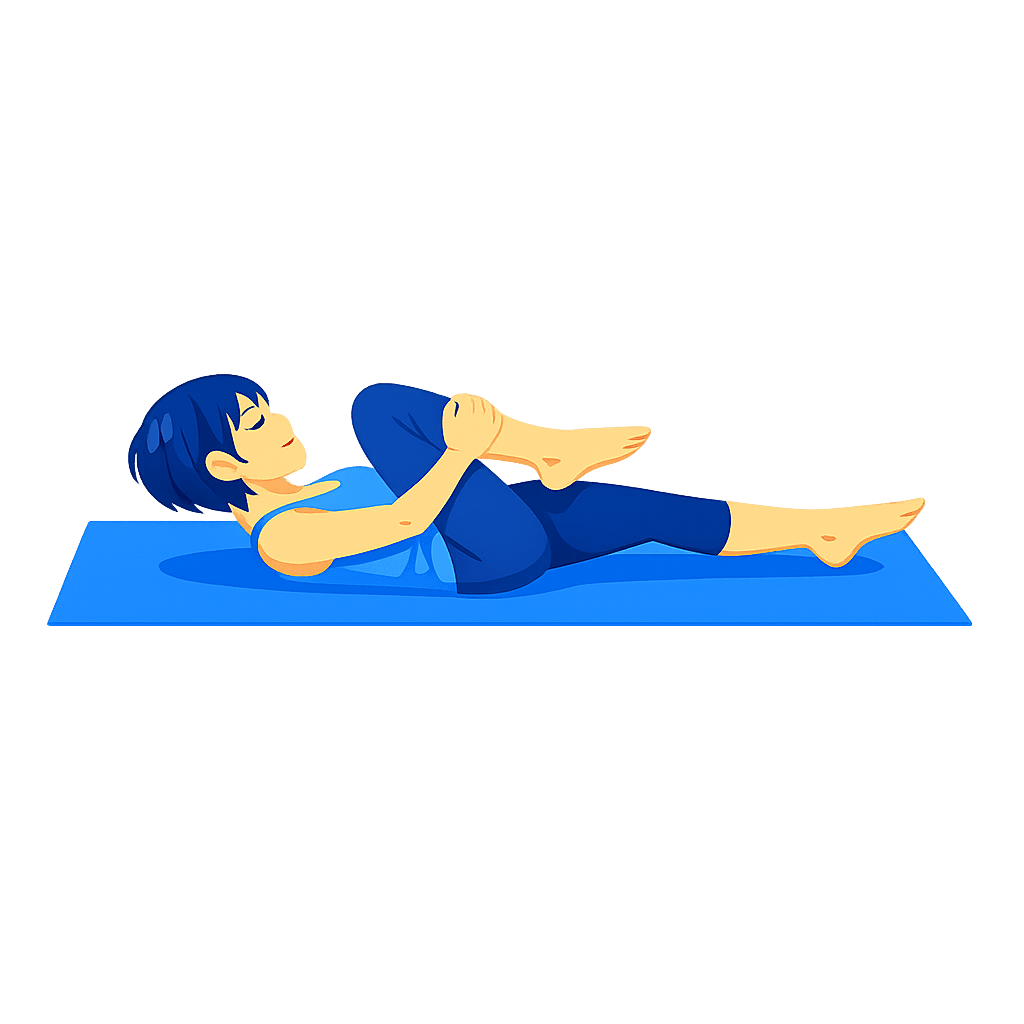
Single Leg Stretch
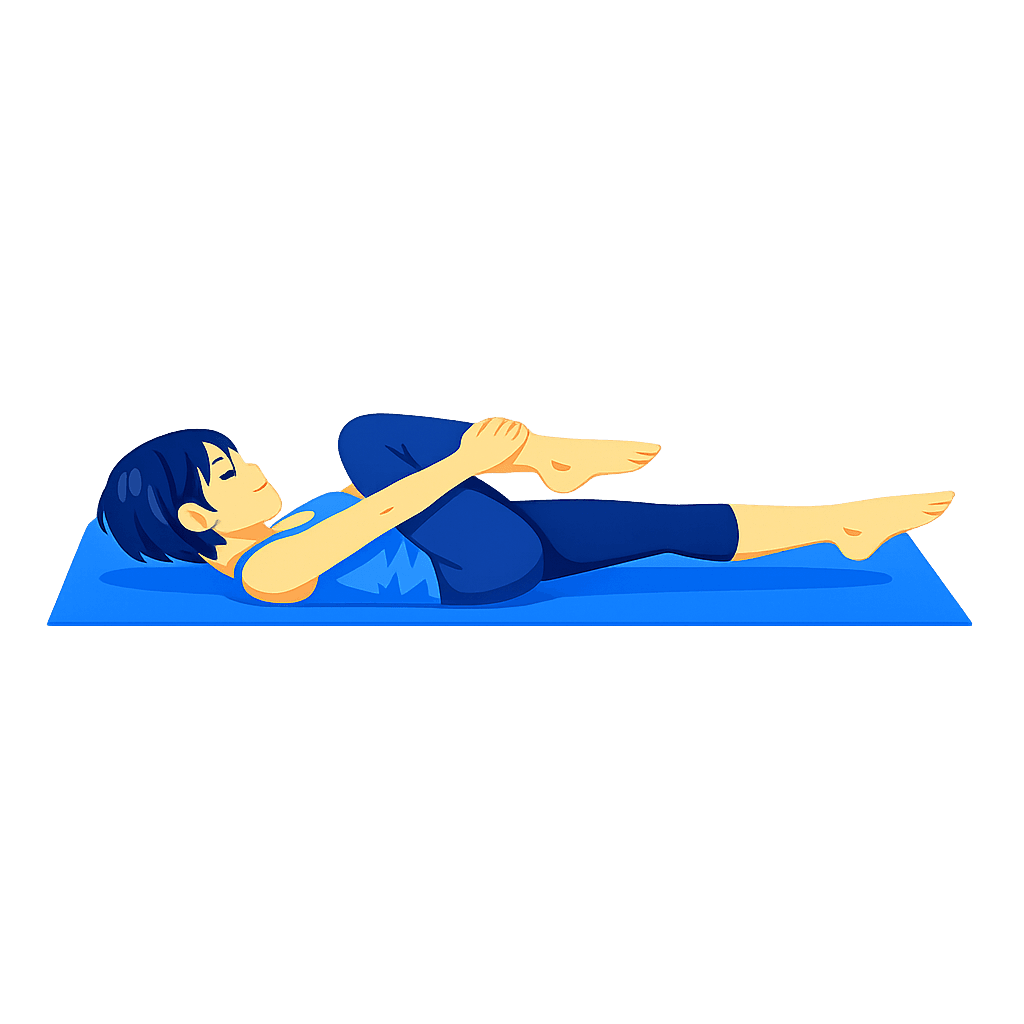
Double Leg Stretch
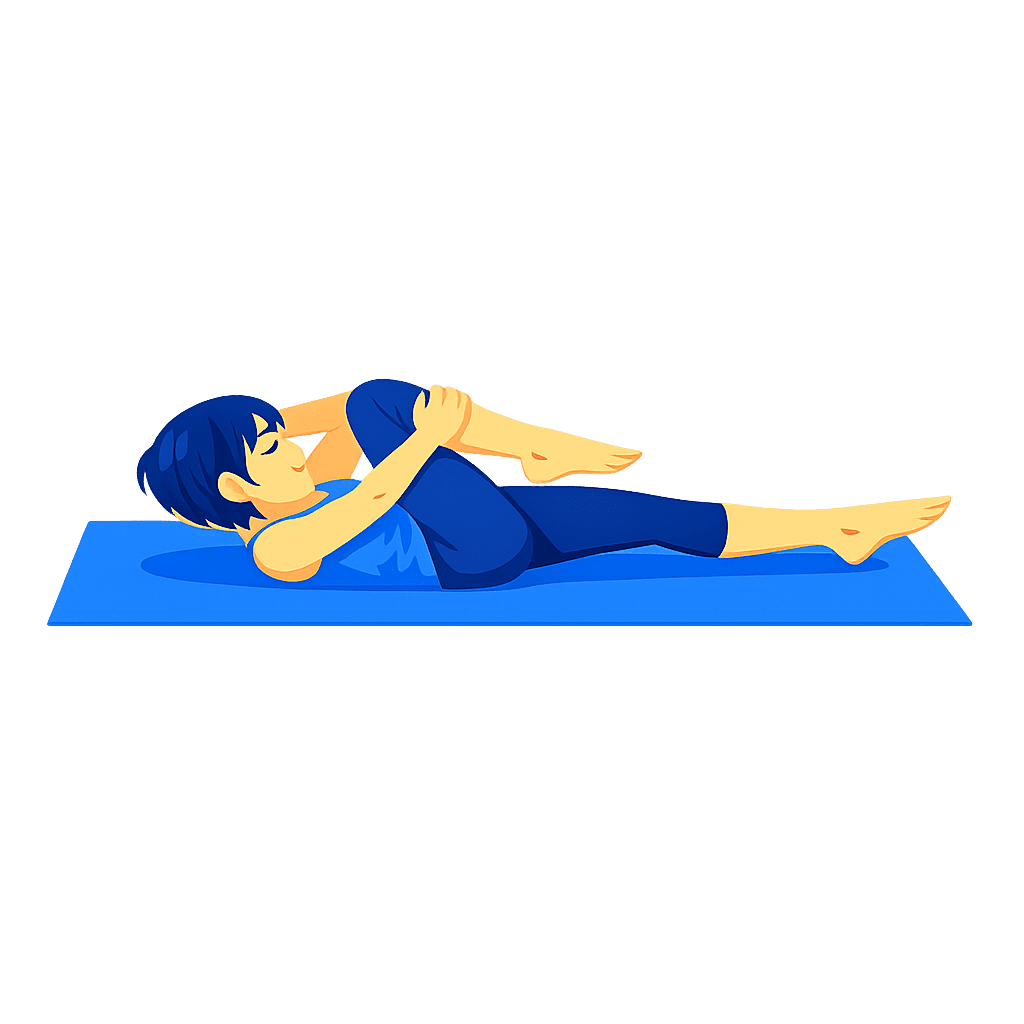
Criss-Cross
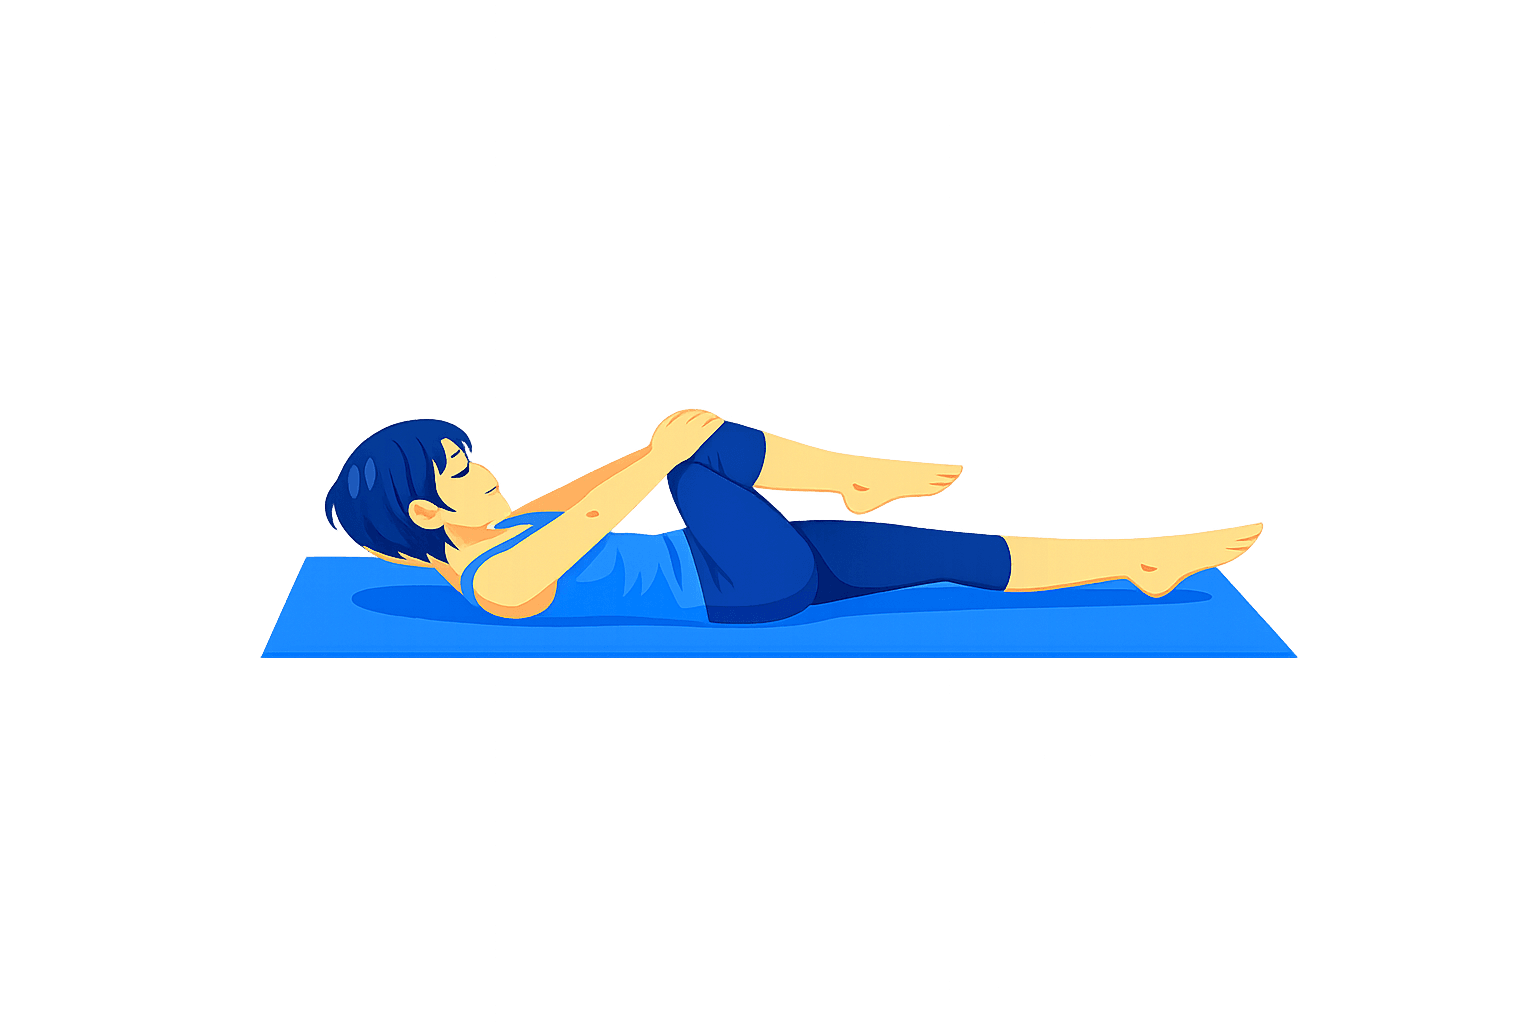
Pilates Curl
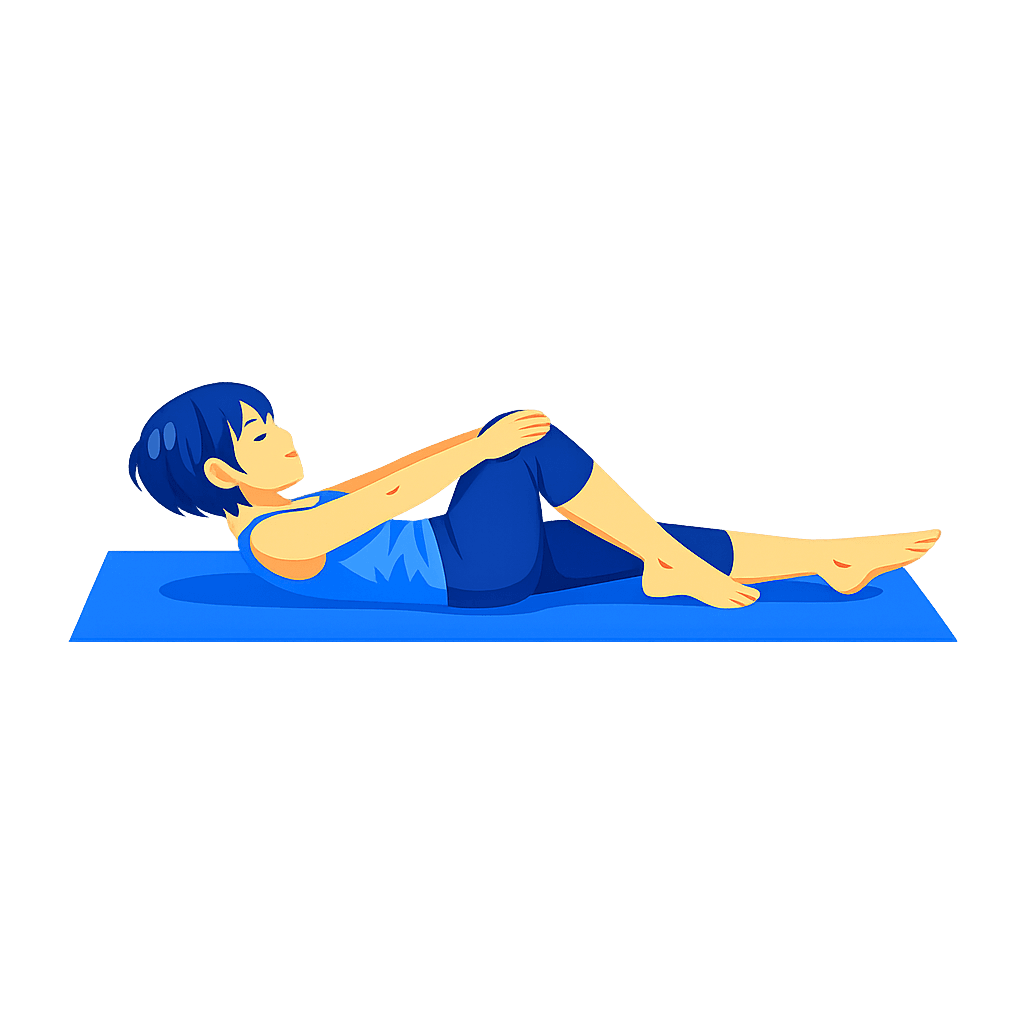
Plank Prep
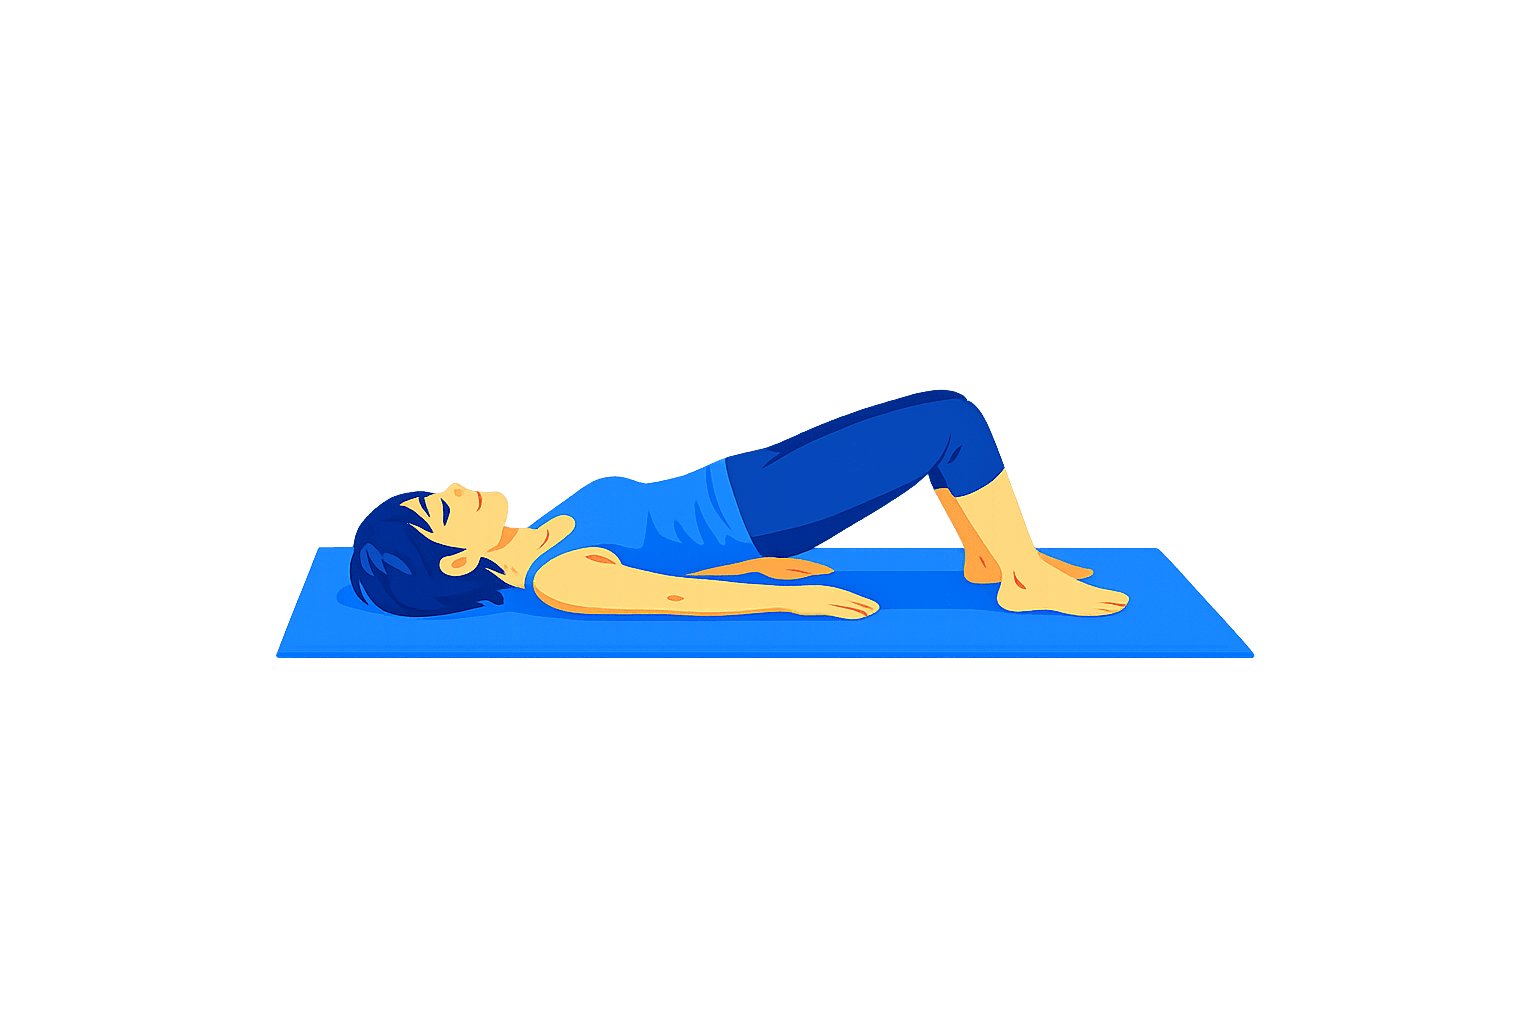
Glute Bridge
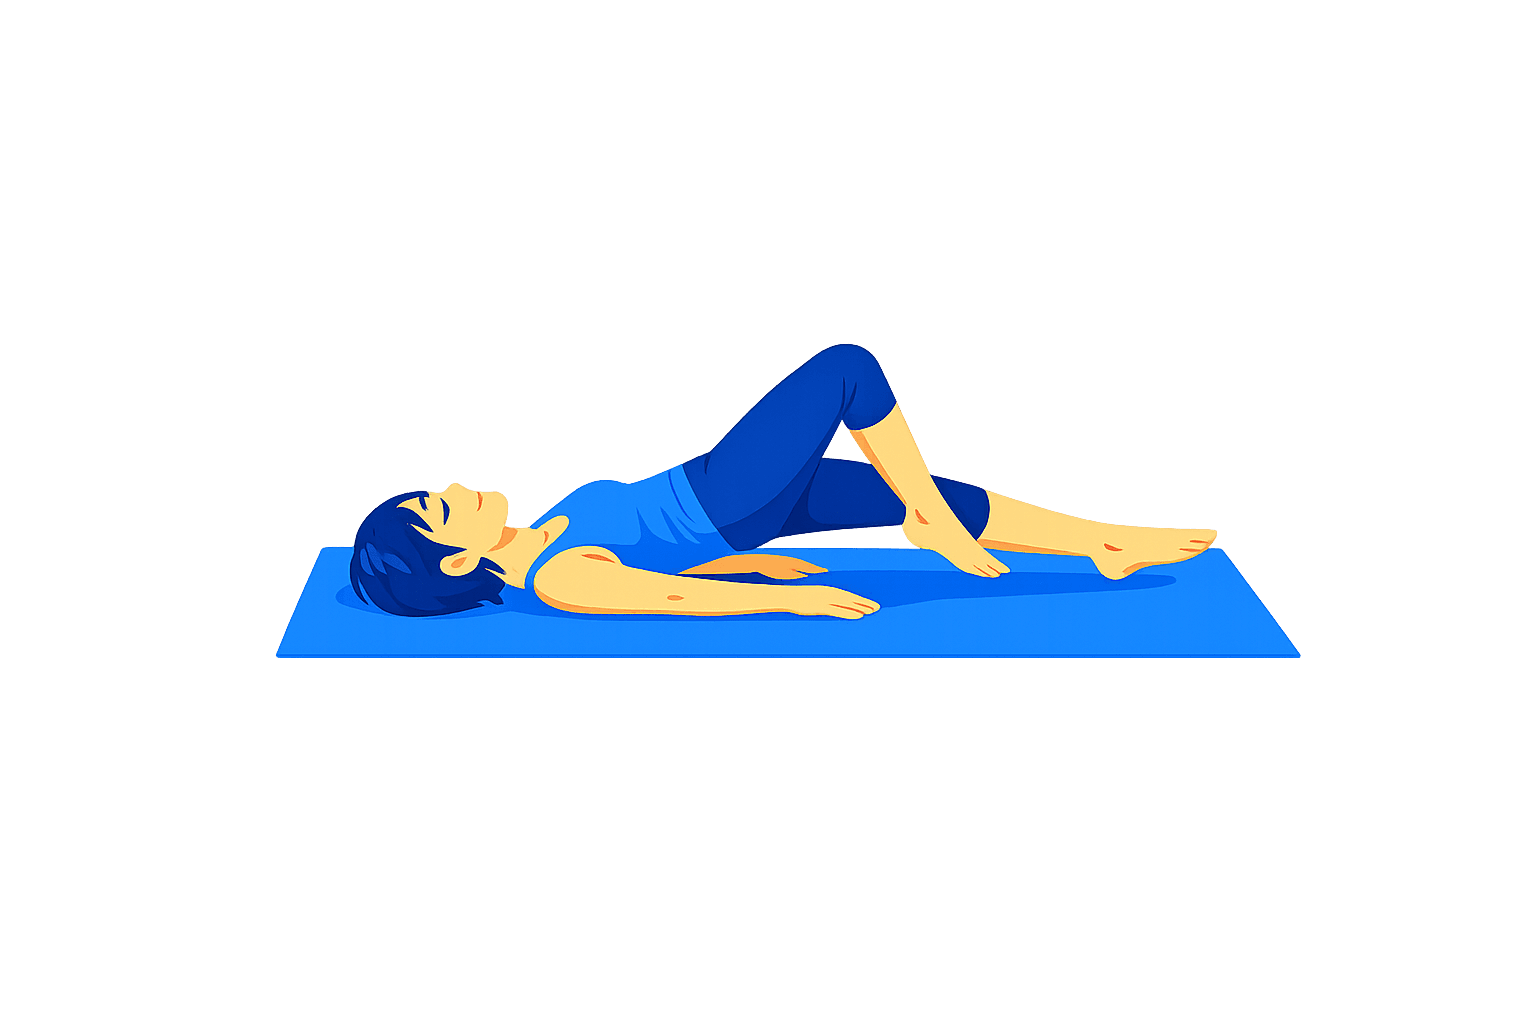
Bridge March
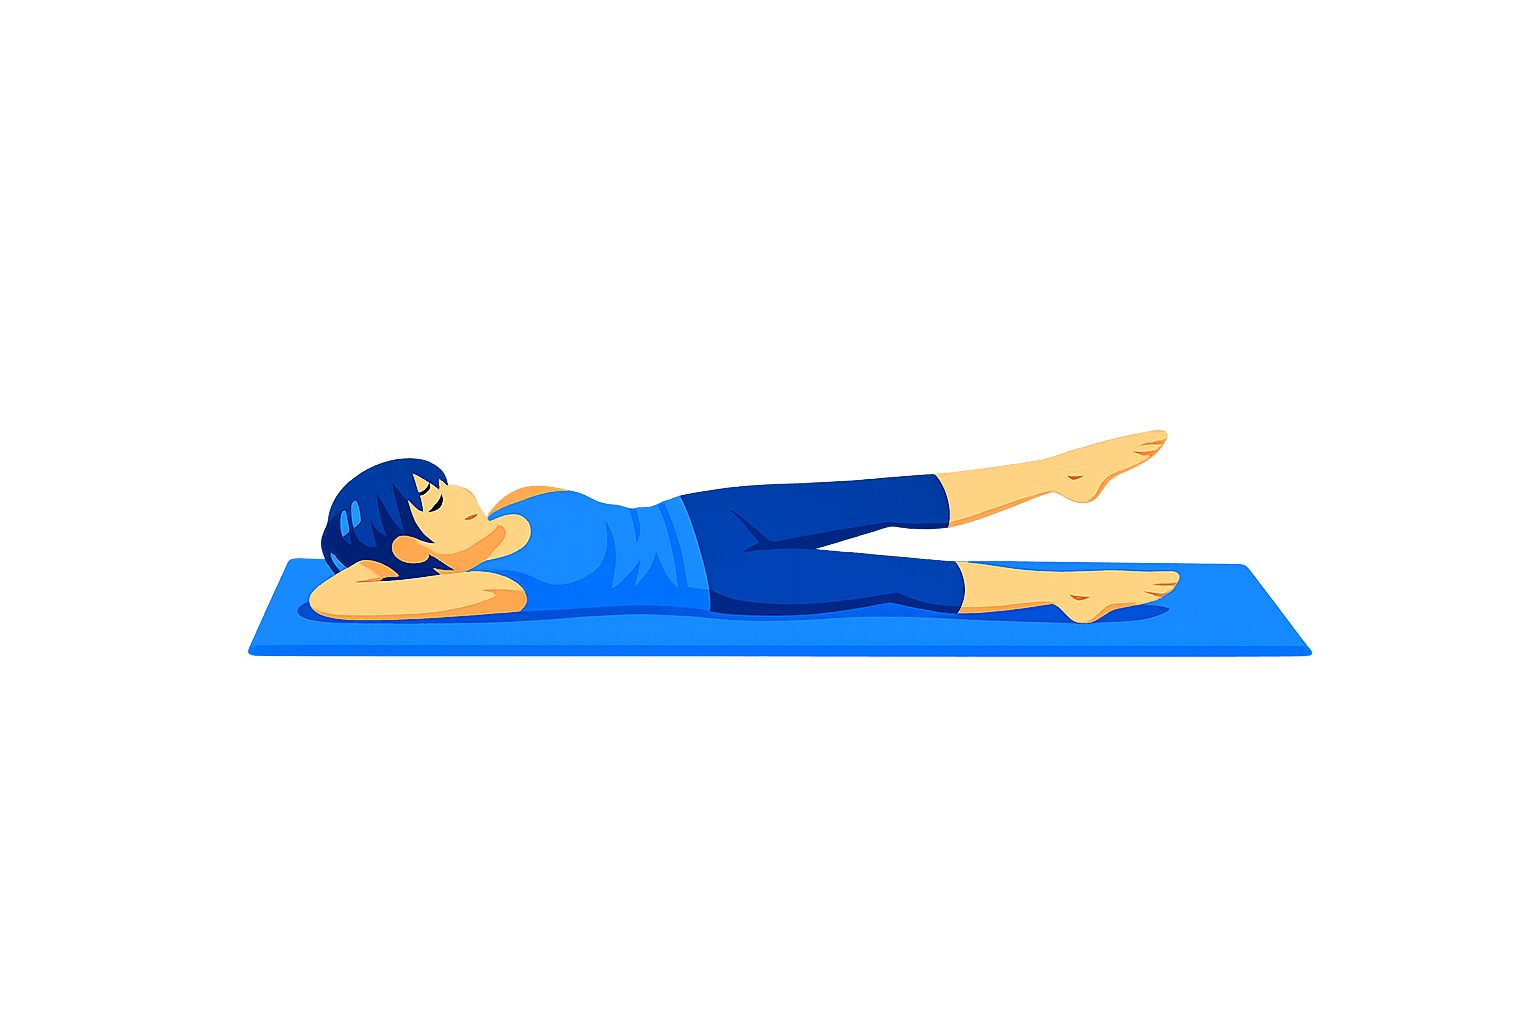
Side-Lying Leg Lift
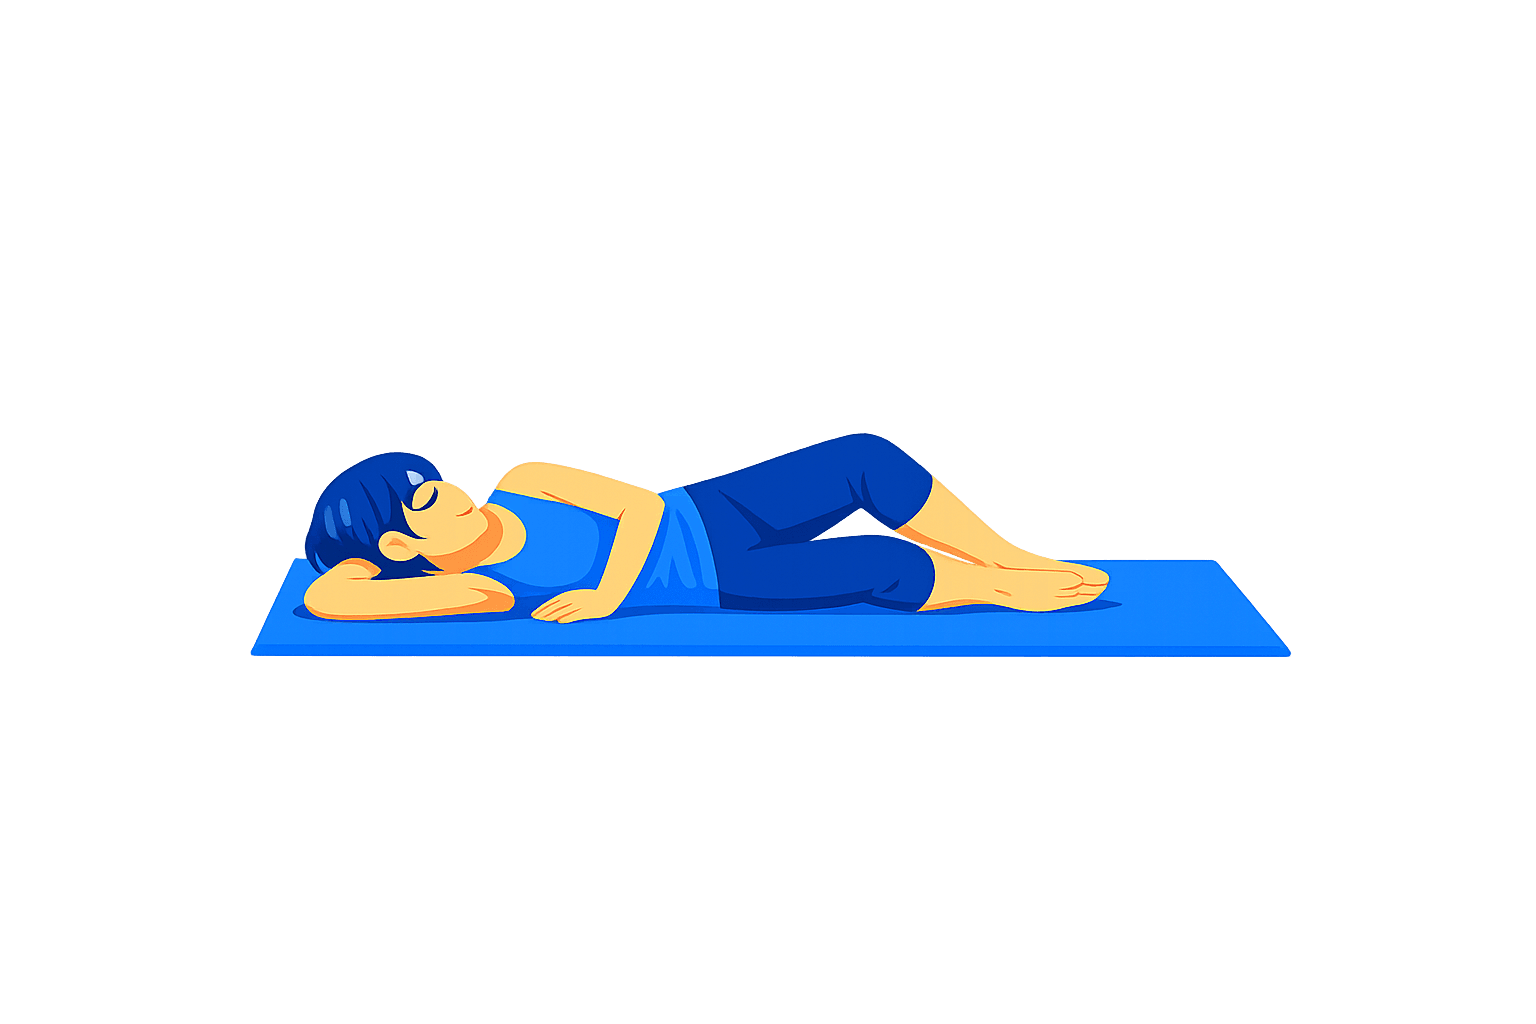
Clamshell
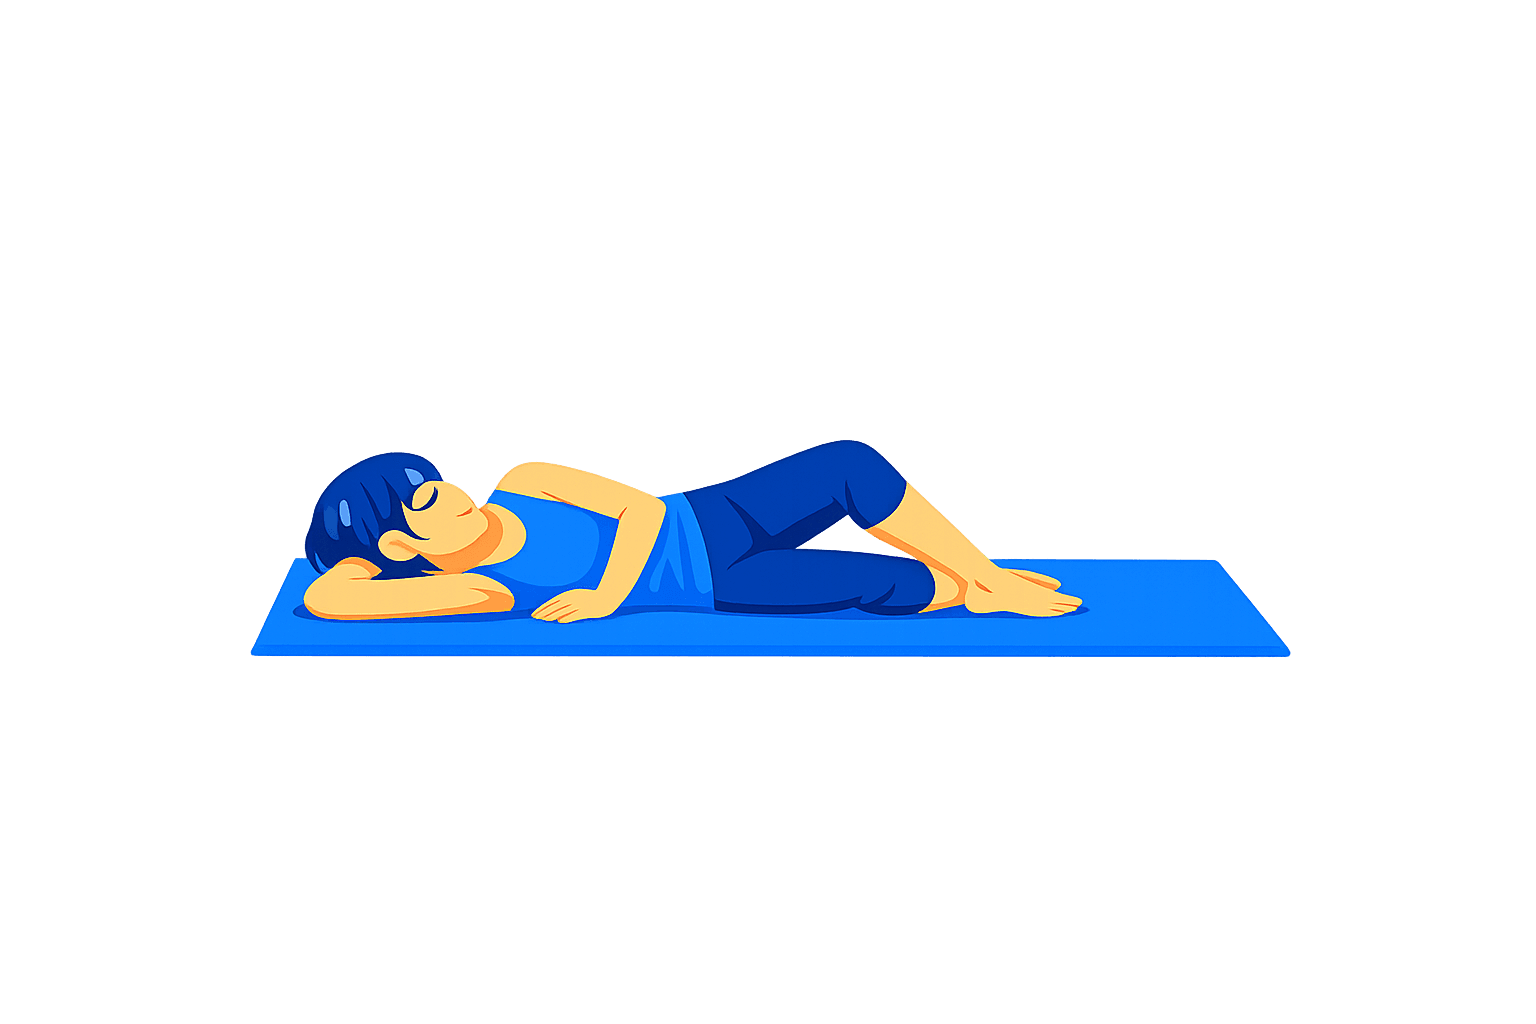
Inner Thigh Lift
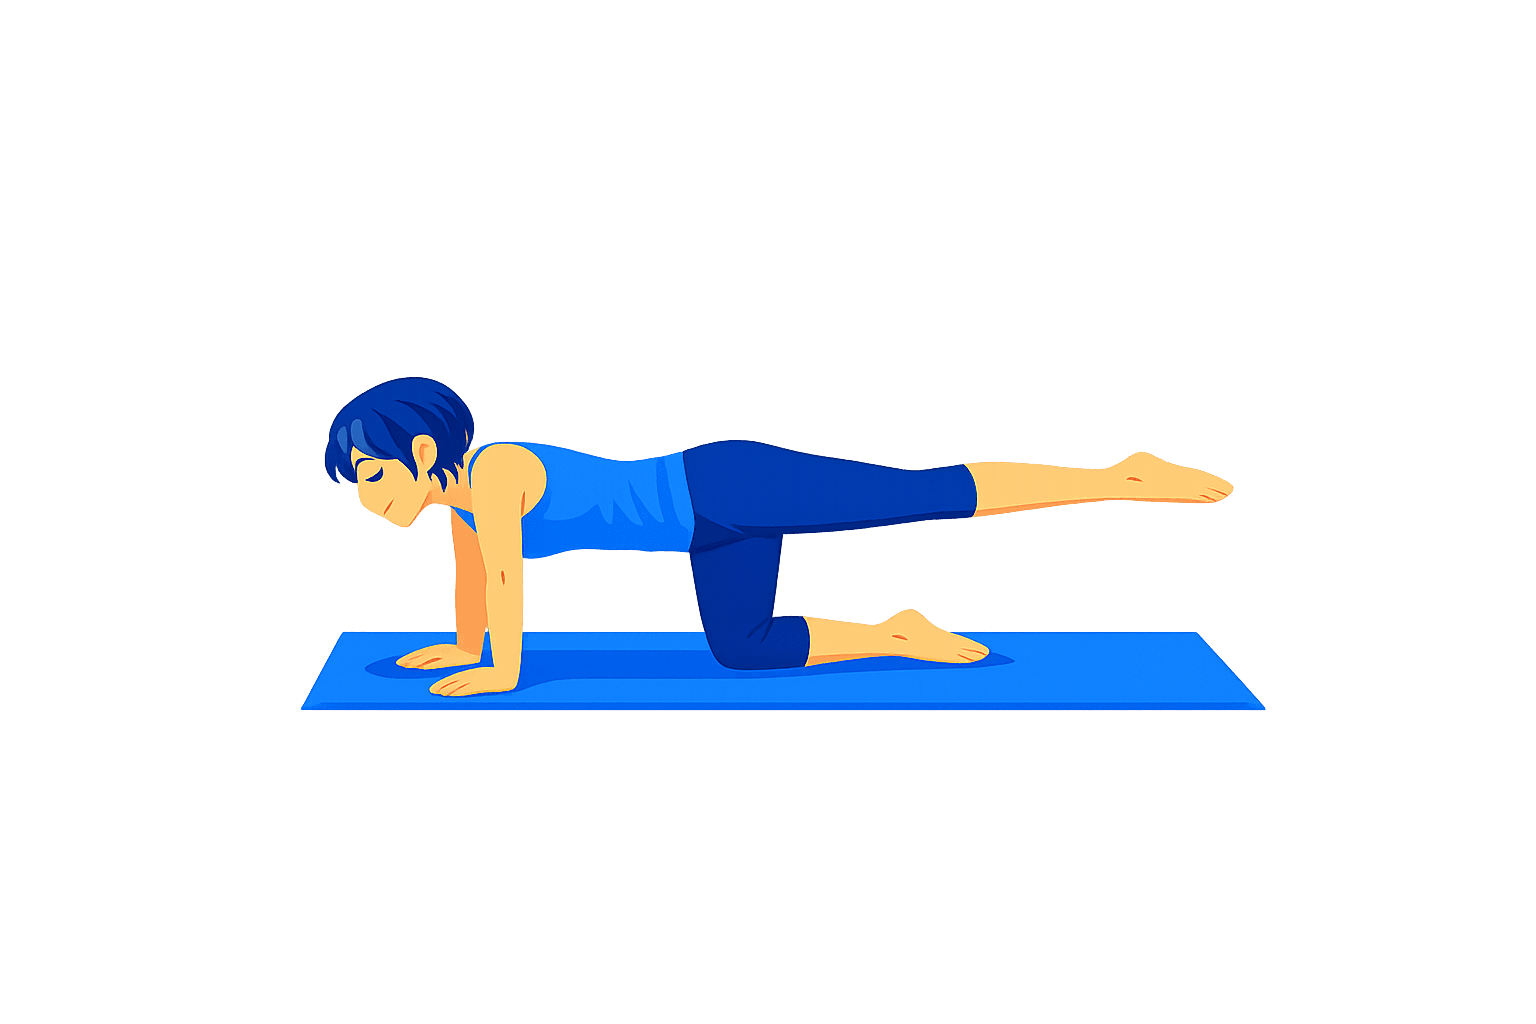
Kneeling Leg Extension
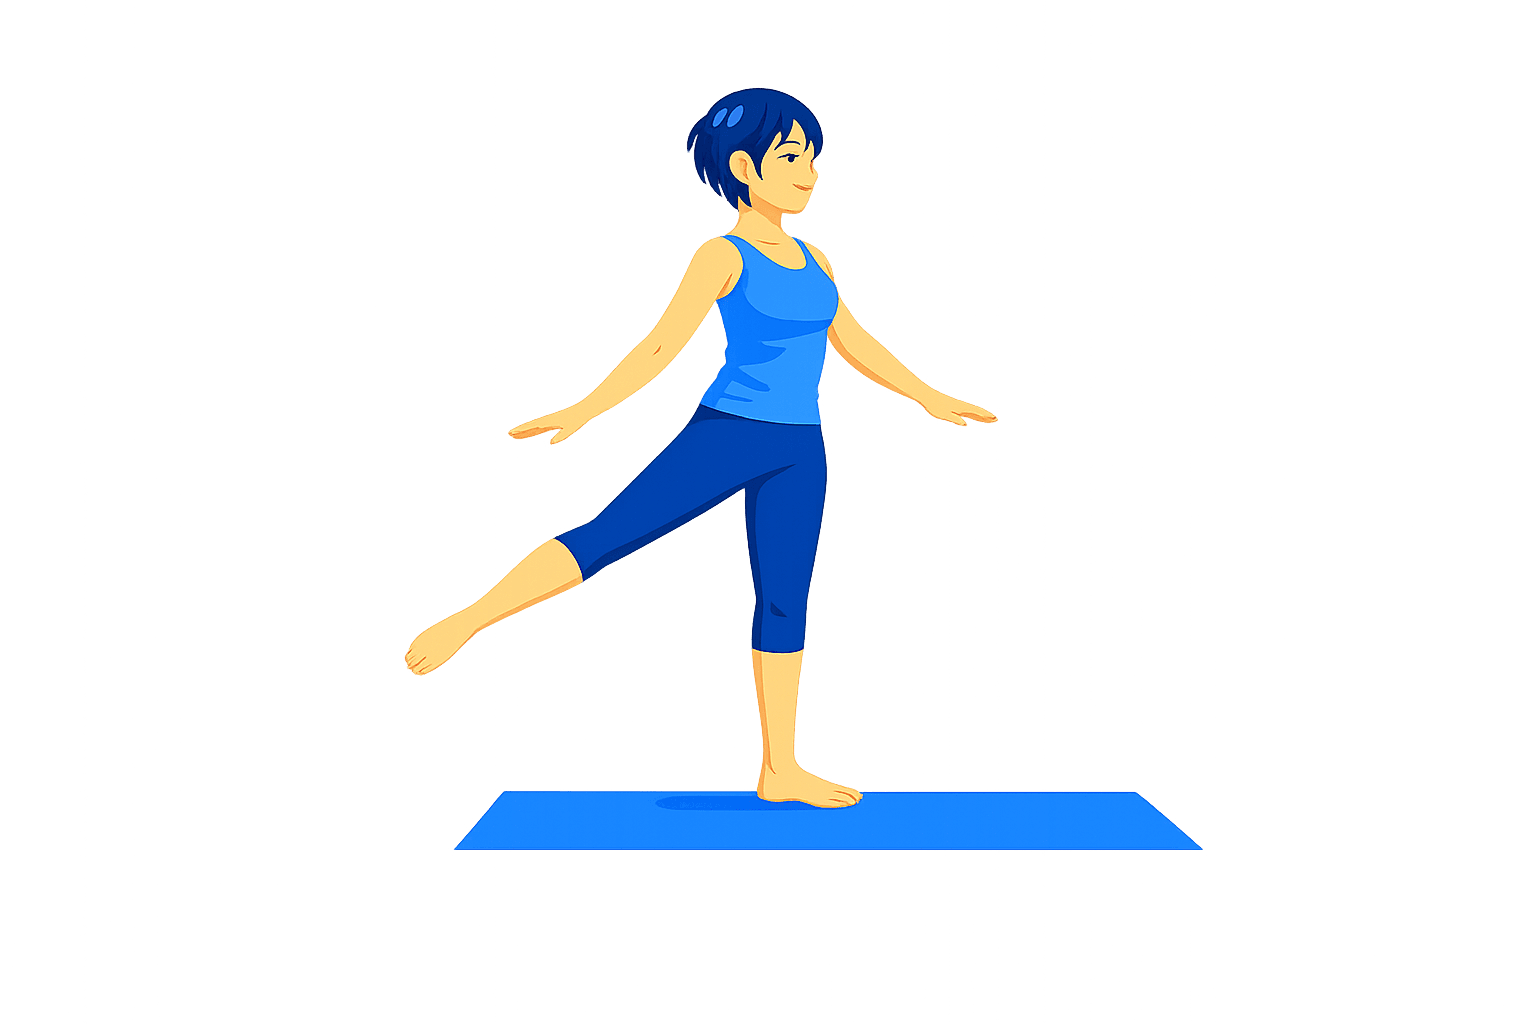
Standing Leg Lift
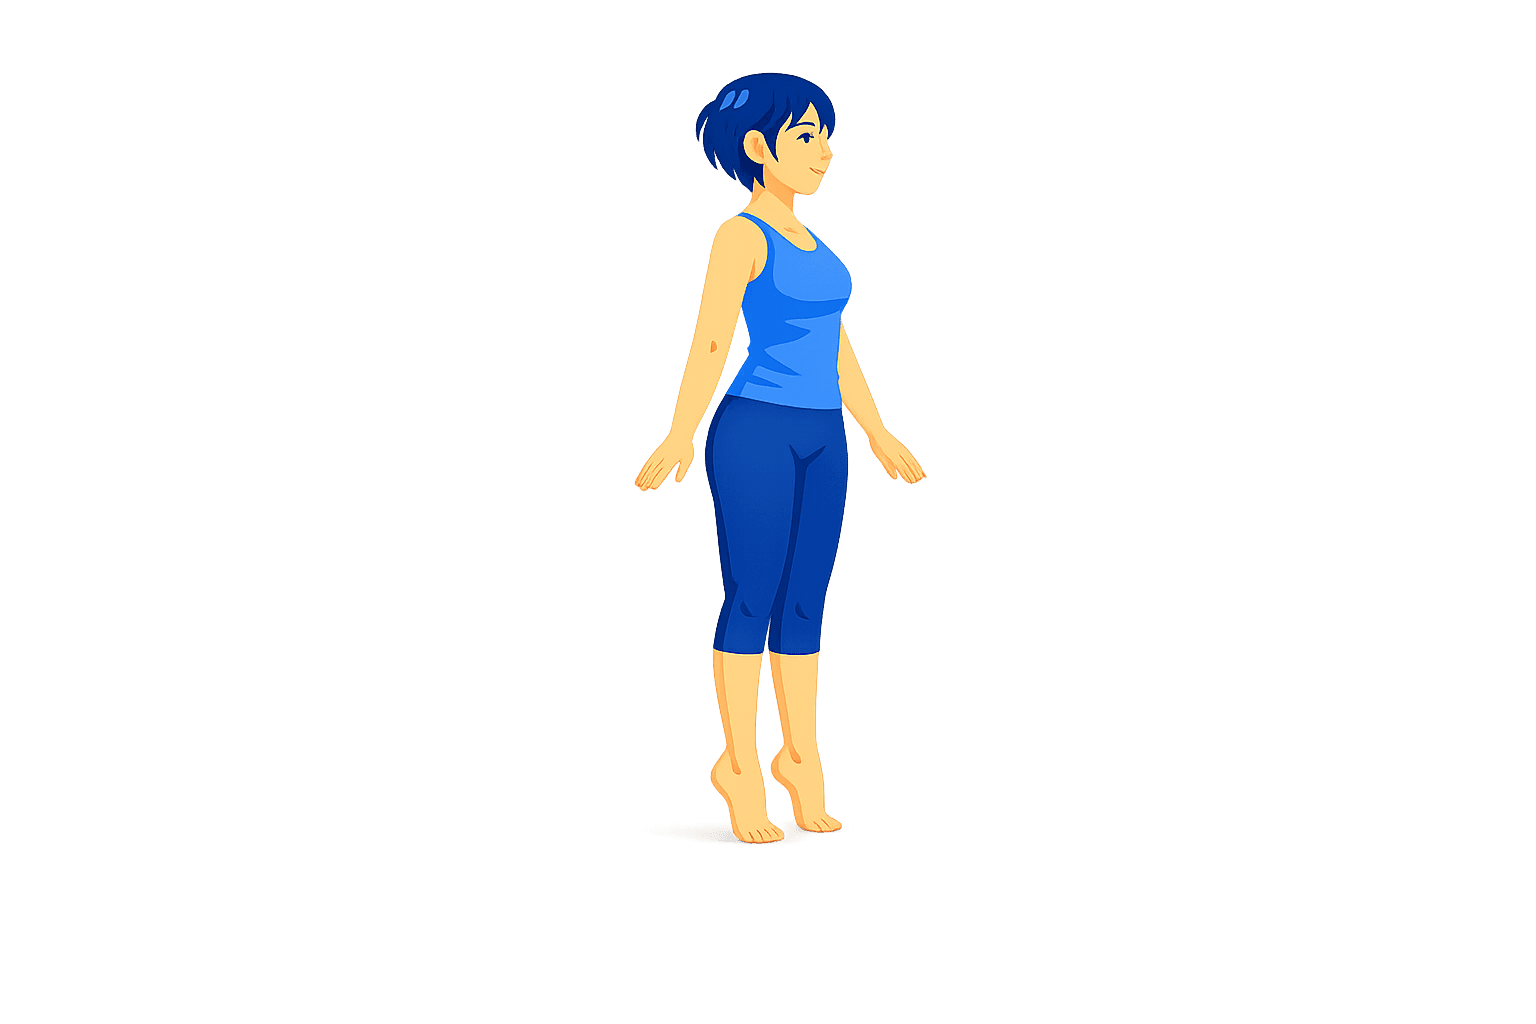
Standing Calf Raise
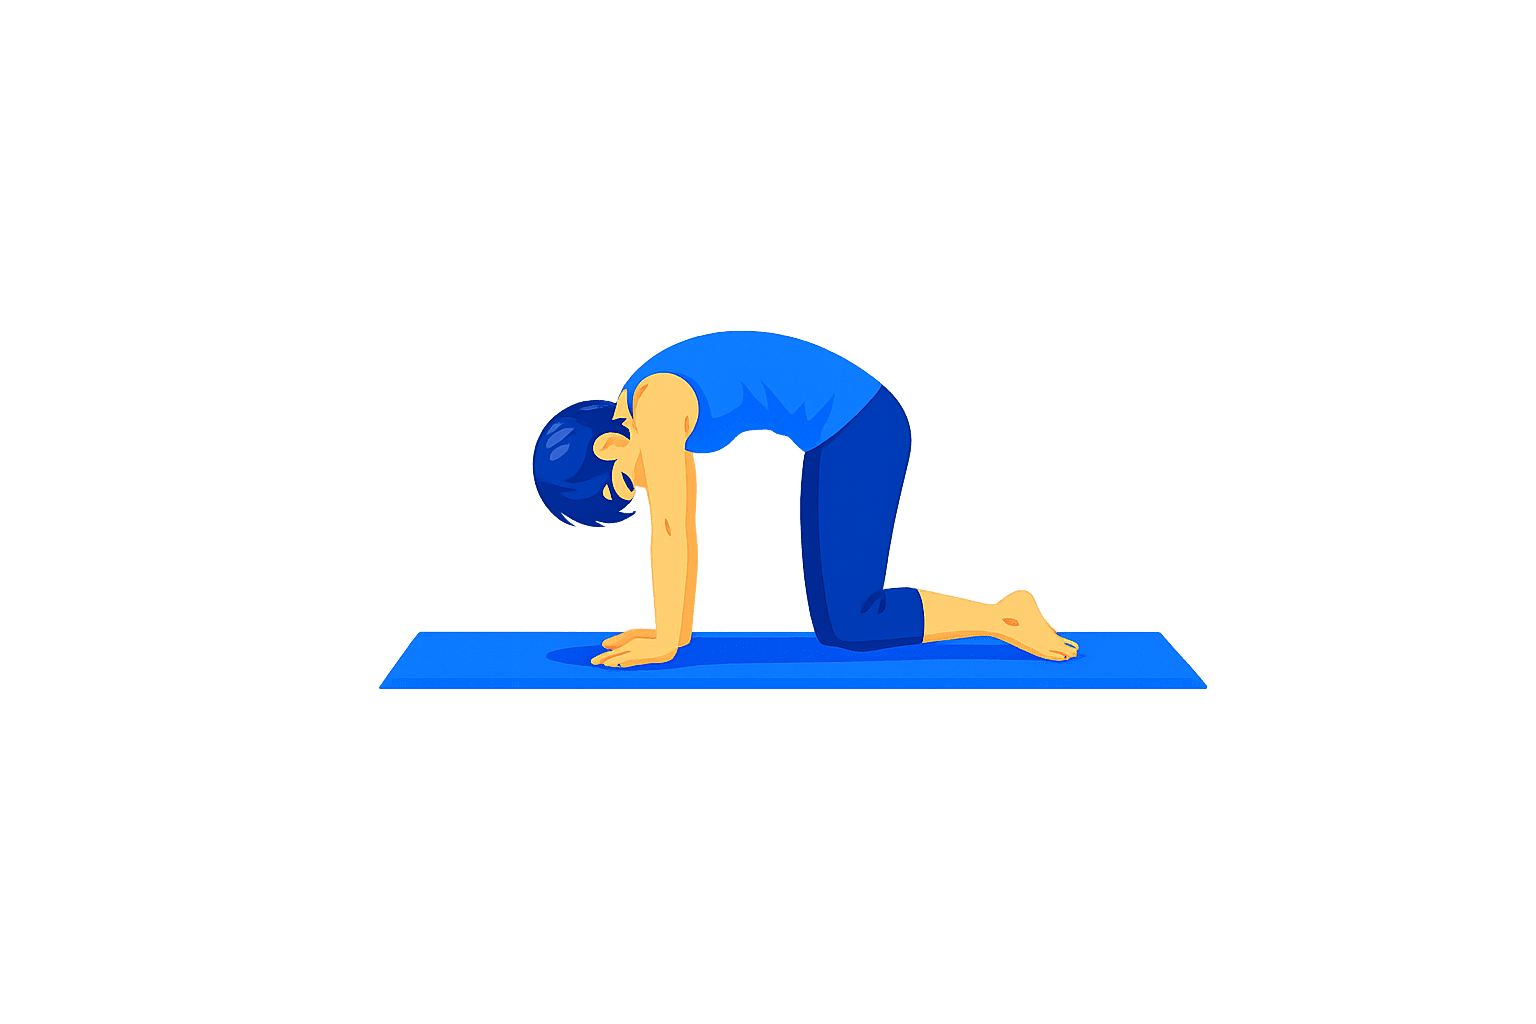
Cat-Cow
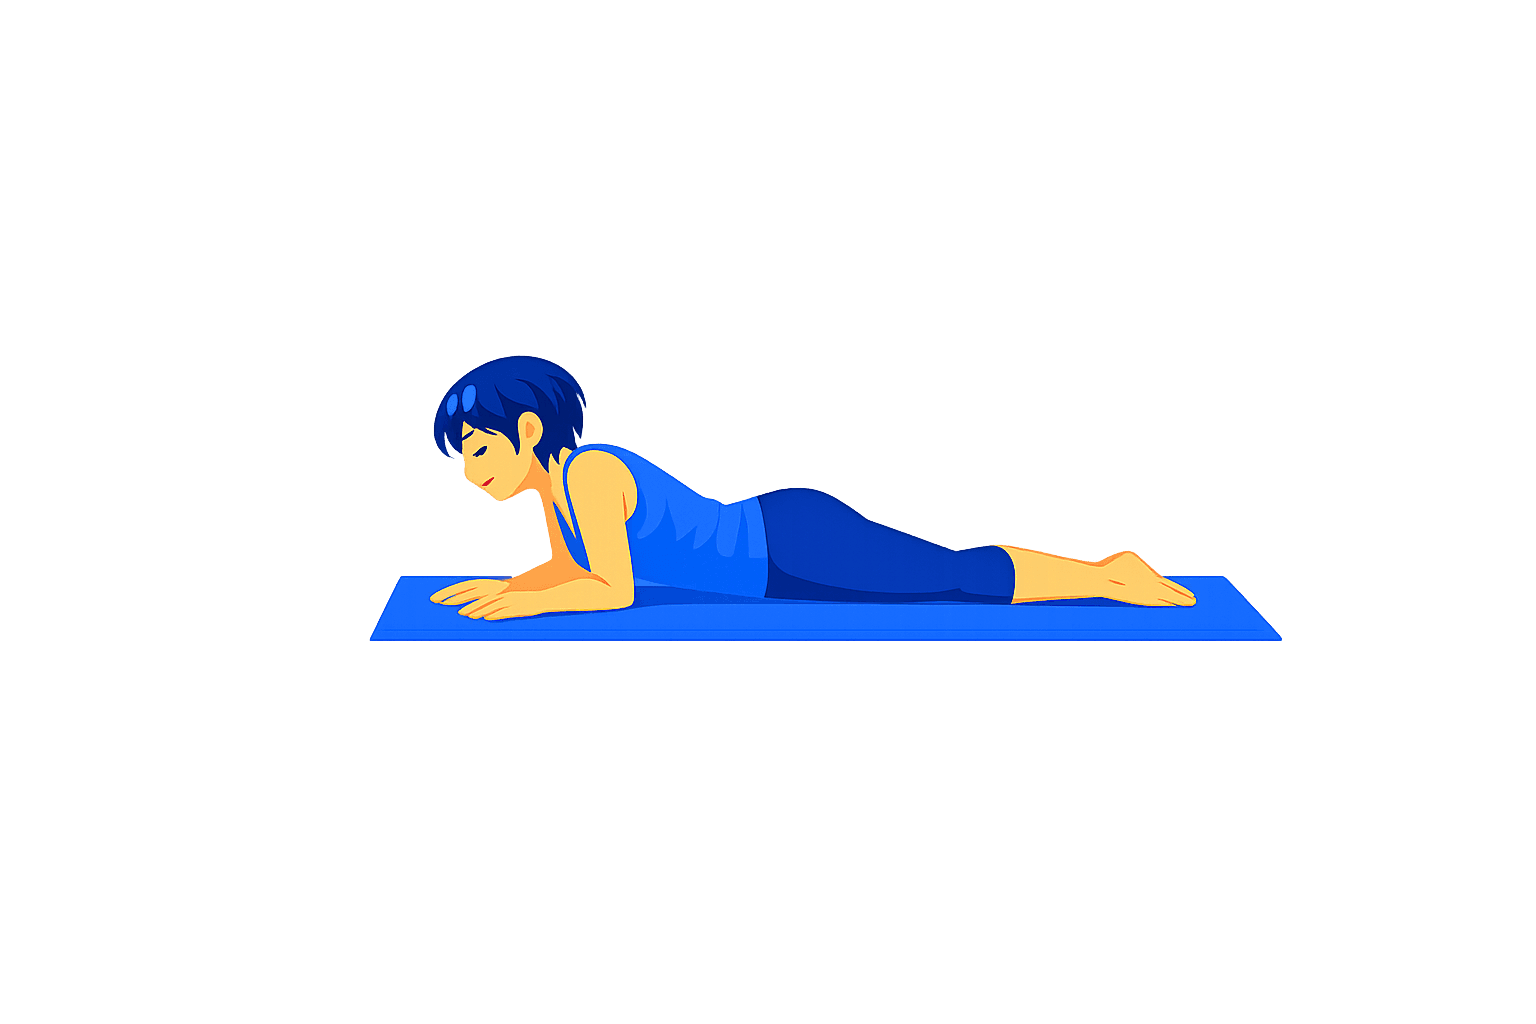
Swan Prep
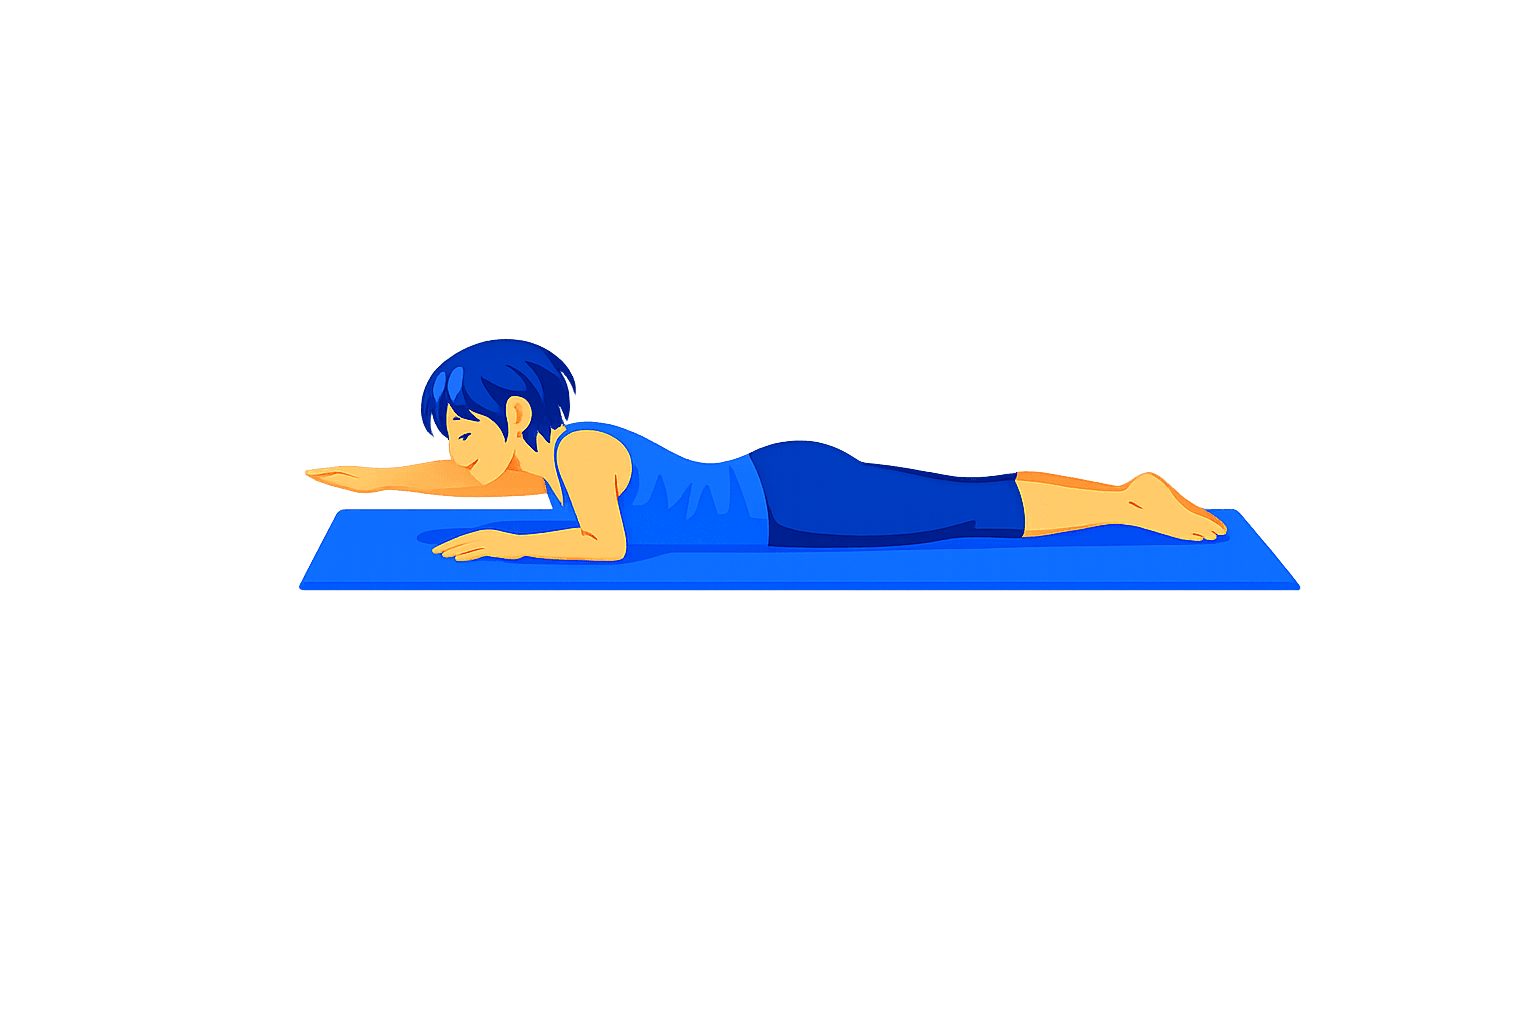
Swimming Prep
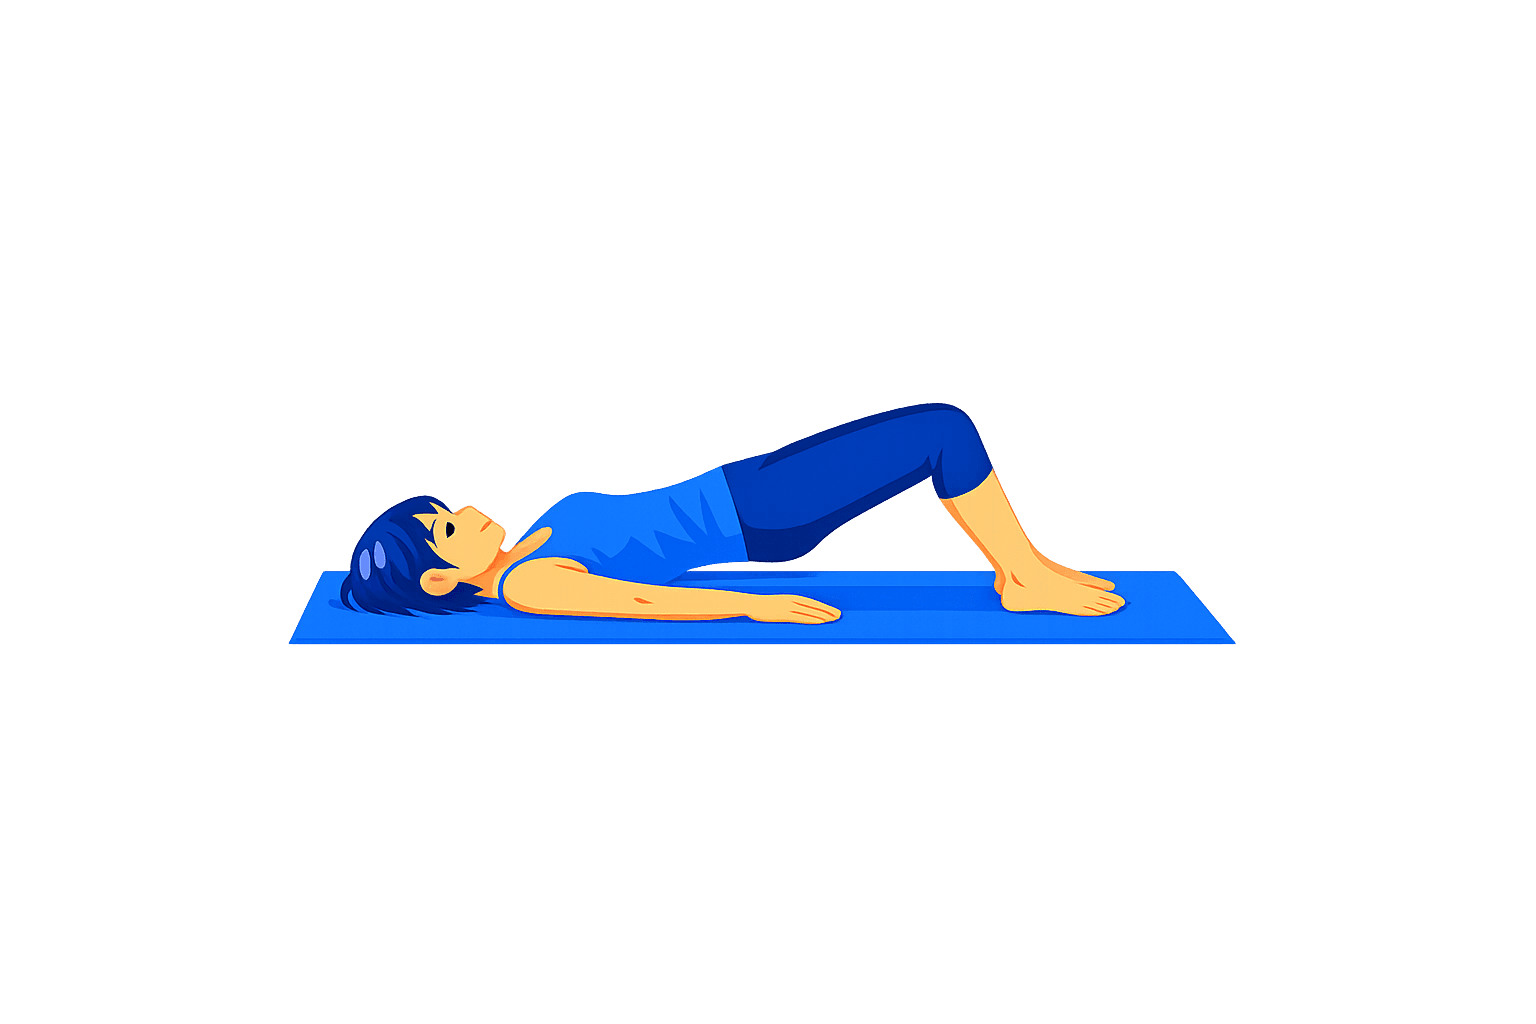
Shoulder Bridge Hold
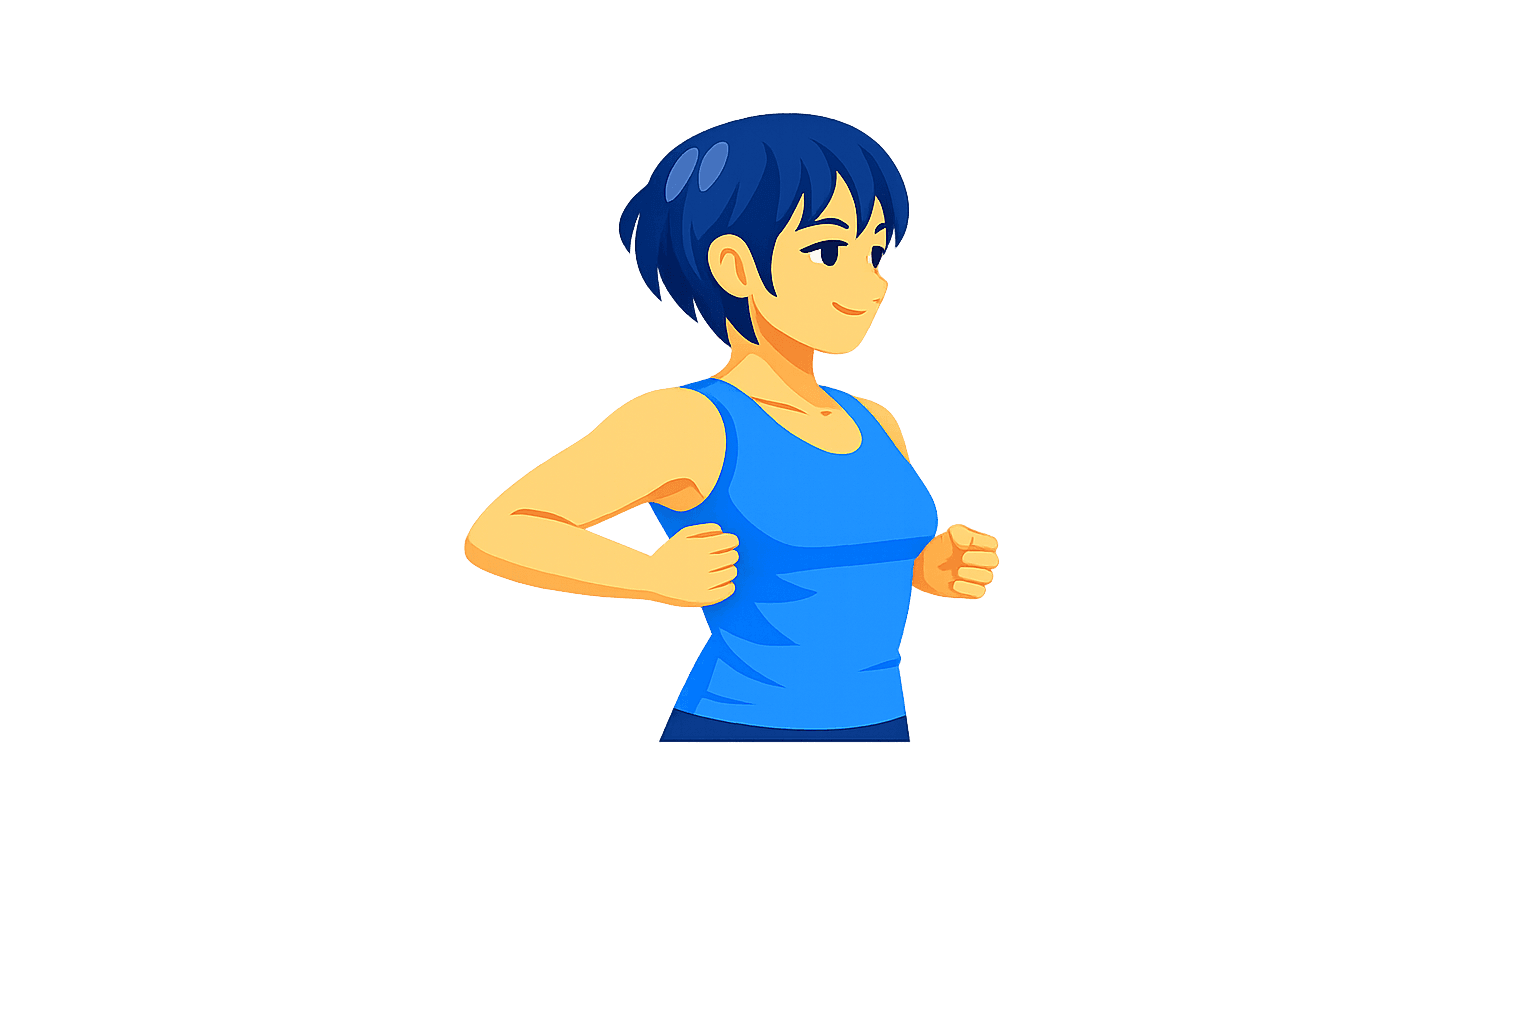
Shoulder Blade Squeeze
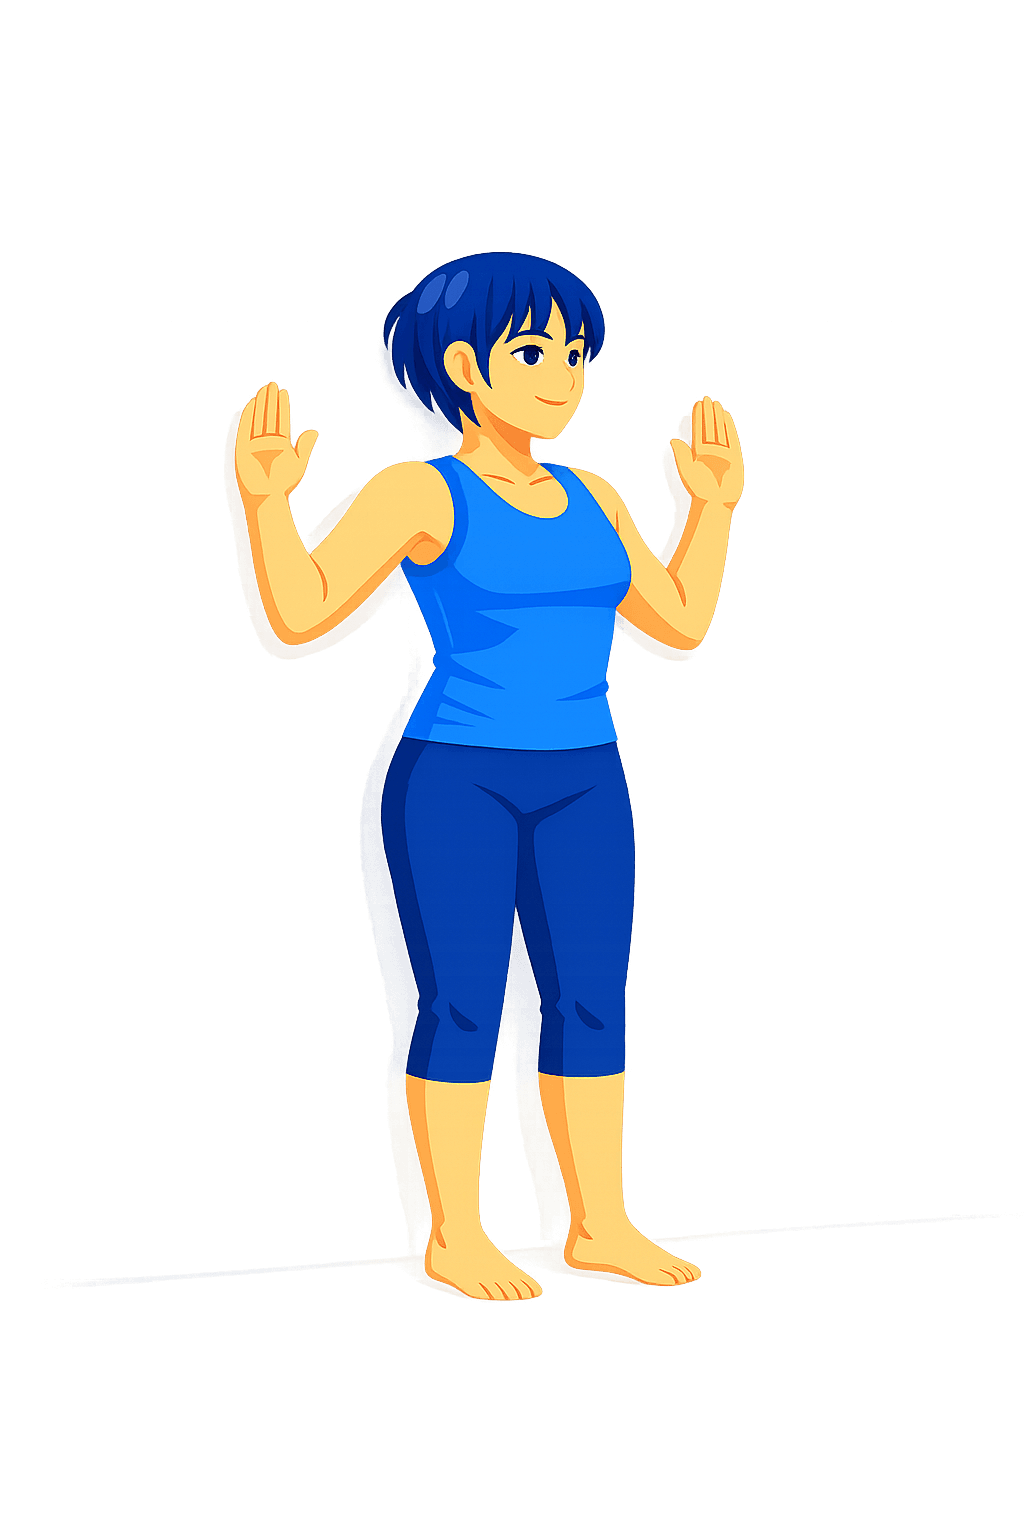
Wall Angels
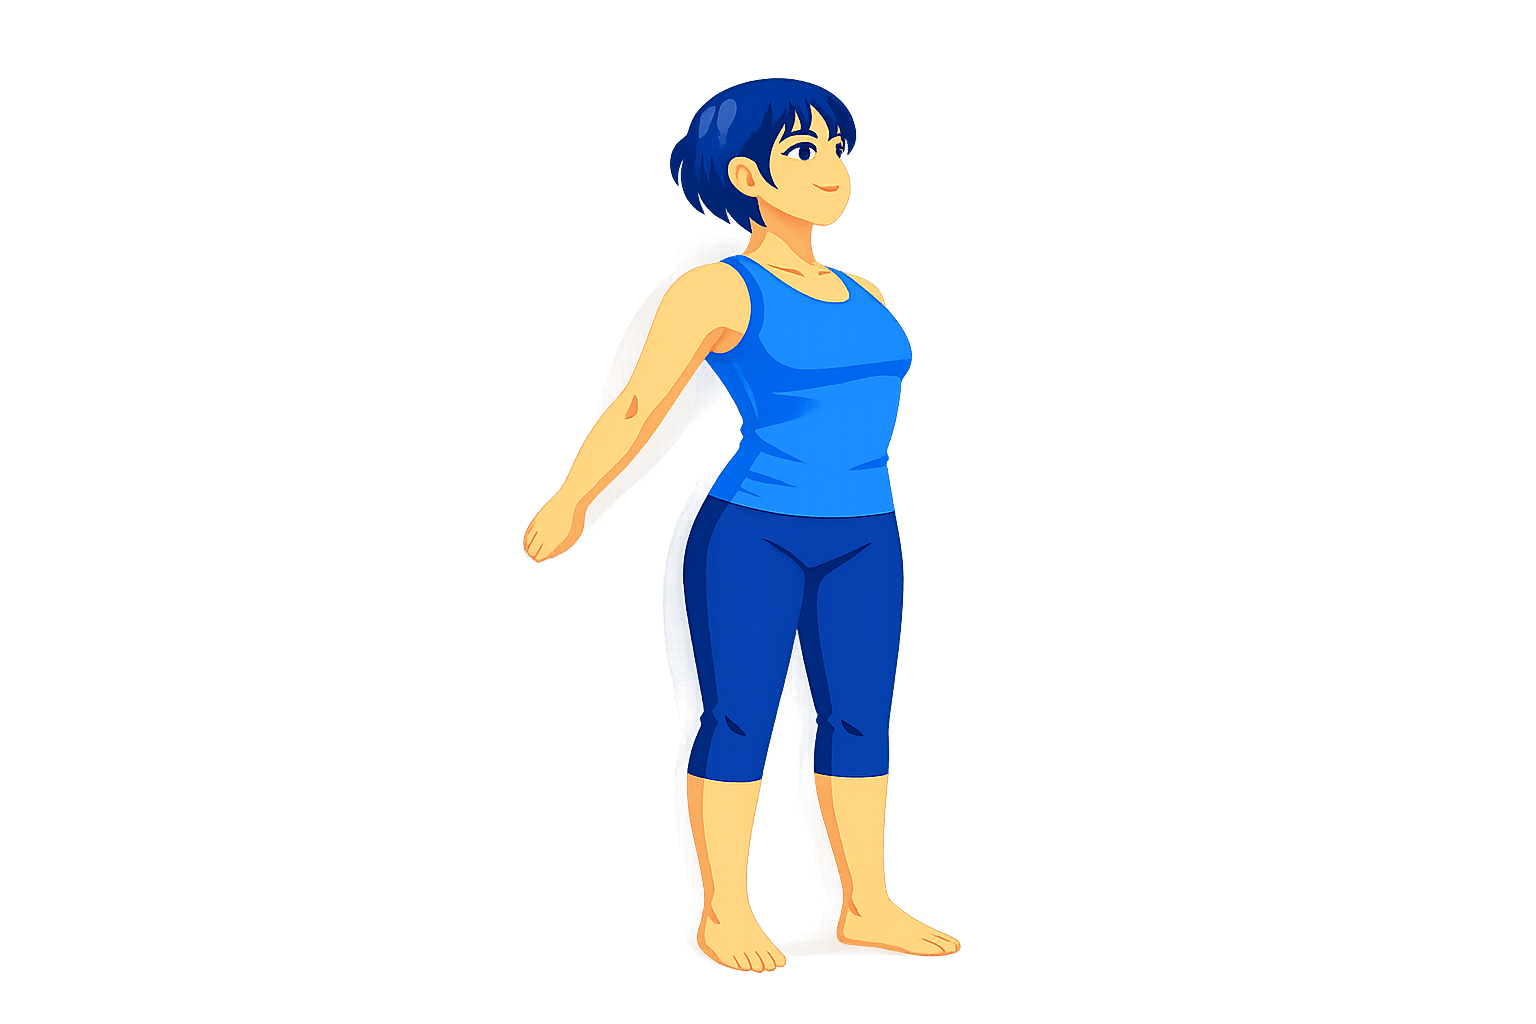
Chest Opener
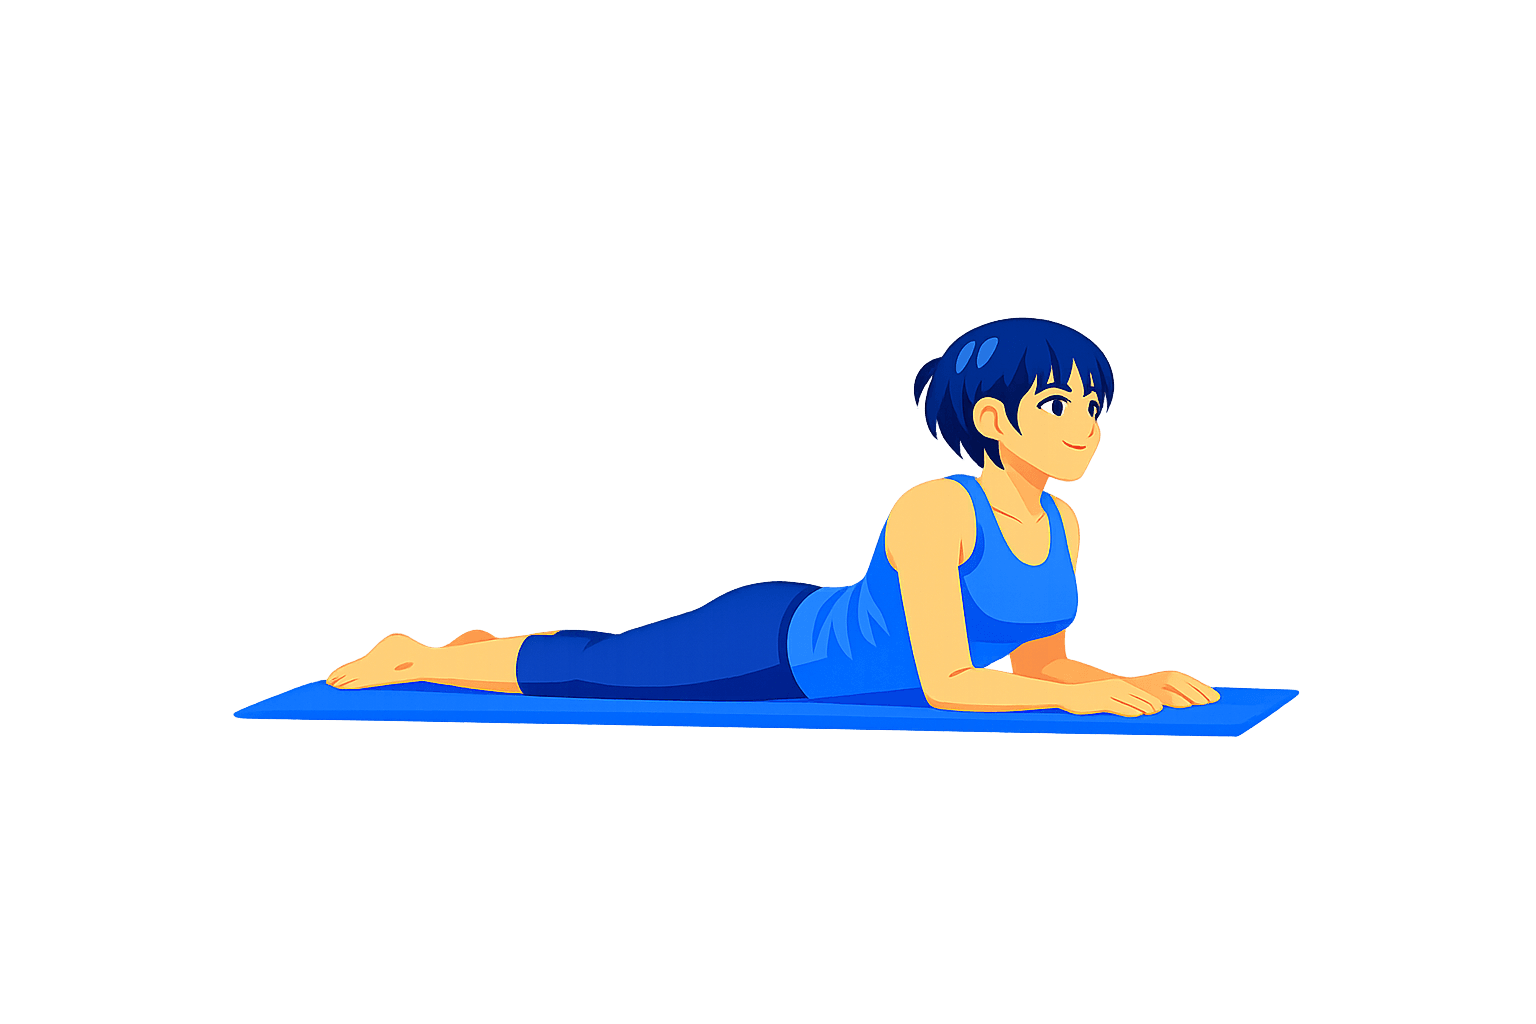
Spine Extension Prep
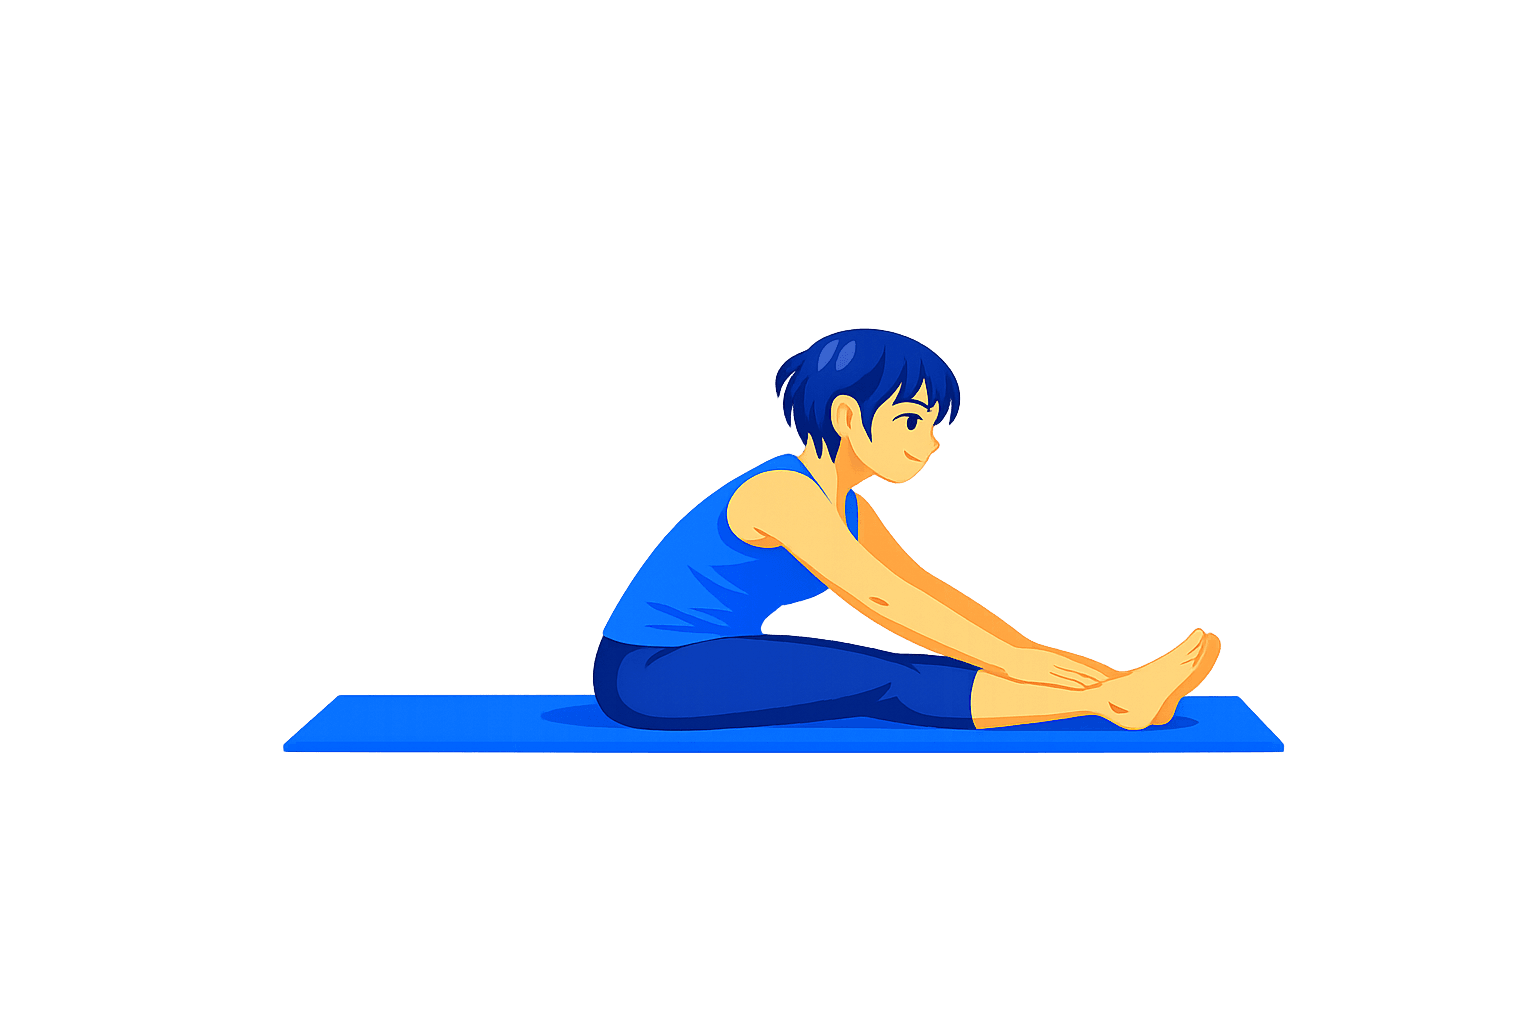
Spine Stretch Forward
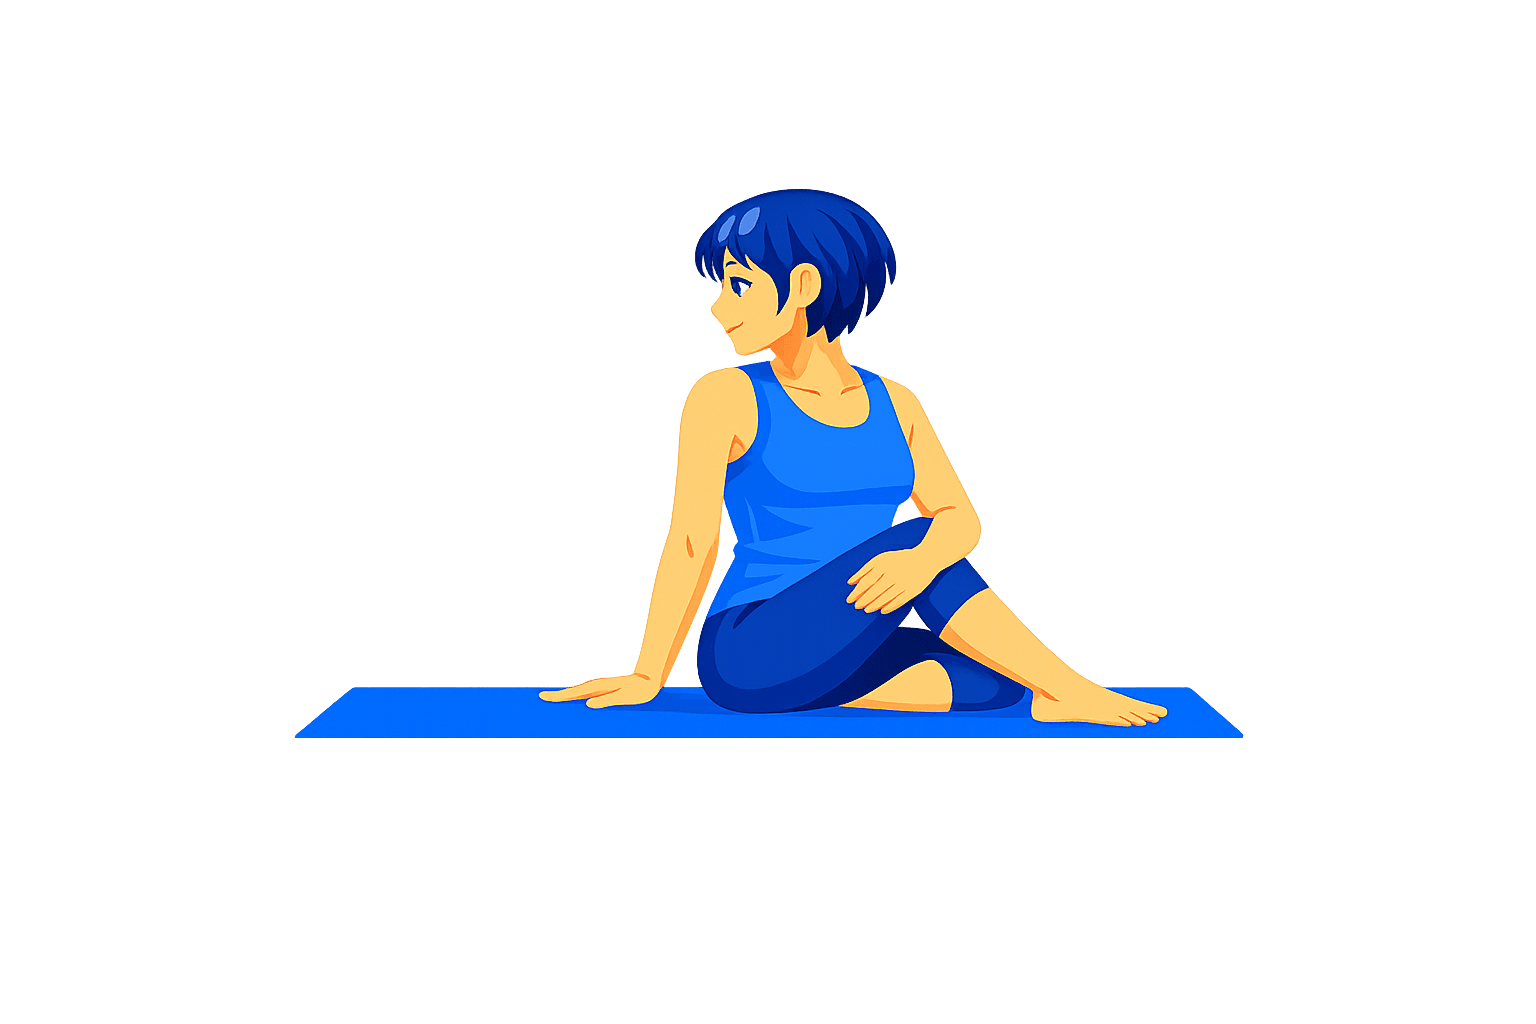
Seated Twist
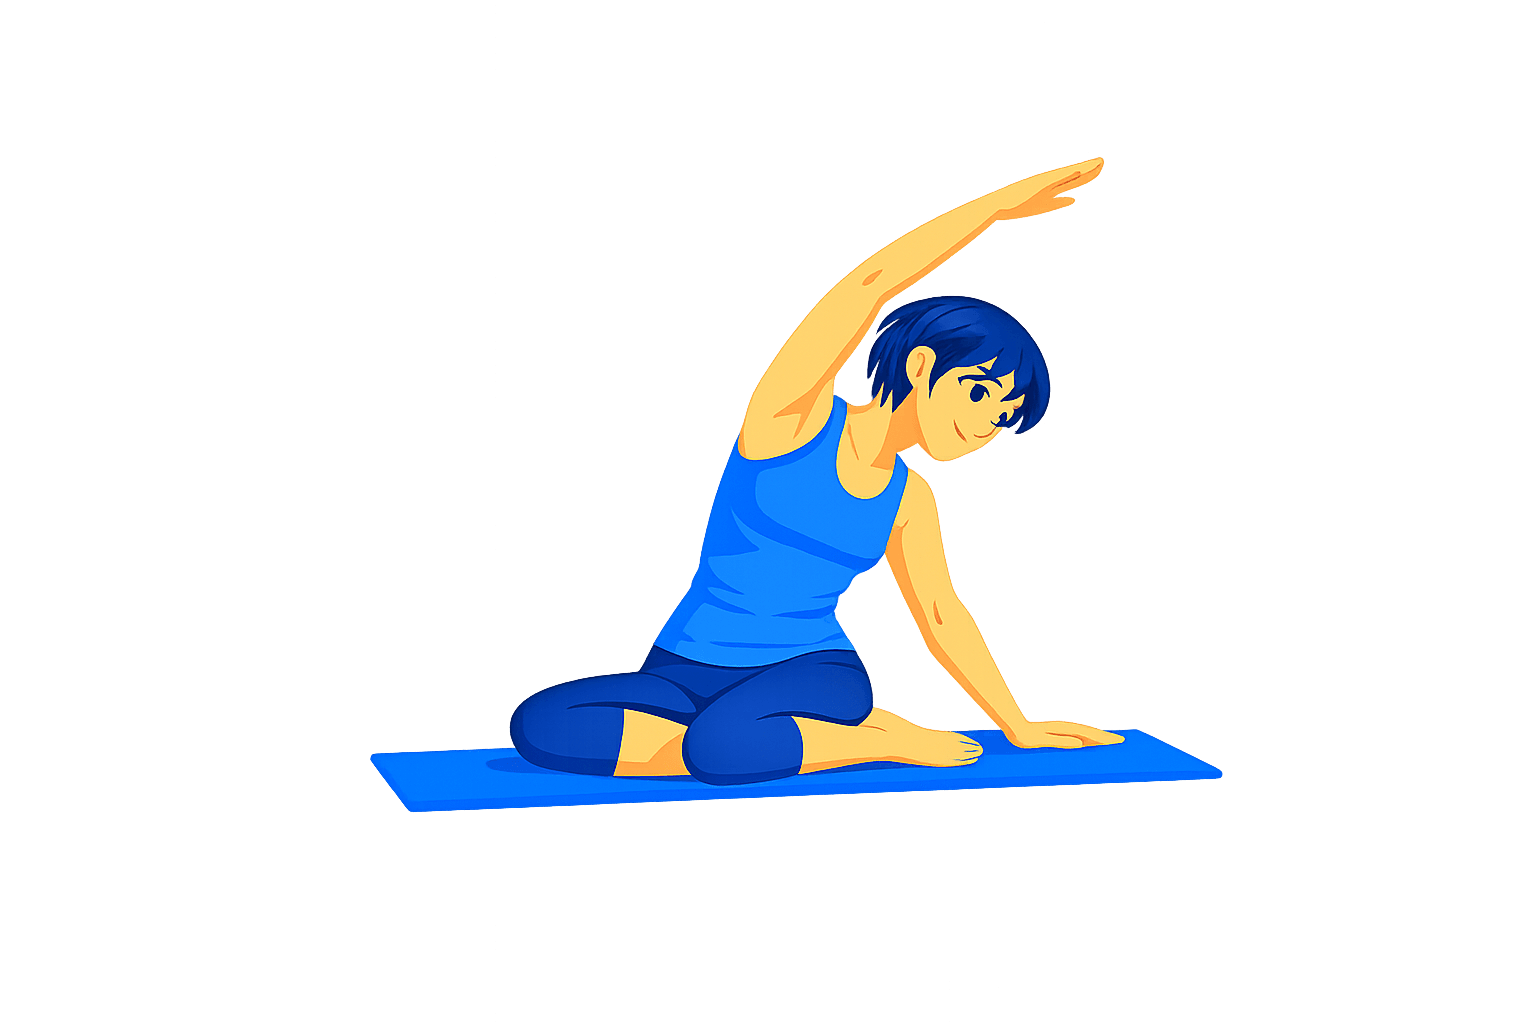
Mermaid Stretch
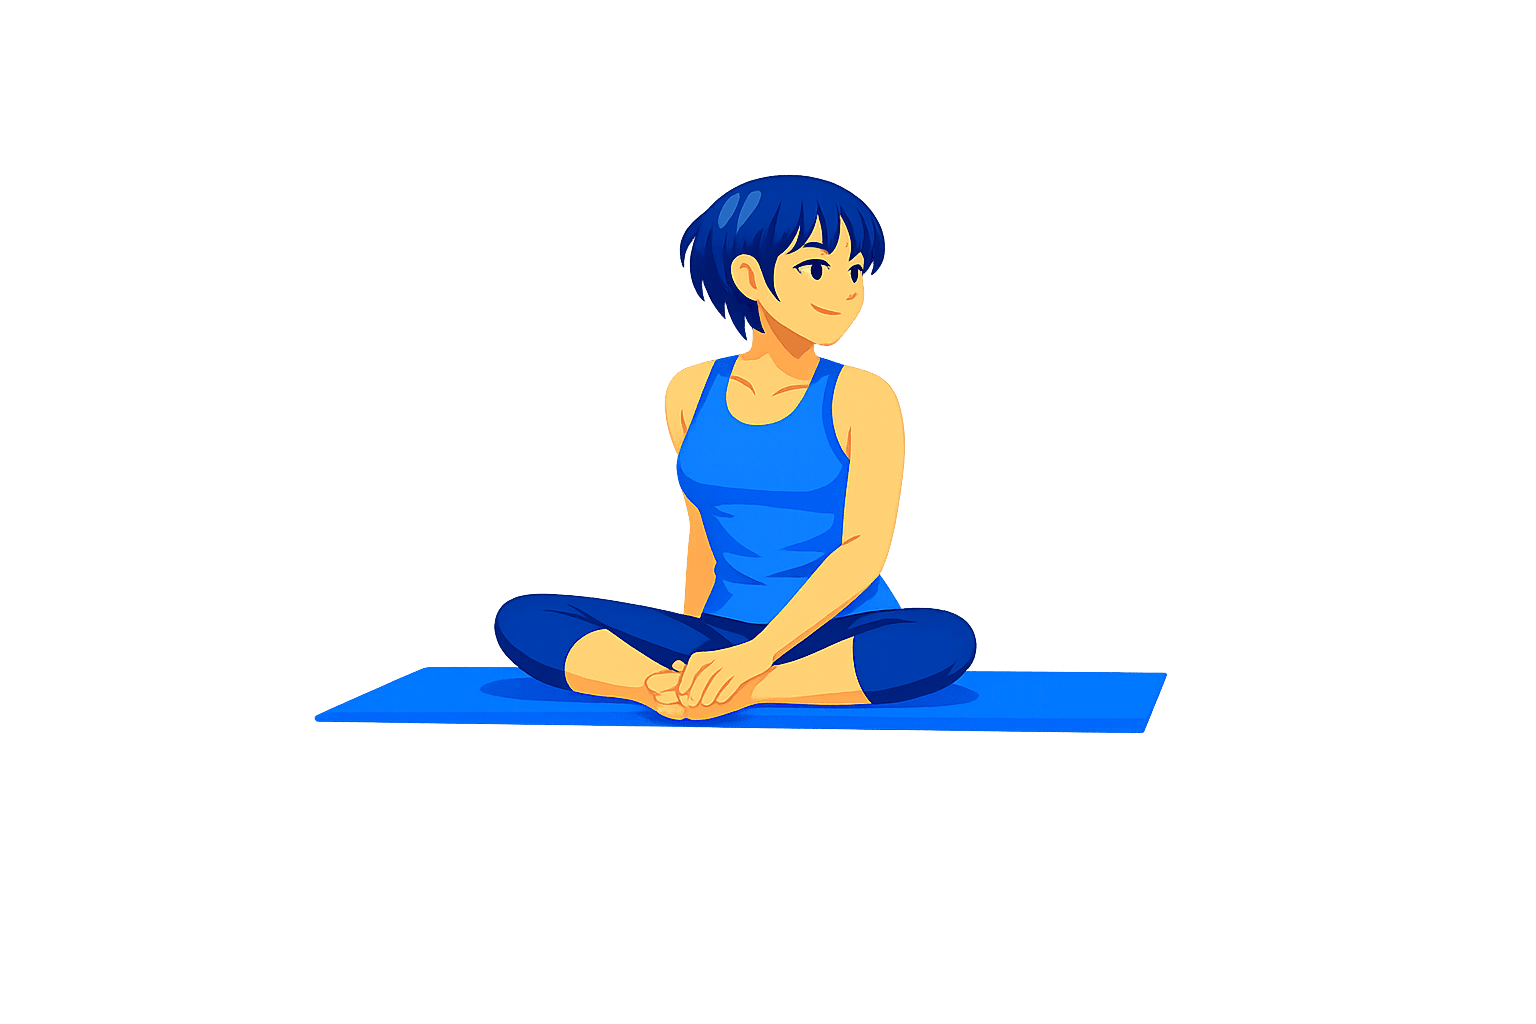
Hip Opener
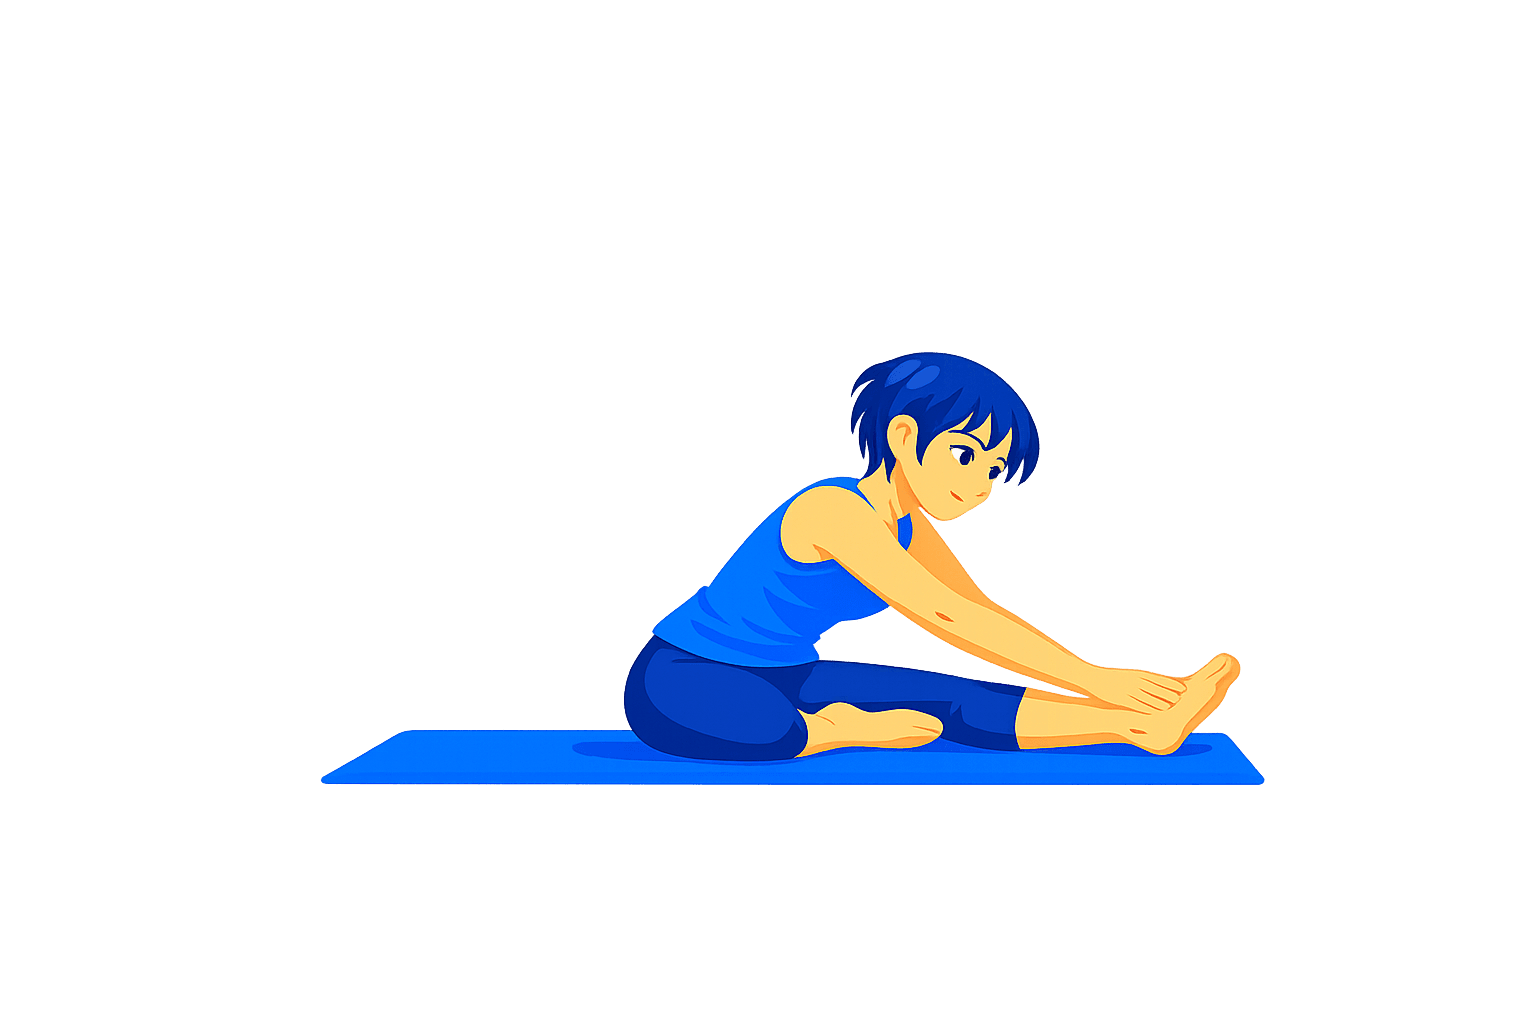
Hamstring Stretch
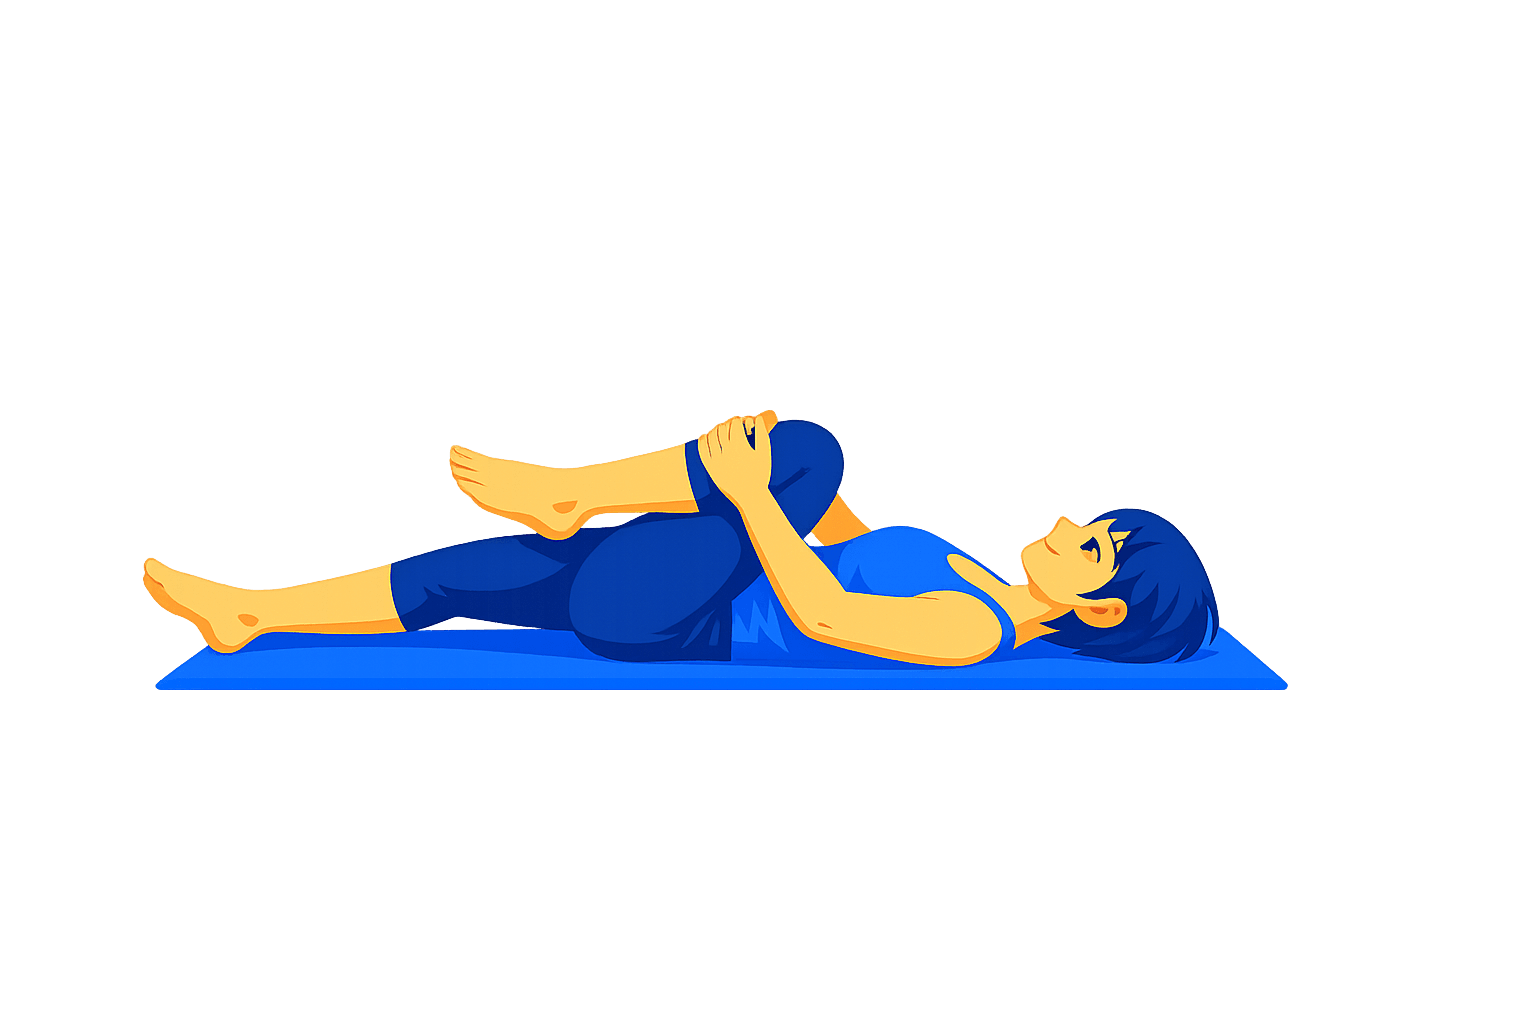
Figure Four Stretch
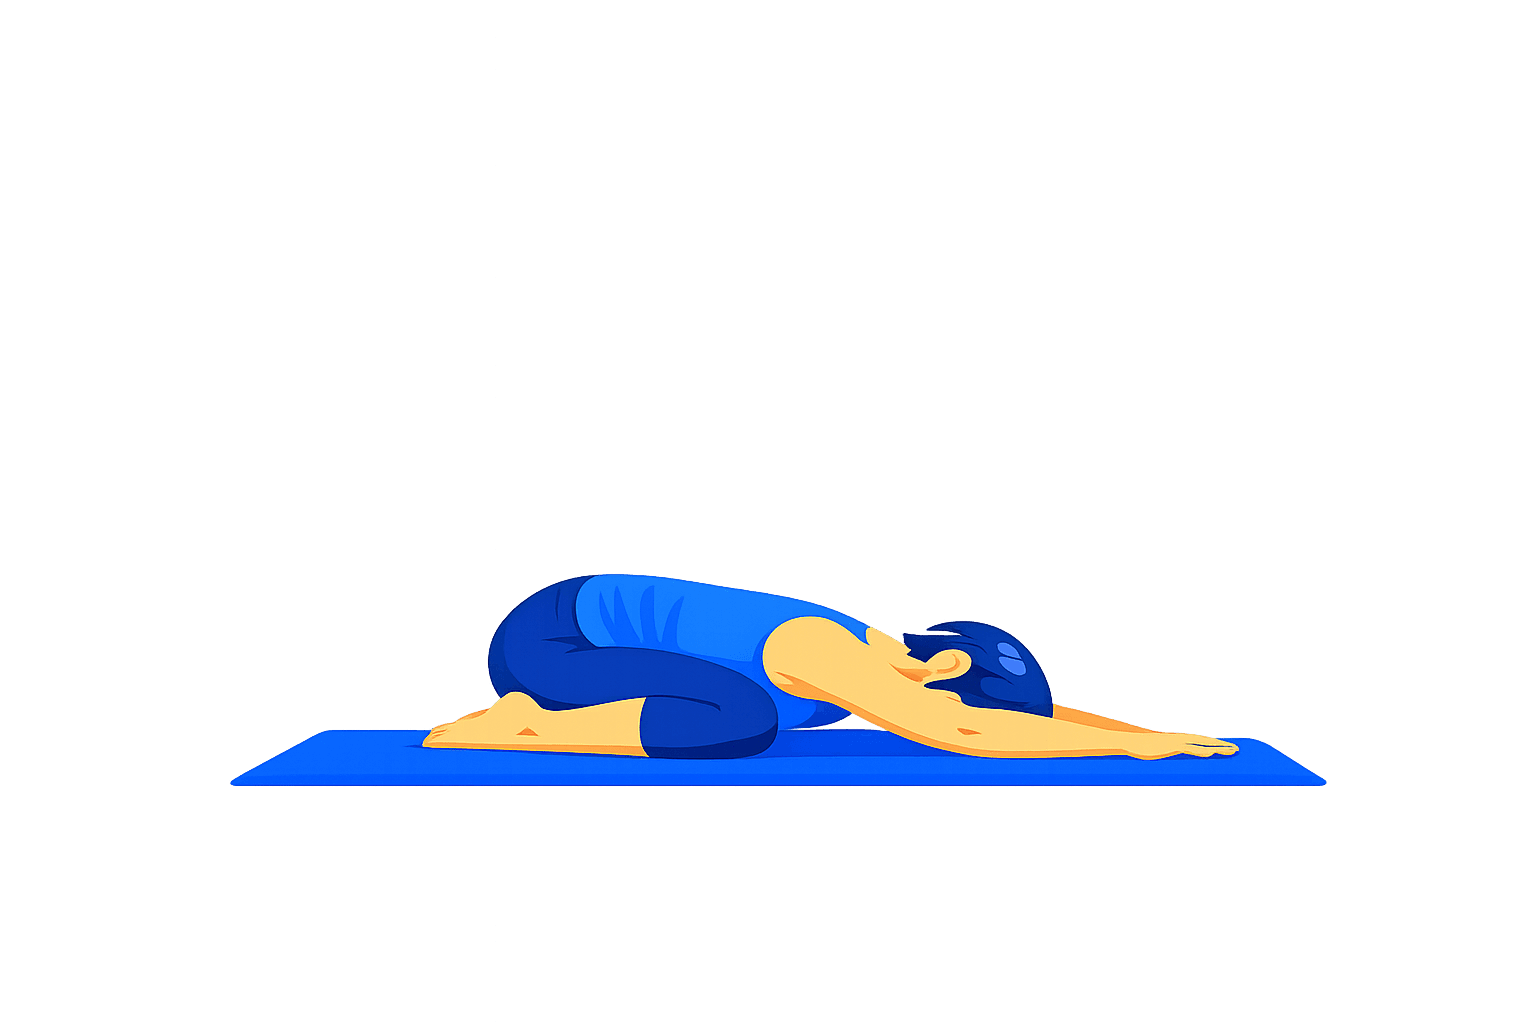
Child's Pose Reach
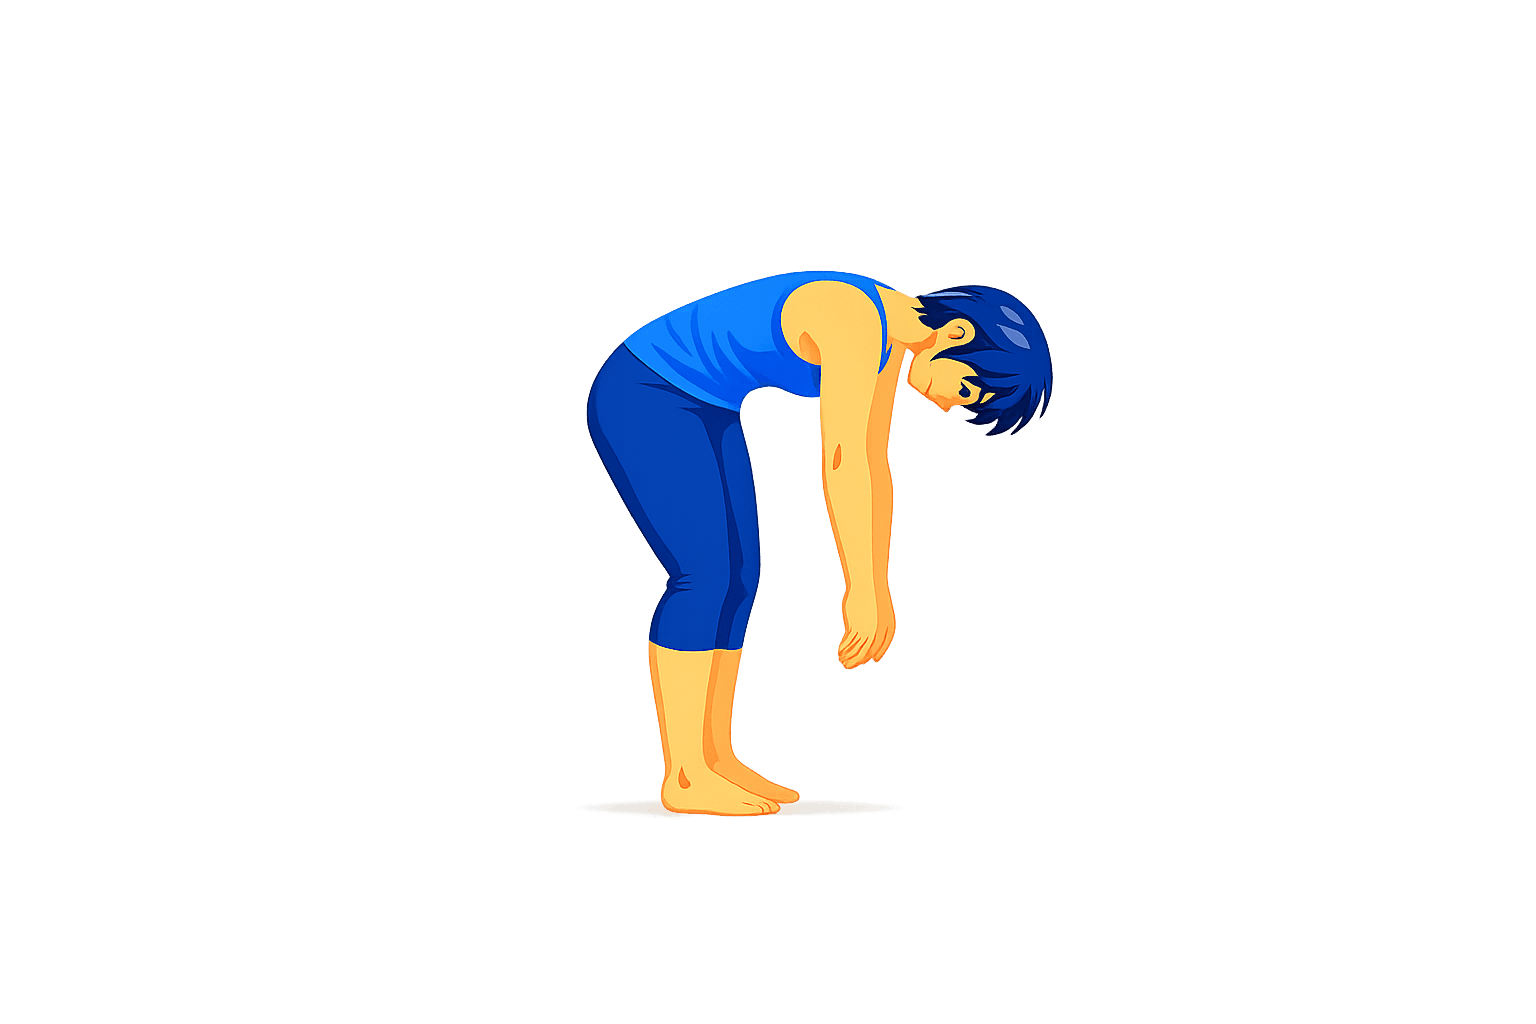
Roll Down
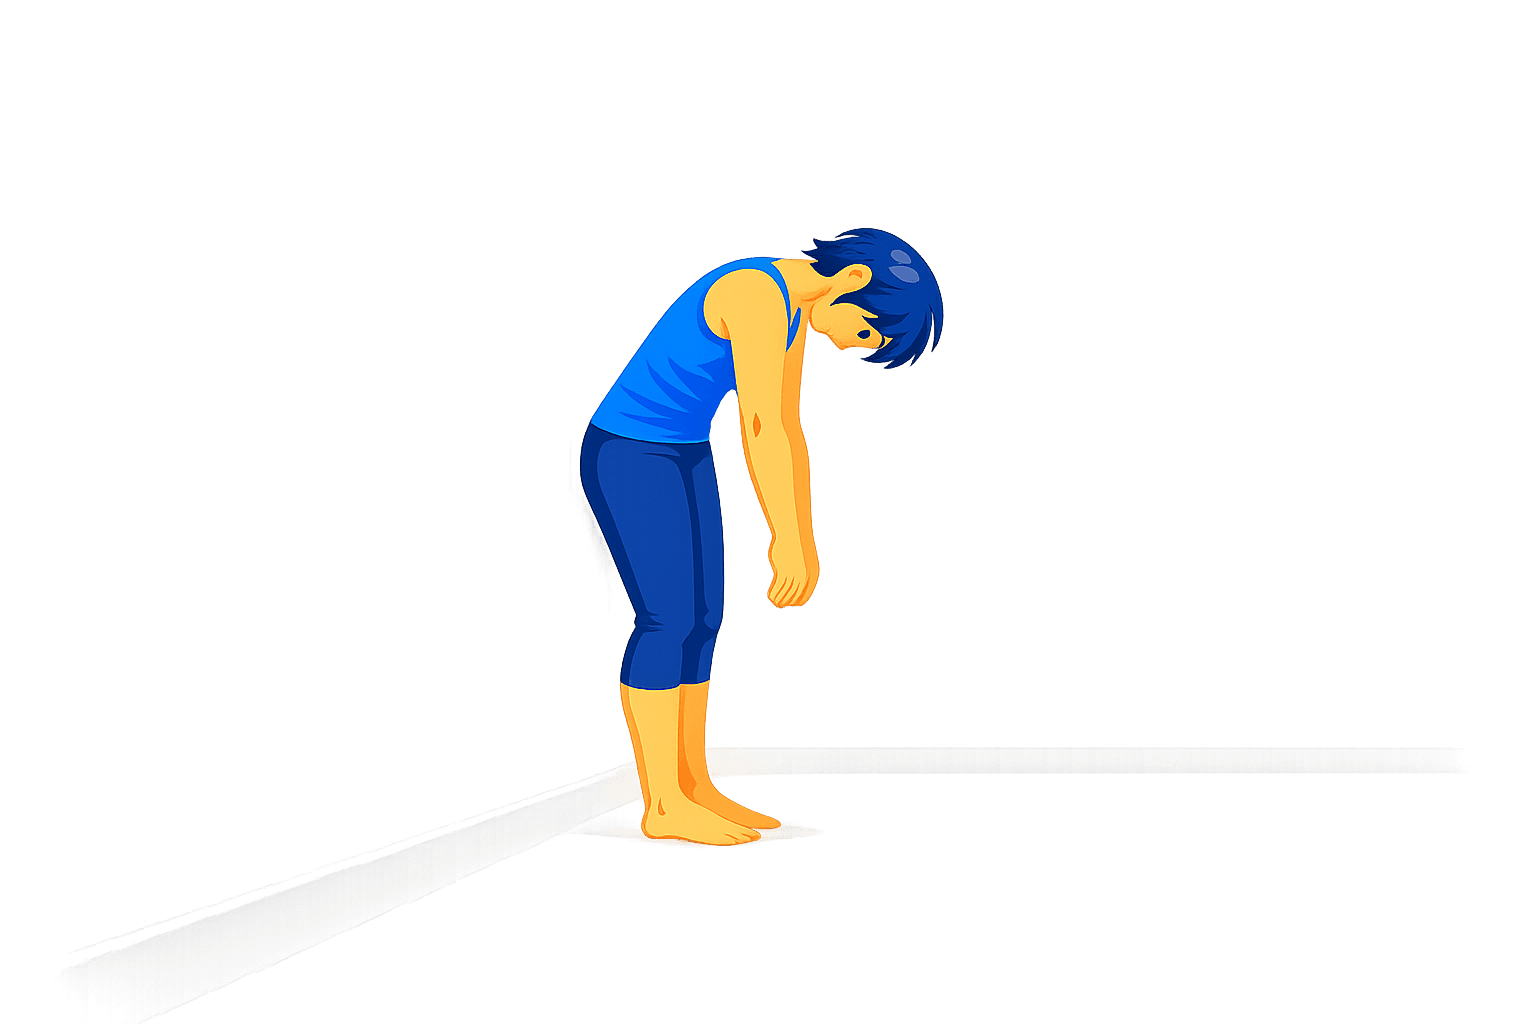
Wall Roll Down
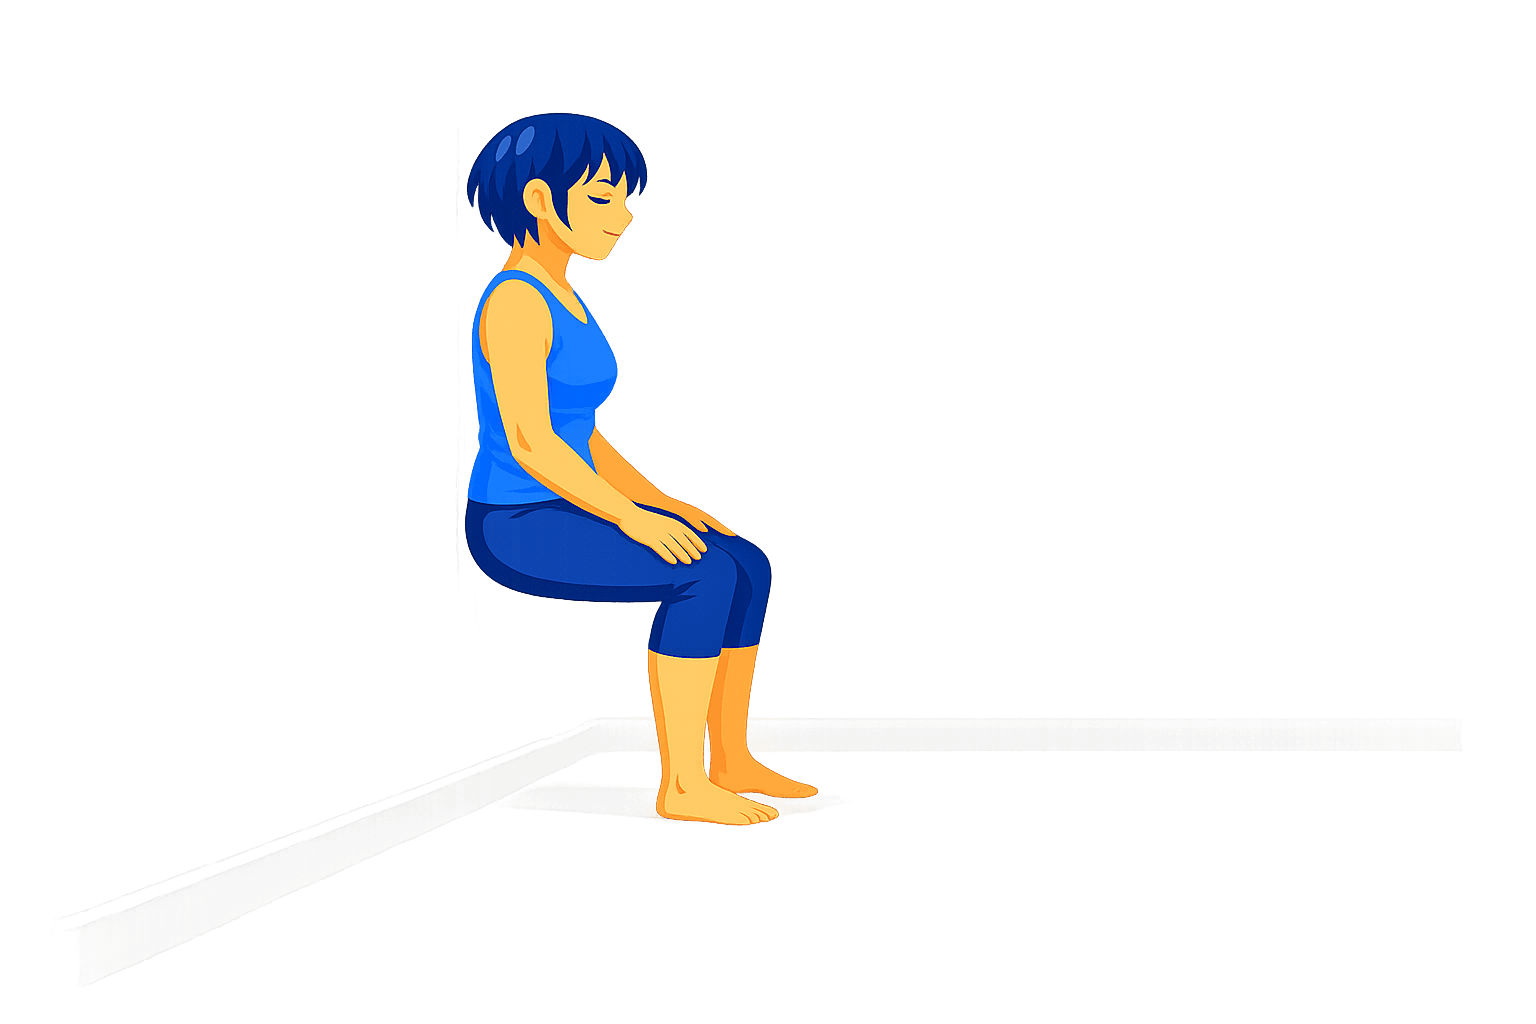
Wall Squat
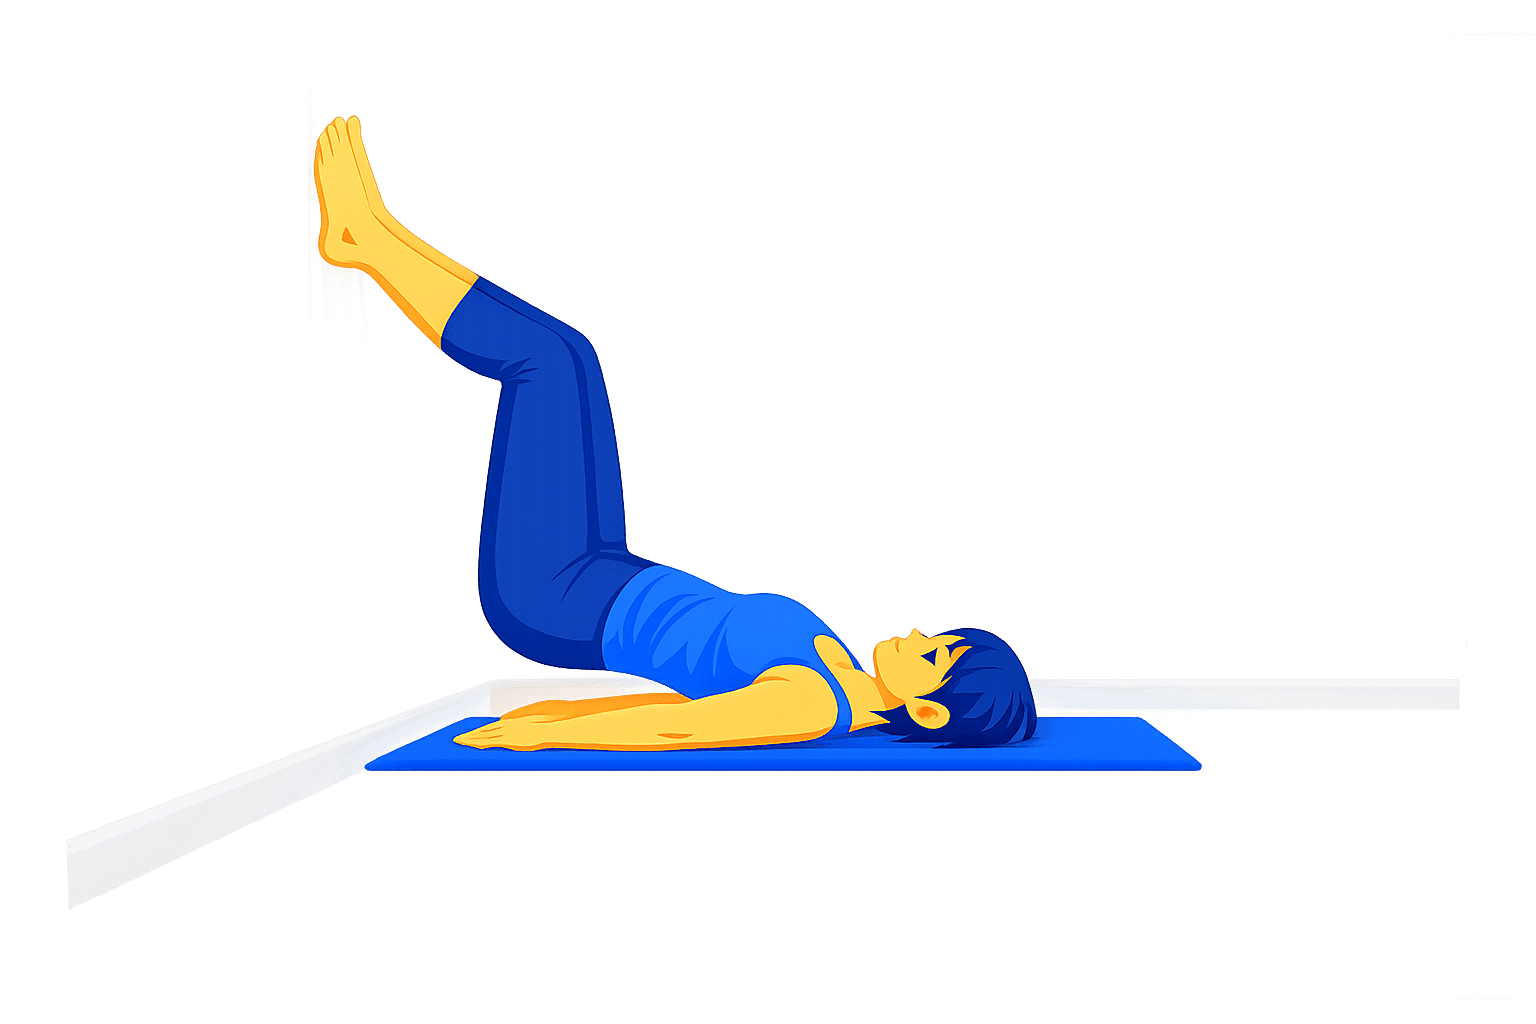
Wall Bridge
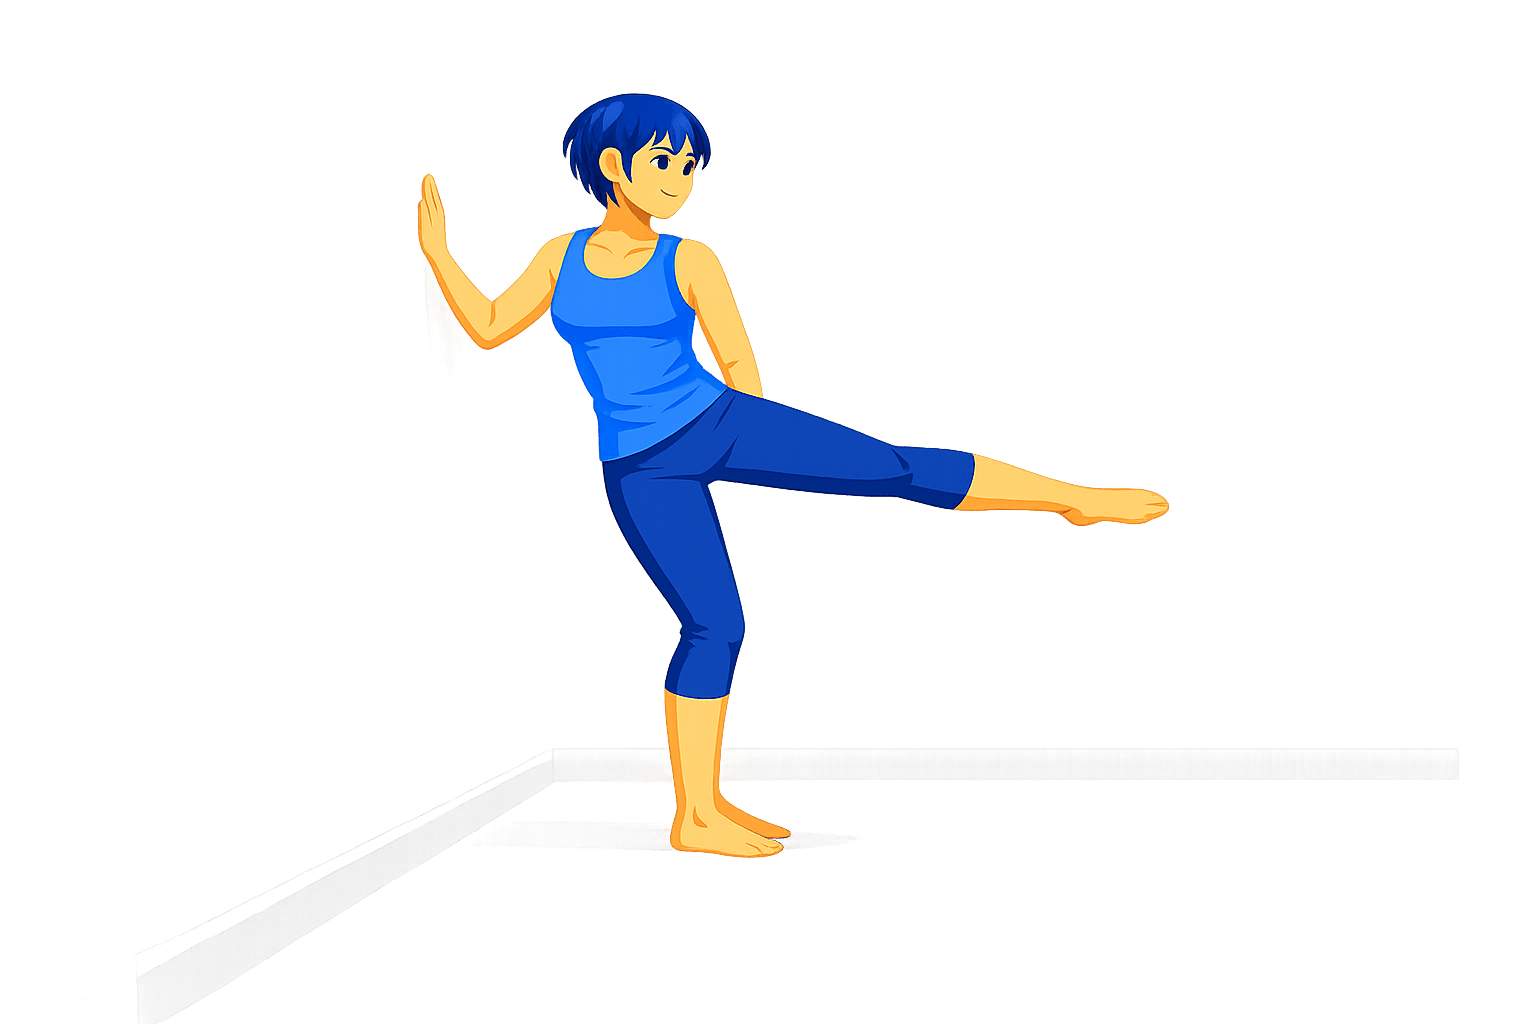
Wall Leg Lift
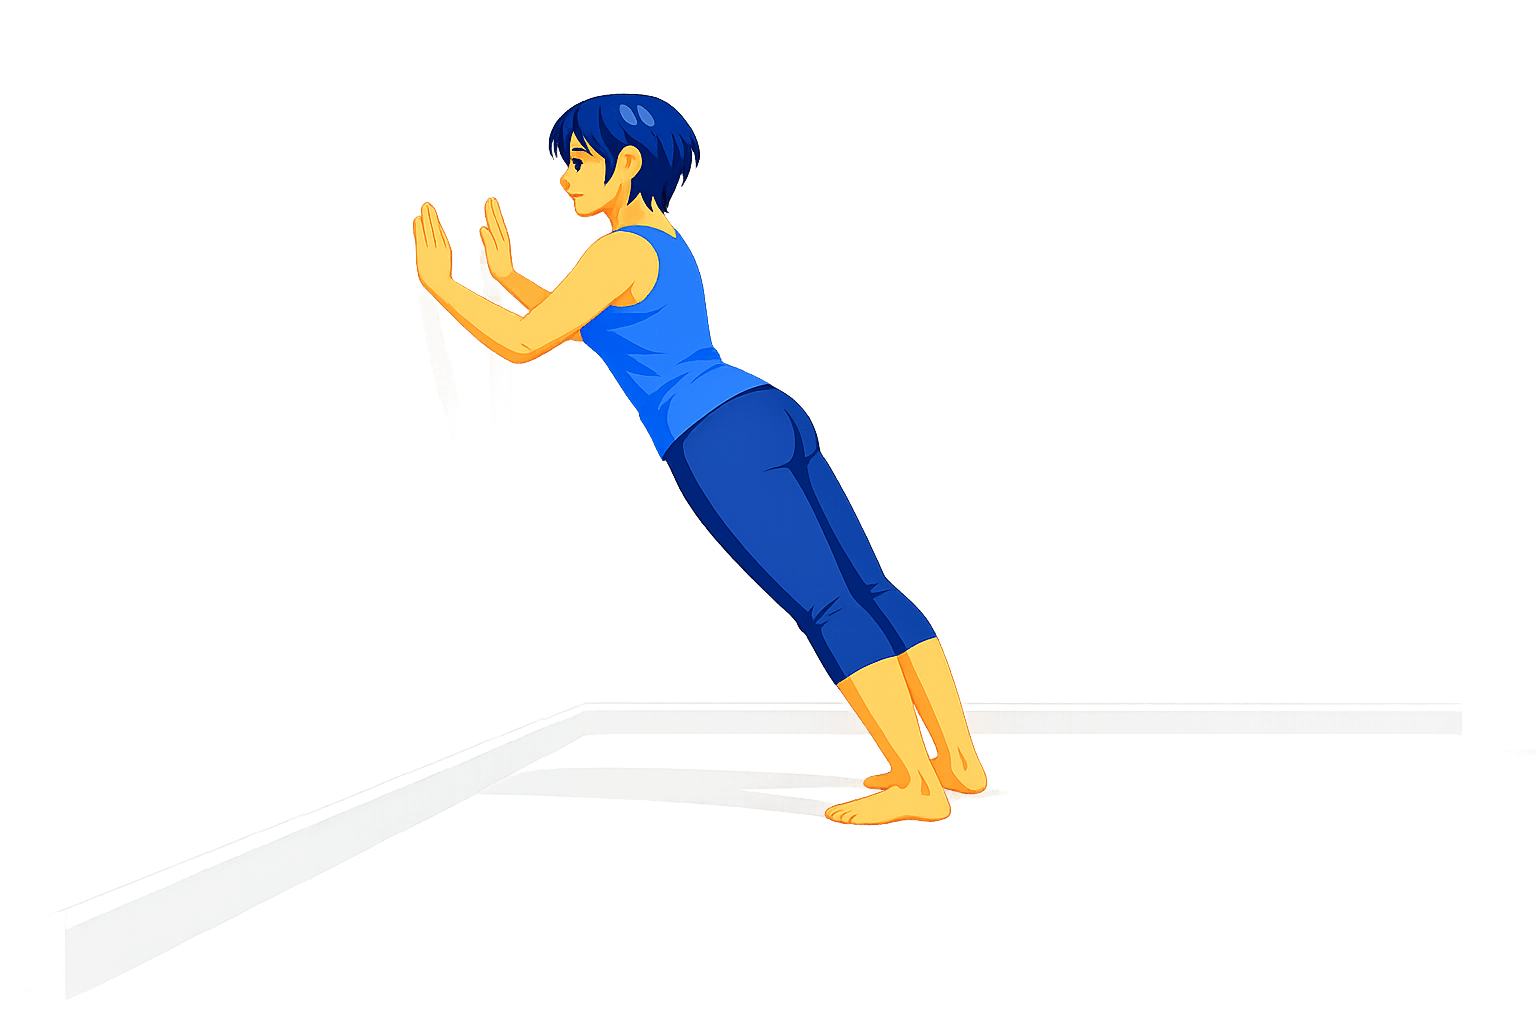
Wall Push-Up
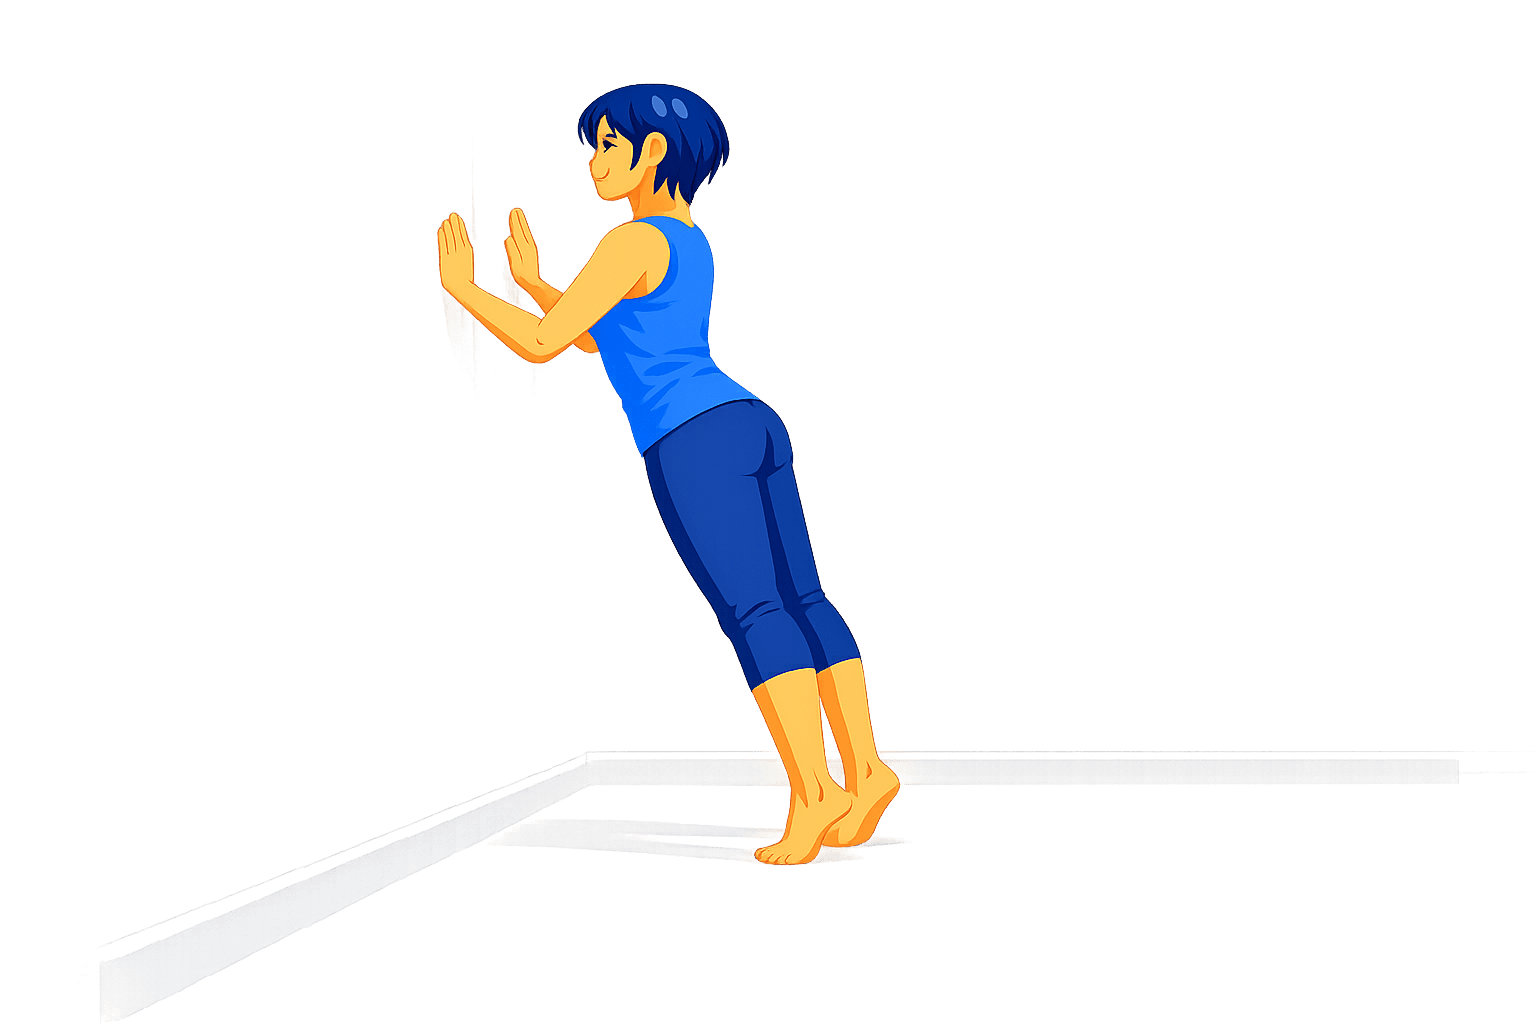
Wall Calf Raise
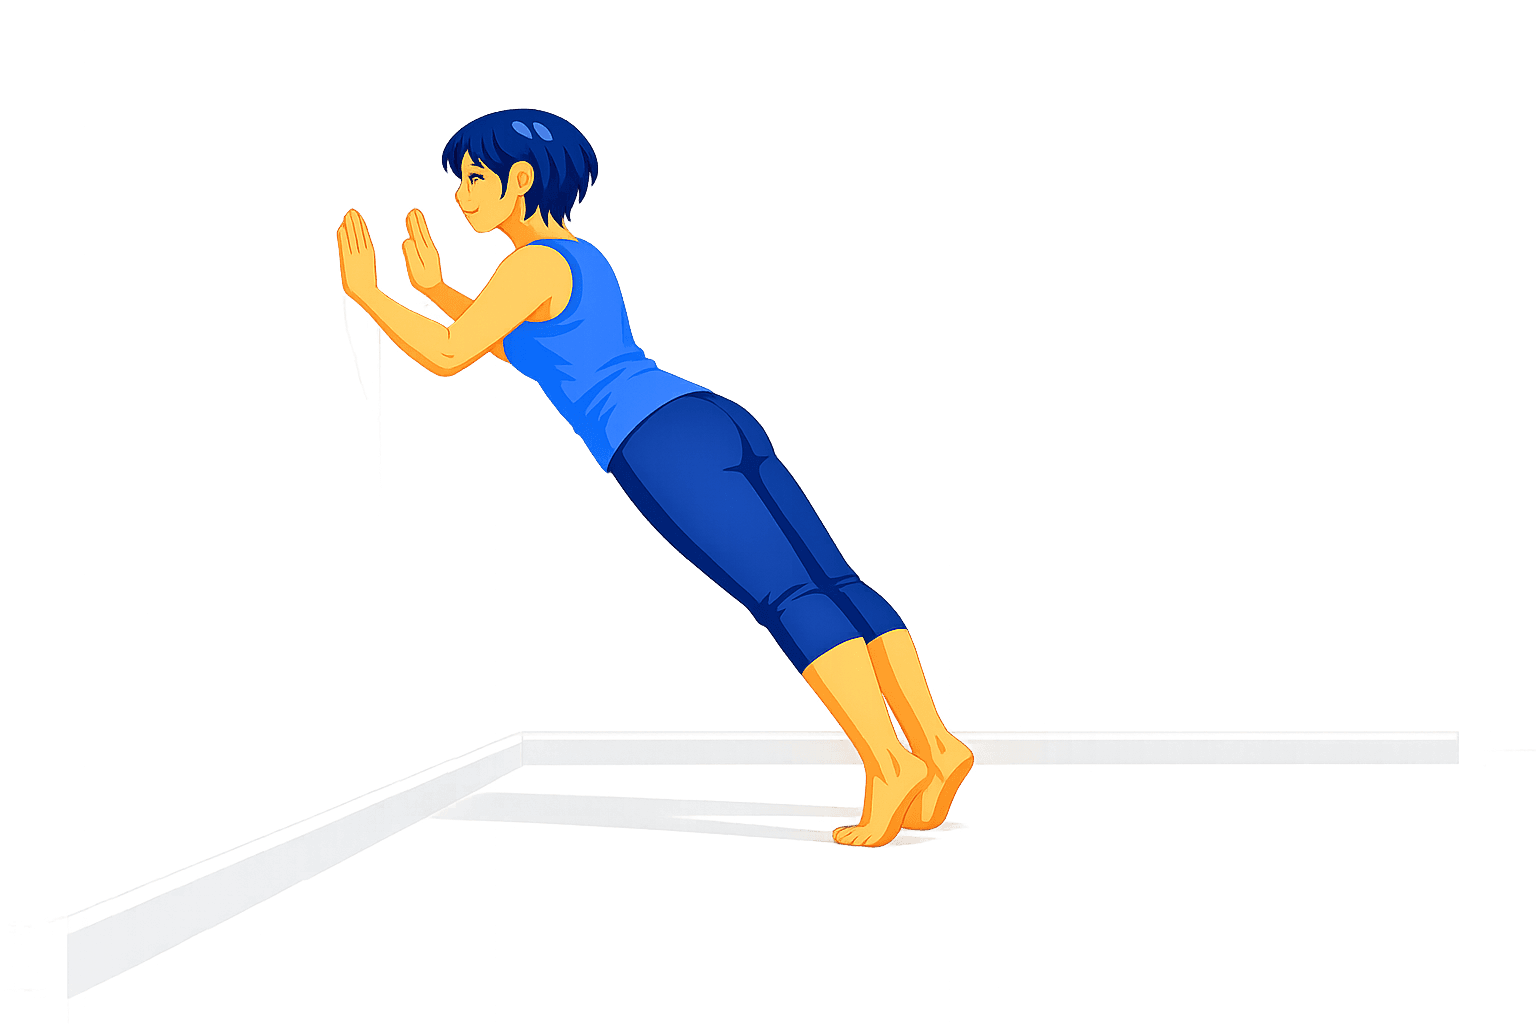
Wall Plank Hold
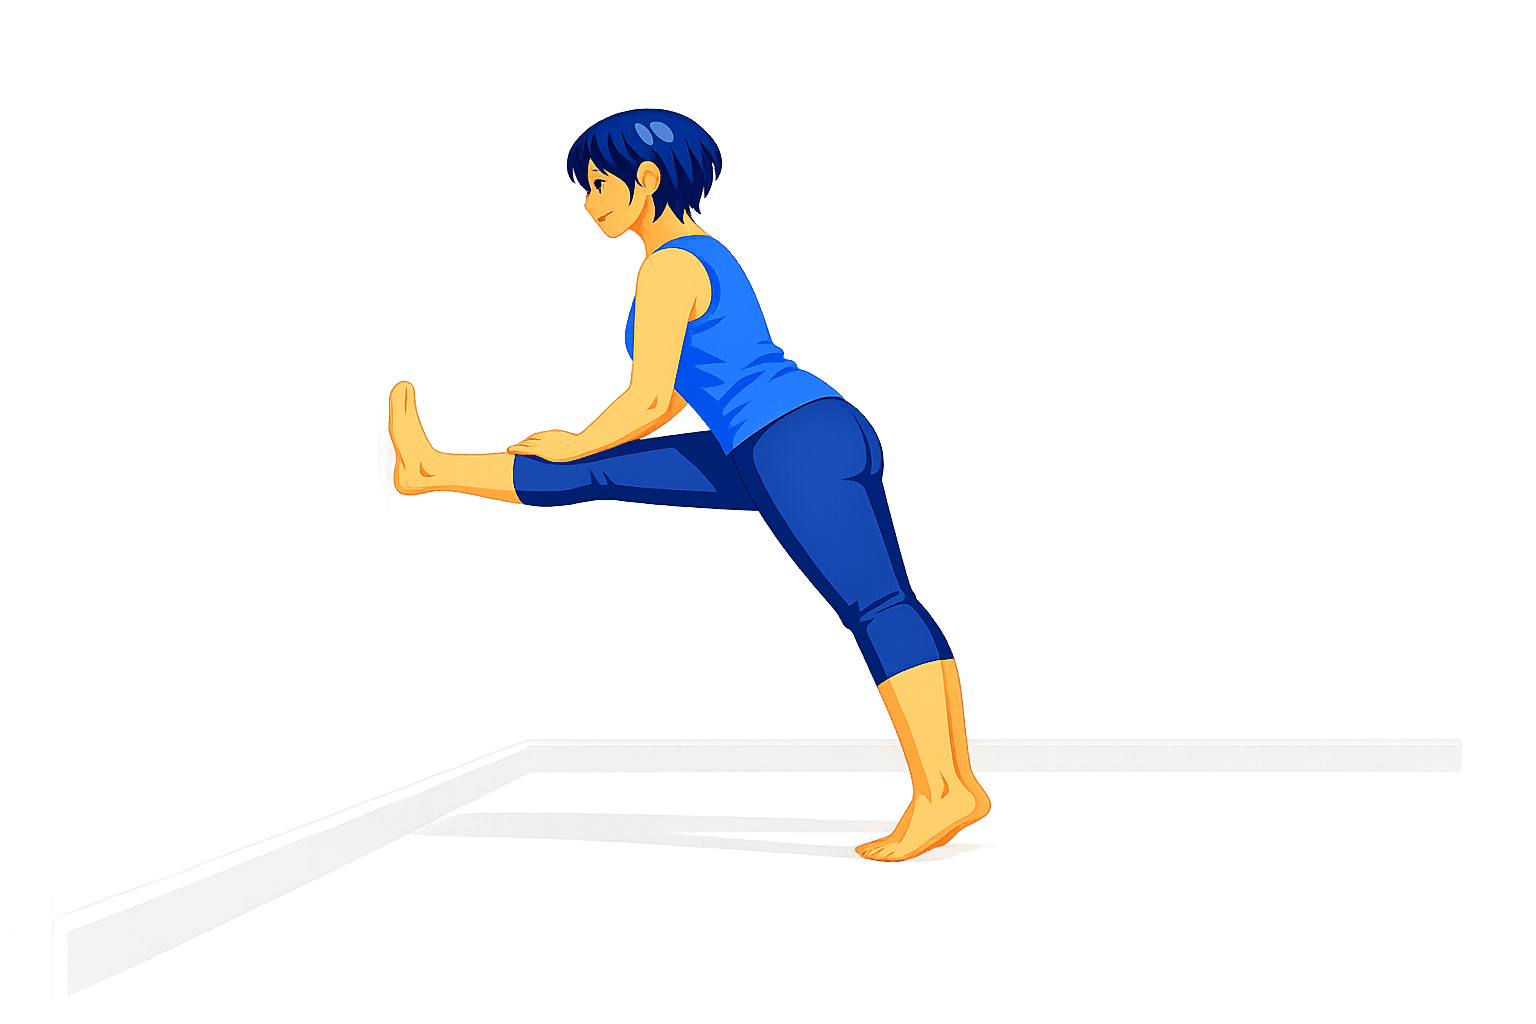
Wall Hamstring Stretch
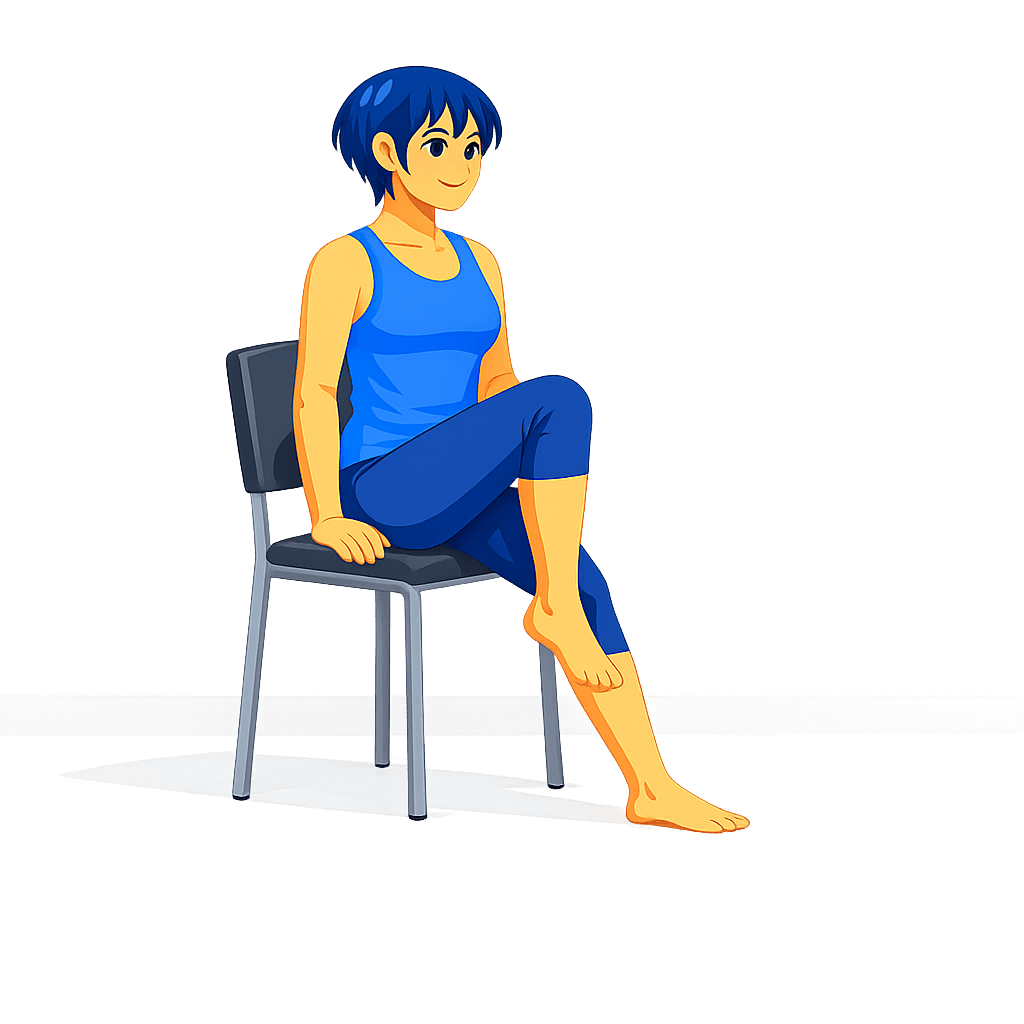
Seated March
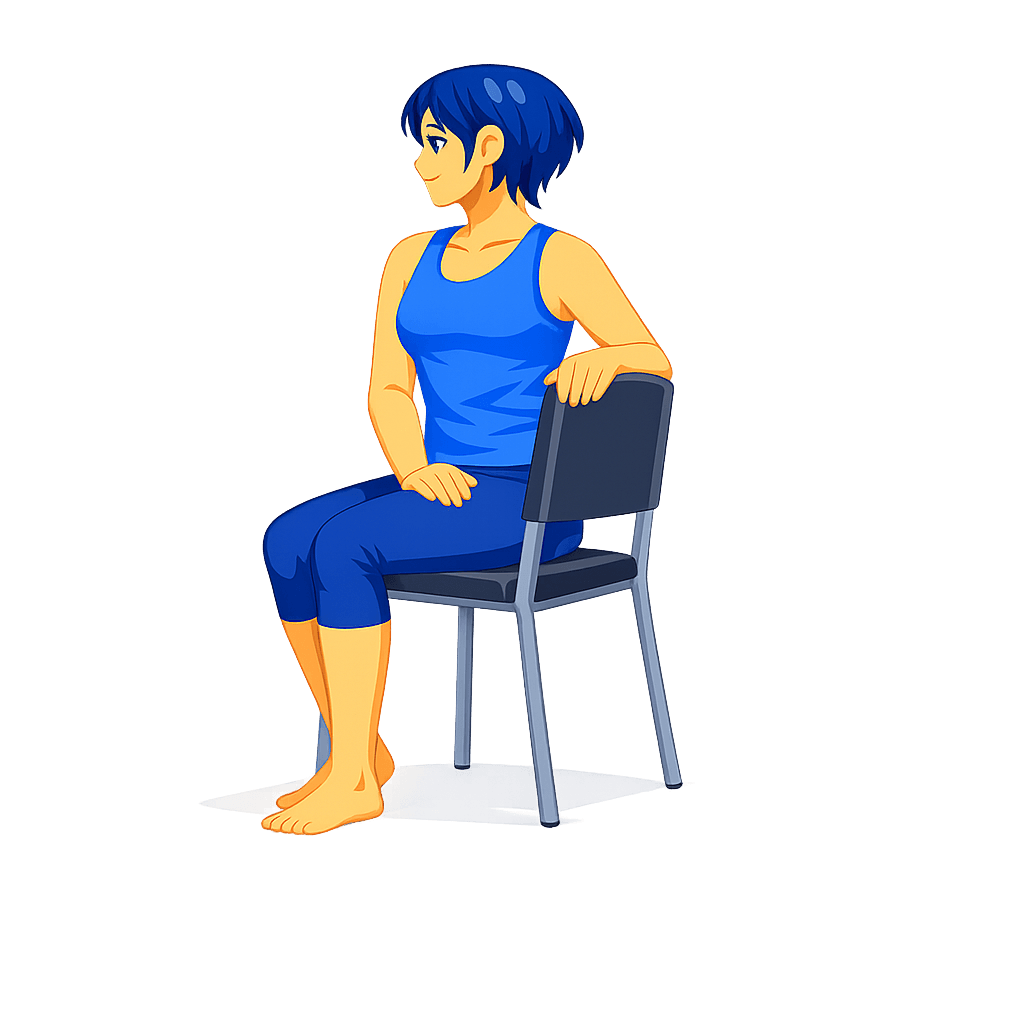
Chair Seated Twist
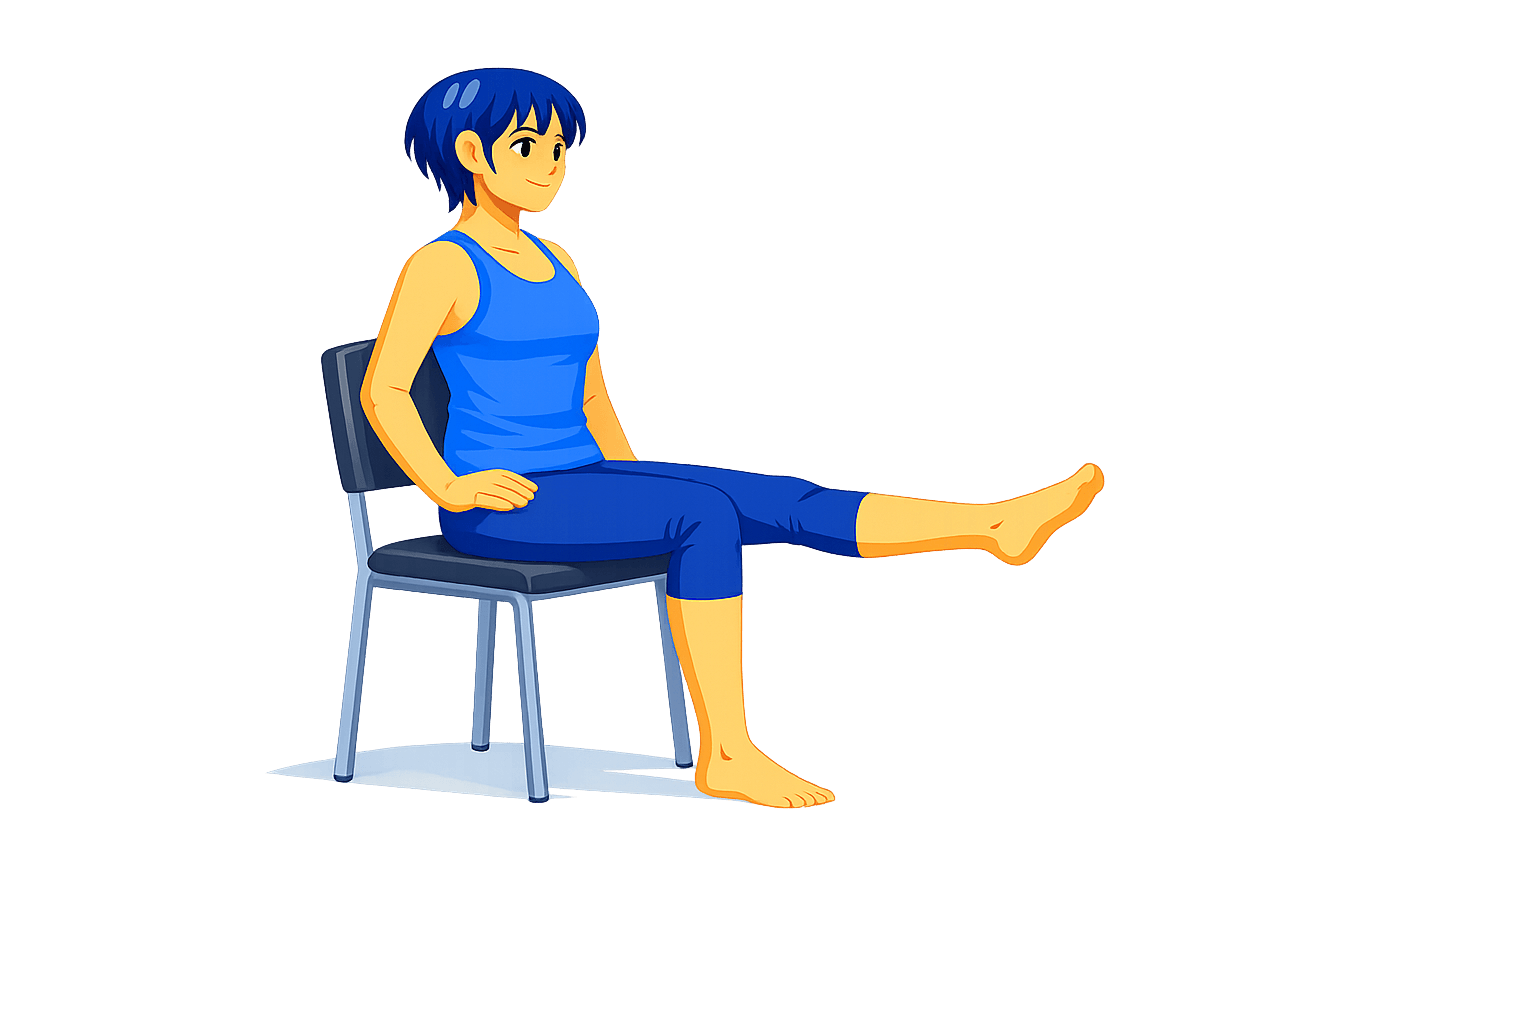
Chair Leg Extension
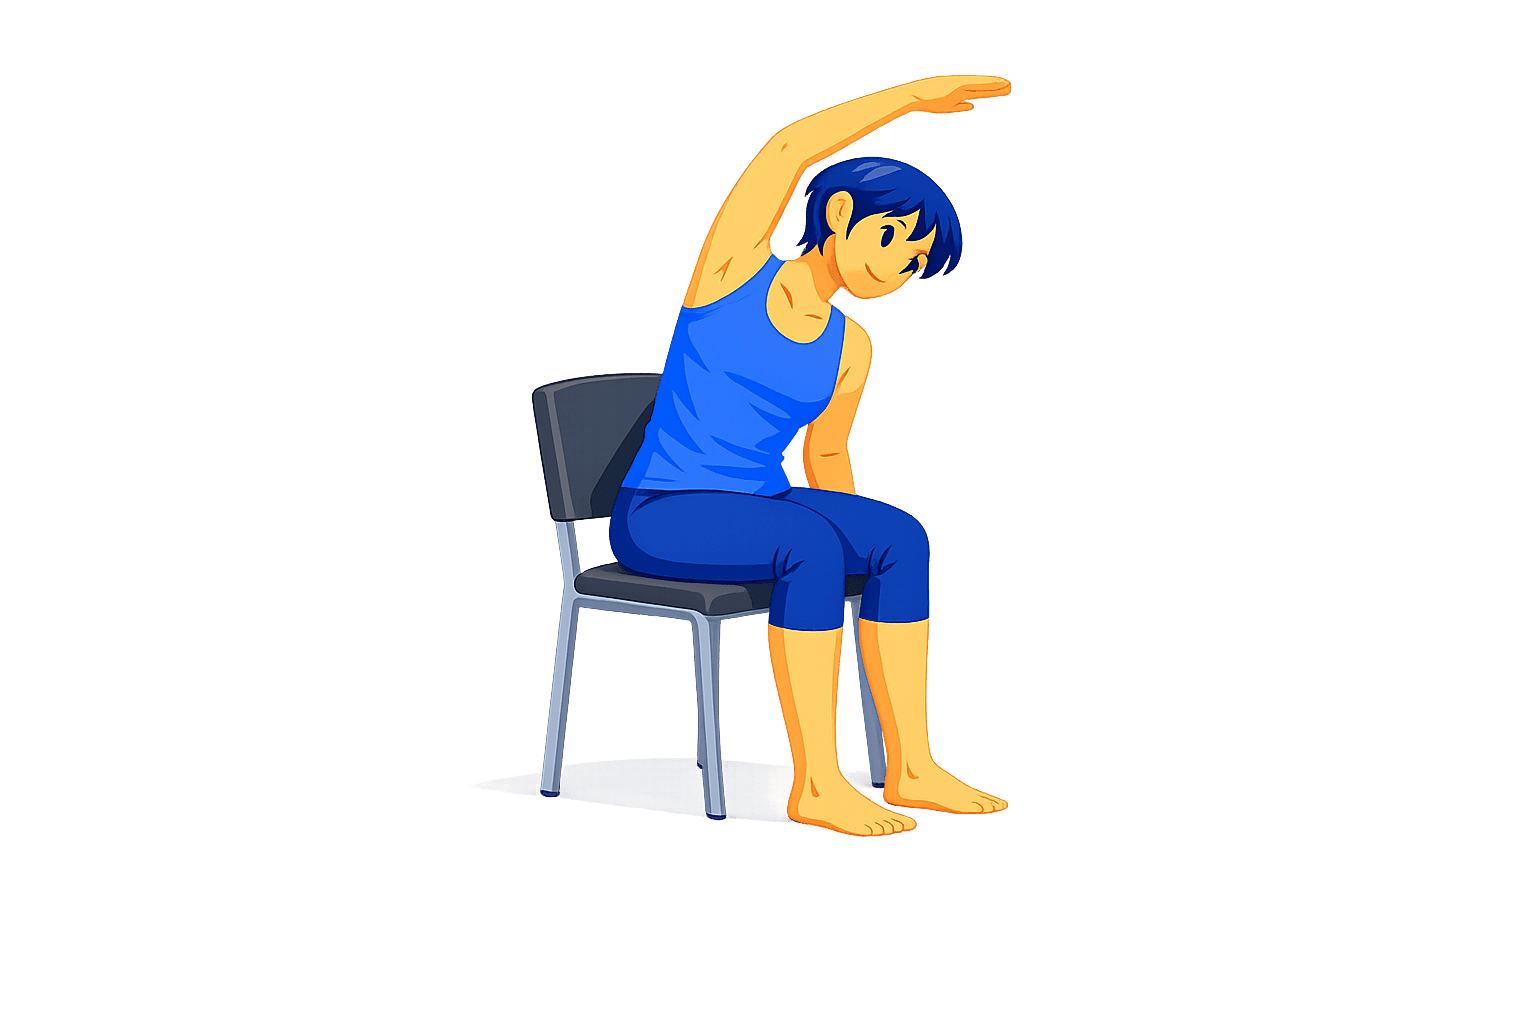
Chair Side Bend
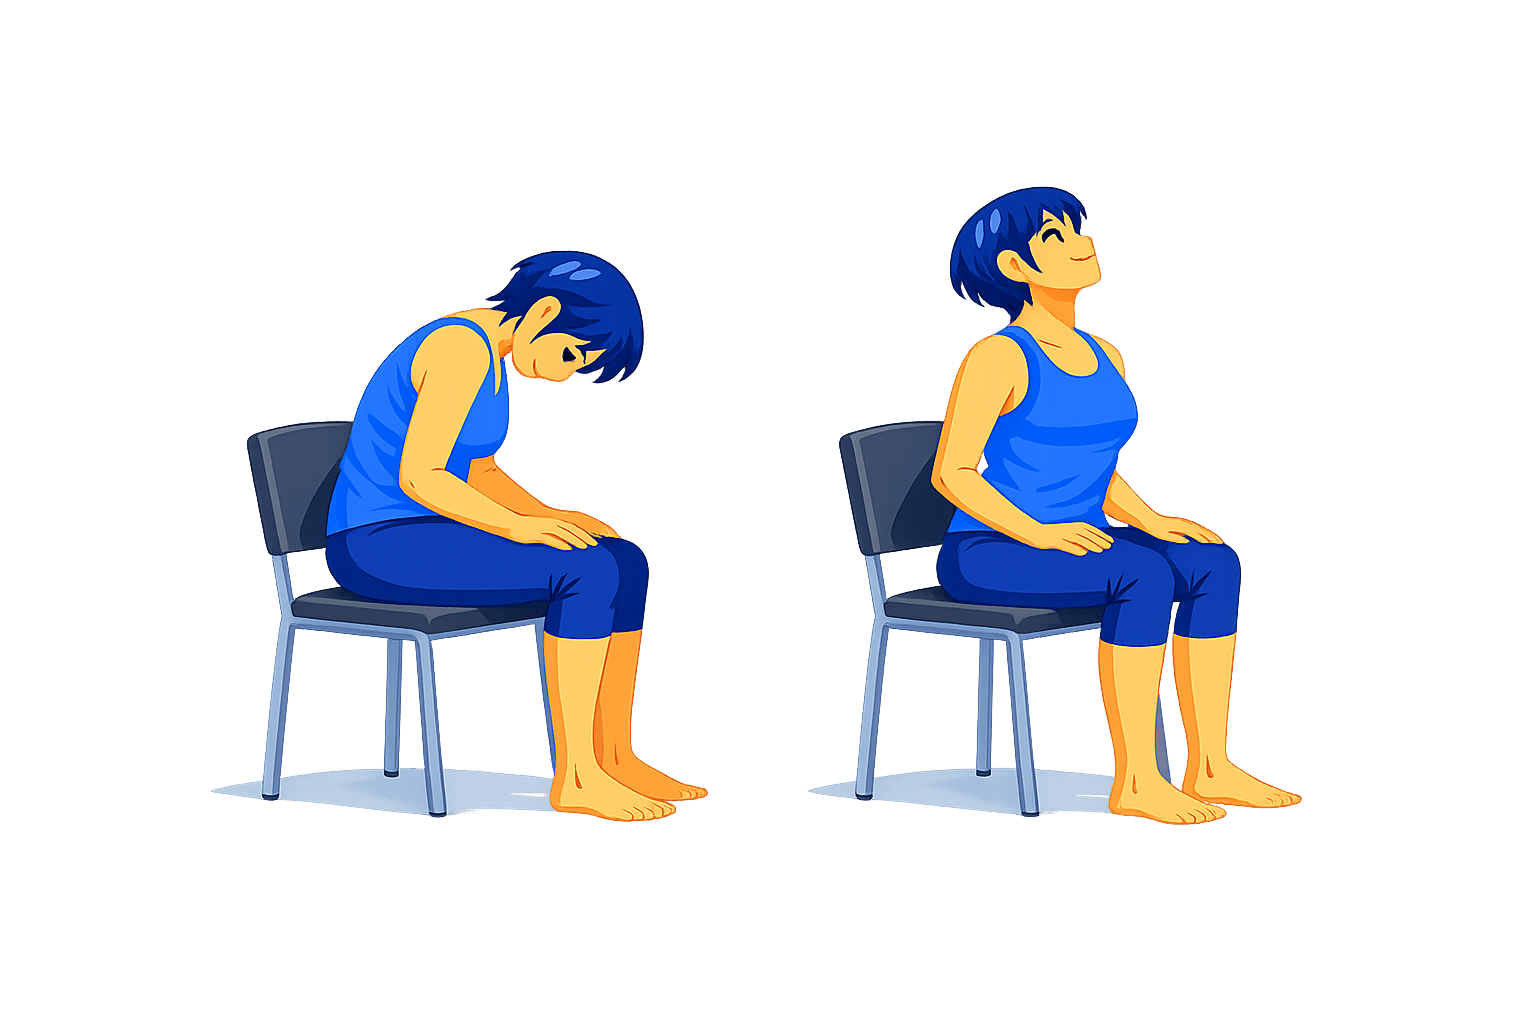
Chair Cat-Cow
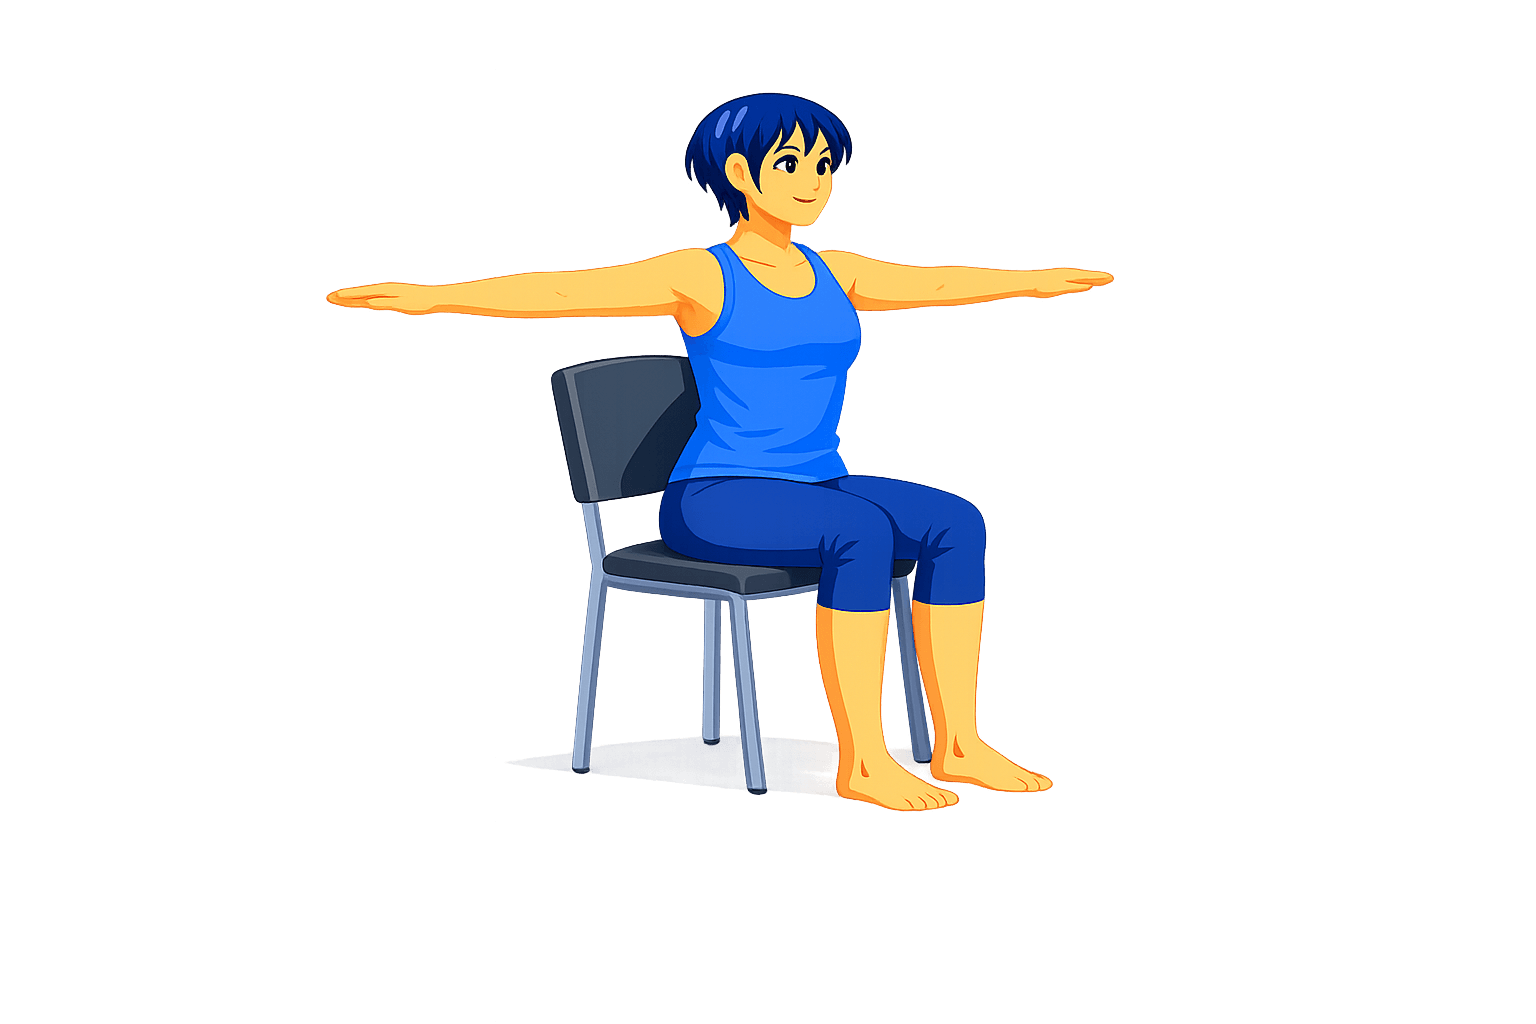
Chair Arm Circles
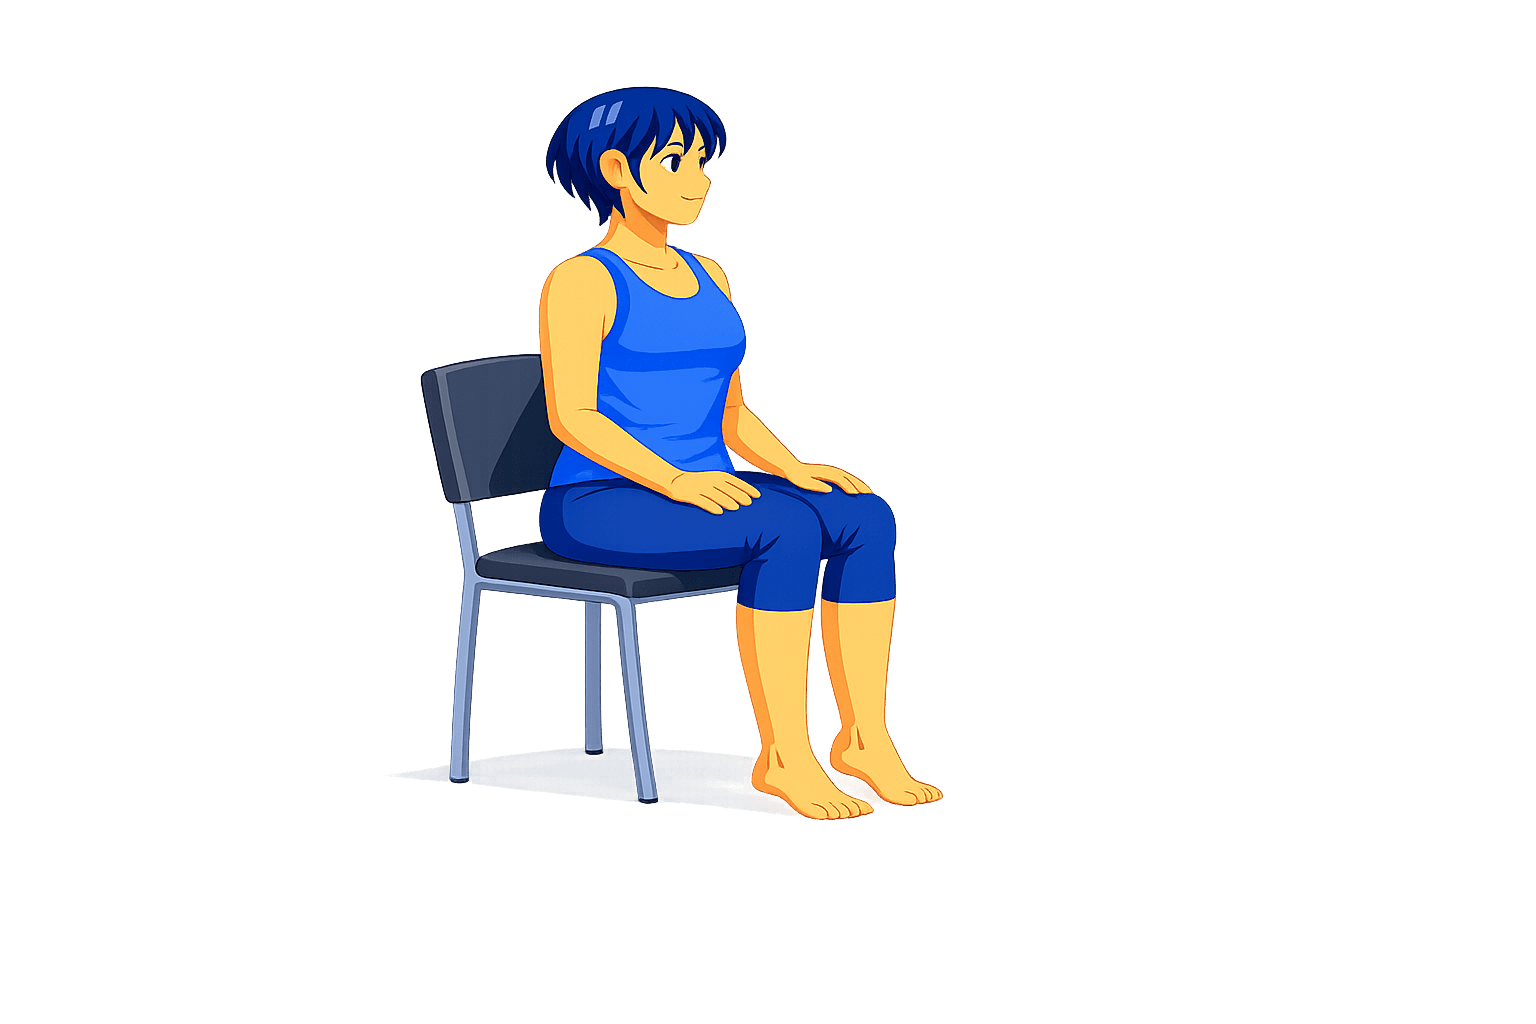
Chair Heel Raise
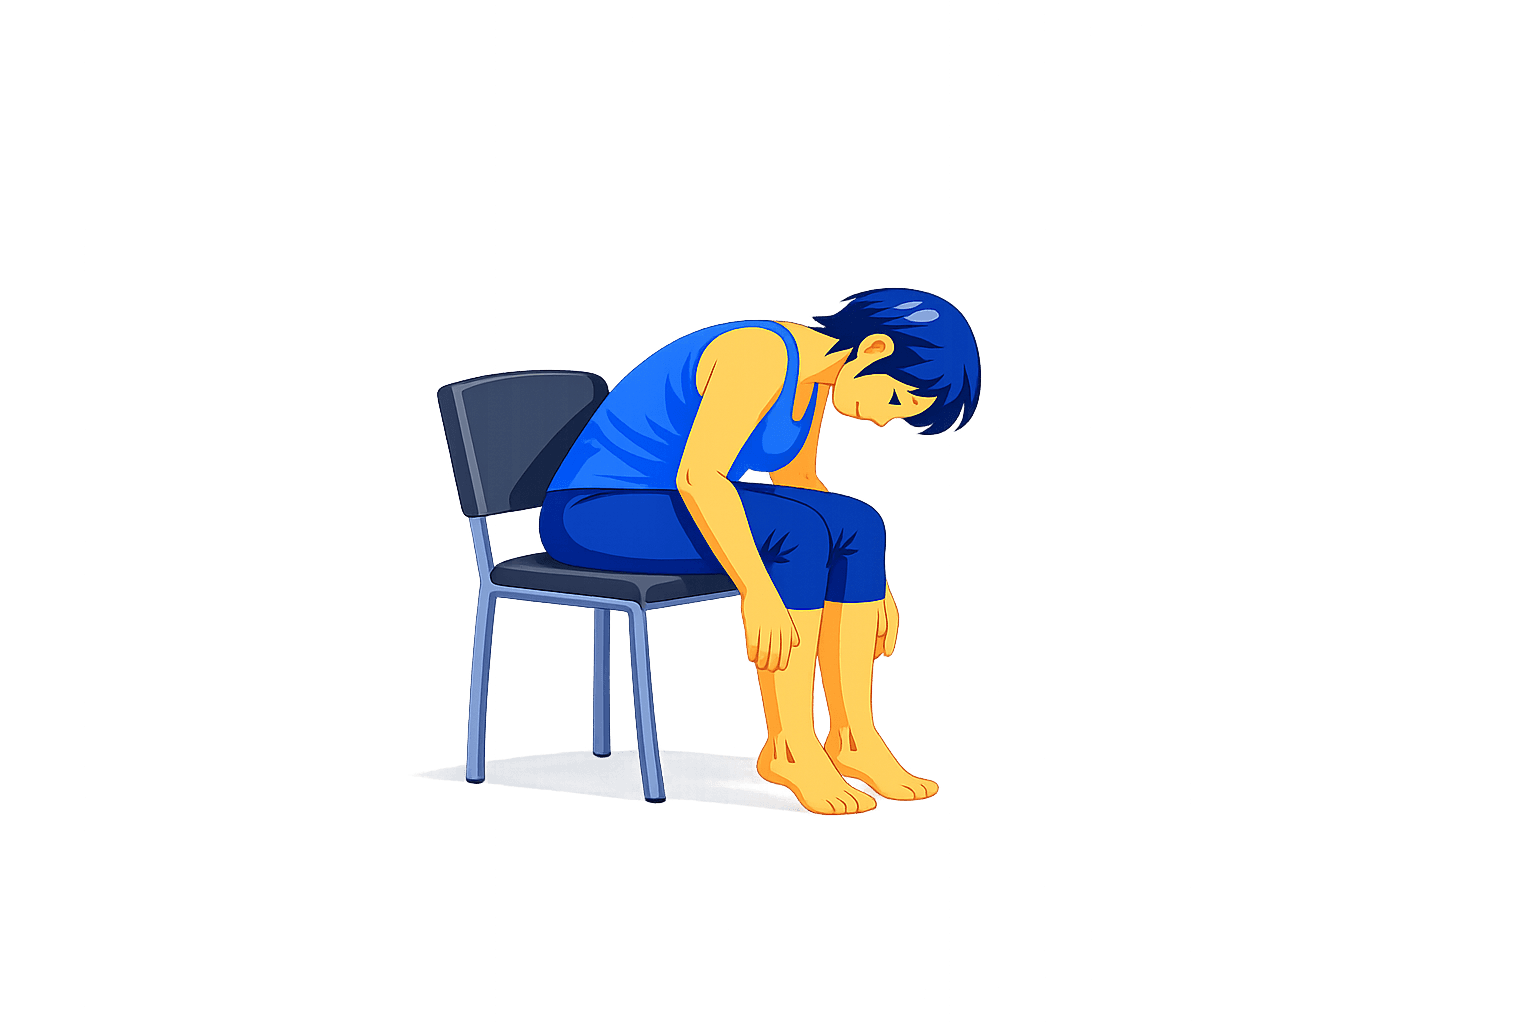
Chair Forward Fold
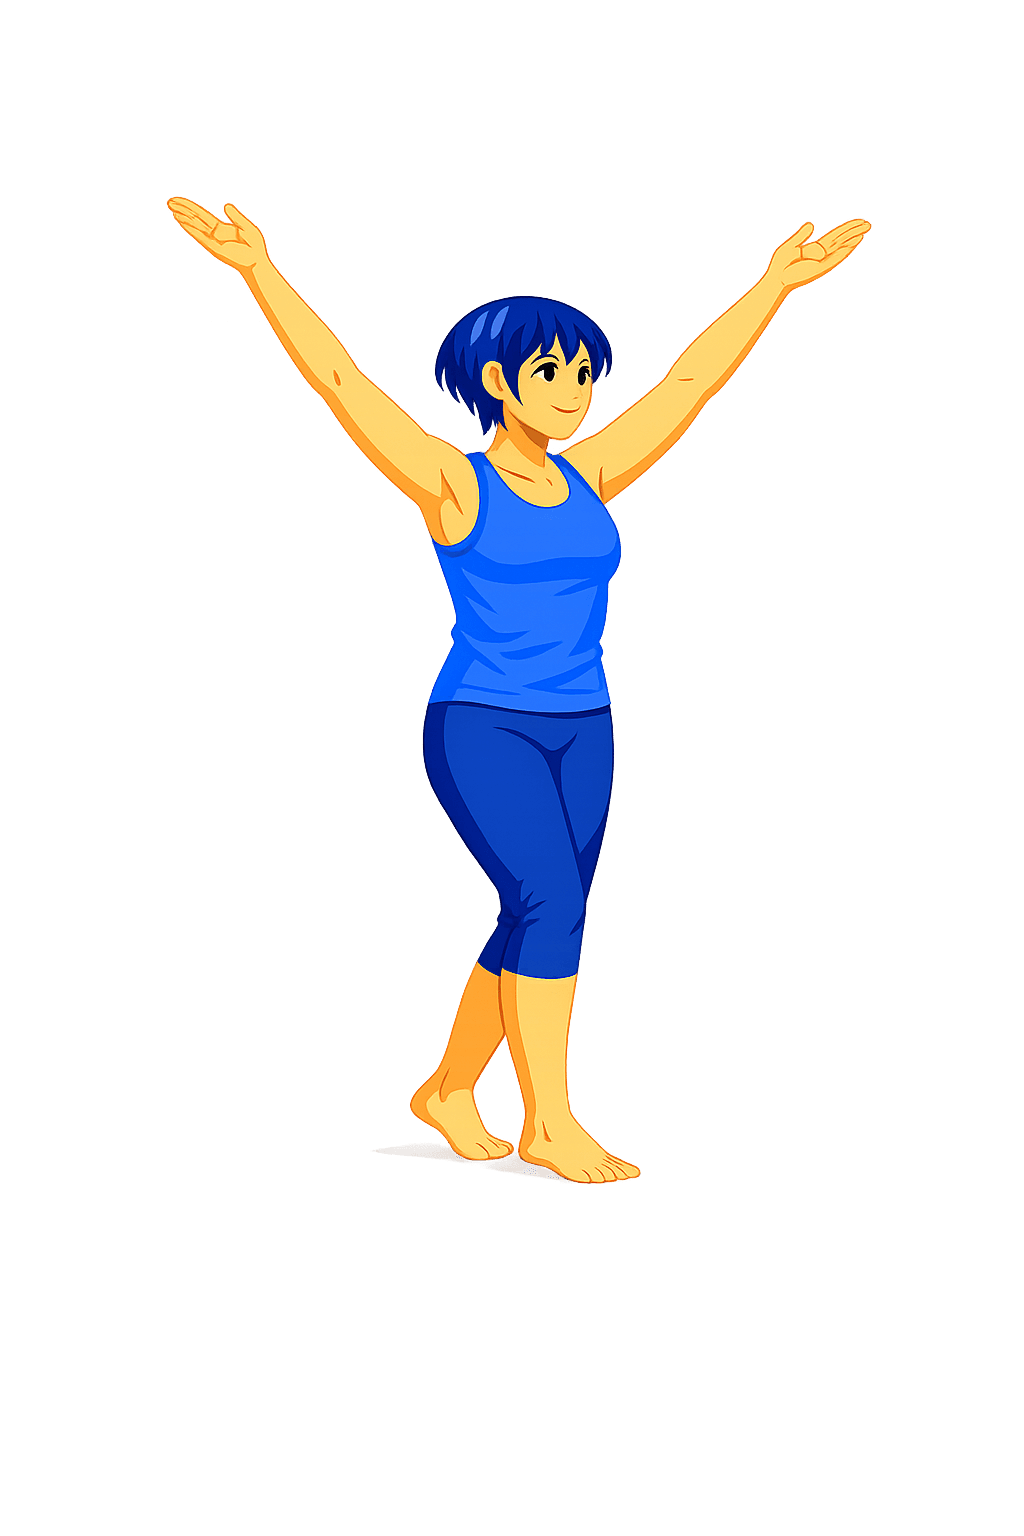
Standing Pilates Flow
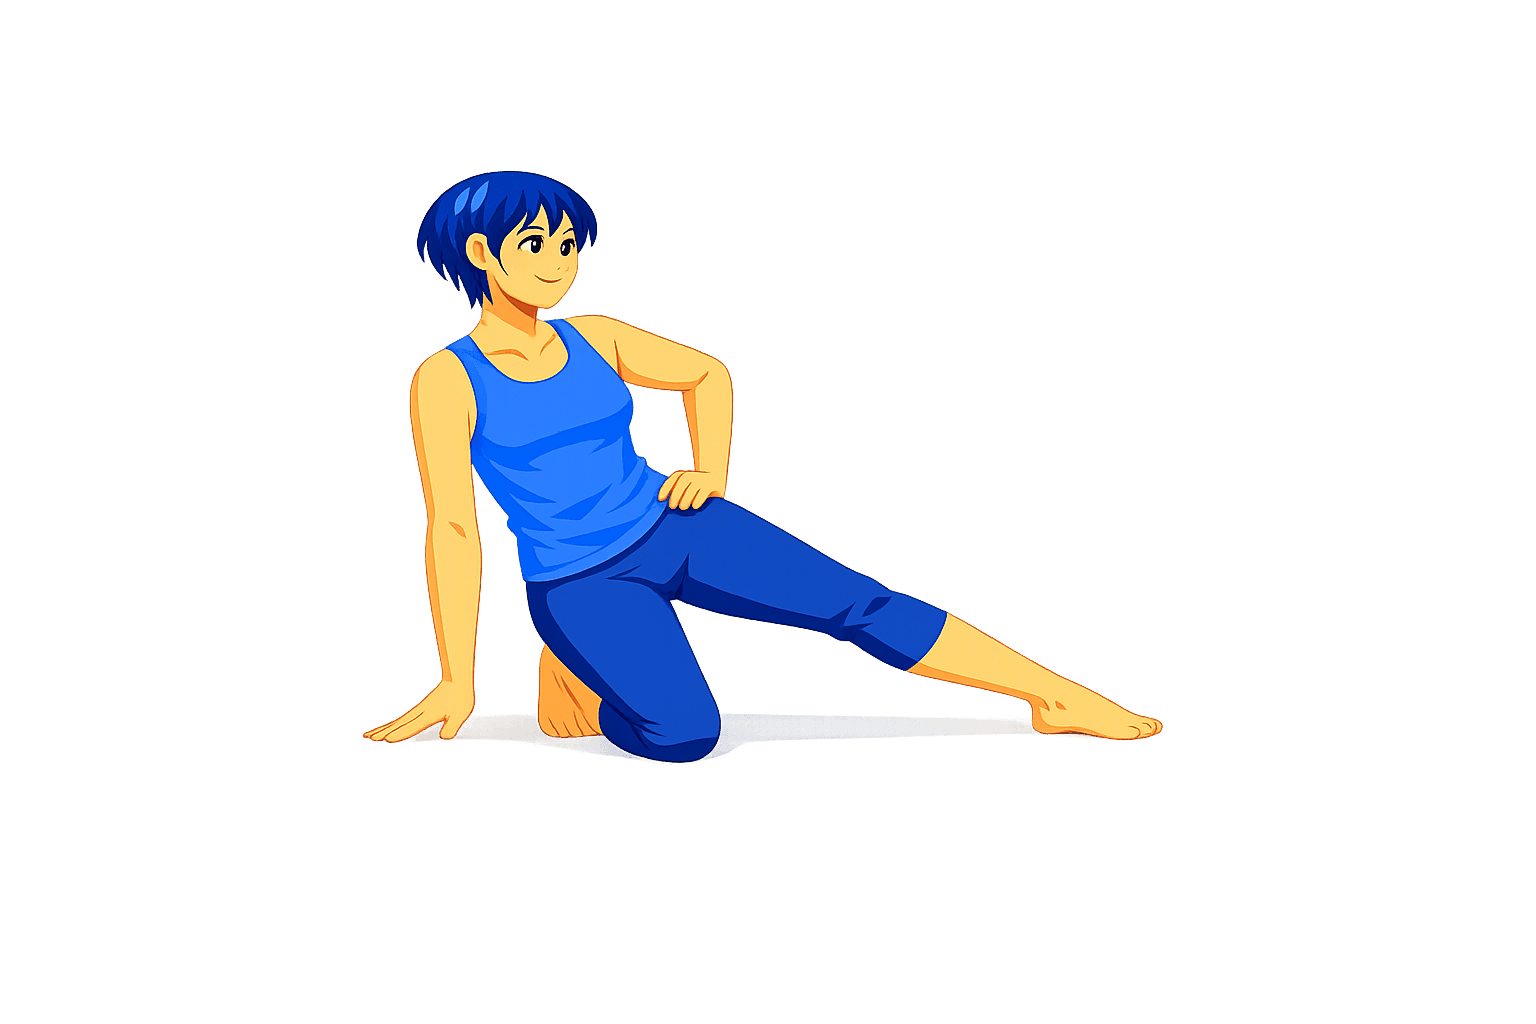
Kneeling Side Kick Prep
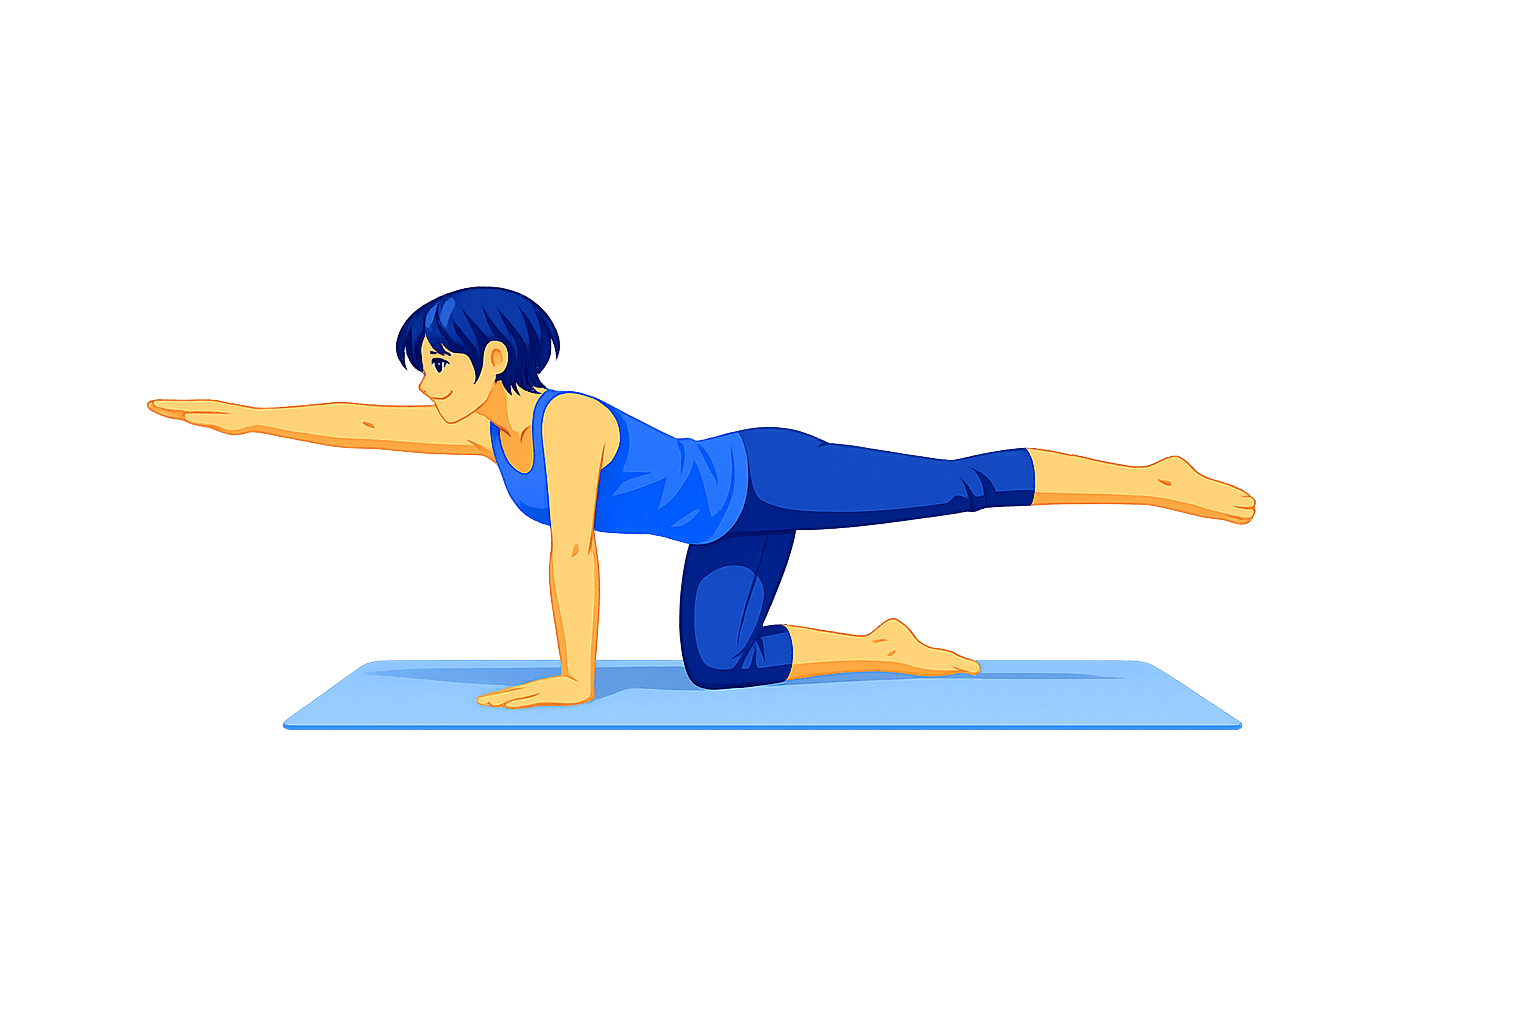
Bird Dog
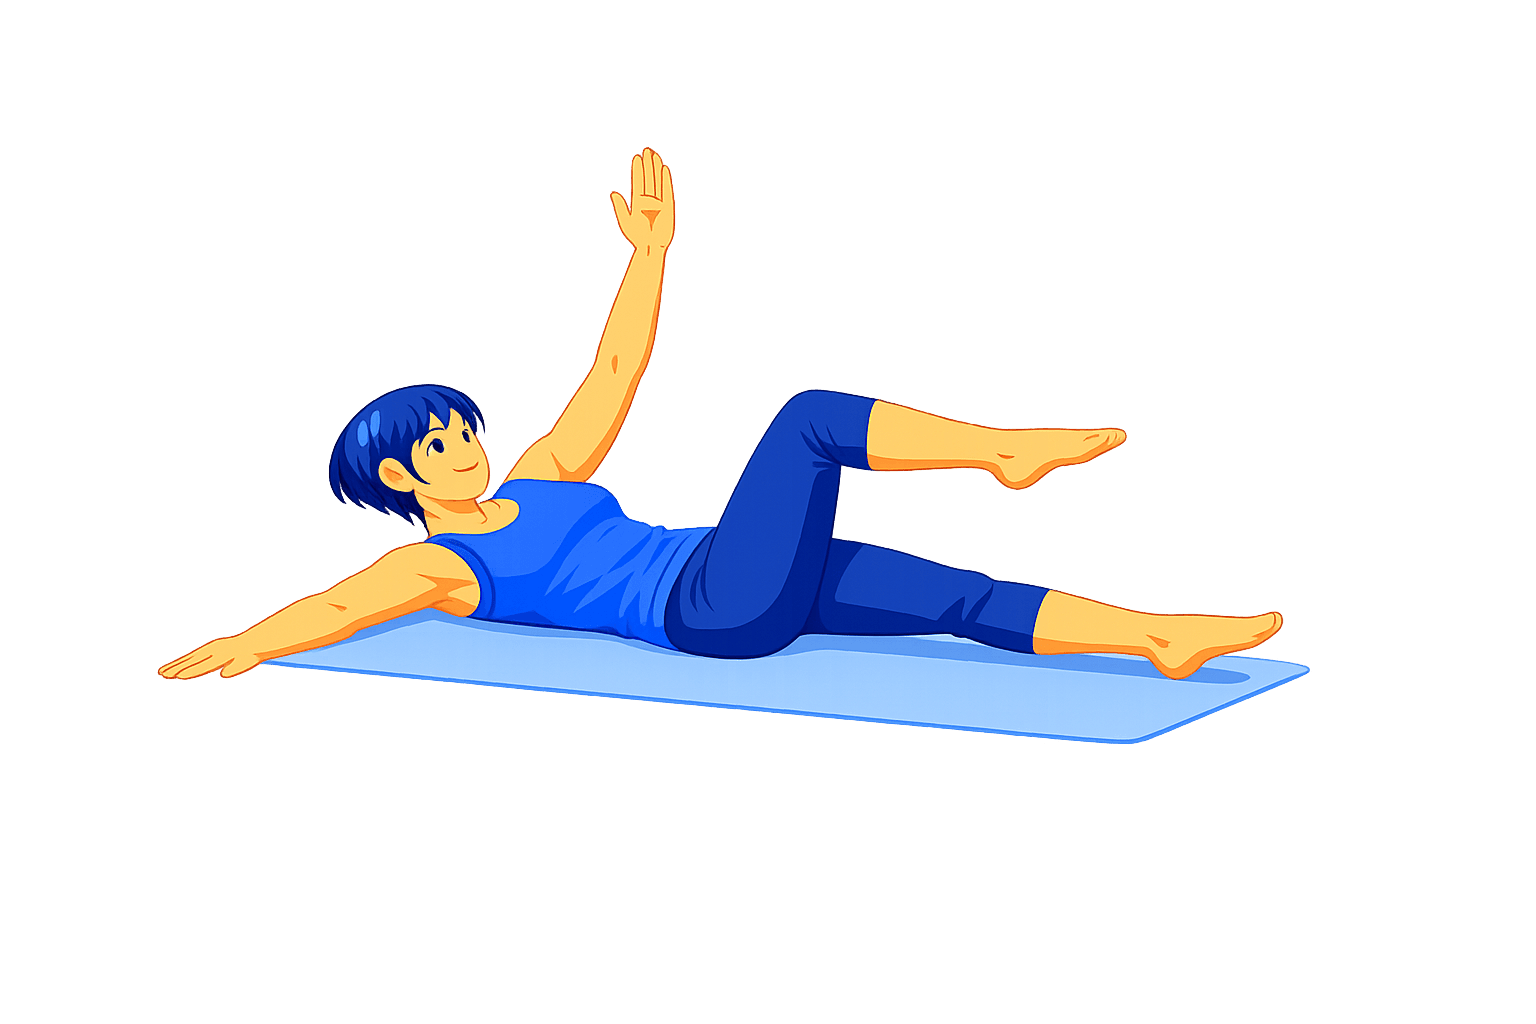
Dead Bug
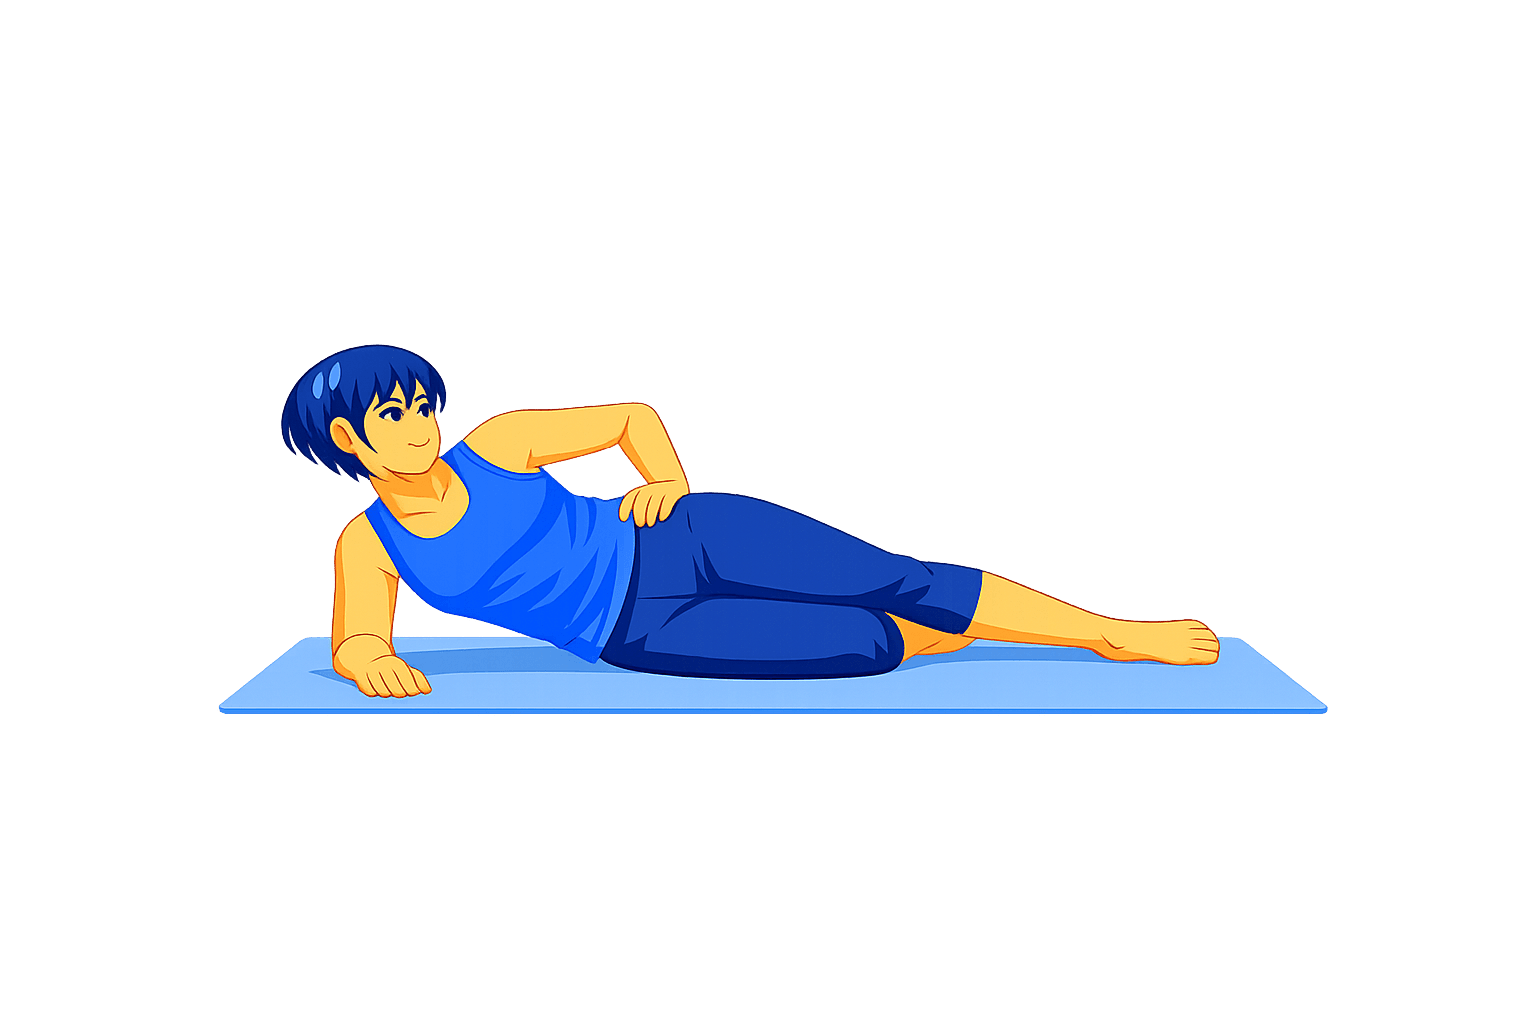
Side Plank Prep
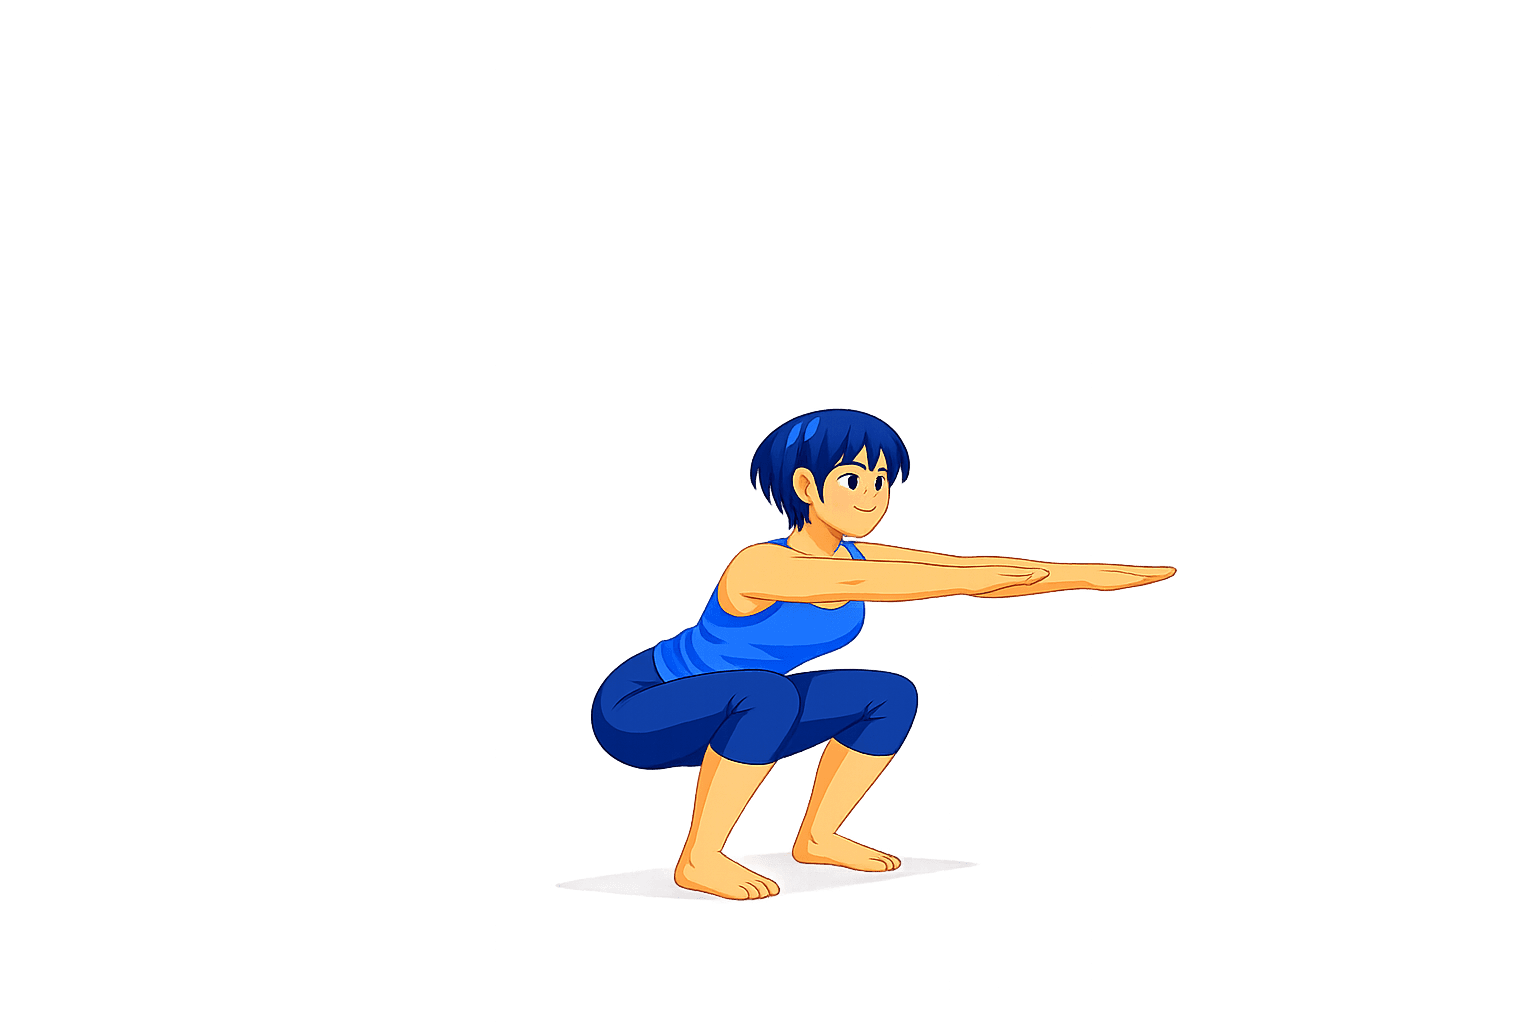
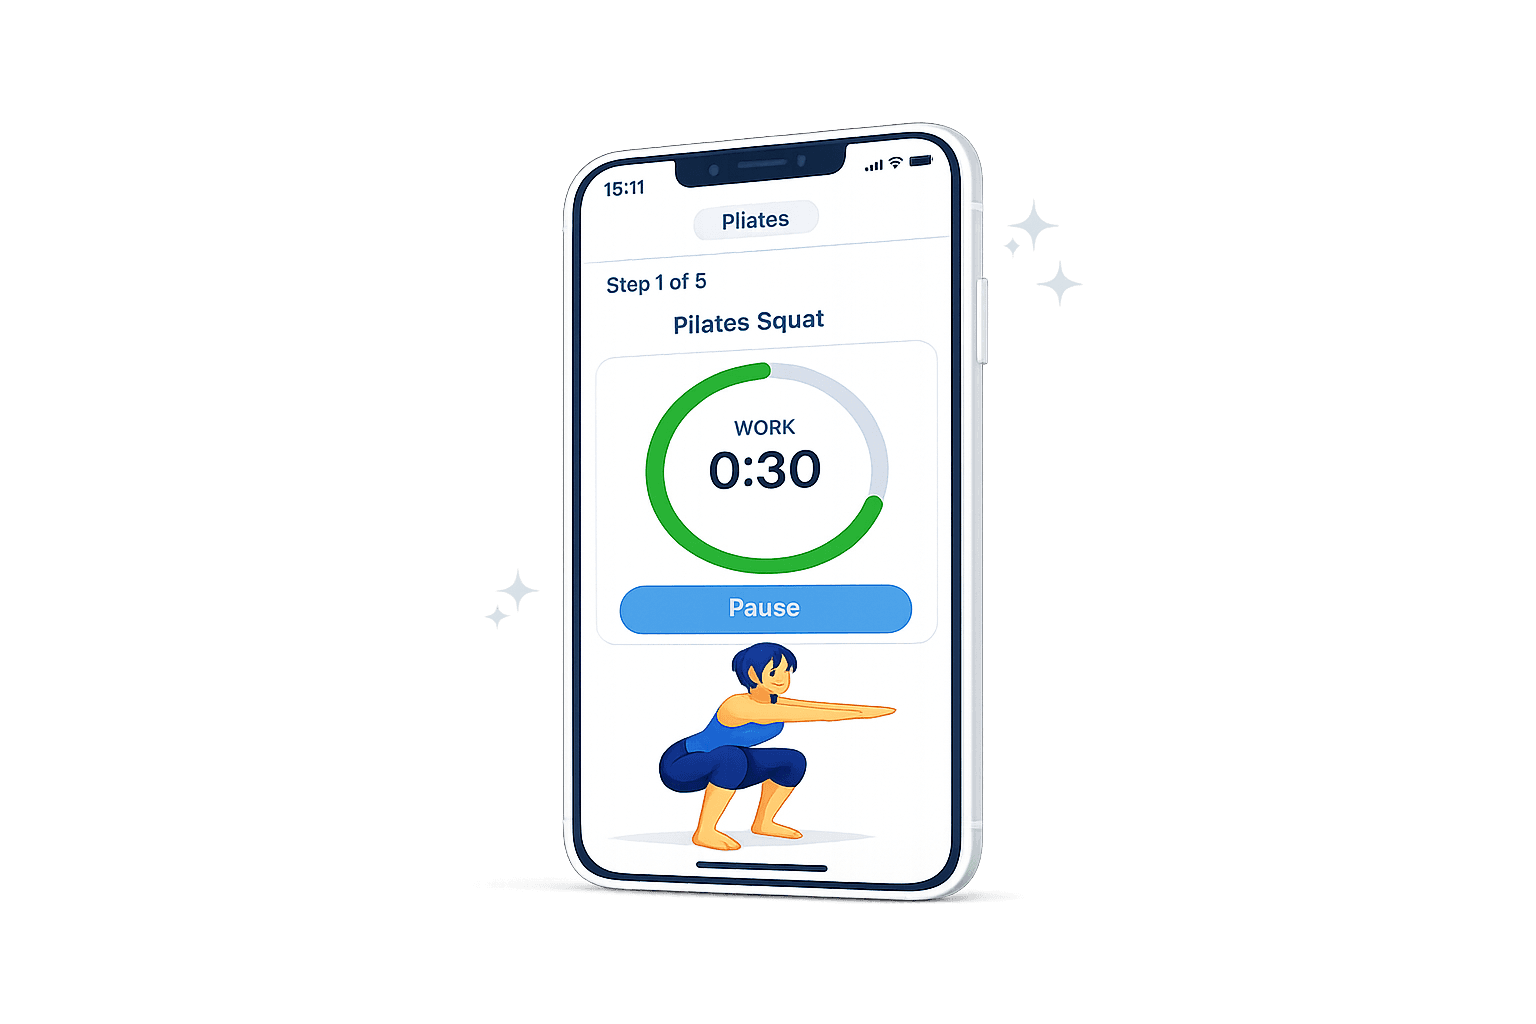
Pilates Squat
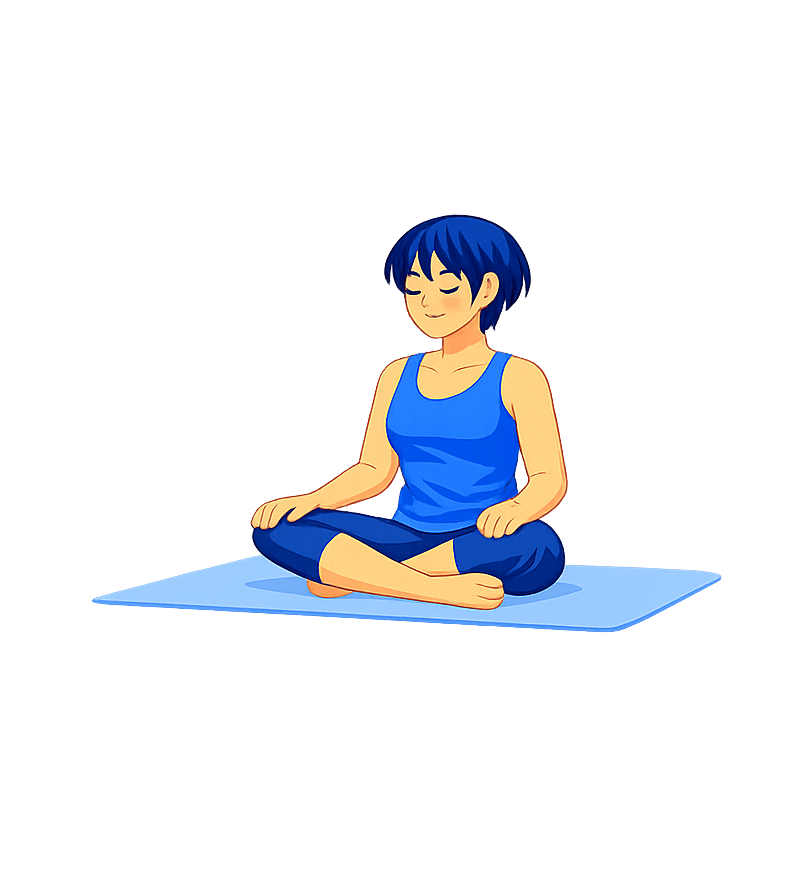
Rest Position
Pilates Workout App exercise instructions
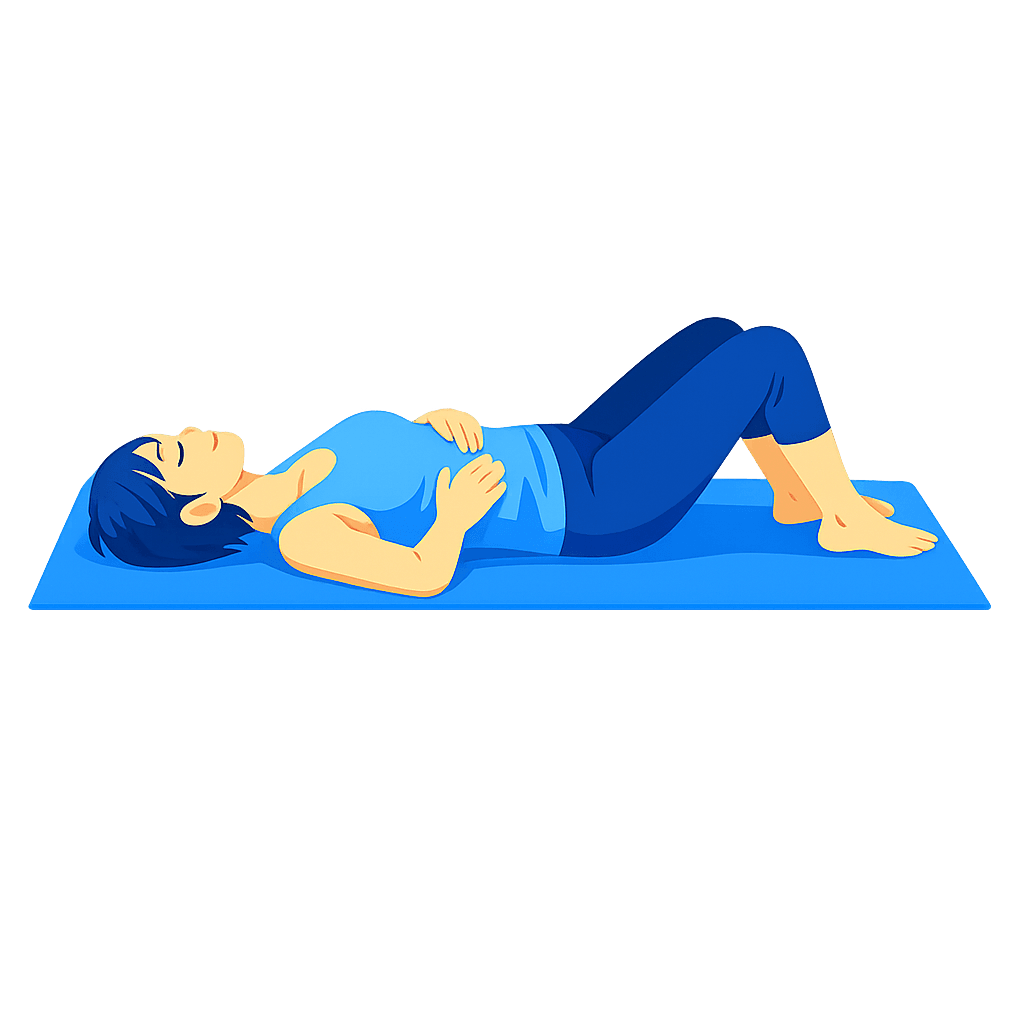
Pilates Breathing
How to do it
- Lie on your back or sit tall with your ribs stacked over your hips.
- Place your hands lightly around the sides of your ribs.
- Breathe in through the nose and let the ribs expand sideways.
- Breathe out slowly and gently draw the lower belly inward.
- Keep the neck, jaw, and shoulders relaxed.
What to focus on
- Let the ribs move more than the shoulders.
- Keep the breath smooth instead of forced.
- Use the exhale to find light core engagement.
- Stay tall or long through the spine.
Make it easier
- Practice seated if lying down feels awkward.
- Use shorter breaths and a smaller belly draw-in.
- Rest one hand on your chest and one on your belly for feedback.
Avoid this
- Holding your breath.
- Pulling the belly in so hard that the ribs lock.
- Shrugging the shoulders on the inhale.
- Tensing the jaw or face.
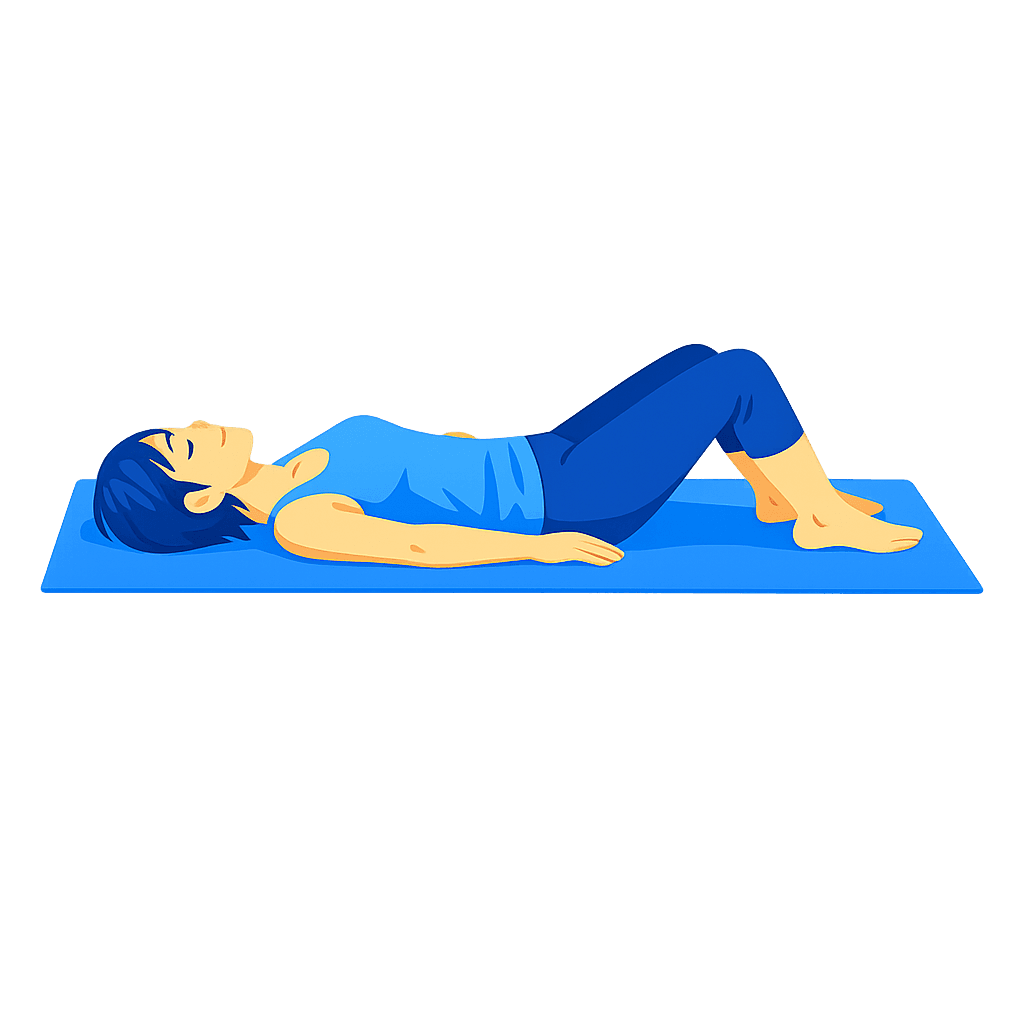
Neutral Spine Setup
How to do it
- Lie on your back with knees bent and feet flat.
- Let the pelvis rest naturally between a heavy arch and a full flattening.
- Keep the ribs soft and the back of the neck long.
- Take a few slow breaths while keeping the body settled.
- Use this position as the starting point for the next exercise.
What to focus on
- Find a balanced pelvis, not a forced position.
- Keep both feet evenly grounded.
- Let the shoulders soften into the mat.
- Notice whether the ribs flare upward.
Make it easier
- Place a small folded towel under the head if the neck lifts.
- Move the feet a little closer or farther from the hips.
- Keep the arms by your sides for support.
Avoid this
- Pressing the low back hard into the floor.
- Overarching the lower back.
- Letting the knees collapse inward.
- Bracing the whole body before you start.
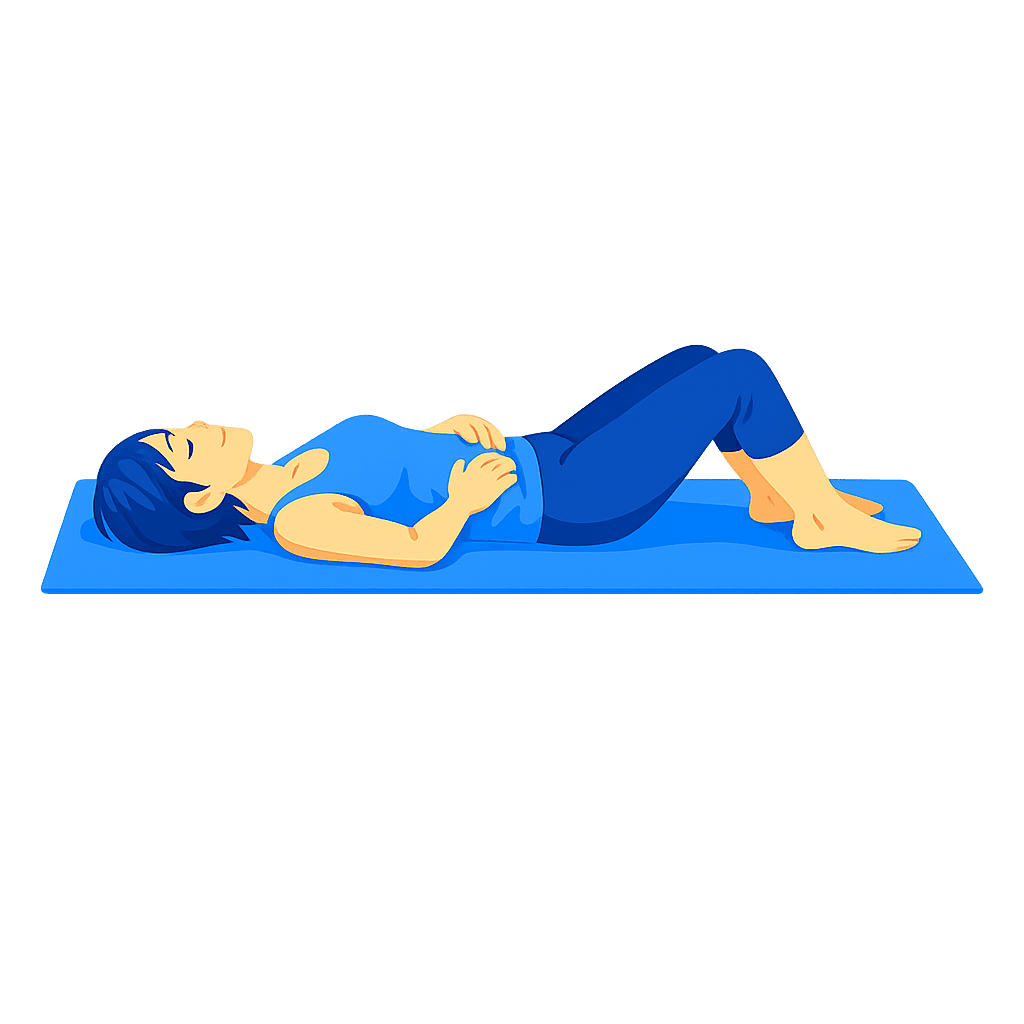
Pelvic Clock
How to do it
- Lie on your back with knees bent and feet flat.
- Imagine your pelvis as a clock face.
- Gently tilt the pelvis toward 12 o’clock, then toward 6 o’clock.
- Add small side shifts toward 3 and 9 o’clock.
- Move slowly through the pattern without lifting the hips high.
What to focus on
- Keep the motion small and controlled.
- Feel the lower back and pelvis moving together.
- Let the breath stay calm.
- Keep the feet and shoulders relaxed.
Make it easier
- Only move between 12 and 6 o’clock.
- Reduce the range until it feels smooth.
- Place hands on the hip bones for feedback.
Avoid this
- Turning it into a bridge.
- Moving quickly or jerking the pelvis.
- Pushing through discomfort.
- Holding tension in the shoulders.
Hundred Prep
How to do it
- Lie on your back with knees bent or lifted to tabletop.
- Curl the head and shoulders slightly if comfortable.
- Reach the arms long by your sides.
- Pump the arms in small controlled movements while breathing steadily.
- Lower the head and feet to reset when the set is done.
What to focus on
- Keep the belly gently drawn inward.
- Make the arm pumps small and crisp.
- Keep the neck long rather than folded.
- Maintain steady breathing through the whole set.
Make it easier
- Keep the head down.
- Keep both feet on the floor.
- Do fewer arm pumps or shorten the set.
Avoid this
- Pulling on the neck.
- Letting the ribs flare upward.
- Swinging the arms with large loose movements.
- Holding your breath.
Toe Taps
How to do it
- Lie on your back with knees bent over the hips.
- Keep the spine steady and arms resting by your sides.
- Lower one foot toward the floor with control.
- Tap lightly, then bring the leg back to tabletop.
- Alternate sides for the planned reps.
What to focus on
- Keep the pelvis still as the leg moves.
- Move from the hip without changing the back position.
- Use a slow lower and a controlled return.
- Keep the shoulders relaxed.
Make it easier
- Start with feet on the floor and lift one knee at a time.
- Lower the foot only halfway.
- Do fewer reps per side.
Avoid this
- Letting the lower back arch as the foot lowers.
- Dropping the leg quickly.
- Pulling the knees too close to the chest.
- Tensing the neck.
Single Leg Stretch
How to do it
- Lie on your back and bring one knee toward the chest.
- Extend the other leg away at a height you can control.
- Hold lightly behind the bent thigh or shin.
- Switch legs smoothly, keeping the torso steady.
- Continue alternating for the planned reps.
What to focus on
- Keep the movement long and controlled.
- Let the hands guide, not pull.
- Keep the ribs heavy and the core engaged.
- Match the switching rhythm with steady breathing.
Make it easier
- Keep the head down.
- Extend the moving leg higher.
- Slow the switches and reduce the reps.
Avoid this
- Yanking the knee into the chest.
- Letting the lower back lift.
- Kicking the leg without control.
- Collapsing the shoulders forward.
Double Leg Stretch
How to do it
- Lie on your back and bring both knees toward the chest.
- Curl the head and shoulders slightly if comfortable.
- Reach the arms and legs away from each other.
- Circle the arms back and draw the knees in again.
- Repeat slowly with control.
What to focus on
- Keep the reach long but manageable.
- Control the ribs as the arms go overhead.
- Move arms and legs together smoothly.
- Keep the neck relaxed.
Make it easier
- Keep the head down.
- Reach the legs higher instead of low.
- Move only the arms or only the legs at first.
Avoid this
- Letting the lower back arch.
- Throwing the arms behind the head.
- Moving too fast.
- Holding breath during the reach.
Criss-Cross
How to do it
- Lie on your back with knees lifted.
- Bring hands lightly behind the head.
- Rotate one shoulder toward the opposite knee as the other leg extends.
- Switch sides in a steady rhythm.
- Keep the elbows wide without pulling the head.
What to focus on
- Rotate through the ribs, not just the neck.
- Keep the pelvis steady.
- Extend the leg only as low as you can control.
- Use a smooth exhale on each twist.
Make it easier
- Keep the feet closer to the floor.
- Make the twist smaller.
- Slow down and pause between sides.
Avoid this
- Pulling the head forward.
- Flapping the elbows inward.
- Rocking the hips side to side.
- Rushing through the reps.
Pilates Curl
How to do it
- Lie on your back with knees bent and feet flat.
- Place hands behind the head or reach arms forward.
- Exhale and curl the head and shoulders off the mat.
- Pause briefly, then lower with control.
- Repeat without using momentum.
What to focus on
- Curl from the upper spine rather than yanking the neck.
- Keep the pelvis steady.
- Let the ribs soften downward.
- Move slowly on the way down.
Make it easier
- Keep the curl very small.
- Reach arms forward instead of behind the head.
- Rest longer between reps.
Avoid this
- Pulling the chin hard toward the chest.
- Swinging up quickly.
- Letting the feet lift.
- Forcing a high sit-up.
Plank Prep
How to do it
- Start on hands and knees with hands under shoulders.
- Step one foot back, then the other, or keep knees down for a shorter version.
- Press the floor away and make a long line from head to hips.
- Hold for the planned time while breathing steadily.
- Lower to the knees before resetting.
What to focus on
- Keep the ribs from sagging toward the floor.
- Press through the whole hand, not only the wrists.
- Keep the neck long and gaze slightly forward of the hands.
- Use the glutes and core to keep the hips steady.
Make it easier
- Keep both knees on the mat.
- Hold for a shorter time.
- Use a wall plank if the floor version is too much.
Avoid this
- Letting the hips drop.
- Piking the hips very high.
- Locking the elbows hard.
- Holding the breath to finish the timer.
Glute Bridge
How to do it
- Lie on your back with knees bent and feet hip-width apart.
- Press through the feet and lift the hips.
- Pause at the top with the ribs controlled.
- Lower the spine and hips back down slowly.
- Repeat for the planned reps.
What to focus on
- Push evenly through both feet.
- Keep the knees pointing forward.
- Feel the glutes working without over-arching the back.
- Lower with control instead of dropping.
Make it easier
- Lift the hips only halfway.
- Move more slowly.
- Place the feet slightly closer to the hips.
Avoid this
- Flaring the ribs at the top.
- Letting knees collapse inward.
- Pushing mostly through the toes.
- Lifting higher than you can control.
Bridge March
How to do it
- Lie on your back with knees bent and feet hip-width apart.
- Lift into a bridge and keep the hips level.
- Slowly lift one foot a few centimeters from the floor.
- Place it back down, then switch sides.
- Continue alternating without letting the pelvis rock.
What to focus on
- Keep weight even through the standing foot.
- Make each knee lift small and controlled.
- Keep the ribs soft rather than flared.
- Feel the glutes and deep core helping you stay level.
Make it easier
- Do regular glute bridges instead.
- Lift the foot only slightly.
- Pause between sides to reset the hips.
Avoid this
- Letting one hip drop.
- Pushing the bridge too high.
- Marching quickly.
- Shifting all the weight into the low back.
Side-Lying Leg Lift
How to do it
- Lie on one side with legs long and stacked.
- Support your head with your arm or a folded towel.
- Keep the top hip stacked over the bottom hip.
- Lift the top leg slowly, then lower it with control.
- Complete the reps, then switch sides.
What to focus on
- Keep the toes pointing forward rather than rolling open.
- Make the lift smooth and moderate.
- Keep the waist long on both sides.
- Use the side of the hip instead of swinging the leg.
Make it easier
- Bend the bottom knee for more support.
- Lift the leg only halfway.
- Place the top hand on the floor for balance.
Avoid this
- Rolling the hips backward.
- Kicking the leg up with momentum.
- Shrugging the shoulders.
- Letting the foot drift far in front of the body.
Clamshell
How to do it
- Lie on one side with knees bent and feet stacked.
- Keep your hips stacked and your heels together.
- Open the top knee like a clamshell without rolling the pelvis back.
- Pause briefly at the top.
- Lower the knee slowly and repeat before switching sides.
What to focus on
- Keep the movement at the hip, not the lower back.
- Use a small range you can control.
- Keep the feet touching.
- Feel the side glute working.
Make it easier
- Place your back near a wall for feedback.
- Make the opening smaller.
- Rest between reps if the hip starts to roll.
Avoid this
- Rolling the whole body backward.
- Lifting the feet apart.
- Forcing the knee too high.
- Moving fast to chase more reps.
Inner Thigh Lift
How to do it
- Lie on one side and bring the top foot in front of the bottom leg.
- Keep the bottom leg long.
- Rest the top foot on the floor for support.
- Lift the bottom leg a small amount from the mat.
- Lower with control and repeat before switching sides.
What to focus on
- Keep the torso quiet as the leg lifts.
- Use a small controlled lift.
- Point the bottom knee and toes forward.
- Feel the inner thigh working without twisting the hips.
Make it easier
- Make the lift very small.
- Bend the bottom knee slightly.
- Use your top hand on the floor for more support.
Avoid this
- Rolling onto the back.
- Swinging the leg upward.
- Letting the top knee collapse inward.
- Tensing the neck and shoulders.
Kneeling Leg Extension
How to do it
- Start on hands and knees with hands under shoulders.
- Keep the spine long and the pelvis steady.
- Extend one leg straight back without lifting the hip high.
- Pause briefly, then return the knee under the hip.
- Repeat on one side or alternate sides.
What to focus on
- Keep both hip points facing the floor.
- Reach through the heel instead of arching the back.
- Press lightly through the hands.
- Move slowly enough to keep balance.
Make it easier
- Slide the toes back without lifting the leg.
- Do fewer reps per side.
- Place a folded towel under the knees.
Avoid this
- Rotating the pelvis open.
- Kicking the leg too high.
- Collapsing into the shoulders.
- Letting the low back dip.
Standing Leg Lift
How to do it
- Stand tall with feet hip-width apart.
- Hold a wall or chair lightly if needed.
- Shift weight onto one foot and lift the other leg forward, side, or slightly back depending on the routine.
- Lower the foot with control.
- Complete the reps, then switch sides.
What to focus on
- Keep the standing knee soft.
- Lift from the hip without leaning far away.
- Keep the ribs stacked over the pelvis.
- Use a smooth lift and lower.
Make it easier
- Hold a support with one hand.
- Lift the leg lower.
- Tap the toes down between reps.
Avoid this
- Swinging the leg.
- Locking the standing knee.
- Leaning the torso to create height.
- Turning it into a fast kick.
Standing Calf Raise
How to do it
- Stand with feet about hip-width apart.
- Hold a wall or chair lightly if needed.
- Press through the balls of the feet and lift the heels.
- Pause briefly at the top.
- Lower the heels slowly and repeat.
What to focus on
- Rise evenly through both feet.
- Keep the ankles from rolling outward.
- Stand tall through the crown of the head.
- Control the lowering phase.
Make it easier
- Use both hands on a support.
- Lift only halfway.
- Do fewer reps or pause between reps.
Avoid this
- Dropping the heels quickly.
- Rolling onto the outer edges of the feet.
- Bending and straightening the knees to create momentum.
- Shrugging the shoulders.
Cat-Cow
How to do it
- Start on hands and knees with wrists under shoulders and knees under hips.
- Round the back gently and let the head follow.
- Then lengthen the chest forward and soften the belly slightly.
- Move between the two shapes slowly.
- Keep the movement comfortable and controlled.
What to focus on
- Move through the spine one section at a time.
- Keep weight balanced between hands and knees.
- Let the breath guide the pace.
- Keep shoulders away from ears.
Make it easier
- Place a folded towel under the knees.
- Reduce the range.
- Do it seated in a chair instead.
Avoid this
- Forcing the neck upward.
- Locking the elbows.
- Moving quickly without control.
- Sinking heavily into the shoulders.
Swan Prep
How to do it
- Lie face down with hands near the ribs or shoulders.
- Keep the legs long and gently active.
- On an exhale, lengthen the chest forward and lift slightly.
- Keep the lift small and controlled.
- Lower back down slowly.
What to focus on
- Reach forward through the chest before lifting.
- Keep the back of the neck long.
- Use light pressure through the hands, not a hard push.
- Let the upper back do most of the work.
Make it easier
- Keep the lift very low.
- Place a folded towel under the chest.
- Keep hands farther forward for support.
Avoid this
- Throwing the head back.
- Pushing into a high backbend.
- Clenching the glutes hard.
- Forcing the low back to do all the work.
Swimming Prep
How to do it
- Lie face down with arms forward or by your sides.
- Lengthen one arm and the opposite leg away from each other.
- Lift them slightly from the mat if comfortable.
- Lower, then switch sides.
- Keep alternating in a slow rhythm.
What to focus on
- Reach long before lifting high.
- Keep the pelvis heavy and steady.
- Move opposite arm and leg together.
- Keep the breath even.
Make it easier
- Lift only the legs or only the arms.
- Keep the limbs on the floor and practice the reach.
- Place a towel under the forehead.
Avoid this
- Lifting too high.
- Rocking side to side.
- Craning the neck upward.
- Rushing through the switches.
Shoulder Bridge Hold
How to do it
- Lie on your back with knees bent and feet flat.
- Press through the feet and lift the hips into a bridge.
- Keep the knees pointing forward.
- Hold for the planned time while breathing steadily.
- Lower the spine and hips down slowly.
What to focus on
- Keep the ribs from popping up.
- Press evenly through both feet.
- Feel the glutes and back of the legs supporting the hold.
- Maintain a long line from shoulders to knees.
Make it easier
- Hold for a shorter time.
- Lift the hips lower.
- Rest between shorter holds.
Avoid this
- Letting the knees fall inward.
- Overarching at the top.
- Pushing through the toes only.
- Holding tension in the jaw.
Shoulder Blade Squeeze
How to do it
- Sit or stand tall with arms relaxed by your sides.
- Gently draw the shoulder blades toward each other.
- Pause without pinching hard.
- Release the shoulders back to neutral.
- Repeat slowly for the planned reps.
What to focus on
- Move the shoulder blades, not the lower back.
- Keep the neck relaxed.
- Let the chest open without forcing it.
- Use a small precise squeeze.
Make it easier
- Do it seated with back support.
- Use a smaller squeeze.
- Place hands on the ribs to notice if they flare.
Avoid this
- Shrugging the shoulders upward.
- Arching the low back.
- Pulling the elbows behind you forcefully.
- Holding the squeeze too hard.
Wall Angels
How to do it
- Stand with your back near a wall and feet slightly forward.
- Bend the elbows and place arms against or near the wall.
- Slide the arms upward as far as comfortable.
- Lower the arms back down with control.
- Keep the movement slow and clean.
What to focus on
- Keep the ribs from flaring.
- Let the shoulder blades move smoothly.
- Maintain light contact with the wall if possible.
- Use a range that feels controlled.
Make it easier
- Move the arms through a smaller range.
- Stand a little farther from the wall.
- Do one arm at a time.
Avoid this
- Forcing the hands to the wall.
- Arching the lower back to reach higher.
- Shrugging shoulders toward ears.
- Pushing into a pinching feeling.
Chest Opener
How to do it
- Sit or stand tall with arms by your sides.
- Clasp the hands behind the back or hold a towel.
- Gently straighten the arms and open the chest.
- Keep the shoulders down and the ribs controlled.
- Hold for the planned time, then release slowly.
What to focus on
- Feel space across the front of the chest.
- Keep the neck long.
- Open through the shoulders without forcing the arms high.
- Breathe steadily into the ribs.
Make it easier
- Hold a towel between the hands.
- Keep the elbows slightly bent.
- Do the stretch seated if standing feels distracting.
Avoid this
- Jamming the shoulders backward.
- Flaring the ribs to make the stretch bigger.
- Locking the elbows hard.
- Tipping the chin up.
Spine Extension Prep
How to do it
- Lie face down with forearms or hands supporting you lightly.
- Lengthen through the crown of the head.
- Lift the chest a small amount while keeping the lower ribs controlled.
- Pause briefly, then lower.
- Repeat with the same small range each time.
What to focus on
- Think of length before height.
- Keep the shoulders away from the ears.
- Let the upper back initiate the lift.
- Keep the legs relaxed but steady.
Make it easier
- Keep the forehead on a towel and only practice the upper-back engagement.
- Use a smaller lift.
- Place hands farther forward.
Avoid this
- Pushing into a large backbend.
- Craning the neck.
- Squeezing the low back to lift higher.
- Rushing the lowering phase.
Spine Stretch Forward
How to do it
- Sit tall with legs extended or softly bent.
- Reach the arms forward at shoulder height.
- Round forward through the spine as if reaching over a ball.
- Pause briefly, then stack the spine back up.
- Repeat slowly or hold as directed.
What to focus on
- Keep the movement controlled from the spine.
- Let the shoulders stay soft.
- Reach forward without collapsing heavily.
- Keep the breath slow.
Make it easier
- Bend the knees.
- Sit on a folded towel or cushion.
- Reduce how far you fold.
Avoid this
- Pulling hard on the legs.
- Locking the knees.
- Dropping the head aggressively.
- Forcing a deep hamstring stretch.
Seated Twist
How to do it
- Sit tall with legs crossed, extended, or supported by a chair.
- Place one hand across the body and the other behind you for light support.
- Rotate the ribs and shoulders to one side.
- Return to center with control.
- Repeat on the other side.
What to focus on
- Grow taller before turning.
- Keep both sitting bones grounded.
- Rotate through the upper body, not just the head.
- Use breath to keep the movement calm.
Make it easier
- Sit on a folded towel or cushion.
- Keep the twist small.
- Do the chair version for more support.
Avoid this
- Pulling hard with the arms.
- Slumping while turning.
- Twisting into discomfort.
- Letting the knees or hips shift heavily.
Mermaid Stretch
How to do it
- Sit with legs folded to one side or in a comfortable seated position.
- Place one hand on the floor or thigh for support.
- Reach the opposite arm up and over into a side bend.
- Keep the chest open as you breathe into the side ribs.
- Return to center and switch sides.
What to focus on
- Lengthen upward before bending sideways.
- Keep the shoulder away from the ear.
- Feel the stretch along the side body.
- Use the supporting hand lightly.
Make it easier
- Sit on a cushion.
- Do it seated on a chair.
- Keep the top arm lower.
Avoid this
- Collapsing into the supporting shoulder.
- Twisting forward instead of side bending.
- Forcing the hips to stay in an uncomfortable position.
- Holding the breath.
Hip Opener
How to do it
- Lie on your back or sit tall, depending on your chosen setup.
- Cross one ankle over the opposite thigh.
- Keep the foot lightly flexed and the knee open to the side.
- Hold the position or gently draw the legs closer.
- Switch sides after the planned time.
What to focus on
- Keep the pelvis steady.
- Look for a moderate stretch around the outer hip.
- Relax the shoulders and jaw.
- Use slow breathing rather than pulling harder.
Make it easier
- Keep the supporting foot on the floor.
- Move the legs farther from the body.
- Do the seated version on a chair.
Avoid this
- Pressing directly on the knee.
- Forcing the hip open.
- Rounding the back heavily in the seated version.
- Stretching into sharp discomfort.
Hamstring Stretch
How to do it
- Lie on your back or sit with one leg extended.
- Lengthen the spine before moving deeper.
- Keep the stretching leg mostly straight with a soft knee.
- Hold behind the thigh, calf, or use a towel if lying down.
- Breathe steadily, then switch sides.
What to focus on
- Feel the stretch through the back of the thigh.
- Keep the pelvis from twisting.
- Use a comfortable range.
- Let the shoulders stay relaxed.
Make it easier
- Bend the knee more.
- Use a towel or strap around the foot.
- Keep the opposite knee bent for support.
Avoid this
- Locking the knee hard.
- Pulling the leg aggressively.
- Rounding the back to chase depth.
- Bouncing in the stretch.
Figure Four Stretch
How to do it
- Lie on your back with both knees bent.
- Cross one ankle over the opposite thigh.
- Keep the crossed foot lightly flexed.
- Hold behind the supporting thigh and draw the legs closer if comfortable.
- Release slowly and switch sides.
What to focus on
- Keep the pelvis heavy on the mat.
- Let the outer hip soften gradually.
- Keep the shoulders relaxed.
- Use the breath to reduce tension.
Make it easier
- Keep the supporting foot on the floor.
- Move the legs farther away.
- Do it seated on a chair.
Avoid this
- Pulling so hard the pelvis lifts.
- Pressing the crossed knee with force.
- Letting the ankle collapse.
- Holding through pain or tingling.
Child's Pose Reach
How to do it
- Start on hands and knees.
- Send the hips back toward the heels.
- Reach the arms forward on the floor.
- Let the chest soften toward the mat while breathing slowly.
- Walk the hands to one side if the routine calls for a side reach.
What to focus on
- Keep the breath slow and easy.
- Let the back widen with each inhale.
- Reach through the fingertips without tensing the shoulders.
- Use the position as a calm reset.
Make it easier
- Place a cushion between hips and heels.
- Keep knees wider apart.
- Rest forearms on a pillow or chair.
Avoid this
- Forcing the hips to the heels.
- Shrugging the shoulders.
- Pressing into knee discomfort.
- Holding the breath.
Roll Down
How to do it
- Stand tall with feet grounded.
- Lower the chin slightly and roll down through the spine.
- Let the arms hang as you fold.
- Pause briefly at a comfortable depth.
- Roll back up slowly, stacking the spine.
What to focus on
- Move one section of the spine at a time.
- Keep the knees soft.
- Let the head and arms stay heavy.
- Breathe steadily as you return upright.
Make it easier
- Bend the knees more.
- Roll down only halfway.
- Place hands on thighs for support.
Avoid this
- Bouncing at the bottom.
- Locking the knees.
- Rushing back to standing.
- Pushing into dizziness or discomfort.
Wall Roll Down
How to do it
- Stand with your back near a wall and feet slightly forward.
- Let the head nod gently.
- Roll down one section of the spine at a time.
- Stop at a comfortable point, then roll back up slowly.
- Keep the movement small if the wall limits your range.
What to focus on
- Move gradually from the neck through the upper back.
- Keep the knees soft.
- Let the arms hang naturally.
- Use the wall as feedback, not something to push against.
Make it easier
- Roll down only halfway.
- Keep hands on thighs.
- Stand farther from the wall.
Avoid this
- Dropping quickly.
- Locking the knees.
- Pulling the head down with force.
- Trying to touch the floor at any cost.
Wall Squat
How to do it
- Stand with your back against a wall and feet slightly forward.
- Slide down the wall into a comfortable squat.
- Keep knees tracking over the feet.
- Hold for the planned time or press back up for reps.
- Return to standing slowly.
What to focus on
- Keep the back supported by the wall.
- Press through the whole foot.
- Keep the knees from collapsing inward.
- Use a depth you can control.
Make it easier
- Squat less deeply.
- Shorten the hold.
- Place feet a little farther from the wall.
Avoid this
- Letting knees cave inward.
- Sliding too low to stand back up smoothly.
- Lifting the heels.
- Holding tension in the shoulders.
Wall Bridge
How to do it
- Lie on your back with feet placed on the wall and knees bent.
- Press the feet into the wall.
- Lift the hips into a small bridge.
- Pause briefly at the top.
- Lower the spine and hips with control.
What to focus on
- Keep both feet pressing evenly.
- Use the glutes without arching the low back.
- Keep the knees aligned with the feet.
- Lower one segment at a time if possible.
Make it easier
- Place feet lower on the wall.
- Lift the hips less.
- Do fewer reps.
Avoid this
- Pushing so hard the body slides.
- Letting the knees drift apart or collapse inward.
- Flaring the ribs.
- Dropping the hips quickly.
Wall Leg Lift
How to do it
- Stand side-on or facing a wall for support.
- Place one or both hands lightly on the wall.
- Shift weight onto one foot.
- Lift the free leg slowly to the side, back, or forward depending on the routine.
- Lower with control and switch sides.
What to focus on
- Keep the standing leg steady.
- Use the wall for balance, not to lean heavily.
- Keep the pelvis level.
- Move through a range you can control.
Make it easier
- Lift the leg lower.
- Tap the foot down between reps.
- Stand closer to the wall.
Avoid this
- Swinging the leg.
- Leaning the torso into the wall.
- Locking the standing knee.
- Turning the foot outward to fake height.
Wall Push-Up
How to do it
- Stand facing a wall with hands at chest height.
- Step the feet back enough to create a gentle incline.
- Bend the elbows and bring the chest toward the wall.
- Press back to the starting position.
- Repeat with steady control.
What to focus on
- Keep the body in one long line.
- Let elbows bend naturally, not flare wildly.
- Press through the whole hand.
- Keep shoulders away from the ears.
Make it easier
- Stand closer to the wall.
- Use fewer reps.
- Pause at the top between reps.
Avoid this
- Dropping the hips forward.
- Shrugging the shoulders.
- Bouncing off the wall.
- Locking the elbows forcefully at the top.
Wall Calf Raise
How to do it
- Stand facing a wall with fingertips resting lightly on it.
- Keep feet hip-width apart.
- Lift the heels and rise onto the balls of the feet.
- Pause briefly at the top.
- Lower the heels slowly and repeat.
What to focus on
- Use the wall only for balance.
- Rise evenly through both feet.
- Keep ankles tracking straight.
- Control the lowering phase.
Make it easier
- Lift halfway.
- Use more hand support.
- Do fewer reps.
Avoid this
- Leaning bodyweight into the wall.
- Rolling ankles outward.
- Dropping heels quickly.
- Using knee bounce for momentum.
Wall Plank Hold
How to do it
- Stand facing a wall and place hands at shoulder height.
- Step the feet back until the body forms a gentle diagonal line.
- Press the wall away and keep the ribs controlled.
- Hold for the planned time.
- Step forward to come out of the hold.
What to focus on
- Keep shoulders broad.
- Maintain a long line from head to heels.
- Use steady breathing.
- Keep the hips from sagging forward.
Make it easier
- Stand closer to the wall.
- Shorten the hold.
- Place hands a little higher.
Avoid this
- Letting the hips drop.
- Shrugging shoulders to ears.
- Locking elbows hard.
- Holding breath through the timer.
Wall Hamstring Stretch
How to do it
- Stand facing a wall or place one heel lightly against the wall at a low height.
- Keep the stretching knee soft.
- Hinge slightly from the hips while keeping the spine long.
- Hold the stretch for the planned time.
- Switch sides slowly.
What to focus on
- Feel the back of the thigh lengthen.
- Keep the pelvis facing forward.
- Use a mild hinge rather than rounding deeply.
- Keep the supporting foot grounded.
Make it easier
- Lower the heel position.
- Bend the knee more.
- Use hands on the wall for support.
Avoid this
- Locking the knee.
- Pulling the toes aggressively.
- Rounding the back to force more range.
- Leaning into pain.
Seated March
How to do it
- Sit tall near the front of a sturdy chair.
- Place feet flat and hands lightly on the chair or thighs.
- Lift one knee a small amount.
- Lower the foot quietly, then switch sides.
- Continue alternating for the planned reps.
What to focus on
- Keep the torso upright.
- Lift from the hip without leaning back.
- Keep the movement smooth and controlled.
- Use the chair for light support only.
Make it easier
- Lift each foot only slightly.
- Hold the sides of the chair.
- Slow the pace and pause between sides.
Avoid this
- Rocking backward with each lift.
- Gripping the chair too hard.
- Rushing the march.
- Letting the shoulders creep up.
Chair Seated Twist
How to do it
- Sit tall with both feet flat on the floor.
- Place one hand on the opposite thigh and the other on the chair.
- Turn the ribs and shoulders gently to one side.
- Return to center with control.
- Repeat to the other side.
What to focus on
- Keep both sitting bones grounded.
- Grow taller before rotating.
- Let the head follow the ribs, not lead aggressively.
- Use a comfortable range.
Make it easier
- Make the twist smaller.
- Keep hands on thighs instead of using the chair back.
- Sit farther back for more support.
Avoid this
- Pulling hard on the chair.
- Slumping while twisting.
- Lifting one hip from the seat.
- Forcing the neck to turn farther than the body.
Chair Leg Extension
How to do it
- Sit tall with feet flat on the floor.
- Hold the chair lightly if needed.
- Extend one knee until the leg is mostly straight.
- Pause briefly, then lower the foot with control.
- Complete reps on one side or alternate legs.
What to focus on
- Keep the thigh steady as the lower leg moves.
- Sit tall without leaning back.
- Move slowly through the extension.
- Keep the supporting foot grounded.
Make it easier
- Extend the knee only halfway.
- Do fewer reps.
- Sit farther back in the chair for support.
Avoid this
- Kicking the leg quickly.
- Locking the knee hard.
- Rounding the back.
- Holding the breath.
Chair Side Bend
How to do it
- Sit tall with feet flat and hips grounded.
- Place one hand on the chair or thigh.
- Reach the opposite arm overhead.
- Bend gently to the side while keeping the chest open.
- Return to center and switch sides.
What to focus on
- Lengthen upward before bending.
- Keep both sitting bones on the chair.
- Breathe into the side ribs.
- Keep the top shoulder relaxed.
Make it easier
- Keep the top arm lower.
- Make the bend smaller.
- Hold the side of the chair for support.
Avoid this
- Collapsing forward.
- Lifting one hip from the chair.
- Shrugging the raised shoulder.
- Forcing a deep side bend.
Chair Cat-Cow
How to do it
- Sit tall with hands on thighs.
- On an inhale, gently lift the chest and lengthen the spine.
- On an exhale, round the upper back and soften the gaze downward.
- Move between the two shapes slowly.
- Keep the feet grounded throughout.
What to focus on
- Let the movement travel through the spine.
- Keep the shoulders relaxed.
- Use the breath to guide the pace.
- Avoid making the motion too large.
Make it easier
- Make the rounding and arching very small.
- Sit farther back for support.
- Keep hands closer to the hips.
Avoid this
- Throwing the head back.
- Forcing the low back into a deep arch.
- Rushing the breath.
- Letting the knees or feet shift around.
Chair Arm Circles
How to do it
- Sit tall with feet flat.
- Reach arms out to the sides or slightly forward.
- Make small controlled circles.
- Reverse direction halfway through the set.
- Lower the arms to rest when finished.
What to focus on
- Keep circles small and smooth.
- Keep the ribs from flaring.
- Relax the neck and jaw.
- Move from the shoulders without swinging the torso.
Make it easier
- Bend the elbows.
- Do one arm at a time.
- Lower the arms slightly below shoulder height.
Avoid this
- Making circles so large they become uncontrolled.
- Shrugging shoulders upward.
- Leaning back to hold the arms up.
- Holding the breath.
Chair Heel Raise
How to do it
- Sit tall with feet flat and knees bent.
- Keep the balls of the feet on the floor.
- Lift both heels slowly.
- Pause briefly at the top.
- Lower the heels with control and repeat.
What to focus on
- Press evenly through the balls of the feet.
- Keep knees pointing forward.
- Sit tall without leaning on the chair back.
- Control the lowering phase.
Make it easier
- Lift one heel at a time.
- Lift only halfway.
- Rest hands on thighs for feedback.
Avoid this
- Dropping the heels quickly.
- Rolling ankles outward.
- Bouncing through the knees.
- Tensing the shoulders.
Chair Forward Fold
How to do it
- Sit with feet flat and knees comfortably apart.
- Lengthen the spine first.
- Hinge forward from the hips and let the hands rest on thighs or toward the floor.
- Let the head and neck soften only as far as comfortable.
- Roll or hinge back up slowly.
What to focus on
- Keep the fold relaxed, not forced.
- Let the breath slow down.
- Feel the back and hips release gradually.
- Keep the feet grounded.
Make it easier
- Rest forearms on thighs.
- Fold only halfway.
- Place a pillow on the lap for support.
Avoid this
- Pulling yourself down with the arms.
- Rounding aggressively to reach the floor.
- Holding the breath.
- Moving quickly back upright.
Standing Pilates Flow
How to do it
- Stand tall with feet grounded.
- Move through a simple sequence of arm reach, small knee bend, and controlled rise.
- Keep each transition smooth.
- Repeat the flow for the planned time.
- Return to a neutral standing position at the end.
What to focus on
- Coordinate movement with steady breathing.
- Keep the ribs stacked over the pelvis.
- Use controlled range rather than speed.
- Stay balanced through both feet.
Make it easier
- Make each movement smaller.
- Hold a wall or chair lightly.
- Slow the flow and pause between parts.
Avoid this
- Rushing through the sequence.
- Locking the knees.
- Swinging the arms without control.
- Leaning backward during reaches.
Kneeling Side Kick Prep
How to do it
- Start on hands and knees or a supported kneeling side setup.
- Shift weight into one hand and one knee.
- Extend the free leg to the side or slightly back.
- Lift and lower the leg in a small controlled range.
- Return to center before switching sides.
What to focus on
- Keep the pelvis from rolling open too far.
- Press the supporting hand or forearm into the mat.
- Reach long through the moving leg.
- Move slowly enough to stay balanced.
Make it easier
- Keep the moving foot on the floor and slide it instead.
- Use a forearm support.
- Do fewer reps.
Avoid this
- Dropping into the supporting shoulder.
- Kicking the leg high with momentum.
- Twisting the torso to lift higher.
- Letting the neck collapse.
Bird Dog
How to do it
- Start on hands and knees.
- Reach one arm forward and the opposite leg back.
- Pause while keeping the hips level.
- Return to hands and knees with control.
- Alternate sides for the planned reps.
What to focus on
- Keep the torso steady.
- Reach long rather than lifting high.
- Press the floor away with the supporting hand.
- Keep the back of the neck long.
Make it easier
- Move only the legs.
- Move only the arms.
- Use a smaller reach and shorter pause.
Avoid this
- Rotating the hips open.
- Arching the lower back.
- Dropping into the supporting shoulder.
- Moving quickly from side to side.
Dead Bug
How to do it
- Lie on your back with arms reaching up and knees over hips.
- Keep the ribs soft and the spine steady.
- Lower one arm and the opposite leg away from each other.
- Return to the start position with control.
- Alternate sides for the planned reps.
What to focus on
- Keep the pelvis quiet.
- Move only as far as you can keep control.
- Exhale during the reach.
- Keep the shoulders relaxed.
Make it easier
- Move only the legs.
- Keep knees more bent.
- Lower the heel to the floor instead of extending the leg.
Avoid this
- Letting the lower back arch.
- Moving both limbs too far.
- Holding the breath.
- Rushing the return.
Side Plank Prep
How to do it
- Lie on one side with knees bent or legs extended.
- Place the forearm under the shoulder.
- Press through the forearm and lift the hips slightly.
- Hold the position for the planned time.
- Lower with control and switch sides.
What to focus on
- Keep the shoulder broad and stable.
- Make a long line from head to hips or knees.
- Use the side waist to hold the shape.
- Keep breathing through the hold.
Make it easier
- Keep the knees bent.
- Lift the hips only a small amount.
- Shorten the timer.
Avoid this
- Sinking into the shoulder.
- Letting the hips roll backward.
- Holding breath.
- Pushing through wrist discomfort instead of using the forearm.
Pilates Squat
How to do it
- Stand with feet about hip-width apart.
- Reach arms forward or keep hands at the hips.
- Bend the knees and send the hips back slightly.
- Press through the feet to stand tall again.
- Repeat with a steady pace.
What to focus on
- Keep knees tracking over the feet.
- Stay tall through the chest.
- Use a controlled lower and rise.
- Keep weight balanced across the whole foot.
Make it easier
- Squat less deeply.
- Hold a chair or wall lightly.
- Pause at the top between reps.
Avoid this
- Letting knees collapse inward.
- Lifting the heels.
- Dropping quickly into the squat.
- Arching the back to stand up.
Rest Position
How to do it
- Lie on your back with knees bent and feet flat.
- Let your arms rest by your sides or on your belly.
- Take slow breaths and allow the body to settle.
- Use the pause to reset before the next step.
- Keep the position comfortable and easy.
What to focus on
- Let the breath slow down naturally.
- Release unnecessary tension in the shoulders.
- Keep the knees and feet relaxed.
- Notice how the body feels before continuing.
Make it easier
- Place a pillow under the head.
- Put a cushion under the knees.
- Rest the hands on the ribs for gentle feedback.
Avoid this
- Treating the rest as another exercise.
- Forcing a deep stretch.
- Holding the breath.
- Rushing into the next movement.
Build a Pilates Workout That Fits Your Routine
A good Pilates workout is easier to repeat when the steps are clear, the timing is realistic, and the routine matches how you actually want to train. This Pilates workout app helps you build a custom Pilates routine from selected exercises, then save it as a reusable checklist you can run again later.
Instead of following one fixed plan, you can start with a preset or choose your own exercises. Build a short 5-minute Pilates starter, a core-focused workout, a gentle chair routine, a wall-supported session, or a full body Pilates routine for home use. Each exercise becomes a step in the routine, so the workout is easy to edit, follow, and repeat.
The page is designed as a practical Pilates workout planner for routines you want to control yourself: what exercises are included, how long each step lasts, how many reps to do, and when you want to run it again.
Why Use Checklist for Pilates Routines?
Many Pilates apps are built around video classes, challenges, coaching programs, or weight-loss plans. Those can be useful when you want guided instruction, but they are not always ideal when you already know the type of routine you want and just need a better way to structure it.
Checklist is built around repeatable routines. That makes it a good fit for Pilates workouts that you want to reuse: morning mat Pilates, a quick core session, a wall Pilates routine, a low-impact chair routine, or an evening mobility flow. Once the routine is saved, it can sit alongside your other checklists and routines instead of being locked inside a separate niche app.
The checklist format also keeps the routine editable. You can remove an exercise that does not fit, add one you prefer, change the order, or adjust the timer and reps. When your routine changes, you update the template instead of starting again from scratch.
For execution, Play Mode lets you move through the Pilates routine step by step. That is useful for workouts that include timed holds, repeated movements, short rests, or setup time. You can focus on the current exercise instead of scrolling through a long article or trying to remember the next step.
How the Pilates Workout Builder Works
The builder is designed to help you create a routine without starting from an empty page.
- Choose a preset routine or browse the full exercise list.
- Filter exercises by style, goal, body area, position, level, or equipment/support.
- Select the Pilates exercises you want to include.
- Adjust fields such as duration, reps, sets, rest, preparation time, or notes where relevant.
- Save the result as a reusable routine/template or create a one-time checklist session.
- Run the routine step by step whenever you want to practice.
A preset gives you a quick starting point. For example, you might begin with a beginner mat routine, then remove exercises that feel too difficult and add more mobility work. Or you might start with a core preset, shorten the number of steps, and save it as a 10-minute weekday routine.
The filters are there to help you shape the routine around the type of Pilates session you want. If you want something gentle, you can focus on chair-supported, beginner, low-impact, or mobility exercises. If you want a stronger workout, you can focus on core, glutes, legs, or full body exercises. If you only have a wall or chair available, the support filters help narrow the list.
Pilates Routine Ideas
You can use the builder for different Pilates routines without turning each one into a separate app or fixed program. Useful starting points include:
- Beginner Mat Pilates - a simple routine for learning basic movements and control.
- 5-Minute Pilates Starter - a short sequence for days when you want something quick.
- Daily Pilates Routine - a balanced routine that can be repeated several times a week.
- Core Pilates Workout - exercises focused on abs, obliques, and core control.
- Glutes & Legs Pilates - lower-body exercises using mat, standing, or wall-supported movements.
- Back & Posture Pilates - gentle back, shoulder, and spine-focused steps for a calmer movement session.
- Wall Pilates Starter - supported movements using a wall for structure and stability.
- Chair Pilates Gentle - seated or chair-supported movements for a lower-impact routine.
- Pilates Stretch & Mobility - slower exercises and stretches for flexibility, control, and relaxed movement.
- Evening Pilates Calm - a slower routine that is easier to run before winding down.
These presets are not meant to be rigid programs. They are starting points. The useful part is being able to edit them into routines that fit your time, available space, and preferred exercises.
Save, Run, and Repeat Your Workout
A Pilates list is useful once. A saved Pilates routine is more useful when you want to repeat it. After building your routine, you can save it as a template and run it again without rebuilding the same workout every time.
This matters for consistency. If you want to do core Pilates three times a week, a short morning routine on weekdays, or a wall Pilates session after work, the routine can be prepared once and reused. You can also create separate routines for different situations instead of forcing one workout to do everything.
When you complete checklist sessions, they are automatically saved in your history. That gives you a simple record of what you finished before and supports the habit of running and repeating routines over time.
Scheduling also fits this type of builder. A saved routine can become part of a daily, weekly, or situation-based schedule. For example, you might schedule a short morning Pilates routine, keep a longer full body session for weekends, or use a gentle mobility routine on lighter days.
Who This Builder Is For
This builder is mainly for people who want a practical Pilates routine they can do at home and repeat over time. It is a good fit for beginners and intermediate users who prefer clear steps, simple customization, and reusable routines over a large video library.
It can also work well if you like Pilates but do not want a separate app for every movement habit. You might use Checklist for Pilates, stretching, gym workouts, yoga, morning routines, travel packing, home tasks, and work processes. Pilates becomes one repeatable routine in a broader system.
It is best for simple mat, wall, chair, core, mobility, and full body routines that can be built, saved, and repeated. For advanced Pilates instruction, reformer apparatus work, medical rehab, or specialized programming, users should rely on appropriate specialist guidance outside this builder.
Start With a Preset or Build Your Own
Use the builder above to choose a Pilates preset, filter the exercise list, and create a routine you can actually follow. Keep it short if you are trying to build consistency. Make it more focused if you already know whether you want core, posture, wall, chair, mobility, or full body work.
Once the routine feels right, save it as a reusable template or create a checklist session for one-time use. Then run it step by step, adjust it when needed, and keep the version that fits your real routine.