
There are a lot of benefits to starting your own seeds indoors before the gardening season gets underway. You will save money and have the opportunity to get your hands in the soil before winter has even released its grip on your garden. But the best part about starting seeds yourself is the enormous variety of plants you will have access to simply by buying seeds instead of nursery plants. Ready to dig in? Here are the basic seed starting supplies you need to grow your own seedlings and be the envy of your gardening neighbors.
- Choose any of the following, or be creative and use what you have:
- This is the most important of your seed starting supplies. Your mix should drain well and be light and fluffy. Use a commercial seed-starting mix, or make your own using:
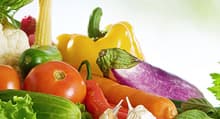
- Choosing seeds is a great winter activity. Scour seed catalogs for new and exciting varieties, trade seeds with your gardening friends, or attend a community seed swap.
- Once you have filled your containers with the seed-starting soil, water the containers thoroughly. After you have planted your seeds, you should mist everything gently with a sprayer full of water twice a day.
- Your little plants won’t need fertilizer for a few weeks. After they have grown several sets of leaves, use a diluted mix of organic, liquid fertilizer in a spray bottle. Give them a good spraying every 5 days. This is called foliar feeding.
- Cover your trays with clear plastic to keep the seeds warm and reduce moisture loss. The plastic covering can be removed once your plants sprout and start to grow.
- You can put your seedlings in a south-facing window that gets lots of sunshine, or you can supplement with a commercial grow light.
- Most plants will germinate and grow well when kept between 65 and 75 degrees Fahrenheit (18 to 24 degrees Celsius). If your room is much cooler than this, you will have to use an electric heating pad that can be positioned under your containers. Made especially for starting seeds, these heaters will warm your plants from the roots up for optimal growing conditions.
- Your seeds will take between 4 and 10 days to germinate, and another six to eight weeks to grow big enough to move outside. Give them plenty of water, warmth, and light, and you will soon have a thriving young garden ready for planting.
5.0 stars
Scores 4.80 with 65 votes
Seed Starting Supplies Tips
- Start your seeds six to eight weeks before your last frost date, which is when they will be ready to go outside.
- If you don't have a sunny window, you can grow your plants entirely under artificial florescent lights. Make sure to position the lights a few inches from the plants for maximum growth potential.
- When the days warm up, you can move your plants outside for a few hours, but be sure to bring them in before the sun goes down.
Table of Contents
Related Checklist

Vegetable Garden
Jake R Brady

Houseplant
Michelle.Tako
Related Checklist Templates


More Checklist Templates
"Seed Starting Supplies" not suitable?
Search the World's largest free library of checklist templates